|
|
Post by snoopy11 on Apr 14, 2019 18:18:25 GMT
Not done much to proceed the repairs as I’ve been looking after the terrors today. AKA the twins. In a short break I had when the were behaving (fast asleep) I did get a coat of primer on.  Prime Prime by mark atkinson, on Flickr |
|
|
|
Post by snoopy11 on Apr 17, 2019 20:02:39 GMT
All finished off today.
Liberal coat of black paint and then a good thick coat of underseal
|
|
|
|
Post by dave1800 on Apr 18, 2019 7:57:04 GMT
Good news, when is the MOT? David All finished off today. Liberal coat of black paint and then a good thick coat of underseal |
|
|
|
Post by Penguin45 on Apr 28, 2019 18:51:08 GMT
This has absolutely nothing to do with me!
Chris.
|
|
|
|
Post by dave1800 on Apr 29, 2019 6:23:28 GMT
Don't worry Chis if the music is copyrighted it will soon be removed - ask Andrew A! Actually it's not bad!
David
|
|
|
|
Post by snoopy11 on Apr 29, 2019 7:02:04 GMT
Actually it's not bad! David I will take that. 😁 @ Mr P 😛😛😛😛 |
|
|
|
Post by indianajones on May 6, 2019 9:27:35 GMT
What a panty dropper lol
|
|
|
|
Post by Penguin45 on May 7, 2019 18:48:52 GMT
I've never been invited to one of those parties......  Snoopy has been busy. Being a high tech 21st Century 'Crab, it needs two temperature senders; one for the electronics and one for the dashboard guage.  GLE GLE by Penguin 45, on Flickr First fit of extension for housing.  GLE GLE by Penguin 45, on Flickr Extended radiator stability bracket.  GLE GLE by Penguin 45, on Flickr Sender and heavy duty gasket, new extended studs.  GLE GLE by Penguin 45, on Flickr Sender clears thermostat nicely. Chris. |
|
|
|
Post by snoopy11 on May 8, 2019 6:33:43 GMT
I’m not quite happy with the fit of those gaskets. They are a bit on the chunky side and over hang the casings a bit to much.
I’m going to try to trim them down a bit so they won’t be seen as much.
|
|
|
|
Post by dave1800 on May 8, 2019 7:52:03 GMT
Do they specify a particular temperature sensor for the EFI or can the system be programmed for different sensors? Is the location of the EFI sensor critical? It won't heat up much until the thermostat opens so I wonder how the fuelling works in the warm up period? I am assuming the temperature gauge sensor is the one still in the original position.
David
|
|
|
|
Post by snoopy11 on May 8, 2019 12:51:48 GMT
The sender in the original position is the one that sends the engine temp to the ecu. I assume the cold start is sorted by electrical trickery within the ecu.
The sender to the ecu is supplied by the kit manufacturer and is programmed to work by them.
The sender in the extension housing above the stat is the one to the dashboard
It has been done this way around as i wanted the more accurate data going to the ecu.
|
|
|
|
Post by dave1800 on May 8, 2019 13:21:54 GMT
That makes a lot of sense; I believe the ECU temperature sensor is used to match the AFR requirements much like the choke but more accurately.
David
|
|
|
|
Post by Penguin45 on May 11, 2019 19:37:49 GMT
 GLE GLE by Penguin 45, on Flickr There we go. Extended studs were still not long enough, so bolts substituted. You can see the other sender feeding the ECU in this shot. Chris. |
|
|
|
Post by Penguin45 on Jul 18, 2019 16:09:33 GMT
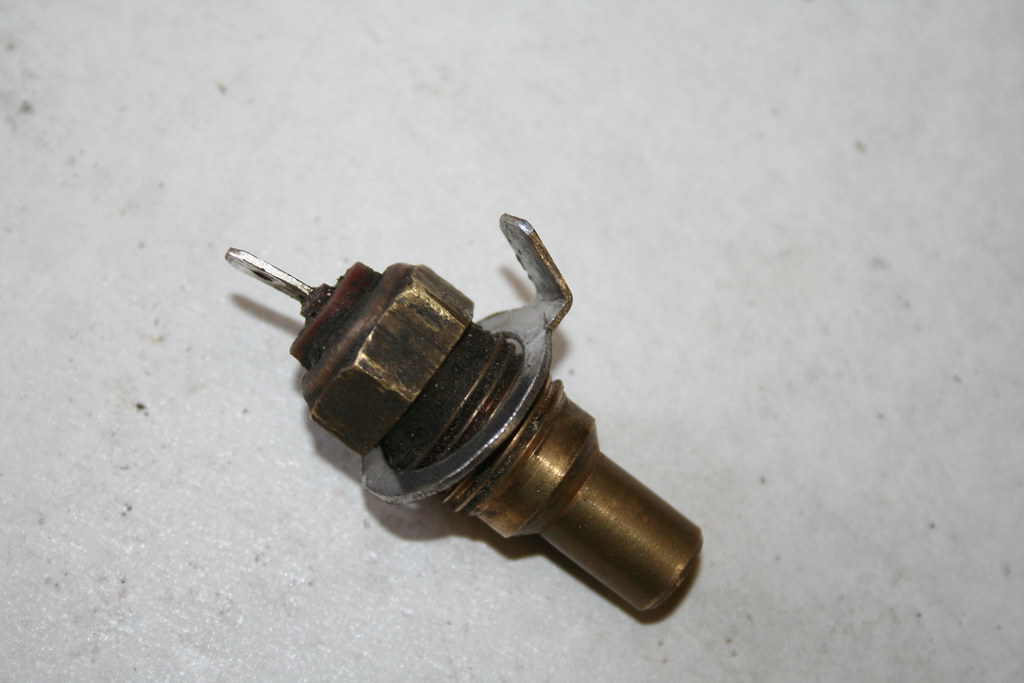
Further to the additional temperature sender being added, Snoopy and I went to the Tatton Park show about a month or so back. Dash board temperature guage still not working. Well, test meters out, half the dash out, wiring chasing for at least an hour. Even Uncle Ron got involved. Finally, the awful realisation dawned. The extension thermostat housing, whilst a pleasing alloy colour was plastic. So the sender wasn't earthed. So the temperature guage won't work...... It currently has a length of bare wire twisted round the senders' brass body and off to ground. The guage now works, however a better solution to the earth is required.  Snoopy's GLE Snoopy's GLE by Penguin 45, on Flickr  Snoopy's GLE Snoopy's GLE by Penguin 45, on Flickr  Snoopy's GLE Snoopy's GLE by Penguin 45, on Flickr That'll fix it properly. Chris. |
|
|
|
Post by Penguin45 on Jul 28, 2019 14:58:24 GMT
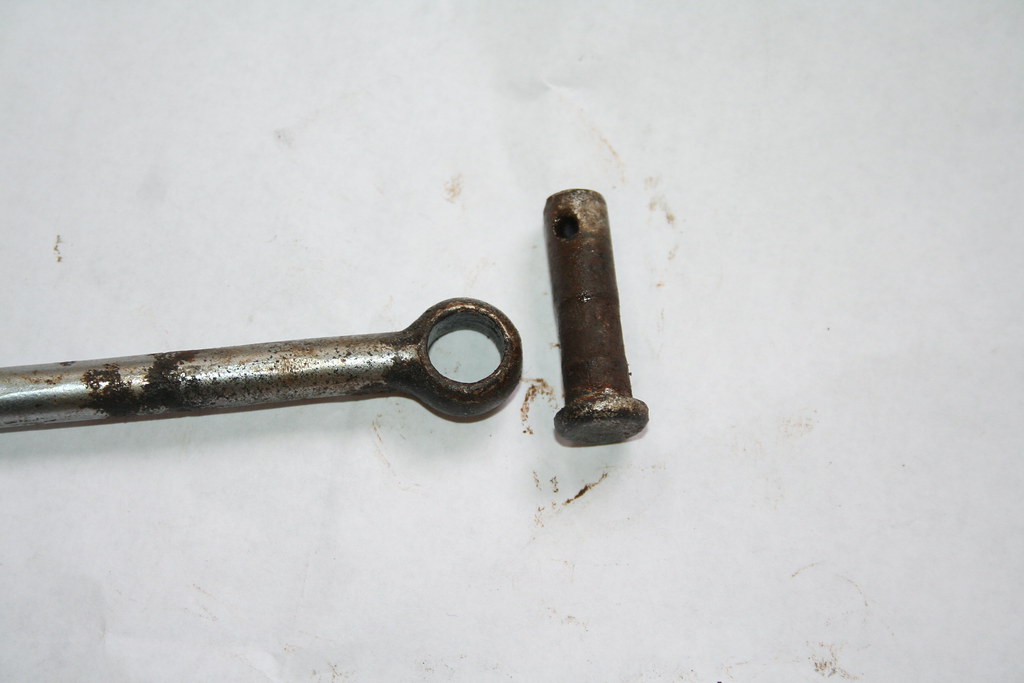
Seeing as Snoopy spent a day helping me with Mo a couple of weeks back, it was now time for me to return the compliment and go and help him out with GLE. Two principal objectives for the day, firstly clutch hydraulics and secondly the ignition switch/steering lock assembly. Clutch set-up was losing fluid and it was becoming harder and harder to select gears. I dug out some seal kits and Snoopy bought one of Tony's über stainless braided clutch hoses. Bling. He does like a bit of bling. The steering lock was exceedingly worn and there was only one key - a suitable blank to get a spare couldn't be traced either. Digging in the parts listing revealed that the last iteration of the lock assembly was 18G8979 and is still available, as it fits the Midget and MGB. Result, bought.  Snoopy's GLE Snoopy's GLE by Penguin 45, on Flickr Shrouds off, sheer bolts drilled out, wiring snipped off the back of the lock.  Snoopy's GLE Snoopy's GLE by Penguin 45, on Flickr  Snoopy's GLE Snoopy's GLE by Penguin 45, on Flickr Old and new. New has spade terminals, so wiring duly tweaked with terminals and insulating sleeves.  Snoopy's GLE Snoopy's GLE by Penguin 45, on Flickr  Snoopy's GLE Snoopy's GLE by Penguin 45, on Flickr Bolted home with new clamp and sheer bolts, which duly sheered. This was to prove a mistake.... Whilst the lock dropped into place perfectly, the key how failed to release the bolt for the steering lock and so prevented the lock barrel being turned to start the car. So, we had to drill out the sheer bolts. A deft application of graphite powder to the lock and oil to the bolt and it worked again, so back on it went with some low profile headed bolts. Then we couldn't make the shroud fit back on, as the rubber housing won't fit. By changing the wiring from crimped to spades and with the addition of the connectors, the lock was ¾" longer and won't fit inside. By this time, I'm starting to get annoyed..... Took it all off again, chopped off the new connectors and soldered the wires to the base of the connectors on the lock. Then chopped off the excess blades with a hacksaw. I think we invalidated the warranty at that point. Anyway, the shrouds now fit, but won't stay in place as the bridge piece inside is broken. Left Snoopy playing with the glue to try and get it back into one piece. A bit of a salutory experience. Pricipally, we have a part sold as a matching replacement, as it has the same part number - BUT - it isn't the same thing. Secondly, it required some fettling to actually make the mechanism work. Disappointing. The clutch was quite straightforward by comparison. Even the clevis pin under the dash came out without a fight. Not too many pics as I got quite distracted by the lock business.  Snoopy's GLE Snoopy's GLE by Penguin 45, on Flickr Actuating rod and clevis pin. Very worn ovalled hole in the rod and badly worn pin.  Snoopy's GLE Snoopy's GLE by Penguin 45, on Flickr 22B65 is the push rod and again is an MG part. It's also the only one listed for the 'Crabs, so why is the one removed nearly ½" shorter? Otherwise it was all pretty standard stuff. Bores both cleaned up nicely, outsides got a wire brushing and new seals fitted.  Snoopy's GLE Snoopy's GLE by Penguin 45, on Flickr  Snoopy's GLE Snoopy's GLE by Penguin 45, on Flickr  Snoopy's GLE Snoopy's GLE by Penguin 45, on Flickr Everything went back on and the system bled up easily. Pedal seems a bit low, but it's smooth and gears can be selected. Chris. |
|


