|
|
OKR
Apr 6, 2020 6:39:02 GMT
Post by 1800heap on Apr 6, 2020 6:39:02 GMT
I thought I better start a new thread for my UK car. First picture which is one of the last taken of the car in the UK. This is at the UK shipping agent waiting to go in to a container bound for Oz, perhaps with the range rover!

After quite a few days at sea here is the pickup at the Australian agent in Brisbane. Gladly just before the Covid-19 pandemonium which had not yet reached us! 
Several hours later and quite a few KM's, this is about half way back at a truck stop to check the load and make sure no bits have fallen off the Ford! 
Here we are after another few hours, finally home in the dark! Very tired but happy. Long day. Left at 4.30am got home at 7.45pm same day.  Very relieved its all over! Now I have to go through getting registered here In Oz. That won't happen at least until the Covid-19 issues settles down. I really can't spend any more money on the car until the prospects of having future work improve. Hopefully you guys are doing OK. We are quite lucky here in Queensland at the moment as we don't have that many cases or a total lock down just yet! Nick |
|
|
|
OKR
Apr 7, 2020 1:35:42 GMT
Post by dave1800 on Apr 7, 2020 1:35:42 GMT
Great news Nick! You and your dad have completed your own London to Sydney Marathon, well Kent to Queensland anyway. Perhaps you should inform Paddy Hopkirk!
Hope things improve on the work front.
David
|
|
|
|
OKR
Apr 8, 2020 16:34:43 GMT
Post by Penguin45 on Apr 8, 2020 16:34:43 GMT
Looks good. Stage two of the adventure.
C.
|
|
|
|
OKR
Apr 12, 2020 6:04:16 GMT
via mobile
Post by 1800heap on Apr 12, 2020 6:04:16 GMT
Great news Nick! You and your dad have completed your own London to Sydney Marathon, well Kent to Queensland anyway. Perhaps you should inform Paddy Hopkirk! Hope things improve on the work front. David That gives me an idea David! First trip needs to be to Sydney! The car has been to London plent might as well take it to the finish! Missed a few bits in between. One day maybe. Nick |
|
|
|
OKR
Apr 12, 2020 6:06:54 GMT
via mobile
Post by 1800heap on Apr 12, 2020 6:06:54 GMT
Looks good. Stage two of the adventure. C. Yep stage two started Chris. Already doing a tidy and repair of some electrical issues. Will post some pictures soon. Nick |
|
|
|
OKR
May 5, 2020 5:58:02 GMT
Post by 1800heap on May 5, 2020 5:58:02 GMT
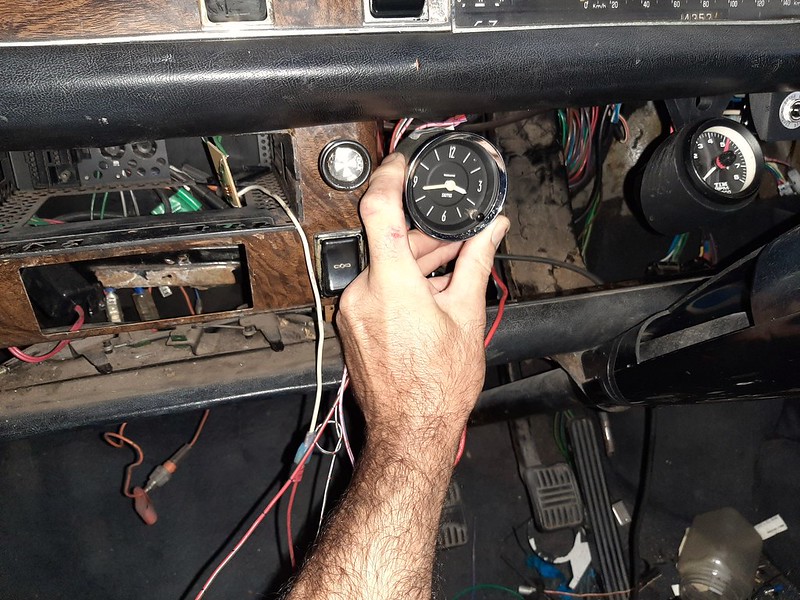
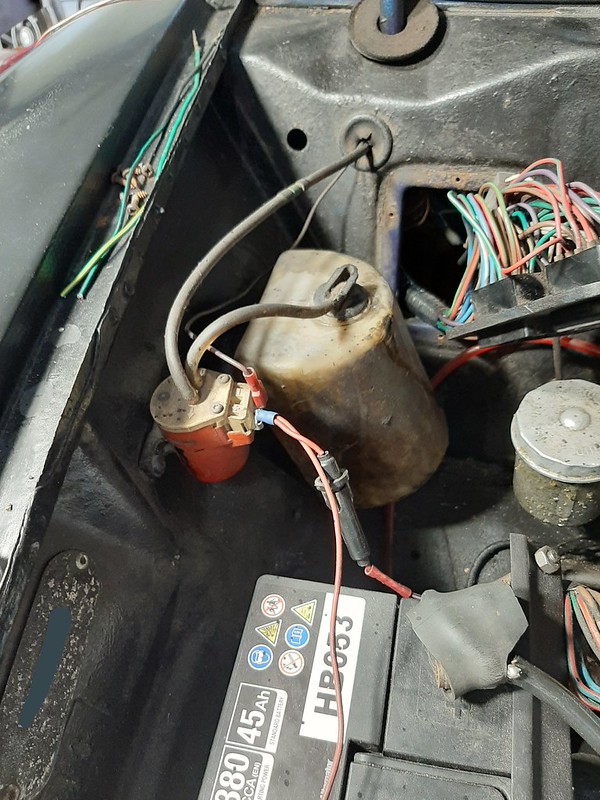
Well it has snowballed a little as you might expect. I found a few wires going nowhere, a couple of switches tucked up under the dash that I forgot were there and the parcel shelf fell apart. Also decided to add some other bits! I didn't take any photos of the parcel shelf repair but I used a fair bit of super glue, some bits of plastic and aluminium to reinforce the tears and covered it in grey leather. I also 3D Printed the switch plate for the switches to be in a sensible spot and the bracket for the Taco, all of which came out ok. Because the car is not very well fused I fitted some circuit breakers. I had the steering column wiring go up in smoke caused by a shorted spotlight many years ago, lack of knowledge and fuse! This car might have been no more if I hadn't got to it quick enough! Lesson learned!! The hanging wires on the left are for a W6 clock I removed from my W6 when it was scrapped. All added to the loom to keep it tidy.  Here is the printing of the bracket that will hold the clock, 3 more switches and 3 more circuit breakers. I plan to switch some parcel shelf lights and probably the interior lights so you don't have to reach behind to the switch thats on the light itself to turn it on. The last switch will be for Air con when/if I get that far.  Finished front view  Back view. You can see the lines from the printing.  Deciding where to put the clock before the parcel shelf was put back in. That is roughly where it is going.  I found a couple of photos of the bulkhead connector which had suffered a bit !   Wire fixed and new plug fitted.  I added some extra wires to the loom plugs for the Taco, spot lights, windscreen washer motor and a shielded data cable that I forgot to add on the engine side plug, so you cant see that one. I didn't get that far into the engine bay loom luckily. You can see where the yellow and blue wires are showing near the bottom of the battery, so not too much loom wrap wasted! A much neater set up for the added washer pump anyway going down to the loom.  Before shot  Next job fit the clock then fix the passenger side parcel shelf! Nick |
|
|
|
OKR
May 9, 2020 1:30:24 GMT
Post by dave1800 on May 9, 2020 1:30:24 GMT
Hi Nick
What material did you use for the 3D printing?
David
|
|
|
|
OKR
May 10, 2020 6:52:50 GMT
via mobile
Post by 1800heap on May 10, 2020 6:52:50 GMT
Hi Nick What material did you use for the 3D printing? David Its an ABS print David. Its taken me a while but I am getting some quite good results with it now. I am printing on glass so the front face comes out nice and flat. I have a little trick that I am using that is working well. You might be able to pick it in the picture. It is harder to print than PLA but PLA is quite useless if you want to actually use the part! It warps if it gets even slightly warm and is affected by moisture. The ABS prints at 250°C and should be much more immune to the heat in the car.
I have almost done the wiring so picture of the finished setup coming soon. Nick |
|
|
|
OKR
May 10, 2020 9:30:34 GMT
Post by andrewa on May 10, 2020 9:30:34 GMT
Impressive stuff - don't completely understand it - seems like magic!
|
|
|
|
OKR
May 11, 2020 0:18:27 GMT
Post by 1800heap on May 11, 2020 0:18:27 GMT
Found my heater issue Jeff! The back of the switch had fallen off! Decided to respray the switch Bezel while I was fixing the switch as it was looking a bit sad. It came out ok just using an aluminium colour spray can. The first one I did with undercoat and it didn't work very well so this one I just did with top coat only.   The plastic was a bit cracked allowing the back to fall off of the switch. I used a bit of thin super glue to fix the crack which you have to be careful with! Don't use too much otherwise you will stick all the insides together and your fingers to it. Don't ask how I know this! I put some hot glue on also as you can see in the picture for extra insurance. I also insulated the out terminals which were bare for reasons only known to Leyland!  Finished the wiring for the clock, switches and circuit breakers.  The three circuit breakers are for extra insurance. One replaces the original cartridge fuse for the heater, the second adds a separate circuit breaker for the cigar lighter socket outlet and the last is for the extra led lighting I am adding for the front foot well.  I have still got to make a cover for the side so you cant see the wiring.  Still lots to do! Nick |
|
|
|
OKR
May 11, 2020 0:20:59 GMT
Post by 1800heap on May 11, 2020 0:20:59 GMT
Impressive stuff - don't completely understand it - seems like magic! Hi Andrew Its a 3D printer from ALDI ! They are fantastic things and I agree they are indeed Magic! Nick |
|
|
|
OKR
May 11, 2020 9:54:54 GMT
Post by andrewa on May 11, 2020 9:54:54 GMT
Wow - thanks for that - have had a look and they're £250 delivered!
Not sure what I'd do with it yet.......
But I do need to join the 21st Century so this could be a start !
|
|
|
|
OKR
May 11, 2020 16:24:17 GMT
Post by tonymark3 on May 11, 2020 16:24:17 GMT
New nacelles for switches are available from Holden.co.uk for the princely sum of £2 each plus the dreaded vat and postage.
Part number 54327265
i bought Half a dozen. Lucas NOS.
Tonymark3
|
|
|
|
OKR
May 11, 2020 21:17:25 GMT
via mobile
Post by 1800heap on May 11, 2020 21:17:25 GMT
Wow - thanks for that - have had a look and they're £250 delivered! Not sure what I'd do with it yet....... But I do need to join the 21st Century so this could be a start ! There are all sorts of printable models online you can print for a bit of fun. I have had my printer for a couple of years and am now starting use it to make useful things as you can see. I would avoid using ABS to start with as it is very fussy to print. The plate for the clock was an 18 hour print. It can be very frustrating when an 18 hour job goes wrong in the last hour! Or you realise after the print you have got a dimension wrong! Gladly the clock plate was good first print. Nick |
|
|
|
OKR
May 11, 2020 21:21:58 GMT
via mobile
Post by 1800heap on May 11, 2020 21:21:58 GMT
New nacelles for switches are available from Holden.co.uk for the princely sum of £2 each plus the dreaded vat and postage. Part number 54327265 i bought Half a dozen. Lucas NOS. Tonymark3 Thanks Tony I will have a look. At the moment we are not getting post from overseas so I didnt bother to look for new ones. I have a couple of the wider body nacelles but not the narrow ones. It only took 10 mins to paint and looks way better. Nick |
|


