|
|
OKR
May 11, 2020 22:42:47 GMT
Post by 1800heap on May 11, 2020 22:42:47 GMT
Bit of a side track from the car but here is first go at a 3D printed fuse box. Its a tricky shape to print so has to be split and printed in two bits. I have adapted the design as I wanted some extra connections and an extra fuse. At the time it seemed like a good idea but I may revert back to just a straight copy. I have to correct the connector dimensions a bit as the slots for the spades are slightly small and they don't fit without some work on the holes. The sizes on the drawing are correct but the slicing software and shrinkage mean I have to over size them on the drawing to get the print to be a good fit. Its a start though. The cad drawing took ages and will take ages to correct unfortunately, so its on the back burner at the moment. My laptop is very unhappy with this drawing as it has a lot of lines and rendering it gives it a hard time! It looks a little small in the picture because there is no front yet and it is sitting lower than the real one. 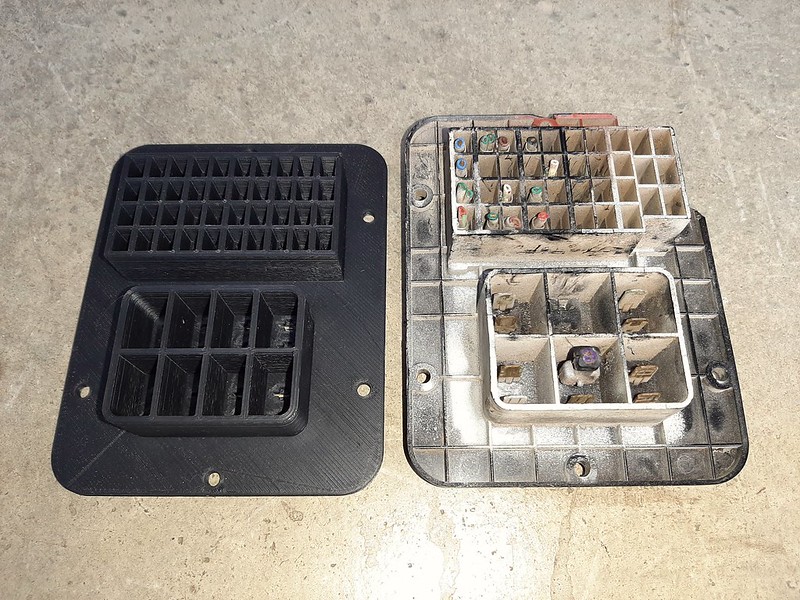 Nick |
|
|
|
OKR
May 13, 2020 0:25:04 GMT
Post by dave1800 on May 13, 2020 0:25:04 GMT
That's very impressive and Lots of work. Shame the shrinkage didn't quite work out. Next purchase needs to be be a 3D scanner so you can go straight from the item to the printer  . Maybe there are 3D scanning services near to where you live which aren't too expensive? David Bit of a side track from the car but here is first go at a 3D printed fuse box .....  Nick |
|
|
|
OKR
May 13, 2020 1:39:05 GMT
via mobile
Post by 1800heap on May 13, 2020 1:39:05 GMT
That's very impressive and Lots of work. Shame the shrinkage didn't quite work out. Next purchase needs to be be a 3D scanner so you can go straight from the item to the printer  . Maybe there are 3D scanning services near to where you live which aren't too expensive? David Sadly no such luck with scanning here David. At the moment I have a little time to play with these things and do some posts. I am school teacher at the moment as there is not much work and my kids are home! Its nothing like I remember either! Nick |
|
|
|
OKR
May 16, 2020 4:41:47 GMT
Post by 1800heap on May 16, 2020 4:41:47 GMT
Bit more work done. I got the side cover made and fitted for the clock panel. Pulled out the passenger parcel shelf and made a start on that. Finished the wiring for the stereo using ISO sockets. The stereo should be plug and play now.  Its almost too far gone but I will have a go and see if I can fix it up!  Drilled out the rivets for a better look.  I decided to ditch the ash tray as it was useless anyway! I think I might put the aircon controls in the hole. Not that this is happening any time soon! I am scratching my head where I will find space for the condenser, so that will hold it up a bit! The compressor is no problem as you can get electric ones. I will have to put in a bigger alternator though! Got to get the car on the road first but no harm in having a plan. The cables attached to the white plugs go to the boot via the roof Channel for some other gadgetry I am planning. The red and black are the ISO stereo plugs.  Completed parcel Shelf lamp. Another 3D printer job. 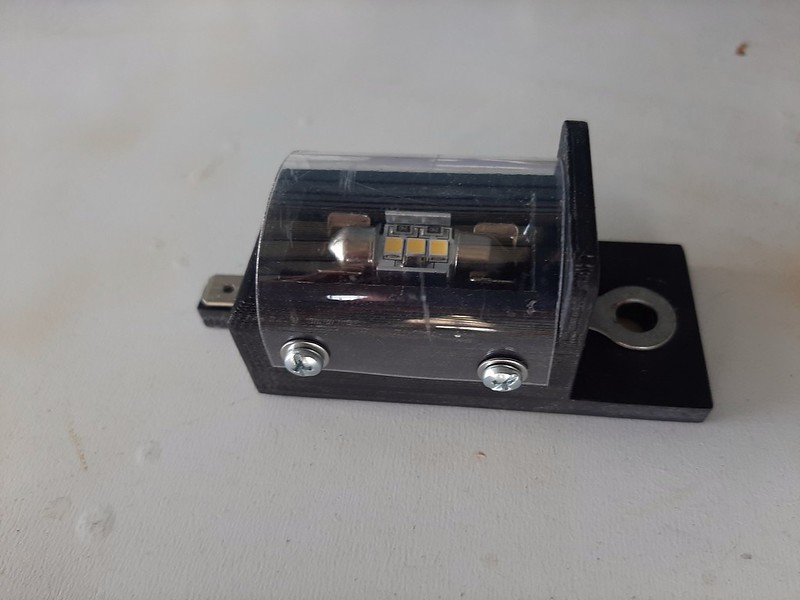  It Works! Nearly didn't though. I thought that the led lamp would not be polarity conscious, lucky I checked it before the epoxy set as I had it backwards! 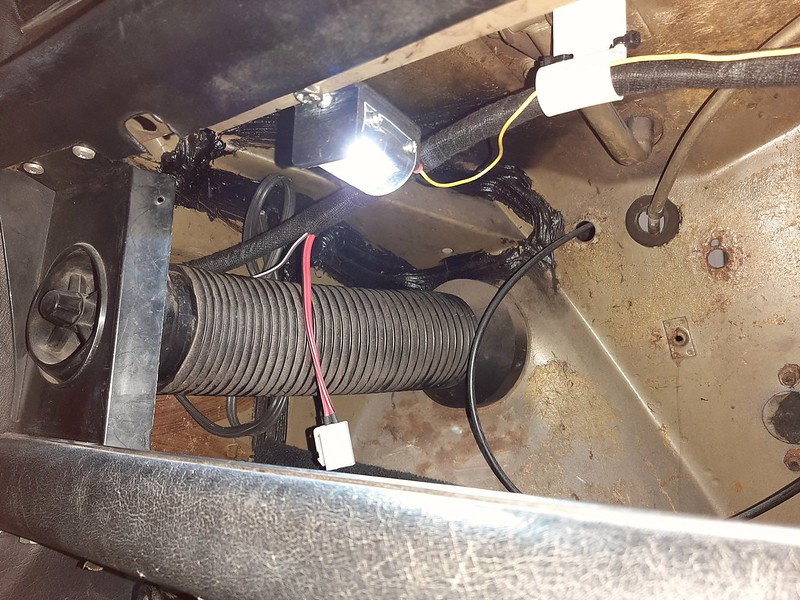 Nick |
|
|
|
OKR
May 22, 2020 2:16:15 GMT
Post by 1800heap on May 22, 2020 2:16:15 GMT
Very Happy with how the parcel shelf turned out considering the state it was in. Took a bit of work though!  Spliced some thick cardboard into the missing parts with super glue. The other rips fixed with wood glue but that was a bit slow to dry so I decided to use super glue for the rest.     Painted with some mat black. Didn't really need to as you can't see when fitted and covered but why not! The top has a piece of bent aluminium riveted to it to stiffen it up and finish it off.   front side covered with an offcut of leather like the driver side.  Also finished off the inside lighting. Lights off. 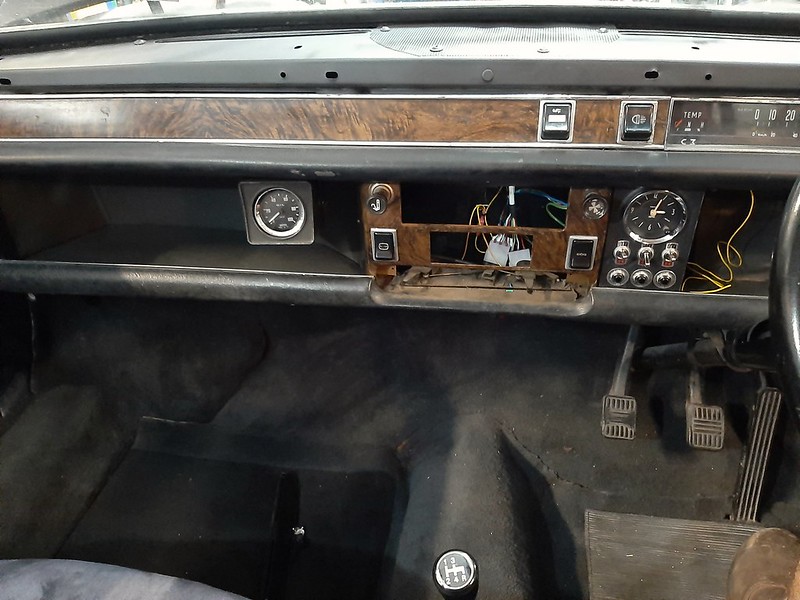 Lights On.  Happy with the extra lighting helps me see these days!  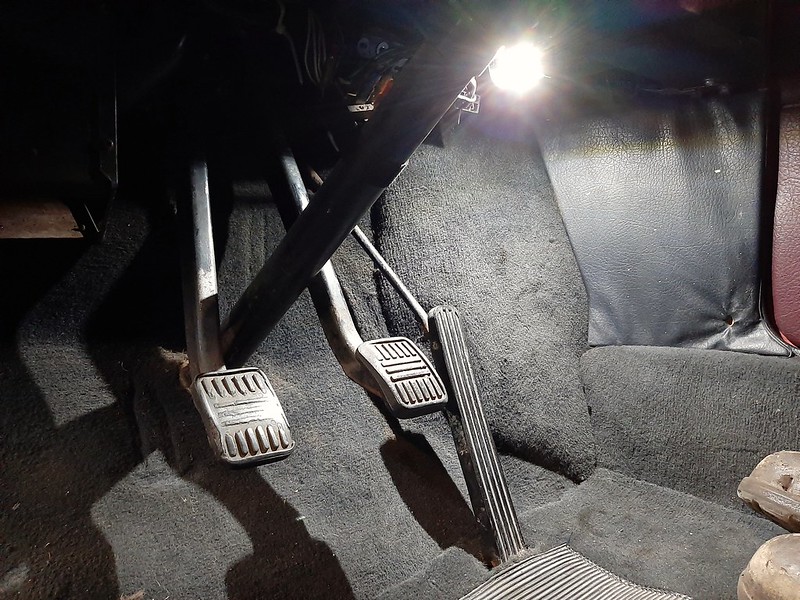 Seat belts next as required by the Oz ADR's Nick |
|
|
|
OKR
May 23, 2020 10:58:45 GMT
Post by dave1800 on May 23, 2020 10:58:45 GMT
Nick, that's an impressive creation from almost nothing, well done.
David
|
|
|
|
OKR
May 23, 2020 12:44:13 GMT
via mobile
Post by jeff on May 23, 2020 12:44:13 GMT
What a great idea, 3d printing parts. My lad has a 3d printer hmmm? I wonder if he can knock up a MK1 parcel shelf top for me. In sections for easy fitting and access to the dash rear. Your dash looks good.
|
|
|
|
OKR
May 24, 2020 9:51:50 GMT
via mobile
Post by 1800heap on May 24, 2020 9:51:50 GMT
Nick, that's an impressive creation from almost nothing, well done. David I did't expect it to come out so well David! Big dose of super glue and a bit of messing around and it came together quite well. I almost dumped it but thought I was not going to find a good one so nothing ventured. Nick |
|
|
|
OKR
May 24, 2020 9:59:45 GMT
via mobile
Post by 1800heap on May 24, 2020 9:59:45 GMT
What a great idea, 3d printing parts. My lad has a 3d printer hmmm? I wonder if he can knock up a MK1 parcel shelf top for me. In sections for easy fitting and access to the dash rear. Your dash looks good. Hi Jeff 3D printers are great for making custom parts. Only thing as I said before you can't really use PLA for prints as they won't stand the heat inside the car. ABS is the go but it takes a bit of getting used to if you have only done PLA printing! I would have just bought lights but LED lights were expensive and not what I was after. Nick Nick |
|
|
|
OKR
May 24, 2020 10:10:45 GMT
via mobile
Post by 1800heap on May 24, 2020 10:10:45 GMT
David I have removed my engine bay loom as it was too hard to work on in the car. The main cables from the starter were corroded and some others are nasty and need fixing. I want to make it more reliable and add the cables for spot lights and upgrade it like the upgrades on the dash wiring. Do you think it is worth going to the extra trouble of replacing the connectors for the lights with water proof ones given the extra cost?
Nick
|
|
|
|
OKR
May 24, 2020 11:01:01 GMT
Post by dave1800 on May 24, 2020 11:01:01 GMT
Hi Nick
I imagine damp and corrosion are far less of an issue in Q'land than in the UK, so it may not be worth going to the expense of waterproof connectors as long as you can be sure the normal replacements are as good a quality as the originals and that can be difficult to assess. I've seen branded (copy?) waterproof connectors at quite reasonable prices locally but not sure what options you have there? It's a job you only want to do once!
David
|
|
|
|
OKR
May 25, 2020 1:11:12 GMT
via mobile
Post by 1800heap on May 25, 2020 1:11:12 GMT
Hi Nick I imagine damp and corrosion are far less of an issue in Q'land than in the UK, so it may not be worth going to the expense of waterproof connectors as long as you can be sure the normal replacements are as good a quality as the originals and that can be difficult to assess. I've seen branded (copy?) waterproof connectors at quite reasonable prices locally but not sure what options you have there? It's a job you only want to do once! David Had a better look for some connectors and the Deutsch type were way cheaper at Jaycar than at Autobarn where I first saw them. Even better prices for bulk buys on ebay. Got a set of crimpers at a reasonable price from Jaycar so am going to do it. You are right David better to only do it once. I might do the horns and coil as well so at least I only would need to replace a small section rather than fix the loom again. I can solder on the horn wires with a connector on each. That will also save me putting in a splice to make the wires long enough. Nick |
|
|
|
OKR
Aug 16, 2020 5:12:42 GMT
Post by 1800heap on Aug 16, 2020 5:12:42 GMT
Couple of things to fix up! Ha Ha! Did a bit of work on the driver side suspension including putting in a NOS displacer, cleaning the housing, fit new ball joints etc. Found welding required and a non rusty gusset plate needed so did that too. Snow balled somewhat as it usually does! Anyway did all that and forgot to take any pictures, but when cleaning up was horrified to notice this!  Gulp!!!! Quite a bit of time under the car!!! Too much rubbish scattered around to see it before. Getting the displacer pipe undone was a bit of a challenge! Didn't have to swear at it MUCH! This exercise lead me to find several issues in the engine bay and two displacer seating rings fitted one on top of the other! Not sure how I managed that years ago! No wonder it never looked quite straight! All the fuel pipes found to be nasty as was the filter (note to self, Dad needs better glasses!) The heater hoses had seen better days and I wanted to insulate the exhaust, fit a heat shield and better set of 'S' Carbs with phenolic spacers (bit warmer in Oz). Also acquired an 'S' air filter box from Andrew so wanted to put that on!  Extractors wrapped. 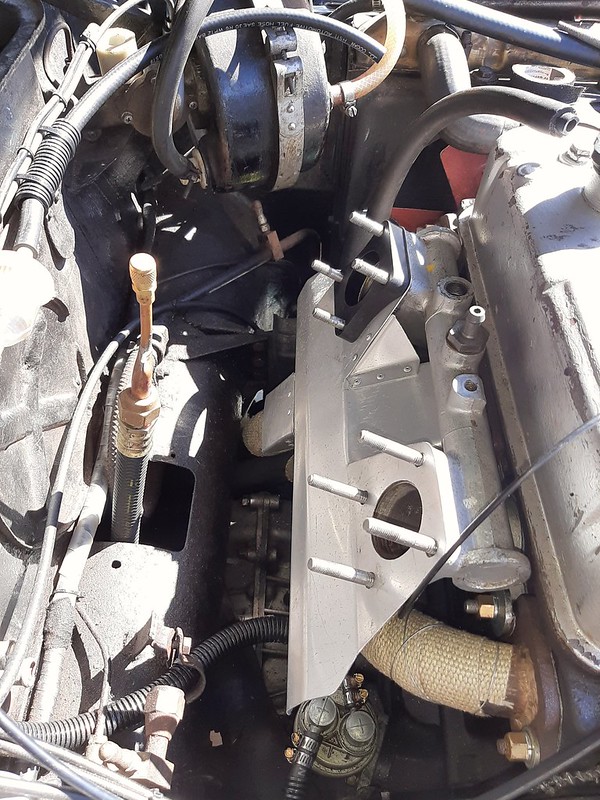 Heat shield cut out bent up to suit and fitted. Very happy with how it turned out, with a couple of tweaks to get round center branch!  Carbs cleaned up and refitted with new hand made gaskets to keep it all non asbestos! All new rubber and a modified heater pipe from rad hose to heater core attached via bracket to inlet manifold to stop it rattling!  New set of K&N's at great expense fitted!  Done and started first kick! I did cheat and fill the float chambers before putting the lids on! I have also made a start swapping out the indicators from W6 to Austin MK2's Nick |
|
|
|
OKR
Aug 28, 2020 8:35:17 GMT
Post by 1800heap on Aug 28, 2020 8:35:17 GMT
I had a feeling it was going to be a bad idea to poke around with the front foot well too much and have good a look at it! There was only a small amount of rust to fix and I was thinking it was going to be quite easy! Some small bits of repair metal and a few more welds probably would have done it. Its under the carpet so didn't really need to be that neat! Not really that much extra rust had formed since I did it the first time 25 or so years ago. Although my welding has improved a little since then! Bit messy couple of holes but otherwise not much rust! 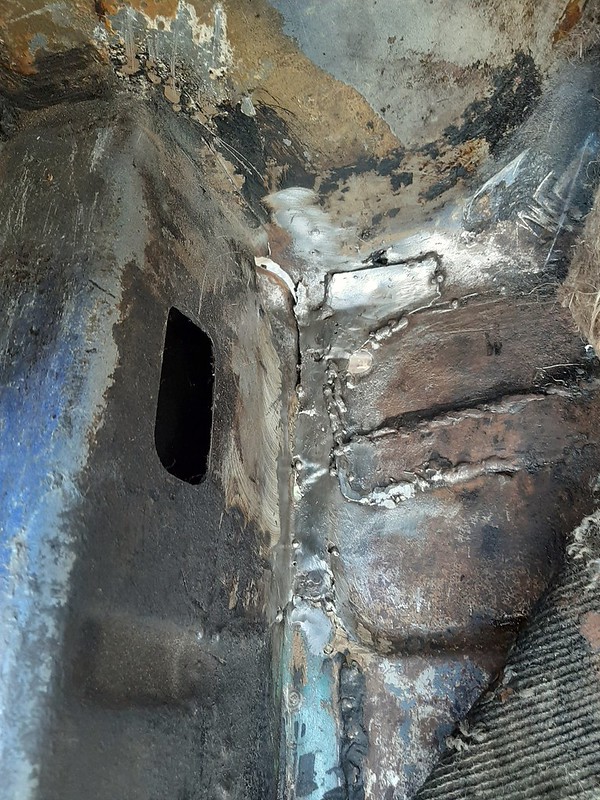 Decided to give it a bit of a tidy up with the grinder and well, kept going a little more and a little more until suddenly I am looking at a much bigger hole! 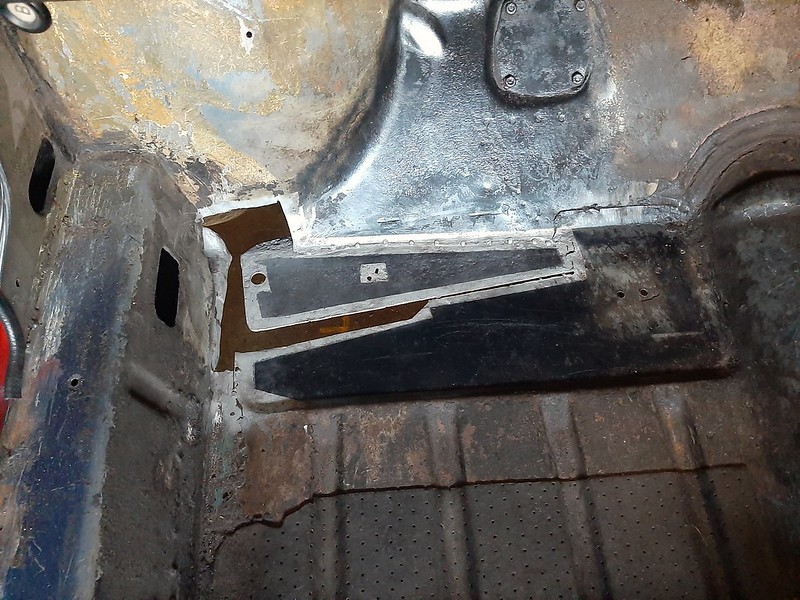 Problem is I started seeing thin areas and it was a bit warped, the welding was a bit poor and not much of it was done very well by the younger me. In the end it didn't actually look very strong as many of the welds were poor! So at this point I am wondering how to put it back neatly, so I didn't just cut it all out for nothing! I can do a reasonable lap join in thin metal but then you have a lap join in it which shows! I am very bad at doing butt joins and usually end up with lots of holes! Give up for a bit! I got to thinking about why I am making holes and thought I would try something! After a bit of messing around with various materials I found an answer that might do the trick for me! Stick a ceramic tile underneath to stop the weld pool dropping and making a hole! I had the power much higher than I normally can to get decent penetration on these spots. This is usually where the skill is that I don't have!   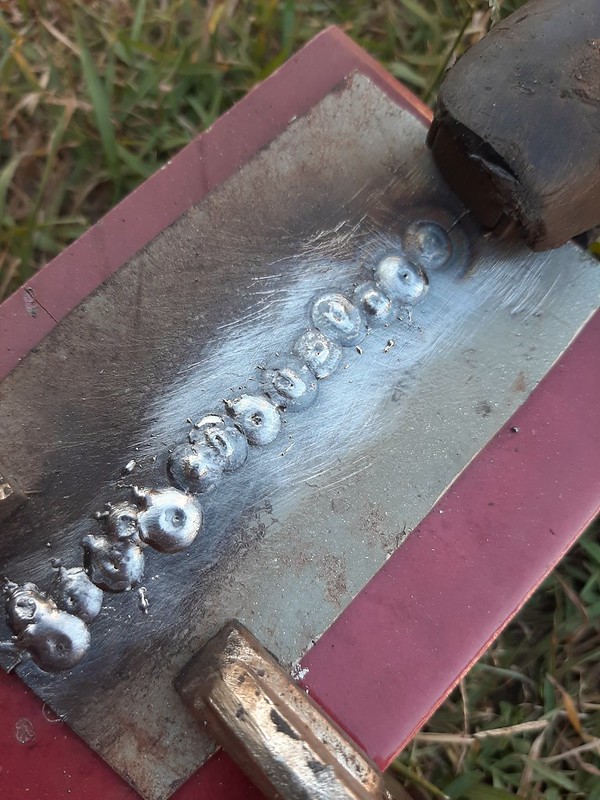  As you can see the underside looks quite good with only a couple of areas I could have done a bit better with my overlap. All the spots would have been holes without the tile there! Here I have polished it up to see how strong it would be! This is the back with small area at the bottom with no penetration, otherwise looks good to me. Very Happy!  Front.  This is the piece cut through the middle with tin snips to see how much I had to grind off to get it flat. Not much!  The tile cracks if you do the spots too close in distance and time, otherwise it just roughs up the glaze a bit, which didn't seem to bother the weld. I have done two butt joins with this tile and it is still usable.  Hopefully I can do the same job on the car! Ill let you know. Nick |
|
|
|
OKR
Aug 28, 2020 10:43:59 GMT
Post by Penguin45 on Aug 28, 2020 10:43:59 GMT
Good effort there, Nick. May I suggest? 1/ Ditch the tiles. Nice off-cut of copper is what you want. It'll take the heat and you can also clamp/lock/fix it behind the work, adding some stability as you go. 2/ Leave a tiny gap. You'll be working mainly with 0.9/1mm steel, so a 1mm gap is good. If you don't, the danger is that your welds sit on the surface and don't go right through (As you have noticed). Flatting back leaves a dangerously thin amount of weld. Gas welding wants an exact fit, so you don't have to use much filler rod. MIG welding works by ADDING filler rod (wire) and therefore you're looking at filling the gap. The hole looks rather familiar, BTW.  Chris. |
|


 . Maybe there are 3D scanning services near to where you live which aren't too expensive?


