|
|
Post by tonymark3 on Apr 12, 2021 17:11:47 GMT
I’m impressed, that’s really neat.
|
|
|
|
Post by Penguin45 on Apr 12, 2021 17:35:13 GMT
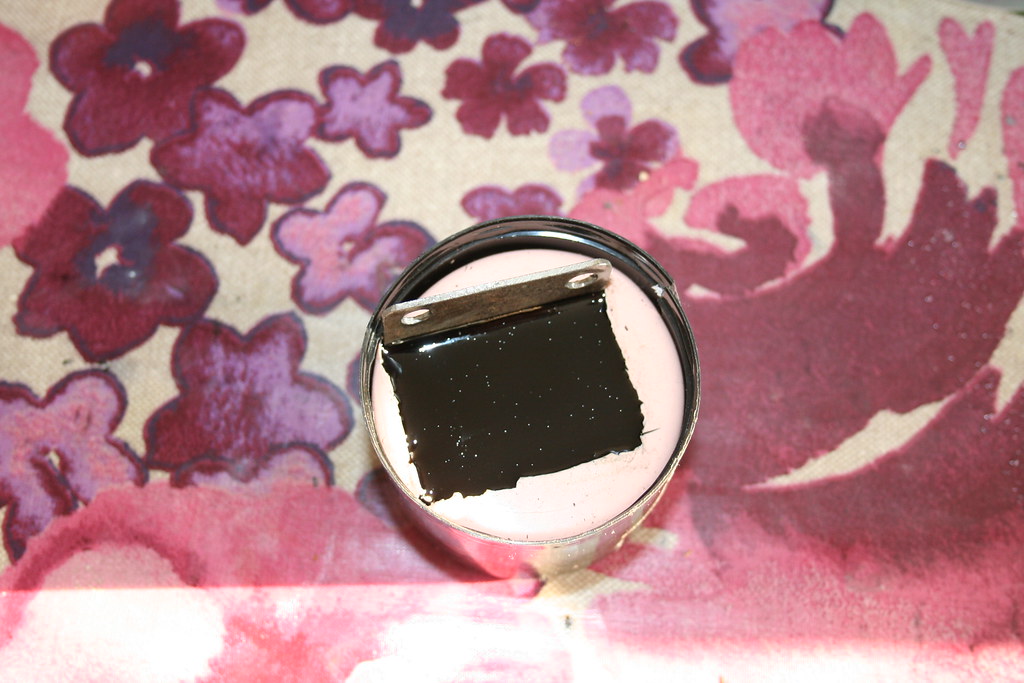
Fiddly. Really bl@@dy fiddly. Two part silicone mould - getting the register correct is very awkward. Might have cracked it now! Find out tomorrow, as the silicone needs 24 hours to cure. Oh - needs more pigment as it's meant to be black!
C.
|
|
|
|
Post by 1800heap on Apr 12, 2021 21:45:44 GMT
Nice job Chris.
Not an easy thing to do with a small and thin item like that. Bubbles, alignment, hardness of the rubber, filling the mould properly and getting the item out of the mould again, what a pain. Rather you than me mate!
I thought about 3d printing a lid but the shape would mean a lot of work finishing to make it look half decent!
Nick
|
|
|
|
Post by Penguin45 on Apr 14, 2021 16:29:56 GMT
Think I've got it.   AMP Fuse Box Cover AMP Fuse Box Cover by Penguin 45, on Flickr Old original, new original, penguin counterfeit.  AMP Fuse Box Cover AMP Fuse Box Cover by Penguin 45, on Flickr Pleased with that. Now the mysteries of red paint.  AMP Fuse Box Cover AMP Fuse Box Cover by Penguin 45, on Flickr As you can see it's taken a few goes to get right! Register, mix, colour, finish, flash, thickness have all been a complete headache. Chris. |
|
cybercontroller
Member
  
Posts: 107
Attribute: Waiting for the right Landcrab
|
Post by cybercontroller on Apr 14, 2021 19:59:10 GMT
Cracking job. Your skills never cease to amaze me.
|
|
|
|
Post by dave1800 on Apr 15, 2021 0:00:13 GMT
Excellent job, Chris. What's next on the list?
David
|
|
|
|
Post by 1800heap on Apr 15, 2021 3:17:38 GMT
Reminds me of the pile of scrap bits I get when I try to 3d print something new! Now you have to make a heap of them for all of those who might need a new one. That way your newly aquired method and skills remains fresh in your mind!  Are you able to get a good range of hardness poly from your supplier or do they only have a small selection? Just wondering from the point of view of mimicking other rubber on the car! Nick |
|
|
|
Post by Penguin45 on Apr 15, 2021 10:07:24 GMT
There are two things going on, one with polyurethane and this with casting resin. The PU I can get in various Shore hardnesses as required and I've pretty much mastered working with it. This casting resin stuff has a mind of its own! Tried making some more covers last night and got four out of six usable ones. Fortunately the shot size is only six grams, so not particularly wasteful when it doesn't work properly. It's the time. Each one needs an hour to cure. New PU project underway.  Mould Mould by Penguin 45, on Flickr Once I get my guillotine blades back from the sharpeners I can do some metalwork and move that one forward. Chrs. |
|
|
|
Post by Penguin45 on Apr 15, 2021 17:06:10 GMT
Made ten altogether.  AMP Fuse Box Cover AMP Fuse Box Cover by Penguin 45, on Flickr Six decent ones on the left. They have mild colour variation. Three "seconds" on the right. Usable, but flawed to look at. Number ten went straight in the bin. There is no consistency to the process, so I doubt I'll go much further with this. I'll see what they look like painted. Chris. |
|
|
|
Post by 1800heap on Apr 15, 2021 22:54:38 GMT
You are doing a fantastic job considering the difficulty Chris.
I know that the smaller the quantity you mix the harder it is to get the correct proportions. You didn't say if you are weighing the mix but even if you are with such a small mix your scales have to be very very accurate to get it spot on!
The pros will vac the mix before use to get rid of bubbles which when I had a go were my biggest problem. I am amazed you are getting so many good ones actually given how thin the shell is. No wonder the register was difficult to get right.
Nick
|
|
|
|
Post by 1800heap on Apr 15, 2021 23:28:53 GMT
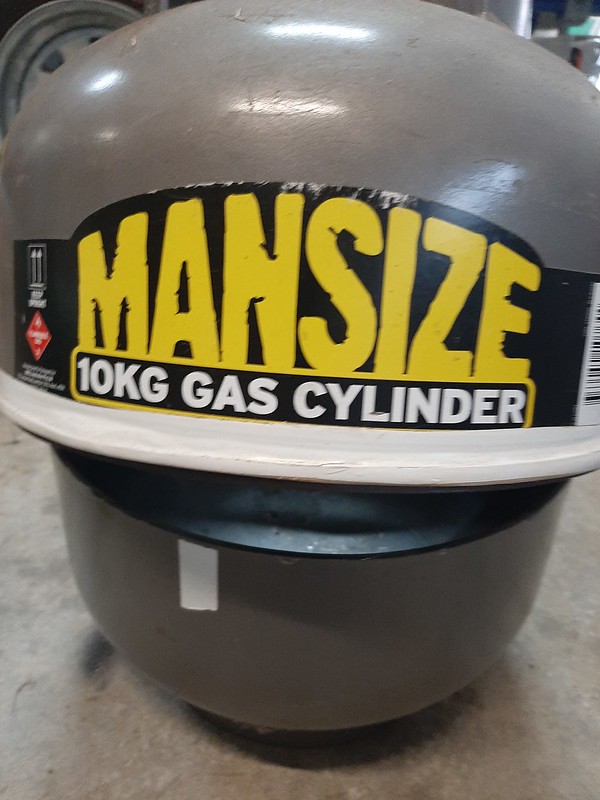
Home made Vac chamber. One of the many things you can make with a BBQ gas tank.
I don't think there is any need with your Amp lid as your results are excellent but if you plan on making engine mounts or something that needs a good bond it might be the go!


 Needs careful cutting to get a straight edge for a good seal and a bit of silver soldering to mod the valve. The tank being welded from two halves has a nice step in it so if you cut in the right spot it fits together nicely. This one has a very small leak as it is not a circular seal. In fact it is a piece of cable sheath taped on. If you put some tape over the join all the way round the tank it is fine. Nick
|
|
|
|
Post by Penguin45 on Apr 16, 2021 10:32:01 GMT
Nice. The problem I have is the working time once stuff is mixed. The PU is 6-7 minutes, the resin is about 3! Whether this is a feature of "hobby" use materials as compared with "professional" ones, I don't know. I've cut up a few of the tiebar bushes and engine steady bushes at random to check for inclusions and haven't found any problems so far. *Crosses fingers behind back.*
Next thing I'm working on uses a 30g shot of PU, which is the biggest so far. That might be more interesting.
MrsP bought me a set of digital kitchen scales (Got fed up trying to scrub PU off her ones) which will measure down to about 6g with reasonable accuracy. This is fine for the other bushes, as I make them as a set of four at a time, or eight for the radiator mounts, so you can mix up a decent quantity at one go. Not practical with the fuse cover as it's taken about three weeks to get one mould workable!
|
|
|
|
Post by Penguin45 on Apr 16, 2021 17:36:39 GMT
Right, decision made. These are up for grabs, then I'm shelving this one for the moment.  Upper Bump Stop Upper Bump Stop by Penguin 45, on Flickr Deal done with MrsP. When coarse engineering meets professional crafting. They look rather good! You can find what Julia really does HERE. So, there are 6 "nice" ones, and 5 "seconds", including a flexible PU one and a very fetching grey one for the rebels among us. £5 for the nice ones, £2.50 for the seconds. That might just recuperate the material costs which have gone into this so far. Drop me a PM with your address if interested. Seeing as it was a beautiful, warm, sunny Lancashire day, I spent the morning in the garage, slaving over a hot drill press and file.  Upper Bump Stop Upper Bump Stop by Penguin 45, on Flickr  Upper Bump Stop Upper Bump Stop by Penguin 45, on Flickr Two hours later, we have ten of these.  Upper Bump Stop Upper Bump Stop by Penguin 45, on Flickr Which go there.  Upper Bump Stop Upper Bump Stop by Penguin 45, on Flickr Fill it through the bigger hole in the middle......  Upper Bump Stop Upper Bump Stop by Penguin 45, on Flickr And behold! 11H 1616 front upper bump stop. Parts listing dates from 1984 and states NLA even back then. Chris. |
|
|
|
Post by tonymark3 on Apr 16, 2021 20:02:35 GMT
Well done Chris. Looks pukka.
What I always wondered was why the engine mounts were in shear when they could have the motor sat on mounts. I suppose it stops the fore and aft waggle but if they were at 45 degrees maybe? Idle thoughts.
Bet you’re wondering what to do next.
|
|
|
|
Post by Penguin45 on Apr 16, 2021 20:58:10 GMT
One of life's little mysteries. Pretty sure Tony Wood had some made up like this:  Engine mount Engine mount by Penguin 45, on Flickr 'Scuse the drawing. There's one as the rear mount on the red car. I'll see if I can get a pic of it in the morning. Chris. |
|


