|
|
Post by 1800heap on Aug 11, 2017 22:10:49 GMT
Hi Steve
Good to hear another crab might be saved. The boys have given you some great tips to take before proceeding with attempting to start the engine. It might also be worth thinking about your aim for the vehicle. What you are looking to do with it I mean. If you really don't want to touch the engine and it is a make or break decision for the car, then take the advise and give it a go. If a full rebuild is on the cards for the car you may well save yourself considerable coin by stripping the engine and not starting it! For example if the cam is seized even if you get it to move before you start, it will likley be toast before it gets any oil!
As David says it is very tempting to attempt to start it but this may cost you money in the long run.
Regards
Nick
|
|
|
|
Post by 1800heap on Aug 11, 2017 5:37:12 GMT
Sorry should have noticed the car no- AH4S makes it an Austin I think.
Nick
|
|
|
|
Post by 1800heap on Aug 11, 2017 2:31:48 GMT
Hi, I am new to the forum , so excuse me if errors occur. in response to your request for info on mark threes:- Engine no 18H 651E-H1451 Chassis 217S-117955A Car no AH4SE-84396A Inner wing plate 11R-0023 and 12R-0039 it was a car owned by a foreman at Morris Motors , Cowley, and I have owned it for the last 37 years or so. currently stripped awaiting soda blasting and painting after usual sills, front valance and offside wing replacement. Engine has stage 2 head, big valves and unleaded done ( small fortune). Oh, registered Dec 31st 1972. Trust info helps. Tony S Hi Tony Welcome to the forum. Thanks very much for the information. Sounds like you are doing a bit of work on the car. We are always interested in restorations! I am guessing the car is a Morris, as the previous owner was from Morris motors. Can you confirm this please. Also according to the 651E it should be a manual with rod gear change, no PAS, carb crancase ventilation and a pre-engaged starter? Look forward to hearing more about your car. Regards Nick |
|
|
|
Post by 1800heap on Aug 9, 2017 6:06:24 GMT
Thought I better put a picture in of my pommy crab. 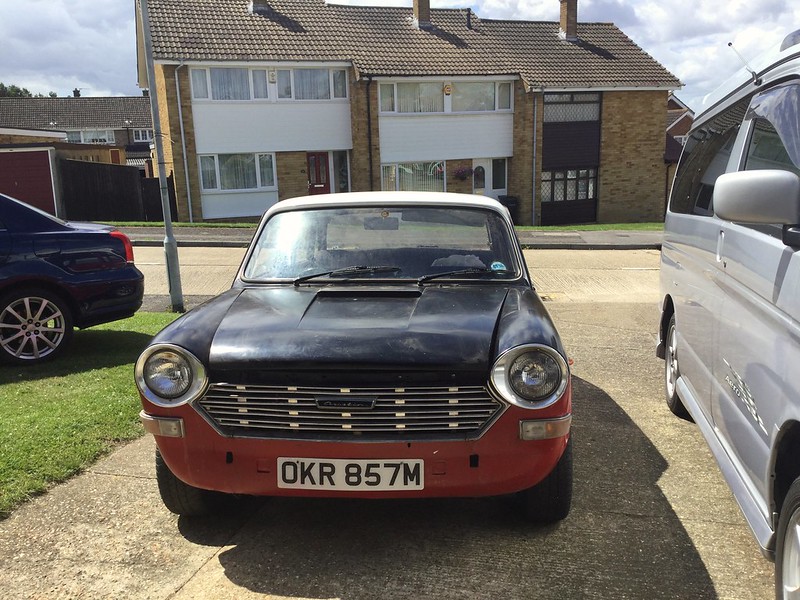
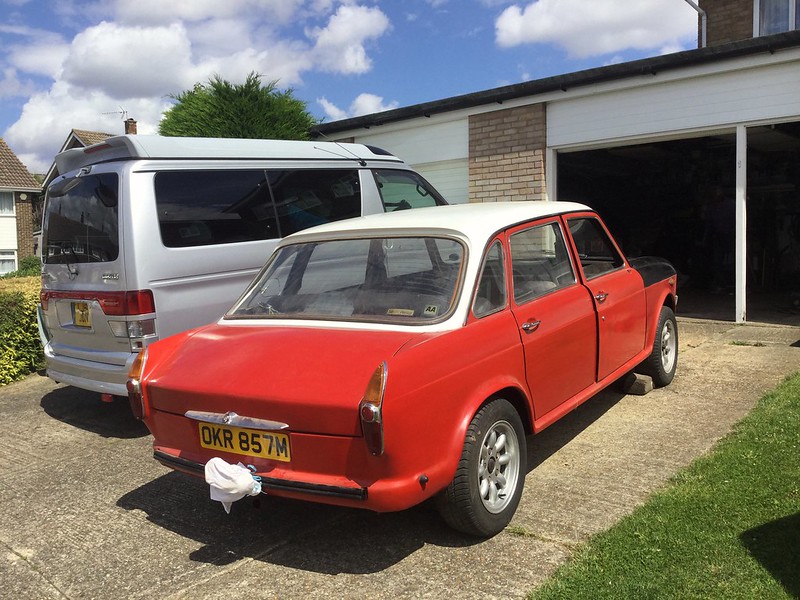 Dad has done a bit of work to make it look ok for the move to Australia. Nick |
|
|
|
Post by 1800heap on Aug 9, 2017 3:41:13 GMT
You are both right. I was surprised given the location how little rust there is really! My UK car I replaced a big section of inner sill and floor and the whole outer sill on both sides. That was approaching 20 years ago! I hope it is still ok because I want to ship it soon! It has not been on the road in that time so has avoided the dreaded salt.
Nick
|
|
|
|
Post by 1800heap on Aug 7, 2017 9:27:39 GMT
Hi Andrew
Looks good mate. Brings back memories of my uncles Jag. One very simmilar to yours. Now you will be able to say "I've got a Jag" how cool is that! Unfortunately his car suffered bady when rats had a go at the wiring. Very sad, he got rid of it after that! Not uncommon apparently according to dealer. Must have been something tasty in the loom!
Nick
|
|
|
|
Post by 1800heap on Aug 4, 2017 9:05:22 GMT
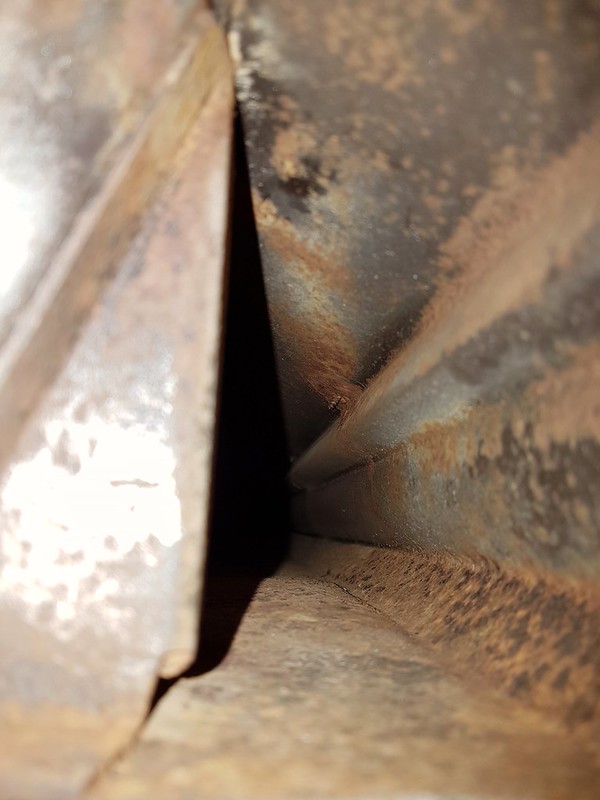
More work on the crab. I decided the only way to straighten the sill was to make a cut along the Kink and hammer it flat with it peeled open. Then weld the cut back up. So I attacked it with a cutting disk. 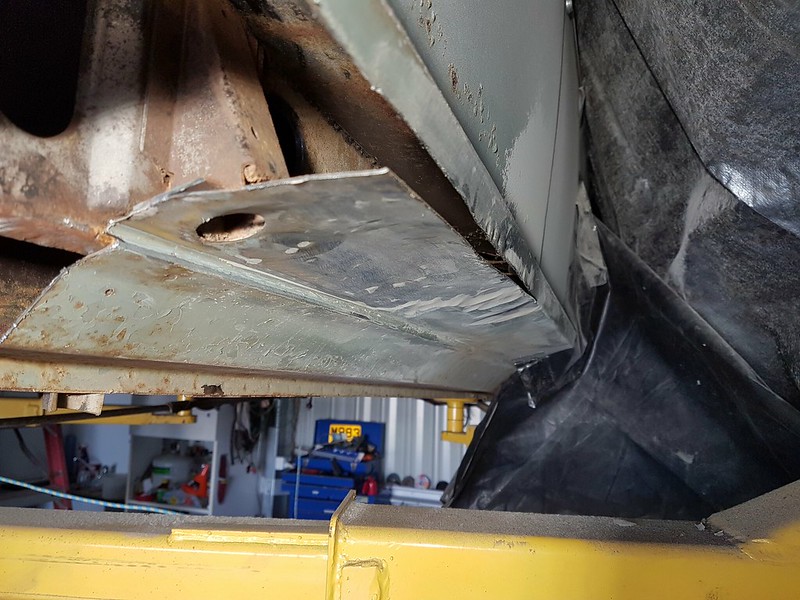
Cut ready for straightening.
Next job was to find the piece of metal that I had already made some time ago for the sill. A piece of flat cut out of a scrapped Toyota! After alot of looking and cursing I remembered it was inside the Car! 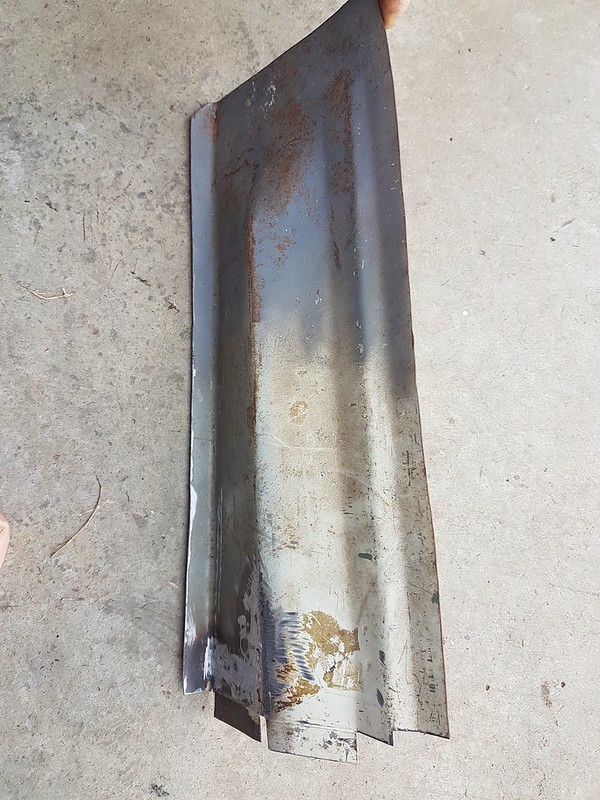
After a bit of bashing got it to fit ok so I decided to give up on a good note! 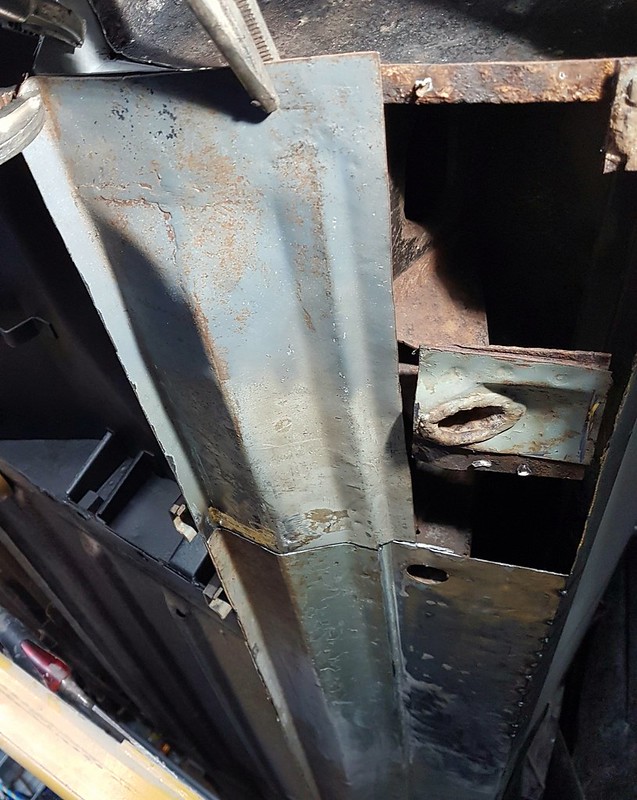
New section fitting.
Next job I suppose will be to make a bit to fill in the remaining hole. I also need to fold a bit of metal to go inside the seam of the cut, to stop me blowing holes in it when I weld it back together!! Nick |
|
|
|
Post by 1800heap on Jul 10, 2017 6:57:13 GMT
Well I have made a start with some scraping and sand blasting. Put a bit of a tent up so I don't cover the shed in grit! 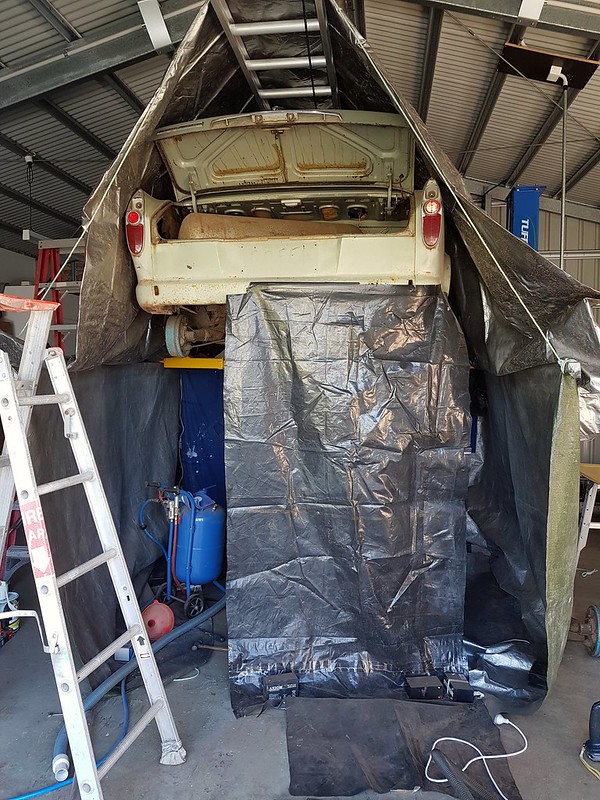 Sand blasting tent setup Sand blasting tent setup
rear section before clean up. 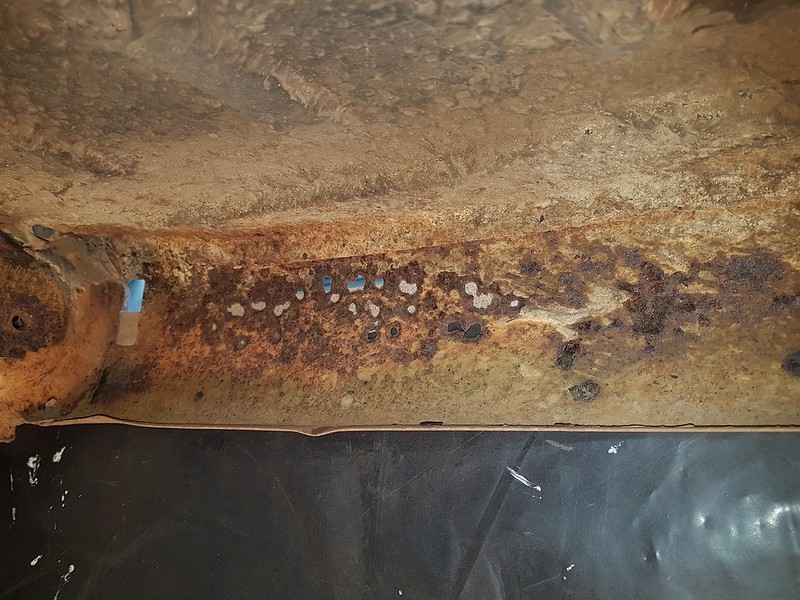
Rear section after scrape then blast then rust converter sprayed on. 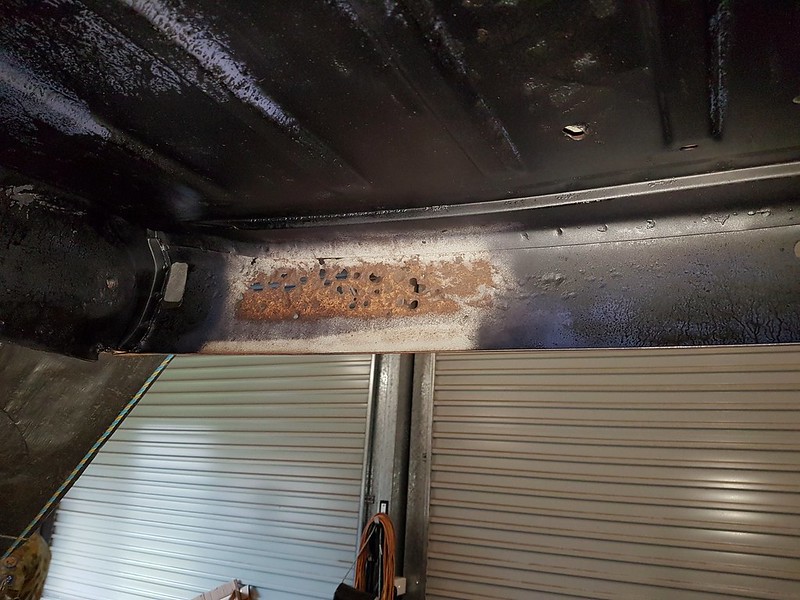 After blast and rustkill After blast and rustkill
Rusty section cut out of sill. Noticed that the sill is a bit wonky! 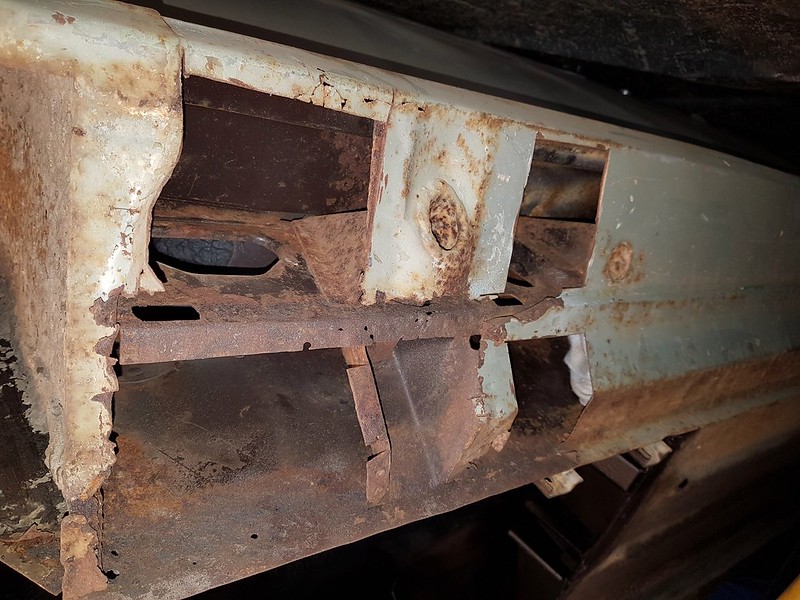 Outer sill rust removed Outer sill rust removed
Filler removed to reveal a bit of a kink!! 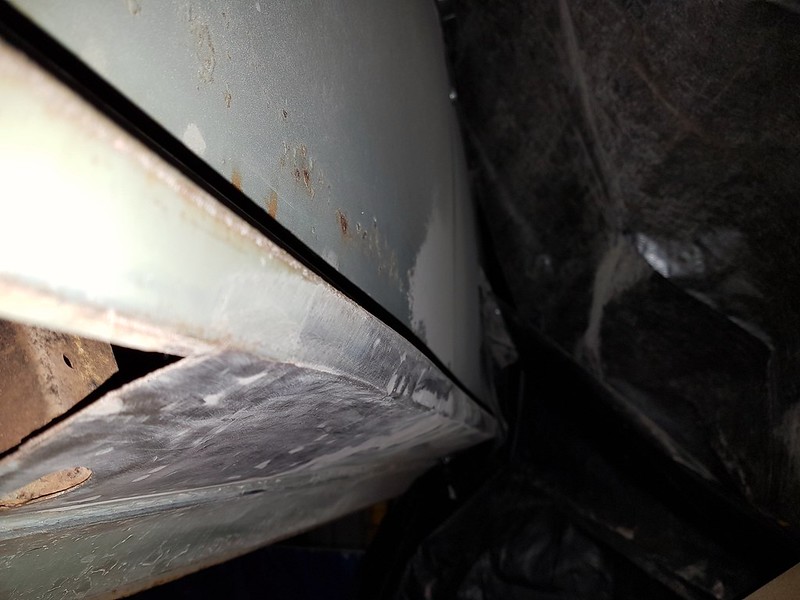 Sill kink Sill kink
Any ideas for the best way to get the kink out would be appreciated while I have the sill open at the rear end. Couple more pictures. 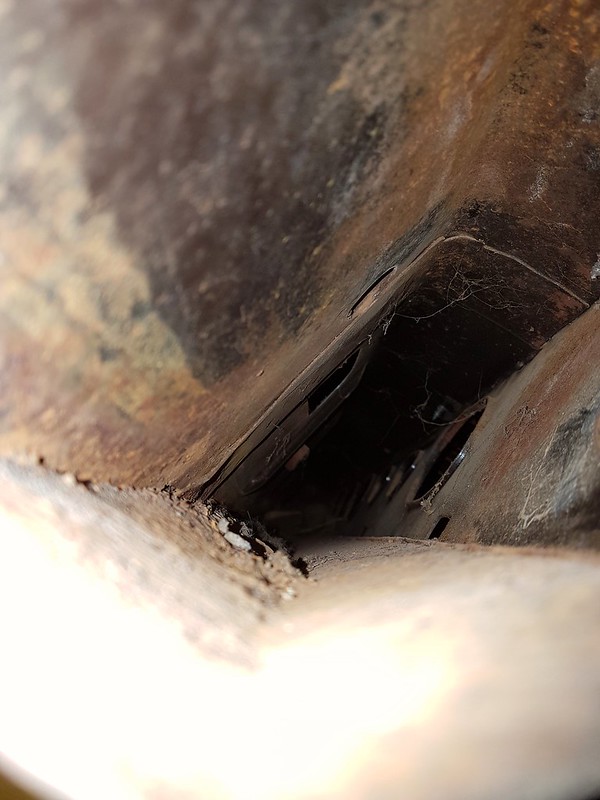 Inside sill inner Inside sill inner
 Inside sill outer Inside sill outer
Nick |
|
|
|
Post by 1800heap on Jul 9, 2017 6:49:01 GMT
I've done a quick "How To" - HERE. Hope it helps, Chris. Thanks Chris I think I have got it! Nick |
|
|
|
Post by 1800heap on Jul 8, 2017 10:55:13 GMT
Hi Chris
I am struggling with posting a Flikr picture can you go through the basics for me. The picture is in Flikr. How do you link it? Do you type in the BBCode direct or are you getting it there another way?
Feeling a little dumb at the moment!! Not intuitive for me at all!!
Nick
|
|
|
|
Post by 1800heap on Jul 8, 2017 10:12:45 GMT
Its up on the hoist! What nasties lurk under the underseal! Surprised to say it doesn't look too bad so far! 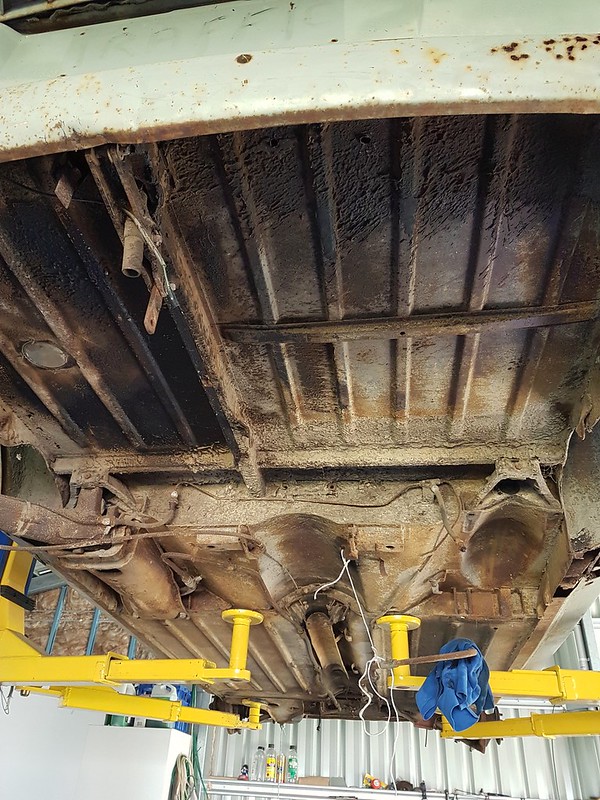
I may even save the old girl, now it has been in the shed for 10 years it qualifies as family!! Got it for parts in 2007 to use for my UK crab, which is STILL in the mother country! Coming to Aus this year I hope! First post to test Flikr. Hopefully resto to follow! Nick |
|
|
|
Post by 1800heap on Jun 12, 2017 20:34:41 GMT
The distance you show here on mine is 20mm and the badge is the same where the bezel is offset. Perhaps it is the same as yours after all. Nick |
|
|
|
Post by 1800heap on Jun 12, 2017 10:45:45 GMT
Would some kind Austin owner please measure the distance form the bottom of the badge to the front lip of the bonnet for me please? This bonnet has a different hole pattern than the one formed by the pins on the Austin badge. Thanks, Chris. Chris On my Upside down crab, the bottom of the Austin badge is 20mm up from the crease line where the curve of the bonnet starts. If I start with a steel rule touching the bottom of the badge and roll it over the bonnet to the bottom fold this give 49mm. I have no idea if the Pommy and upside down Austin badge locations are the same though! Nick Ps Absolutely no idea where the bolts are and yours looks much higher. The badge bezel is wider at the top than the bottom so perhaps is different! |
|
|
|
Post by 1800heap on Jun 11, 2017 6:59:55 GMT
Thanks for the information. I have in fact exchanged the knuckle joints in the left hand side (both front an rear). The right hand side probably still has the original ones. So the pressure on this LH side should be the correct one. This explains the higher pressure needed on the other side. This does not explain the strange ride height measured at the front wing. This must be due to a slight misalignment when the new wings were fitted many years ago. Peter Hi again Peter You are most likely correct about the front wing replacement being the culprit. I am not entirely convinced this is fully to blame though, especially as you say that you have replaced knuckle joints on only one side. I also would not trust floor to sil measurements 100% which is why BL used hub to front wing heights as a setting point. I am not looking at the car though, so its just a gut feeling looking at your measurements! As I said worn components mess with the front to rear trim. Ie can make the rear trim low with front set correctly. It is more likely a combination of factors in my humble opinion. As long as its not annoying to look at all good! Nick |
|
|
|
Post by 1800heap on Jun 10, 2017 11:56:15 GMT
Peter
Well done on the pipe replacement. Not easy if you don't have a hoist! Thanks for the meaurements.
There are a few factors that will effect the front to rear trim. If you are having trouble with this on one side for example.
Wear on the knuckle joint where the displacer connects to the radius arm is a good example. It is also worth checking for play in the rear radius arm bearings.
We are also looking into how much effect ageing displacers have on trim as this has been reported as a possible cause.
Nick
|
|


