|
|
Post by tony on Aug 21, 2015 12:20:44 GMT
Thanks, Andrew. So, it's 1977, series II. Very good look! The one I worked on a few months ago is about 1974 or less, series I. Its fuses location is at the central part of dashboard, just behind the switches. But I won't be able to see her again as the car owner sold her to a Taipei's guy. Regards Tony Hi Tony, Being '77 it would be a series II car and yep, she does look tidy in the pictures. Thankfully here in NZ we don't salt the roads, so the cars don't rust so badly. -Andrew |
|
|
|
Post by tony on Aug 21, 2015 7:19:09 GMT
Hi, Chris. I haven't never seen something like this about the front suspension off before. Does it happen when the vehicle is driven often at high speed as of a result? Regards Tony Well, it got done, but it turned into a titanic battle. We were both drowned rats by the time we finished. Suspension off, no real problems. Disconnected the hydro hose, which seemed a bit on the short side. Would the displacer come out? Would it 'eck. Removed carb to give some room to get pry bars in. Nope. In the end, we took the near side suspension off, pulled the displacer out of that side, giving us an open tube. A 5' length of scaffolding pole used as a battering ram through the tube got it out. What a palaver. 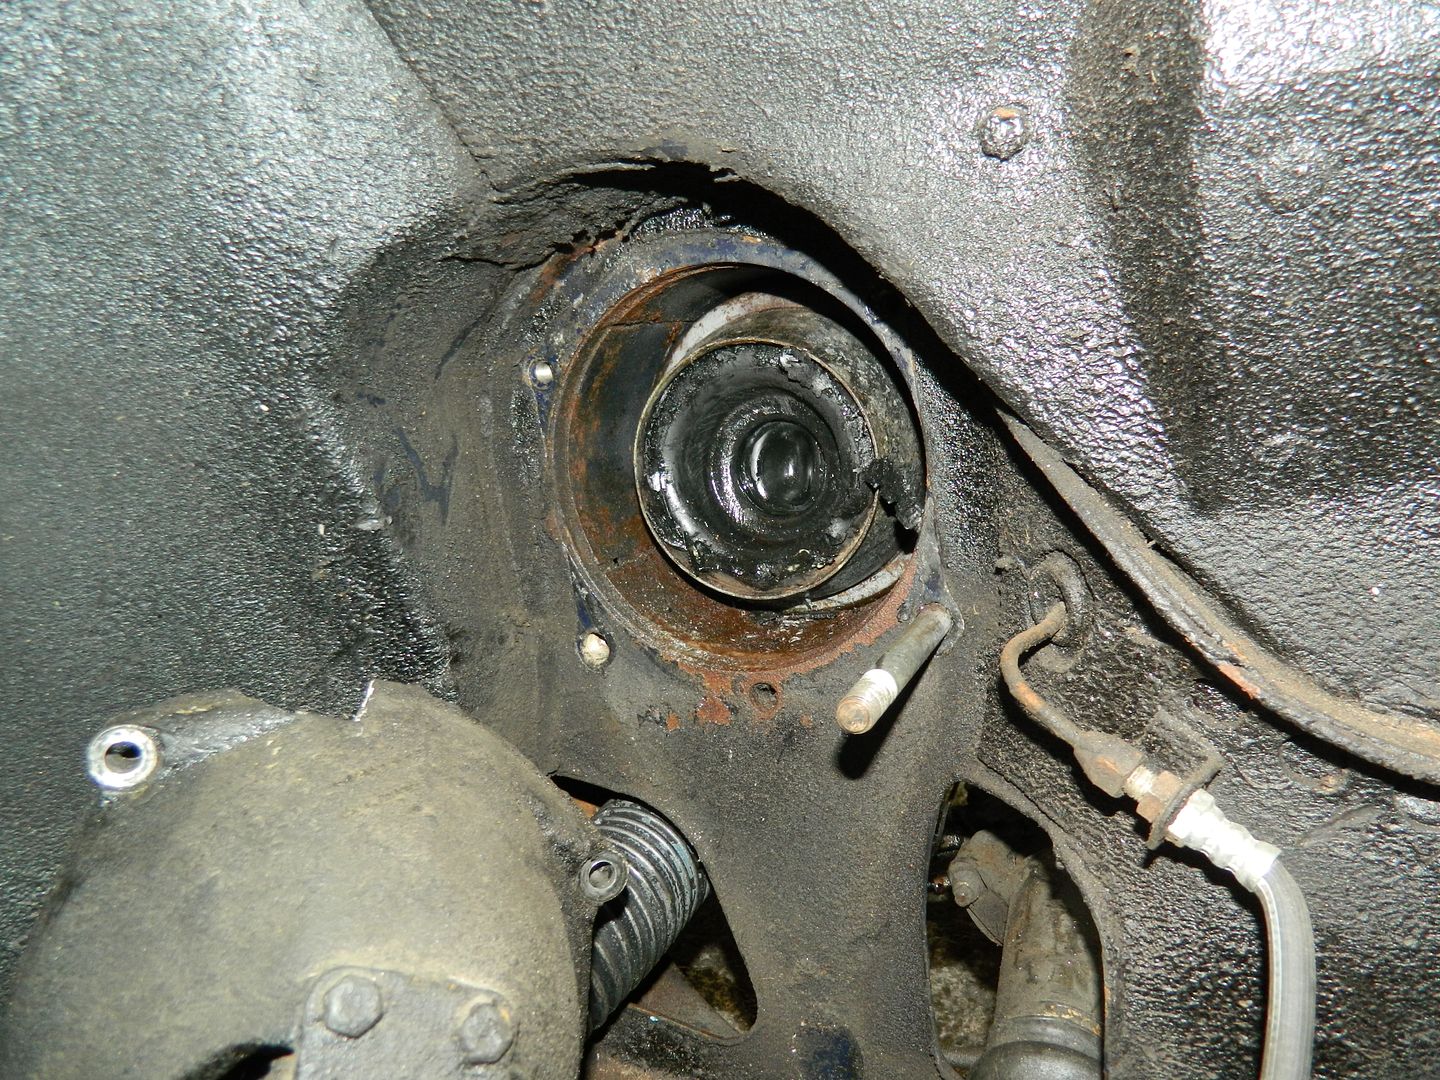 Displacer as revealed. Rubber pretty much blown out all round the edge. 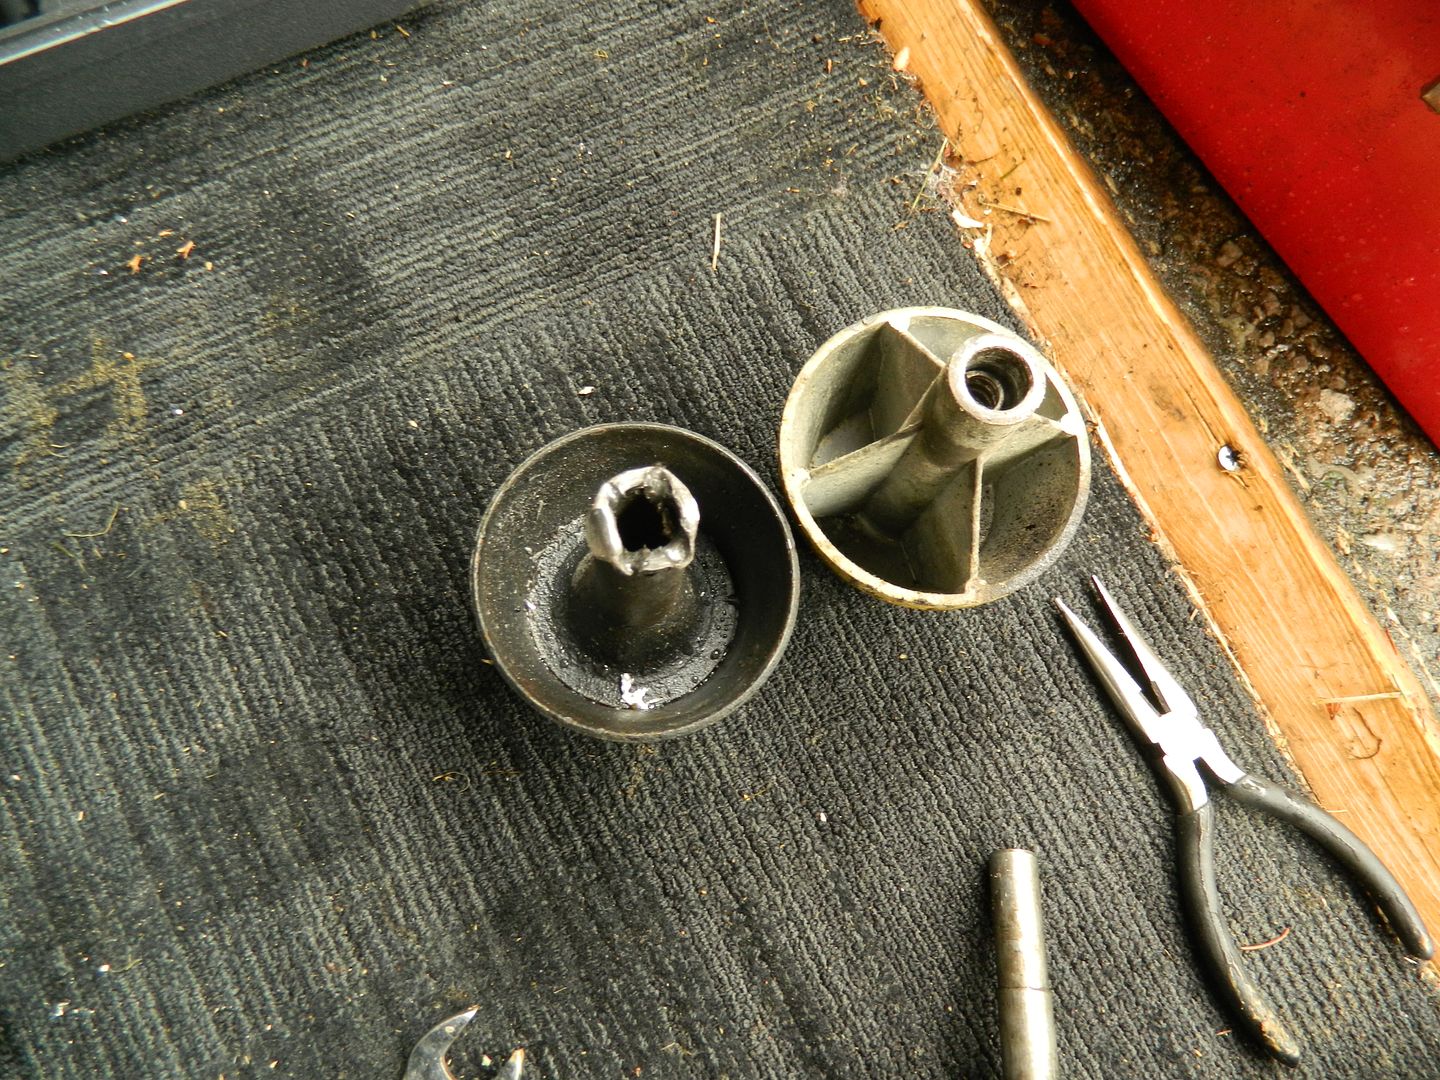 Push rod looking very battered on the left. 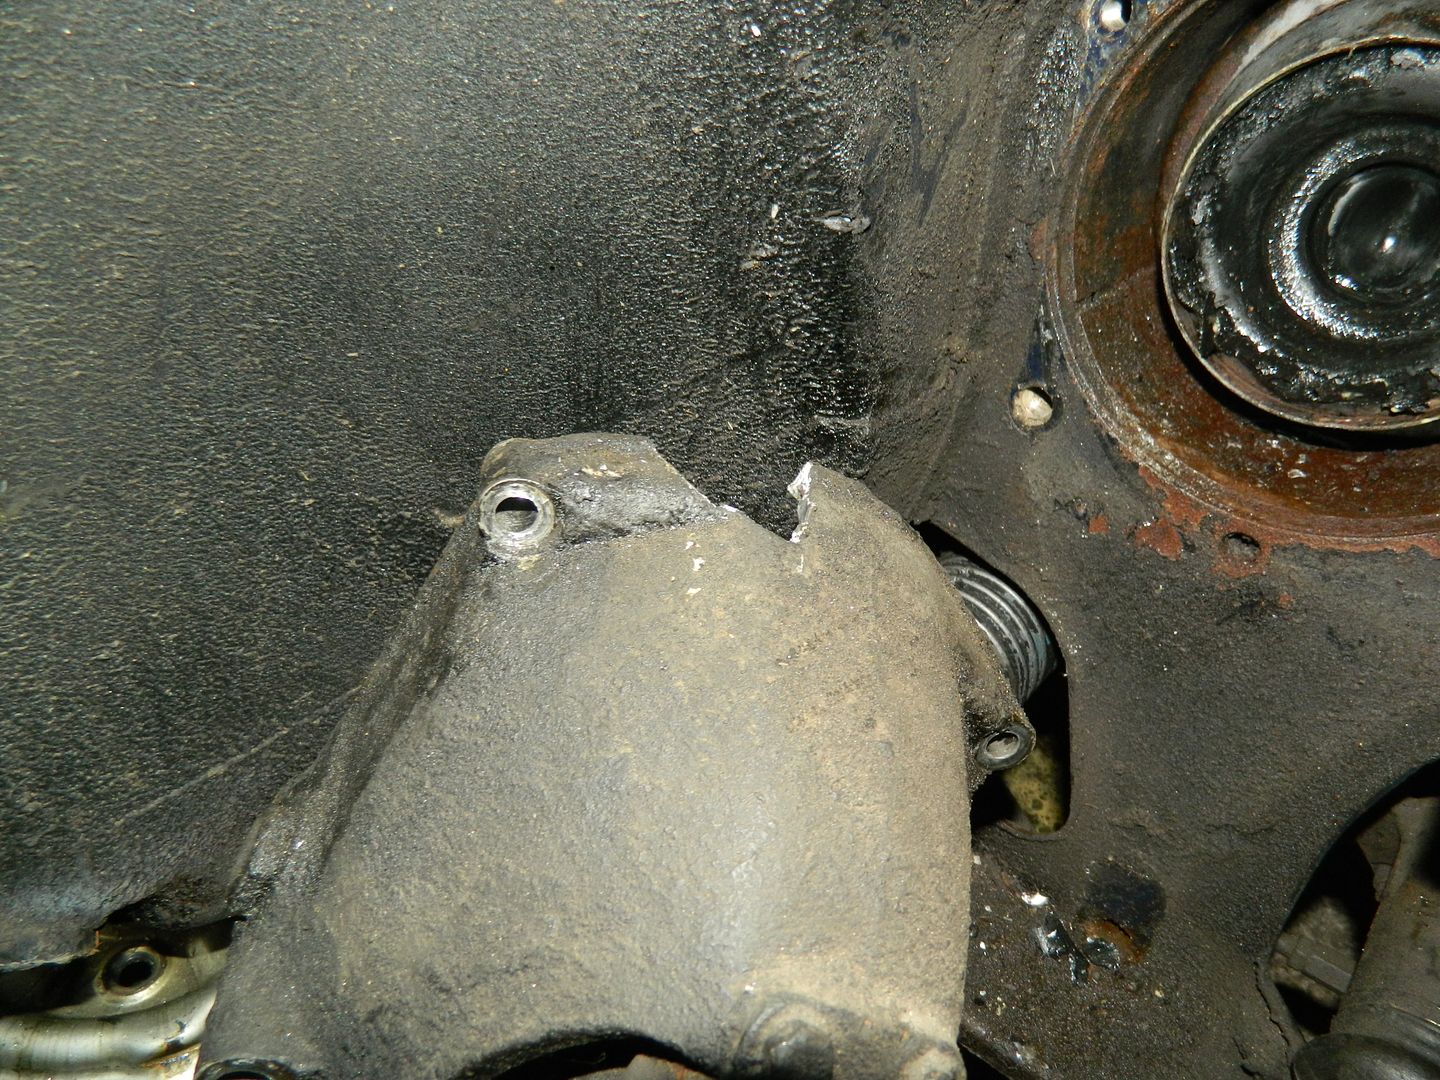 Suspension housing with small chunk knocked out. The housing hasn't cracked, so we've put it back. What I suspect has happened is that the outer push rod has more or less separated from the inner one and done something like this: /\ . The top of the "V" has been rubbing against the suspension housing. You may recall a comment earlier about the suspension "jumping" when we inflated it. I suspect that this is why. 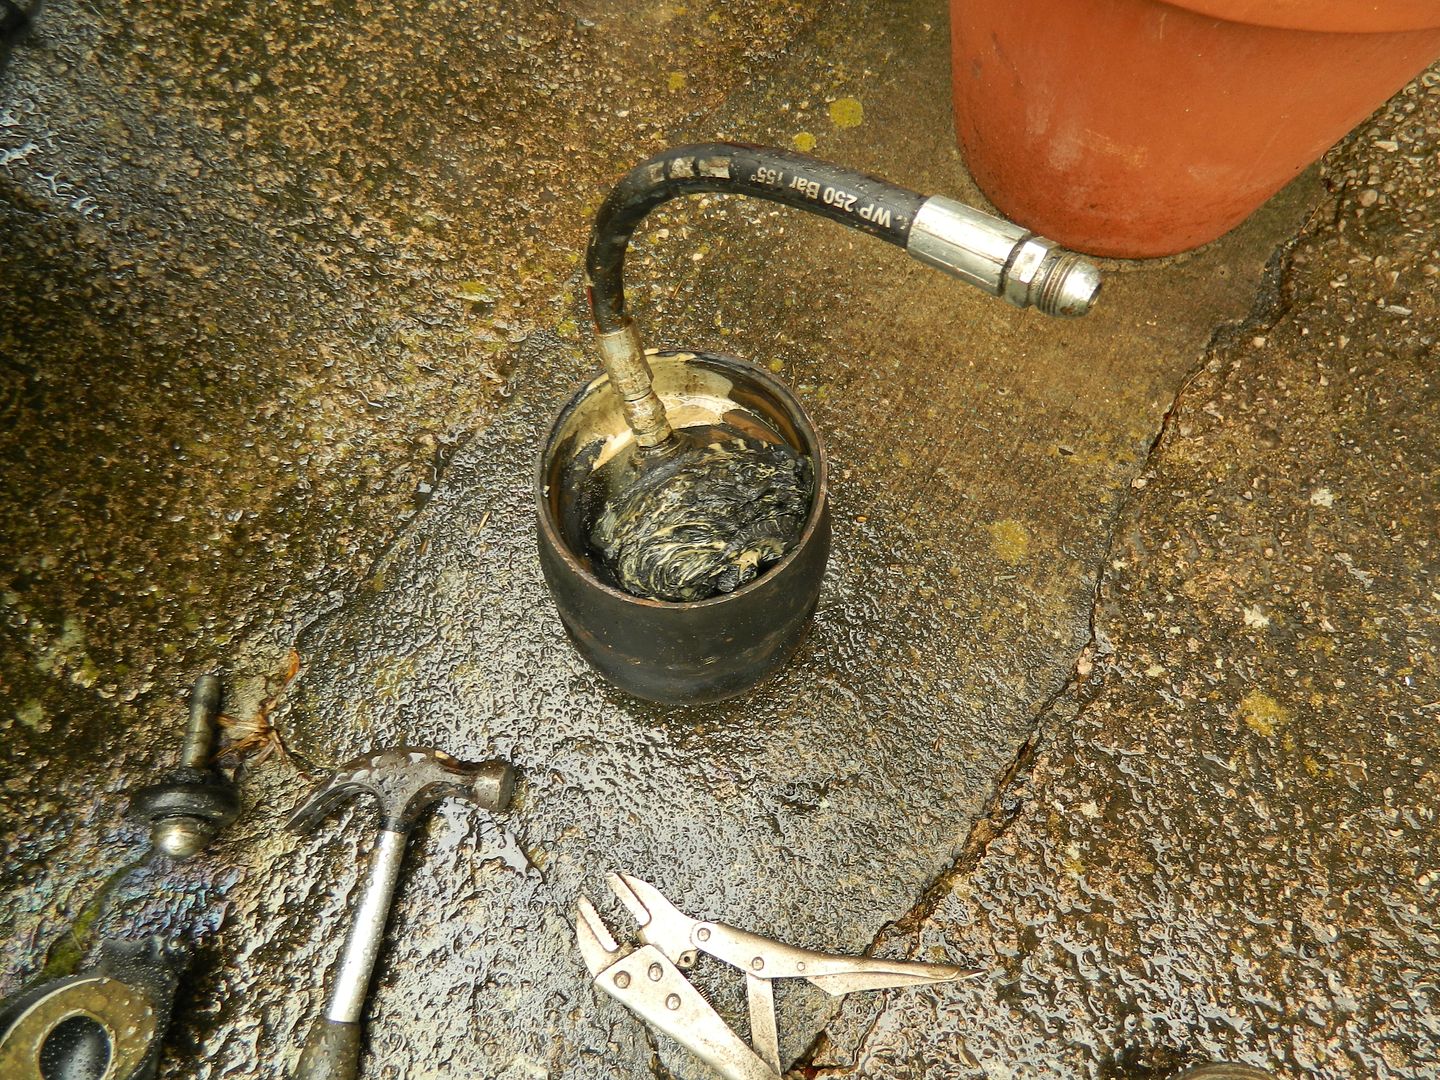 Inboard end of displacer. This one is a pretty epic fail. When we'd finally got the thing out, we managed to re-assemble both sides in little over an hour. Got some pressure in the system and started her up to go for a quick spin before levelling things off properly. There was a most peculiar noise..... Looking into the bonnet showed the o/s drive shaft turning, but no drive to the wheel. Closer investigaation showed that the drive shaft is disconnected inside the CV joint. I wouldn't have thought it possible! Anyway, we were too tired and wet to start pulling the suspension apart again, so that's it for today. I have found a suitable CV joint in the garage, so I'll try and get over again tomorrow. Mark has bought a new toy - a mains electric hammer action wrench. A most impressive bit of kit. Chris. |
|
|
|
Post by tony on Aug 21, 2015 6:47:22 GMT
Is it a XJ-6 Serie One? It is in very good condition, isn't it? I have worked on that kind of vehicle once, changing the clutch set of manual gear box, rebuilding fuel injection system wiring. Regards Tony |
|
|
|
Post by tony on Aug 20, 2015 6:20:17 GMT
Yes, there was a typhoon that blowed down many trees here last Saturday. We survived as our garage is NOW an indoor place. On that Saturday afternoon we did come to our garage to take a look if something went wrong. Thanks to God. Everything was fine. They say there are another two coming this weekend, one of them is very sure to approach to us. From the begining of this year there was a shortage of water, now there is too much. Thank you for your concern, David. About the headrests, one of our customers gave us the two used headrests, probably europeans made. Father cut off some piece of the two matel of each headrest to make them shorter and could be connected to the house water pipe modified. I have to leave right now for work on a Camry AC conditioning system. And I will come back to take about another water pump of Toyota Vehicle. Many thanks. Regards Tony Hi Tony I hope you were not troubled by the recent typhoon? I see there is another maybe arriving at the end of the week. Not just crab water pumps. Mine failed after 80,000 km and my neighbours after just 35,000 km on a Toyota SUV based on the Hilux diesel. Similar symptoms leak one day not the next. Just a dribble but not worth risking. Quite cheap considering the complexity of the casting and easy to get to. Regards David |
|
|
|
Post by tony on Aug 19, 2015 5:31:37 GMT
Father took David's suggestion and uses some protective material for the headrests. Regards Tony 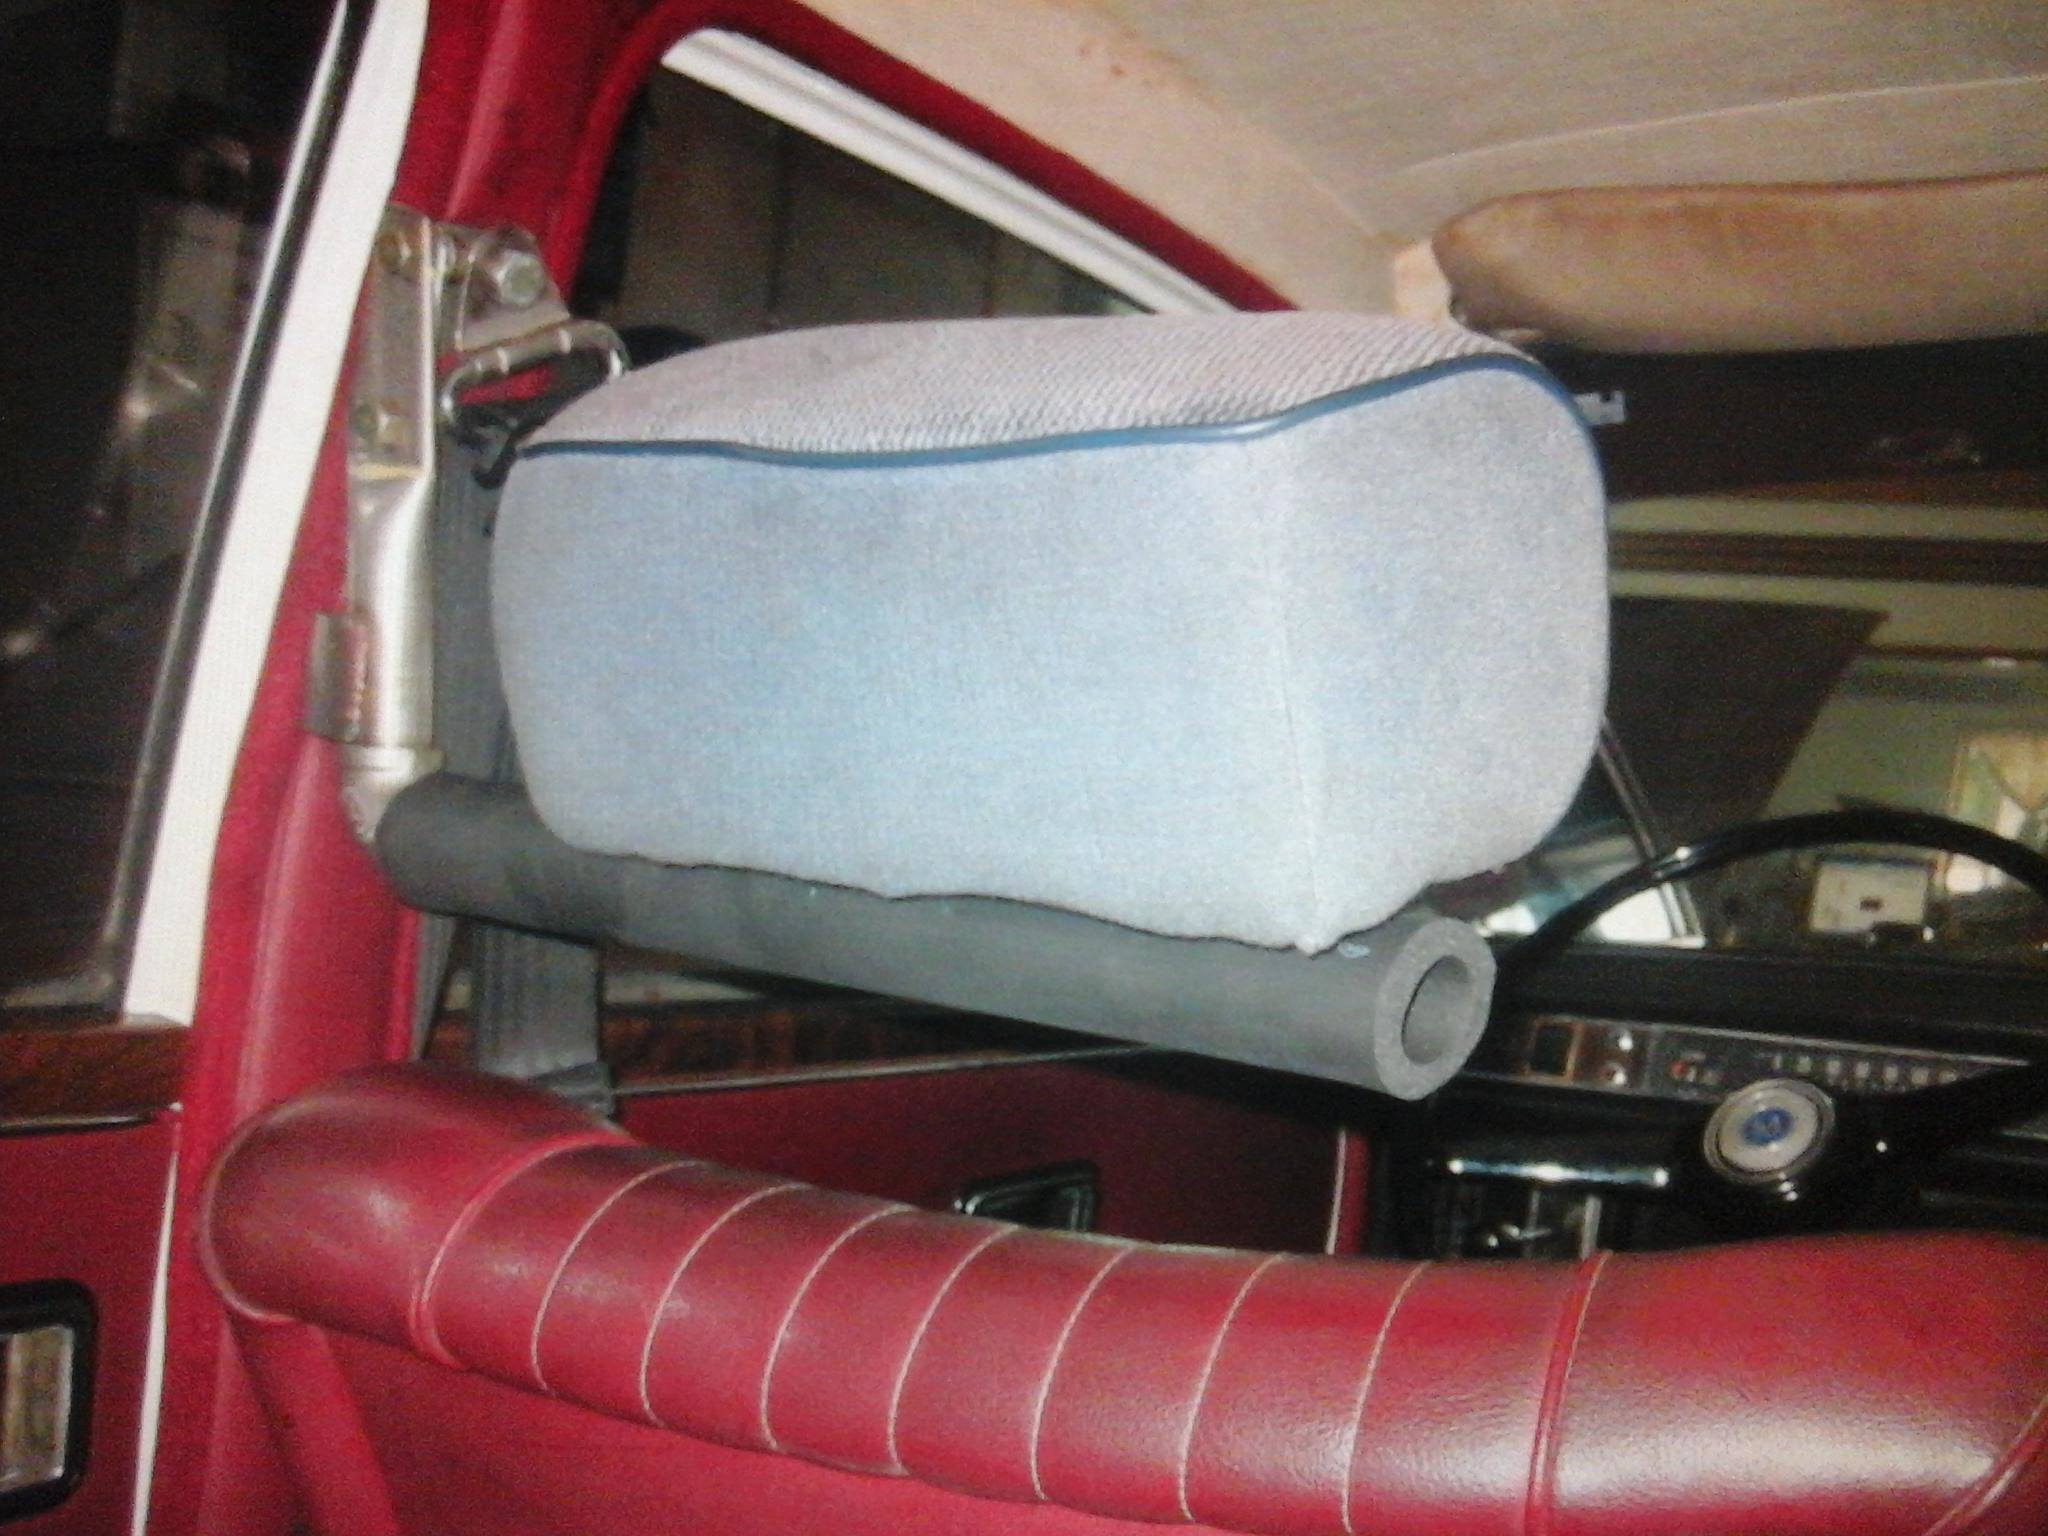 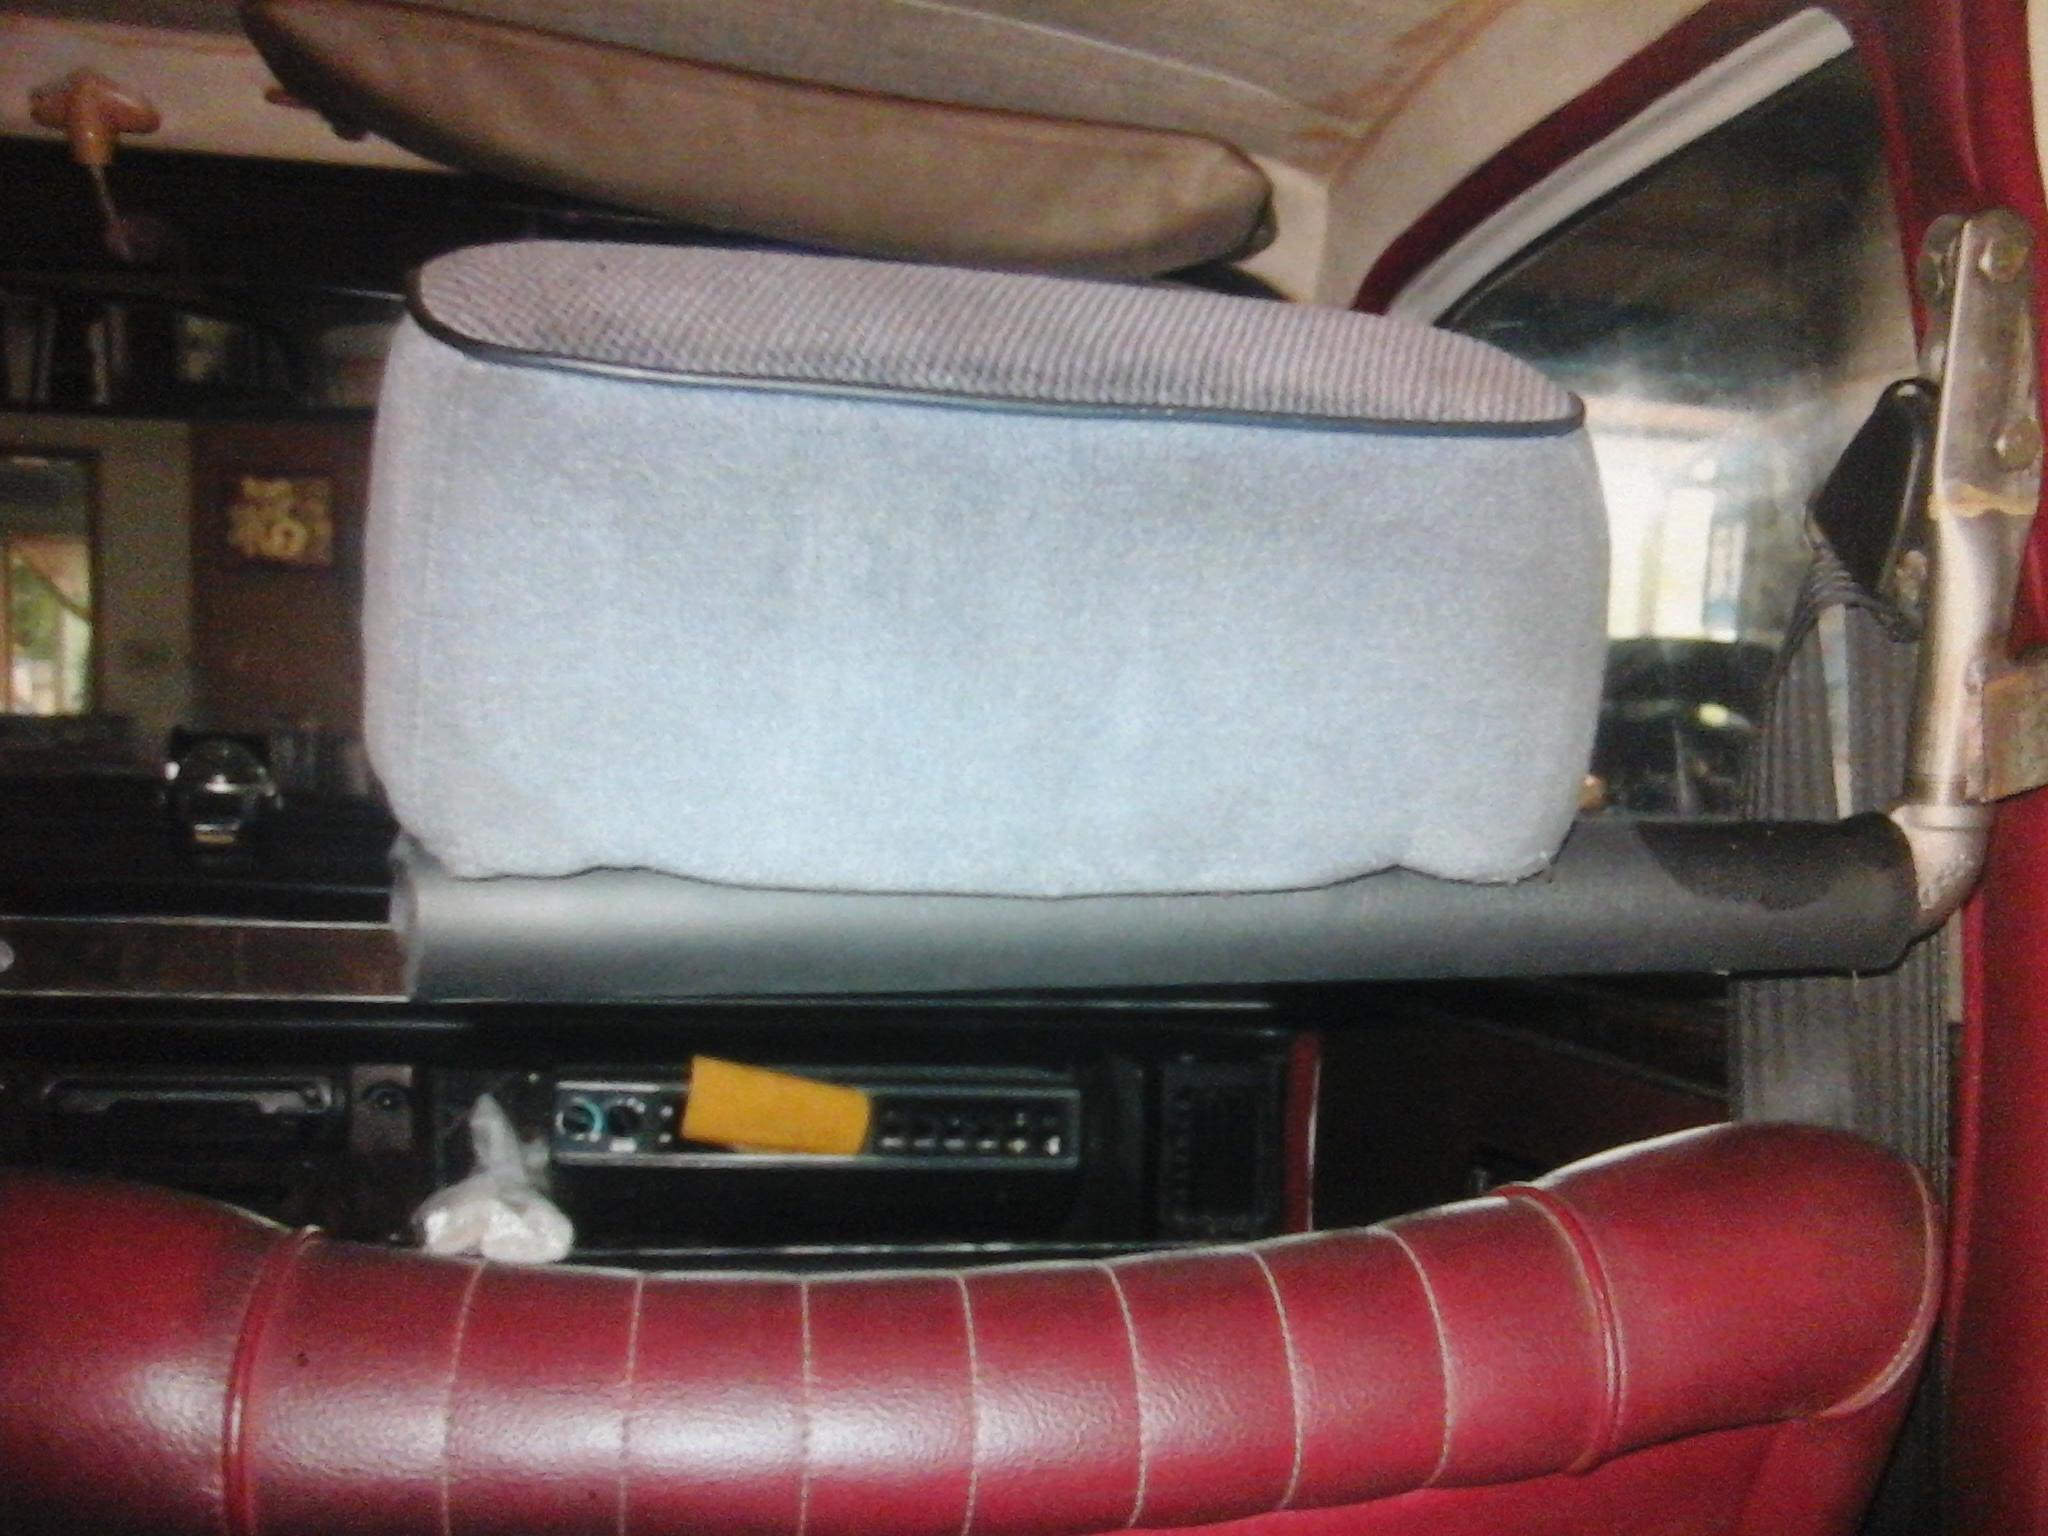 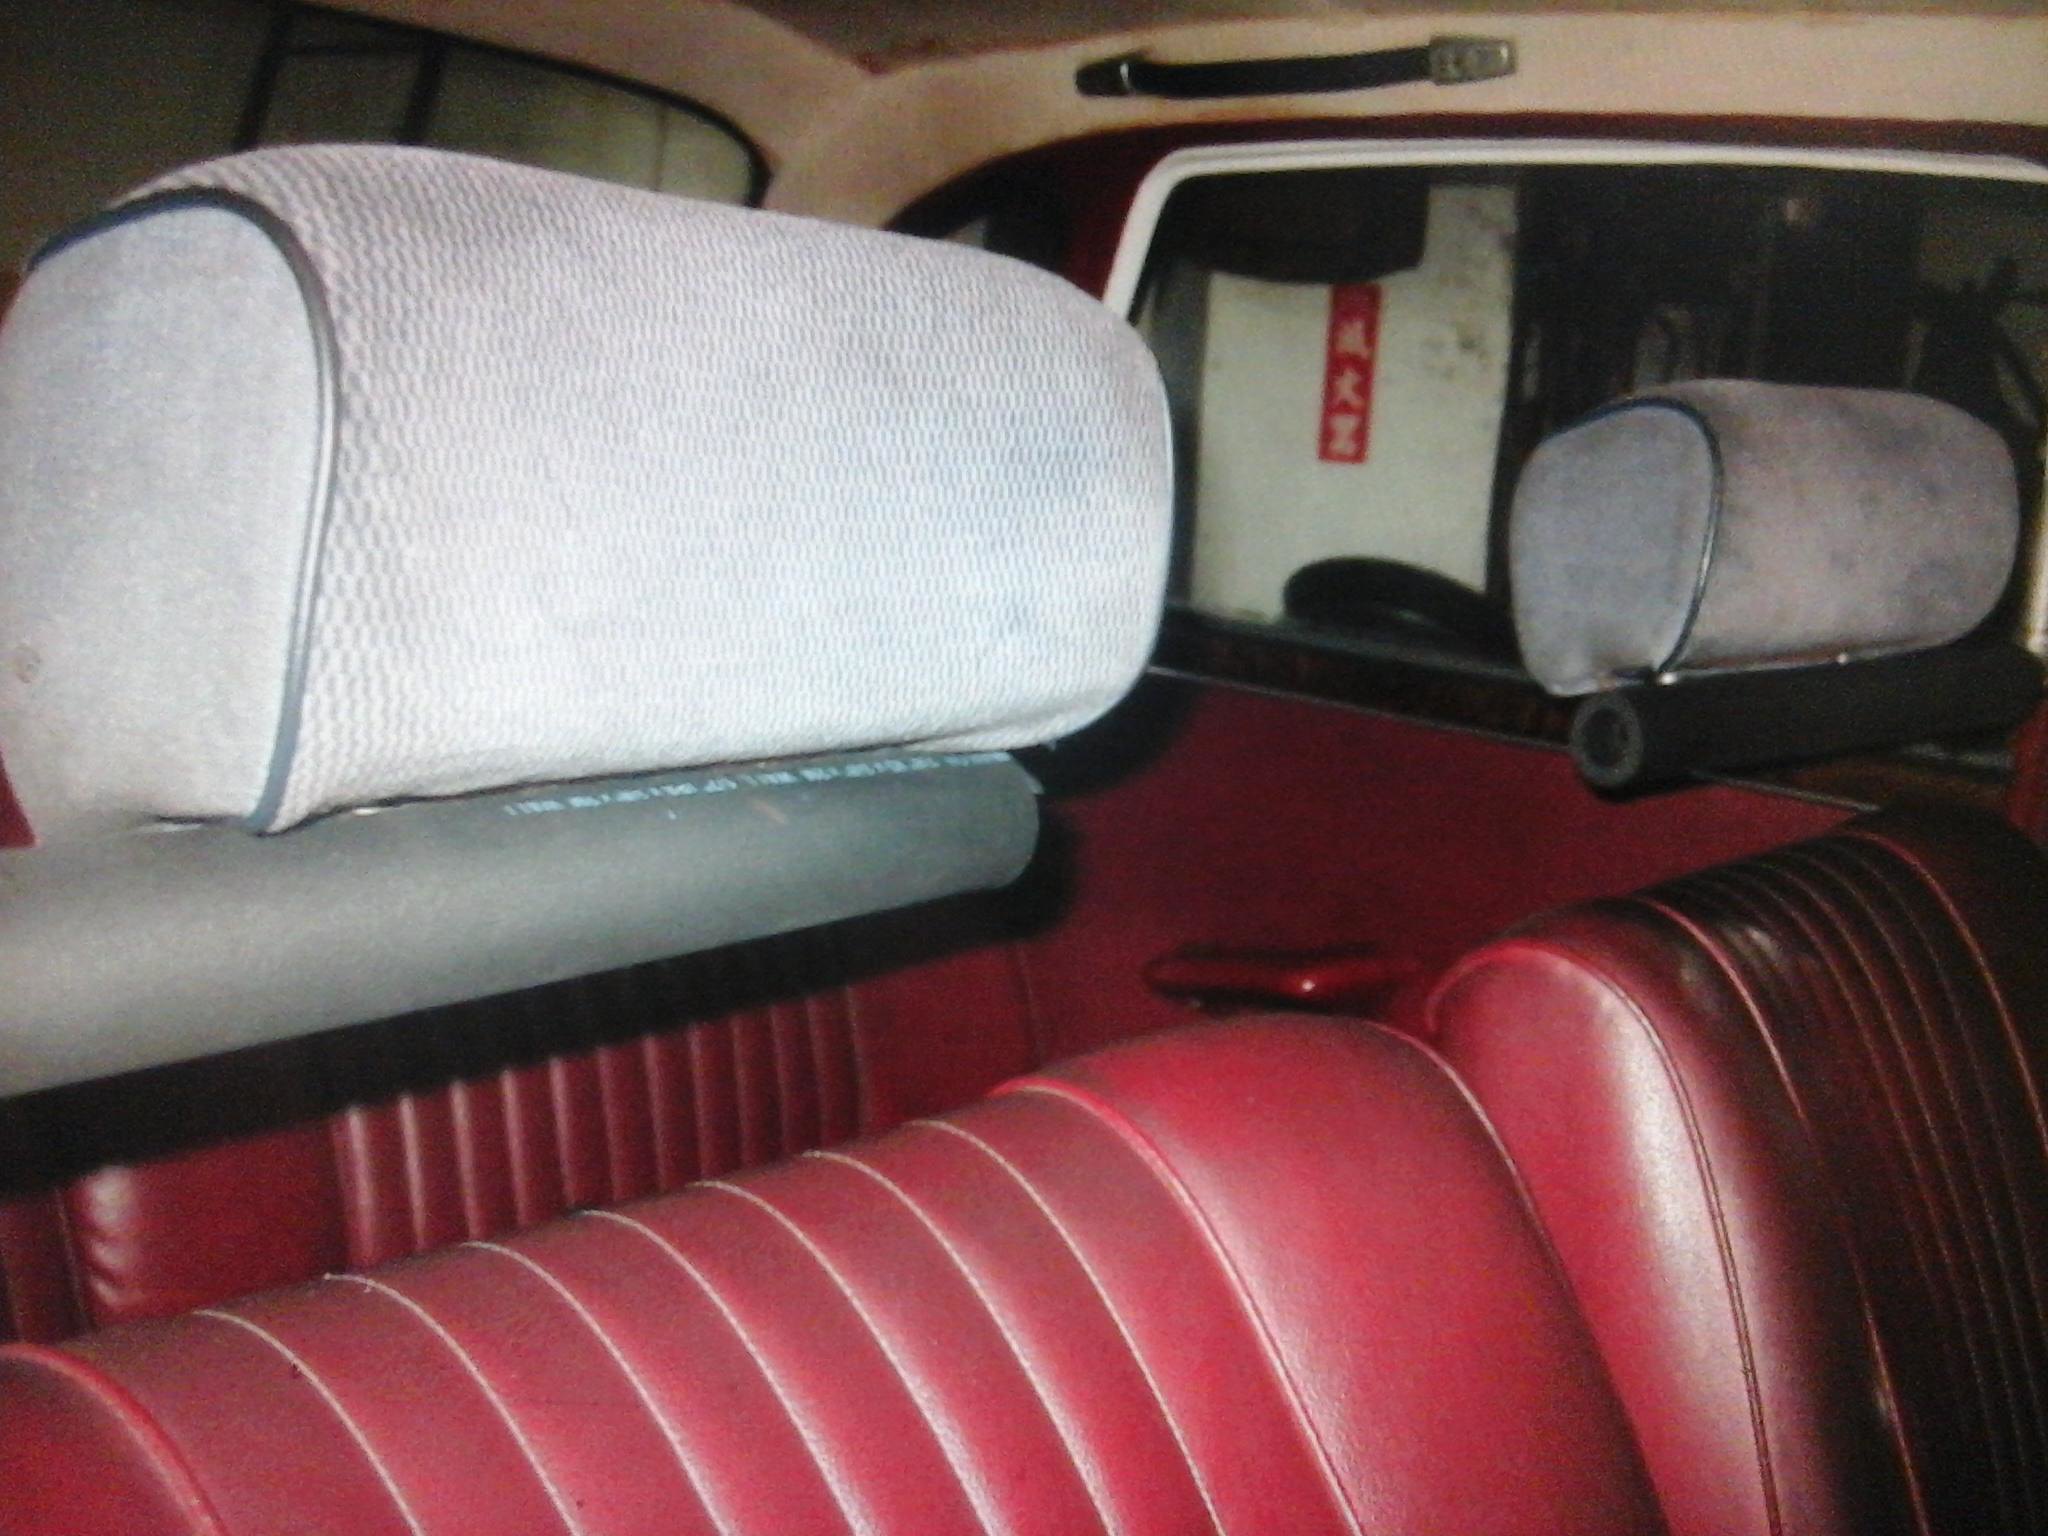 I took the pictures of the pictures again with a Pad in order to work let images on flickr.com. |
|
|
|
Post by tony on Aug 19, 2015 5:26:17 GMT
The rebuilt water pump we repaired in April was installed about months ago. It has been working well since then. The one we took apart from our vehicle was found uneven on the impeller. We simply removed the impeller only and repaired it. Now there is one spare part. 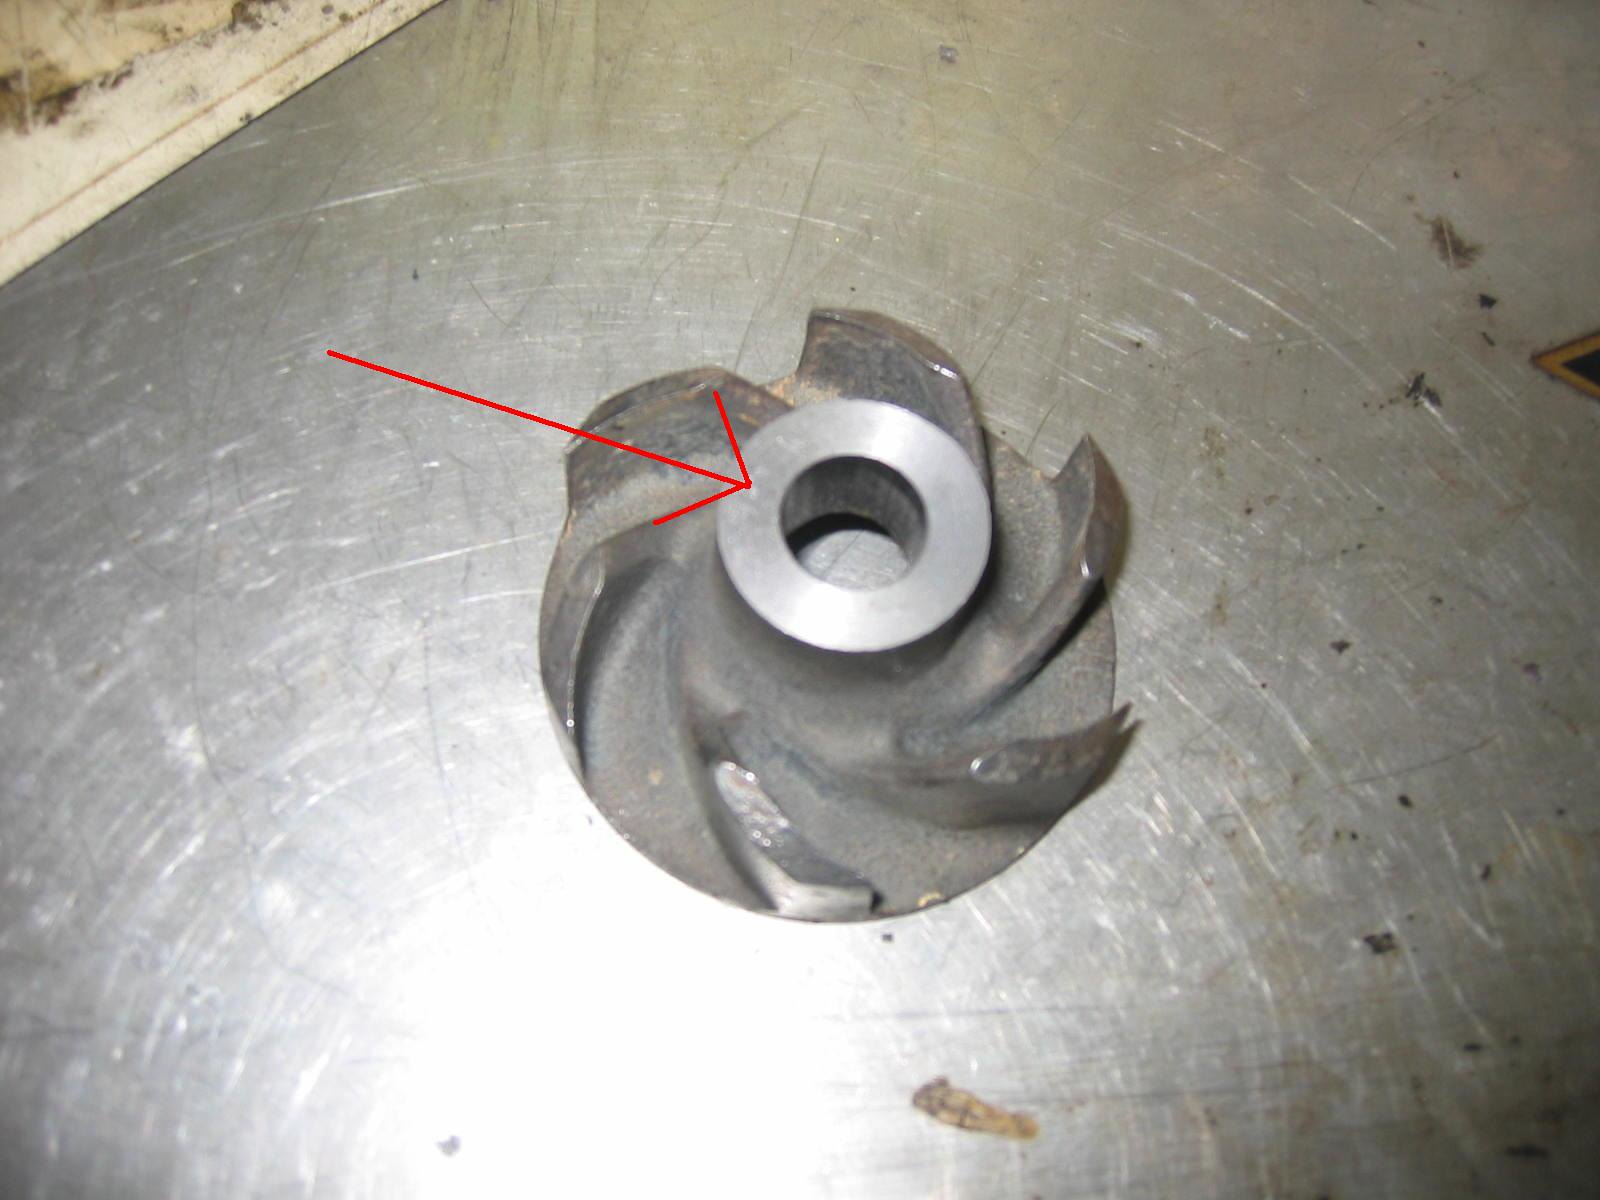 I use this picture as an example to show there is the same problem of the other water pump we noticed the water pump sometimes worked fine and sometimes leaked some coolant. |
|
|
|
Post by tony on Aug 19, 2015 5:15:38 GMT
Very good pictures to show the details. I saw the picture 4 and picture 5. There are two signs to tell: one is some black colour between cylinder 3 and 4; the other is the intake valve of cylinder 4 seems not to close fully as of carbon built up. I agree with David saying, Worth checking the head and block are flat... I also would check all valves are fully closed or not with all valves installed by using some oil between each valve face round edge and cylinder head, and then use air pressured gun with a rag covering the intake port and exhaust port each time to blow some air in. It doesn't need more high pressured air to use. If you see bobbles coming out, the valve is NOT fully closed. If doubt, do the whole cylinder head repair. Regards Tony Ok... had just written a looong, good update with lots of pics with comments and suddenly it disappeared! Damn! But, it was more or less like this. Short version, sorry: Head off, no visible crack in gasket. Gasket seems cheap/ bad though. Few reinforced areas.Rusty spots Rust build up in blind spot hole in gasket, between cylinders 3 and 4. Also tiny straight line between the cylinders in this area.Perhaps it leaked between the cylinders via this hole? Valves and seats fine. Cleaned up and fitted new oil seals while at it. No need to lap. Carbon build up due to oil. It already had uprated oil seals and oil is clearly seen in the inlet manifold inlet ports. I can only imagine this points to oil entering via breather, which is connected to the carb (like ater cars). Pool of oil in oil separator. Fitted later type of separator. Hope that improves things. It uses some oil, only blue smoke after loooong hils on the overrun. The old gasket was a true nightmare to clean off, It was stuck to the cylinder head. Everything cleane up and ready to fit tomorrow. With Payen gasket, I really hope it brings the compression on 3 and 4 back up. I really can't think of anything else causing it. 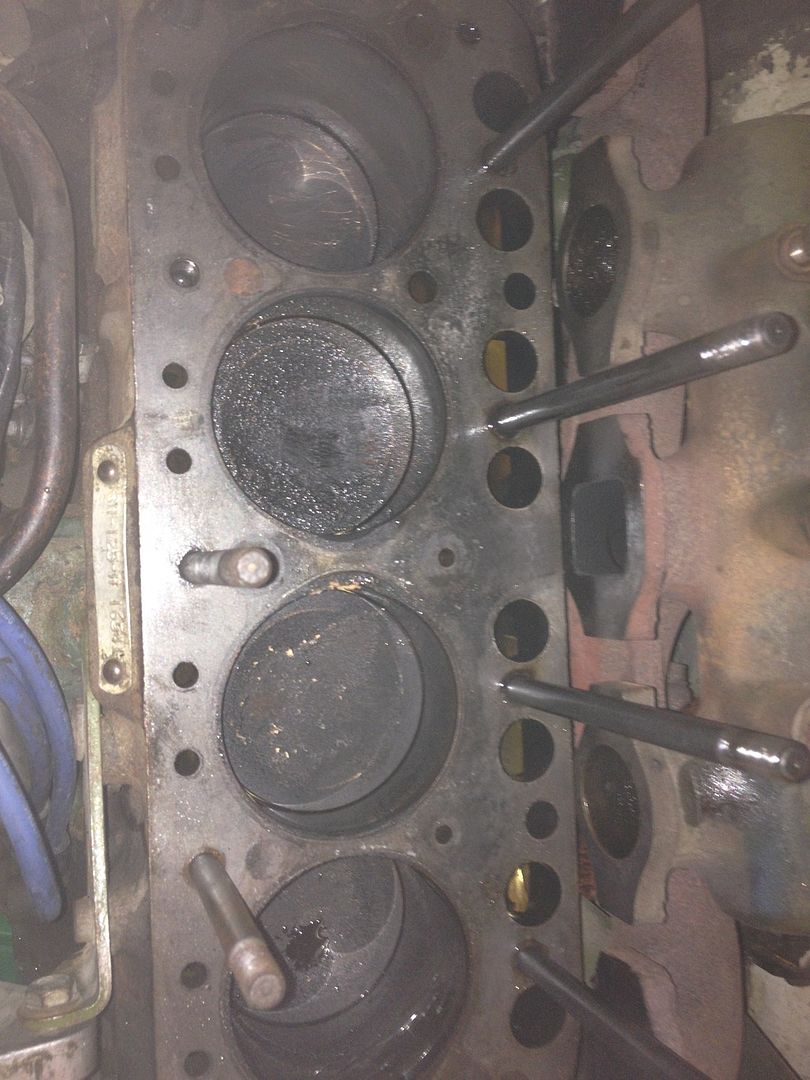 Head off, gasket stuck to head. Not too bad a sight. Oil in number 3 after wet test. Some carbon build up. 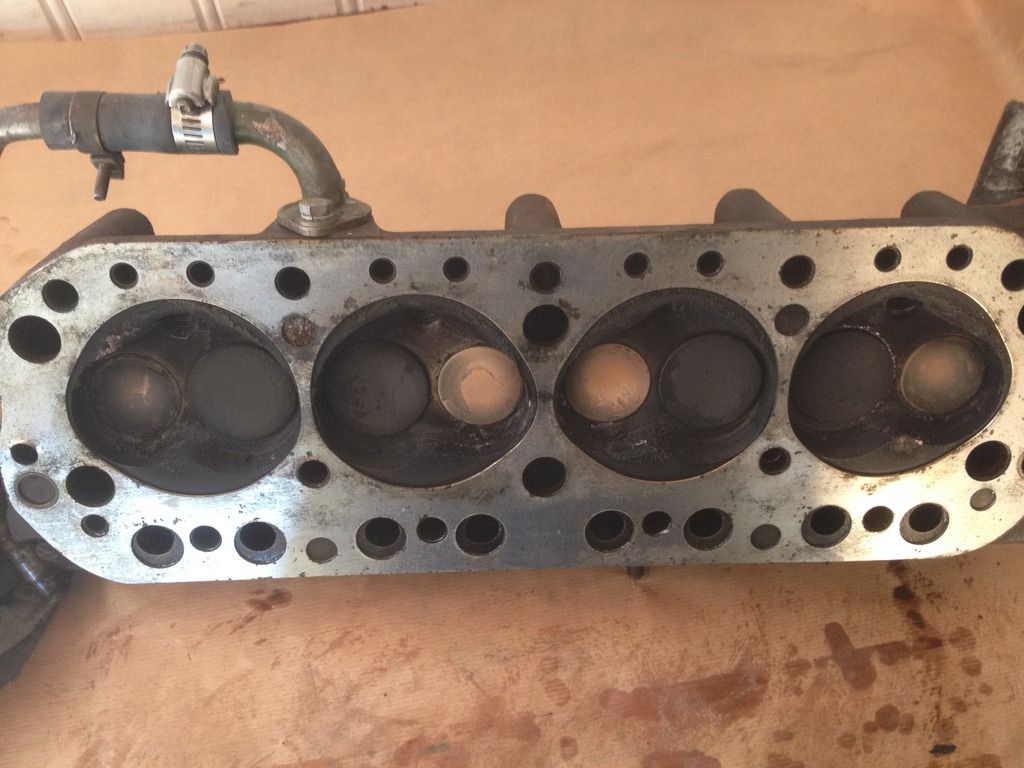 Head as removed. Gasket still stuck on.  Cylinders 3 and 4. So, was there aleak across the gasket here? Hope so. 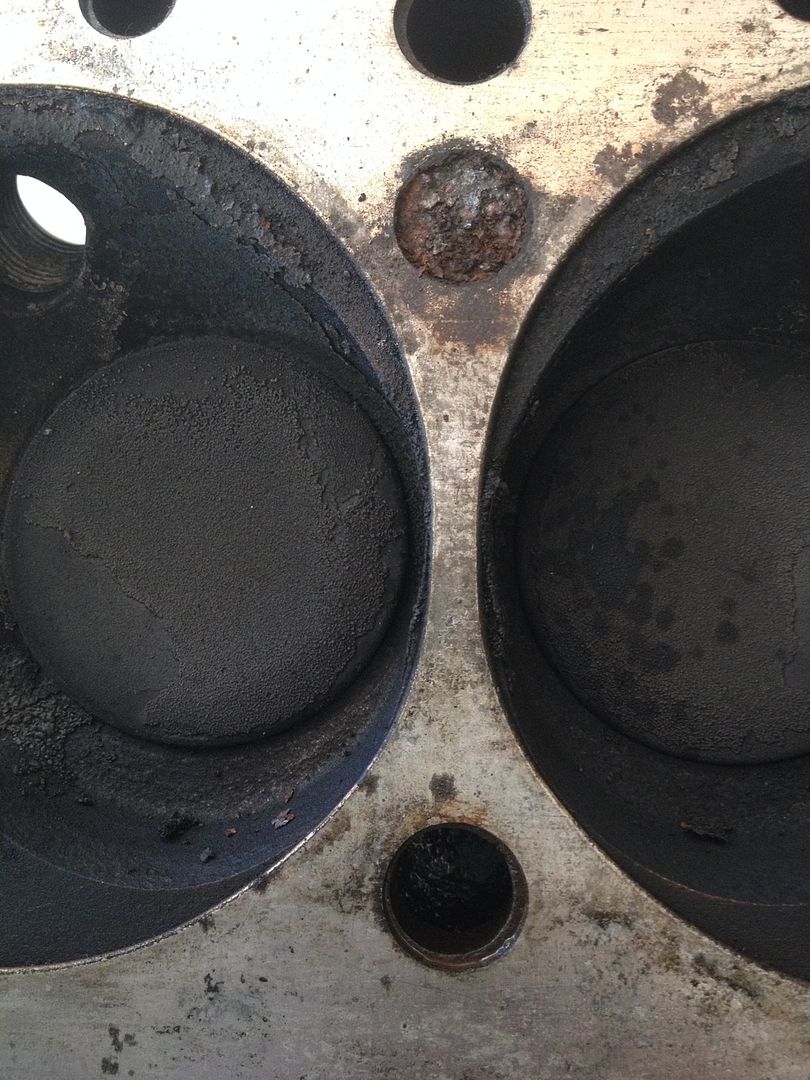 Close up. Note the rust build up and corroded gasket. If your eyes are sharp, there's also a tiny straight line between the cylinders on gasket surface. 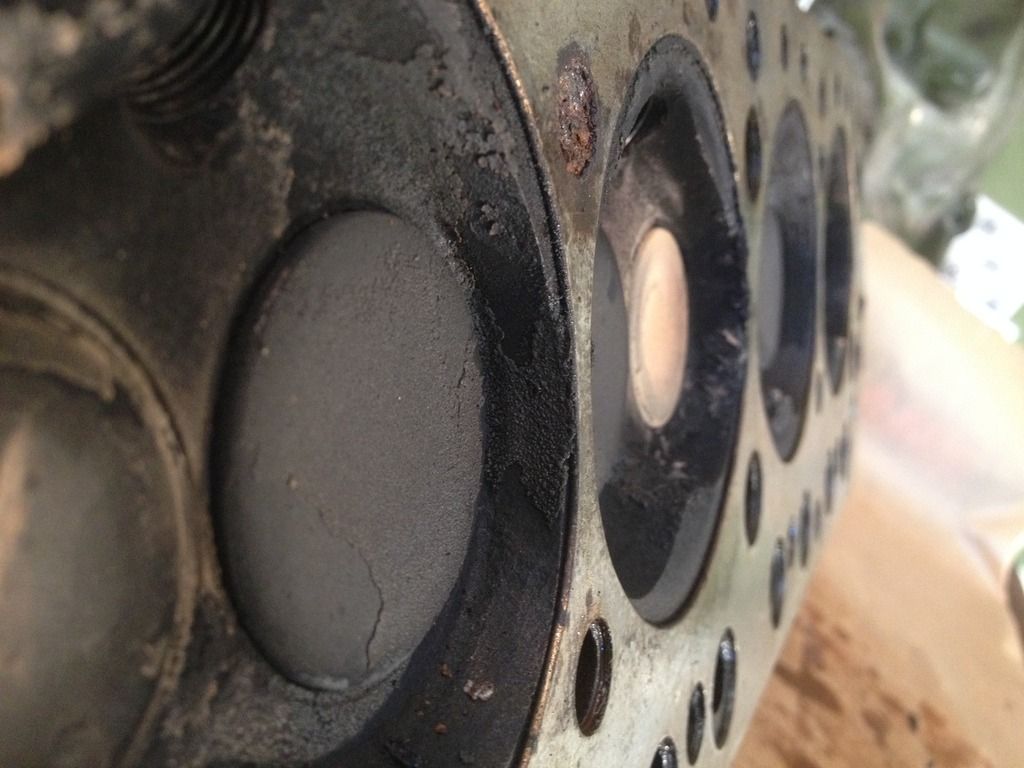 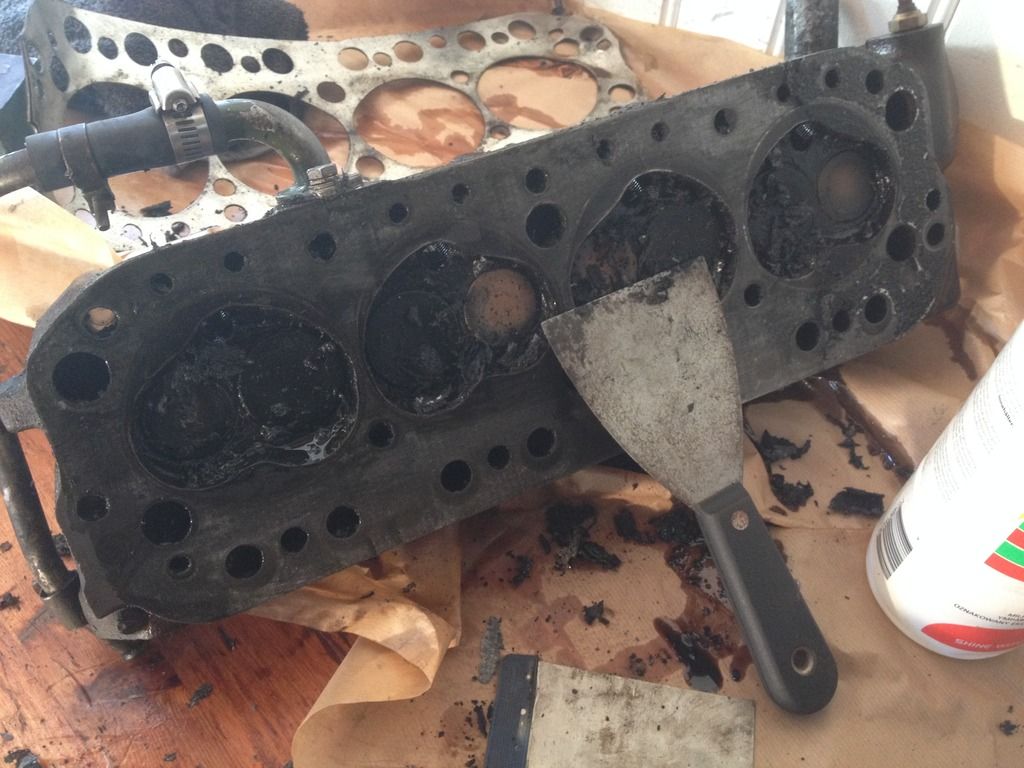 Never anyhing else but Payen again! 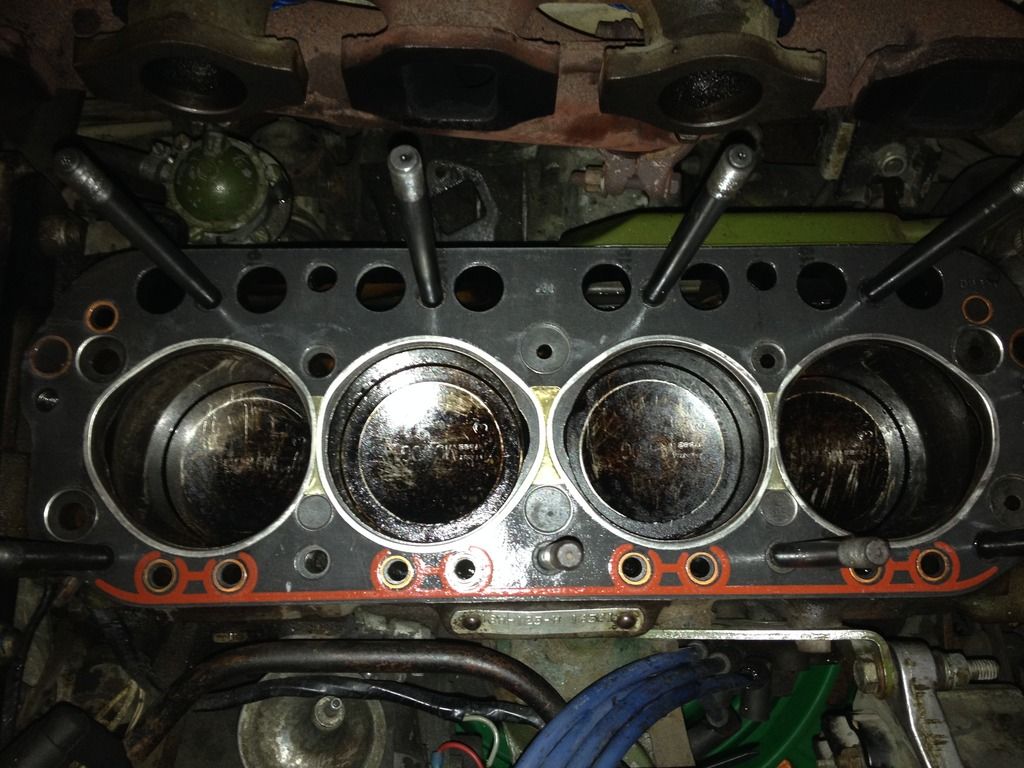 |
|
|
|
Post by tony on Apr 30, 2015 2:33:15 GMT
Add some information about the Step 2 of checking shown below:  When doing the step 2 of checking, make sure the washer fully touch the seal ( Yellow arrowed ). There shall not be any gap between them. Without using glue to stick the impeller and washer together at the first time we did, we found the impeller and the washer didn't rotate simultaneously --- sometimes they did, sometimes they didn't. So we had to use a copper hammer to adjust it, which didn't make it much better. So we had to take the impeller apart again and used some glue between the impeller and washer; used some grease between the washer and seal. The washer shall fully touch the seal, not with too much force. If so, the washer and seal will damage while rotating fast. After installation, check the simultaneousness and non-gap. |
|
|
|
Post by tony on Apr 29, 2015 0:39:45 GMT
Yes, " a good spare to have on the shelf". And please do so as this is the goal of this website to keep Morris on the road. If you find any more details better than mine, please let me know so that we all here can be improved. Regards Tony Excellent piece of work, Tony. As you say, a good spare to have on the shelf. I have been doing some searching this evening and have found a UK source for the bearing and the seal. I also managed to find an old cast iron pump in the garage, so if you don't mind I will try and recreate your rebuild as a technical article for the site. Many thanks, Chris. |
|
|
|
Post by tony on Apr 28, 2015 7:33:40 GMT
We finally got the new bearing (USA )and seal, also took the impeller to a special equipment shop to deal with the surface of it. which didn't charge us for it.   New bearing --- USA part, Master Service Parts, No: WP1060 B. The surface of impeller had to be dealt with as it was uneven, but DO NOT do it too much! See previous picture. 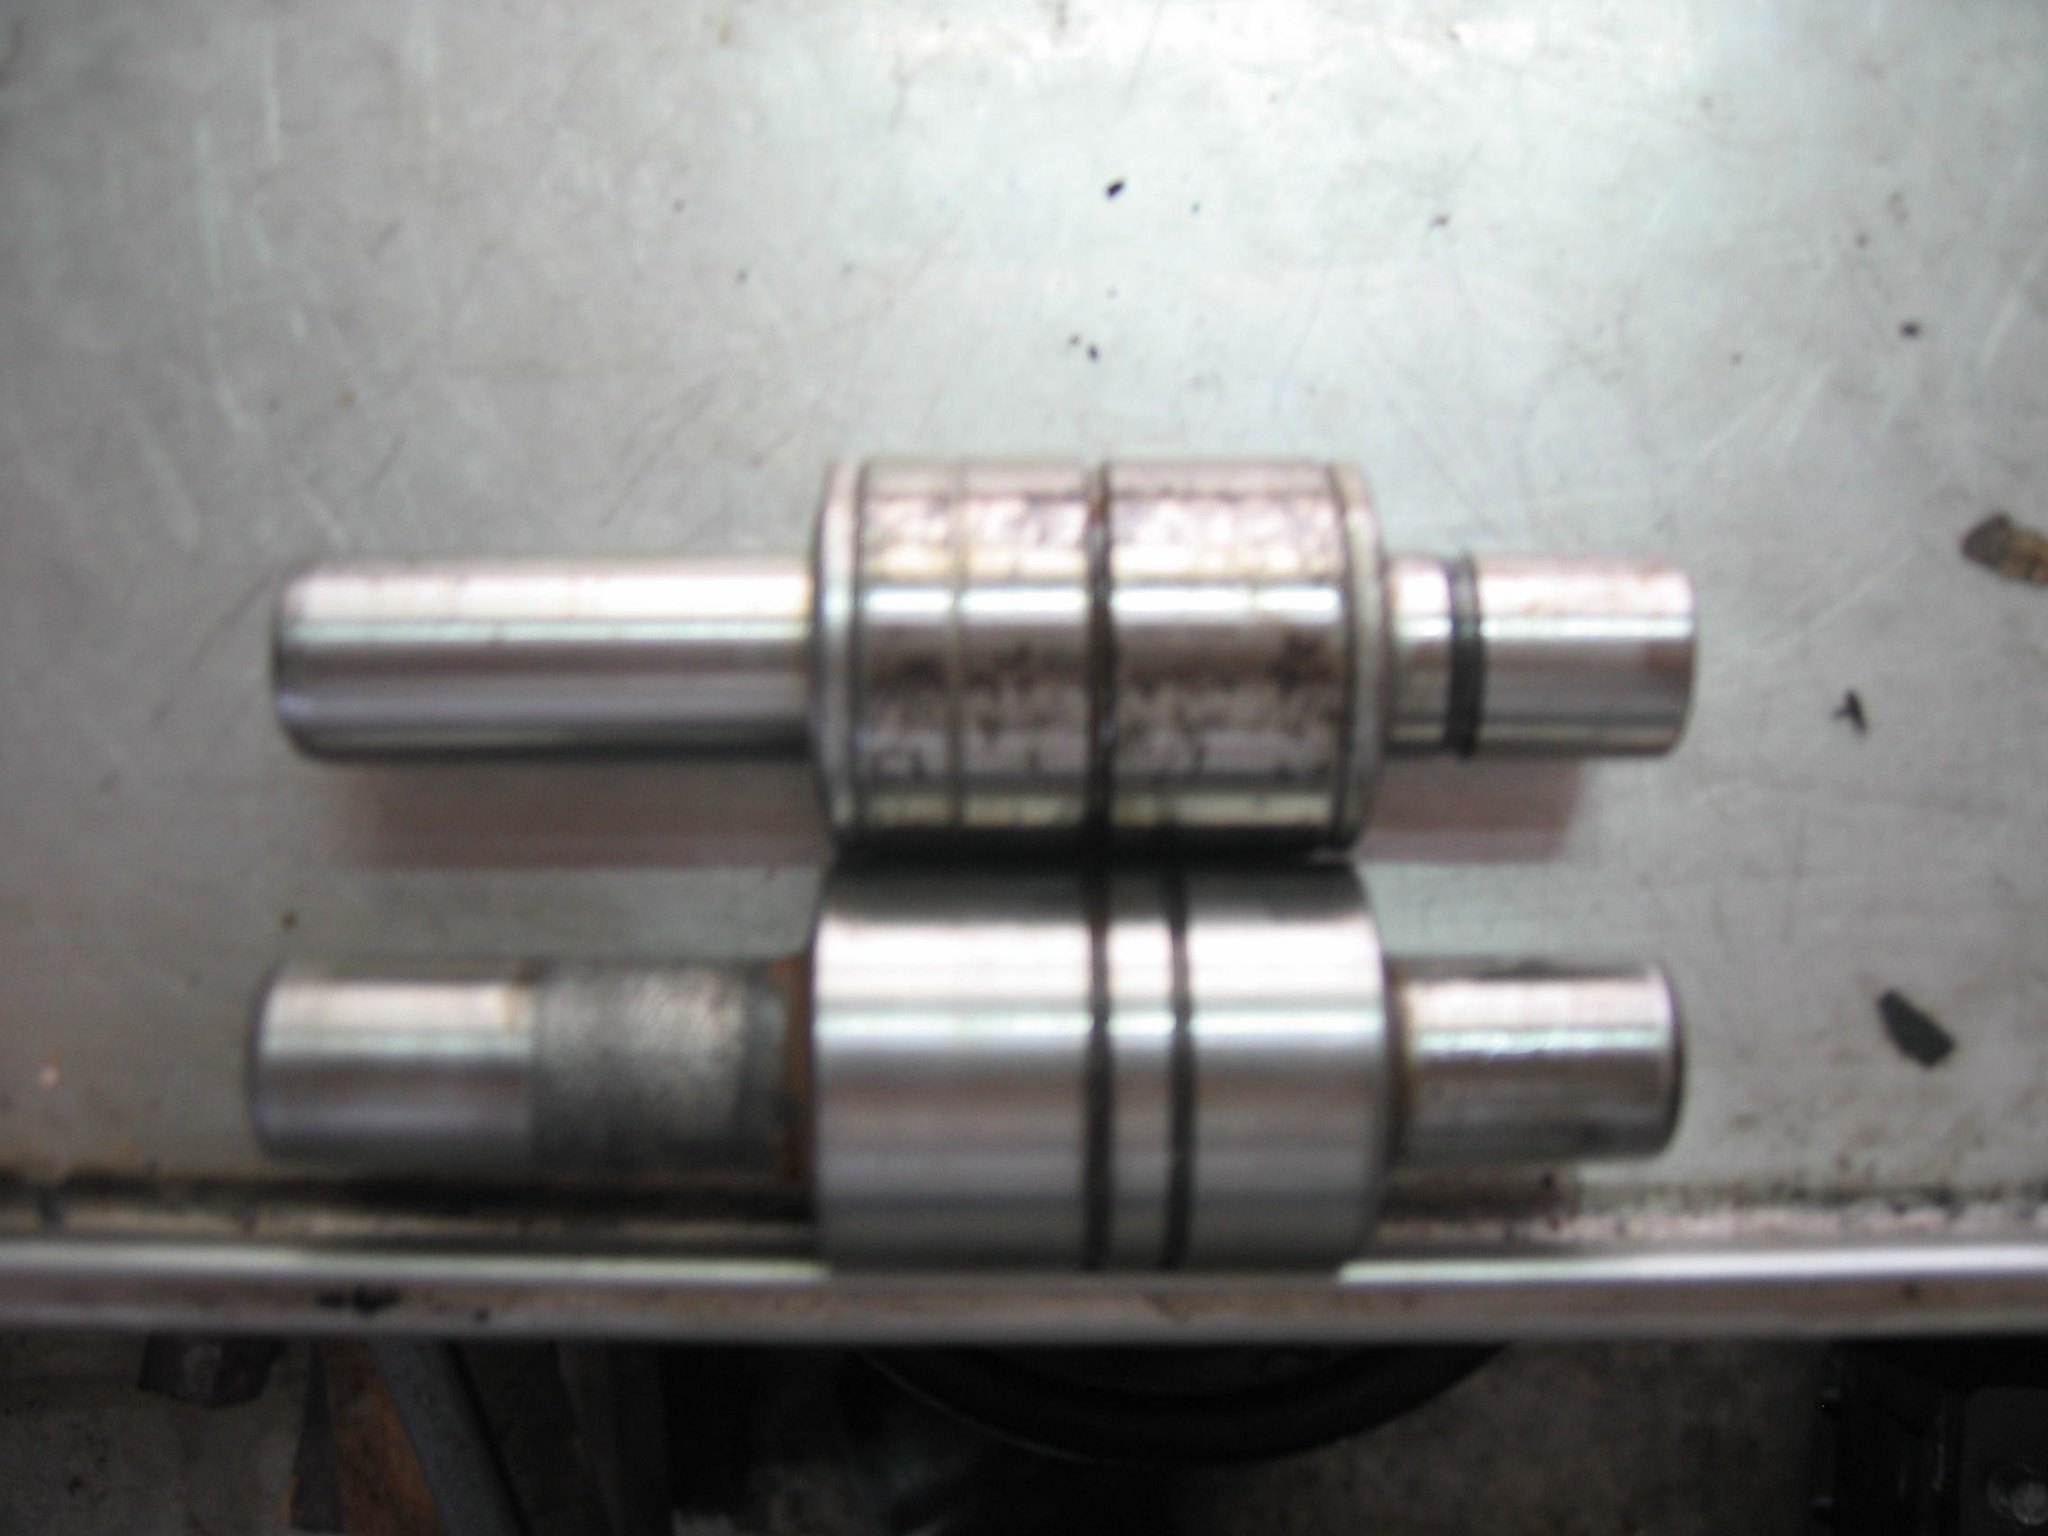 Father cut some piece of the NEW bearing off to be the same as the old one. 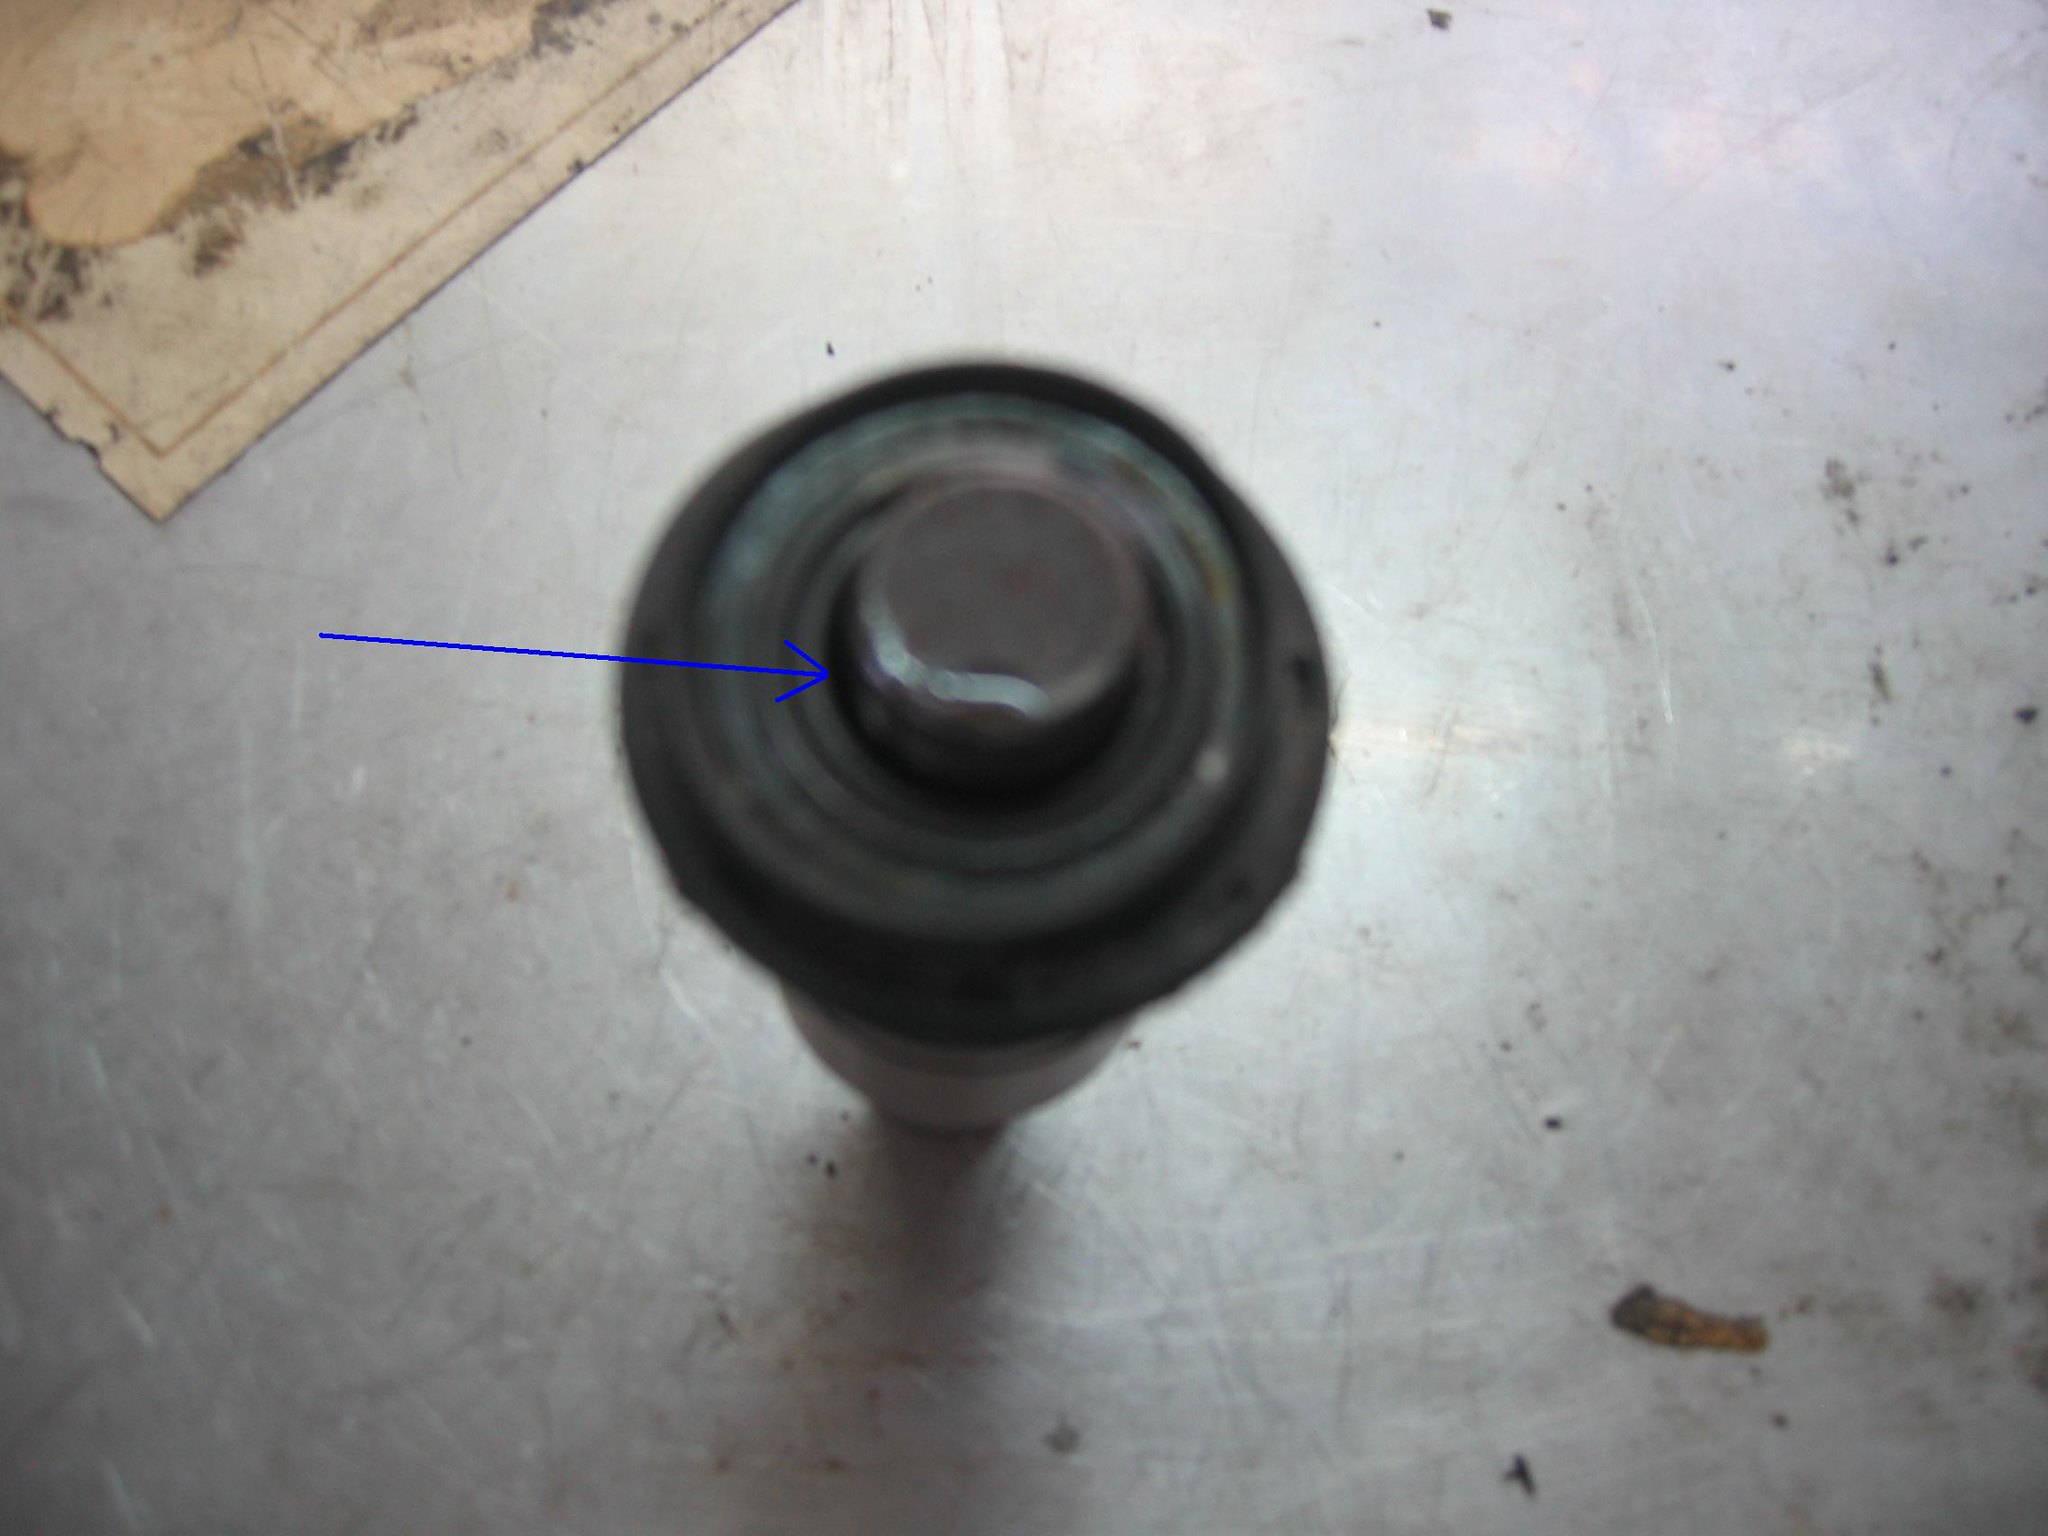 You see there is a little bit gap here, which WON'T make the washer stay at the central position after you install it. That means if it will be moving like vibration when the pump is running. The result will be the damage to the two surfaces between the seal and washer. The old one got the same gap, but there were 2 pieces of parts to make the washer stay right. See the next picture below the two pieces the right button. 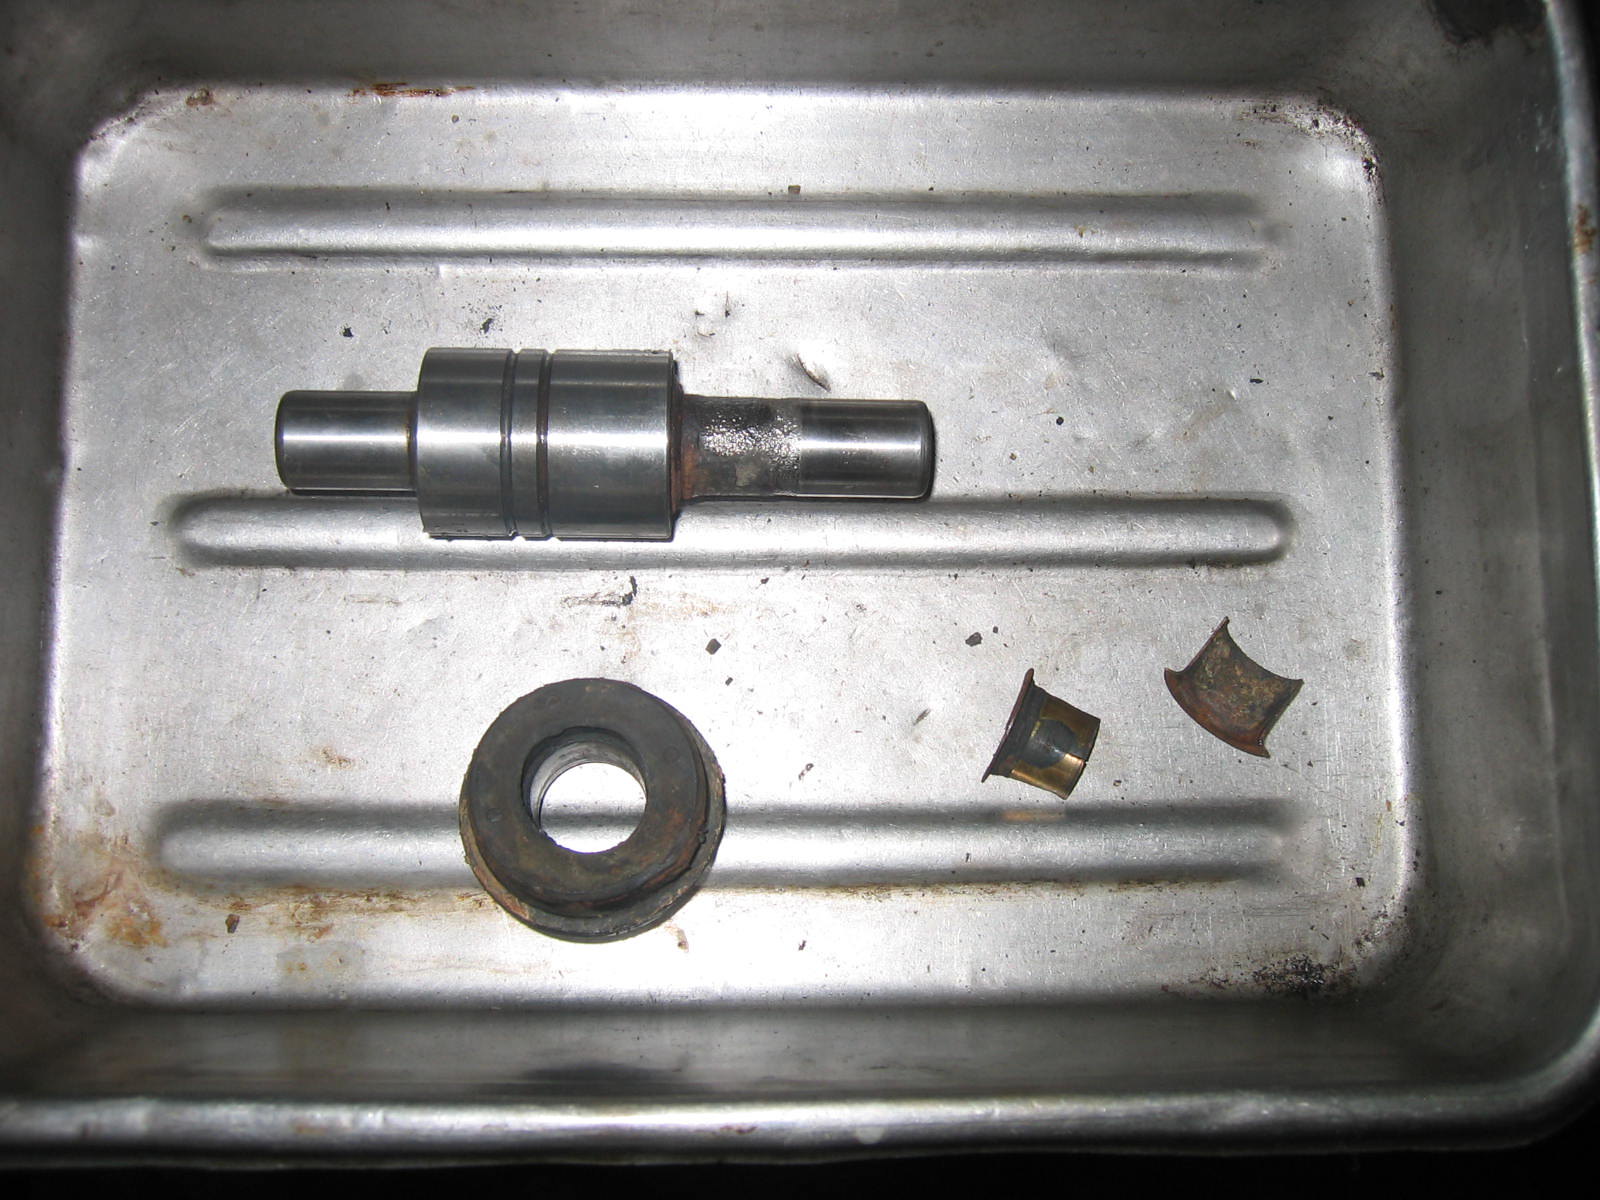 This time we didn't use them --- the 2 pieces ( the right at the button ) Time to assemble the water pump together! 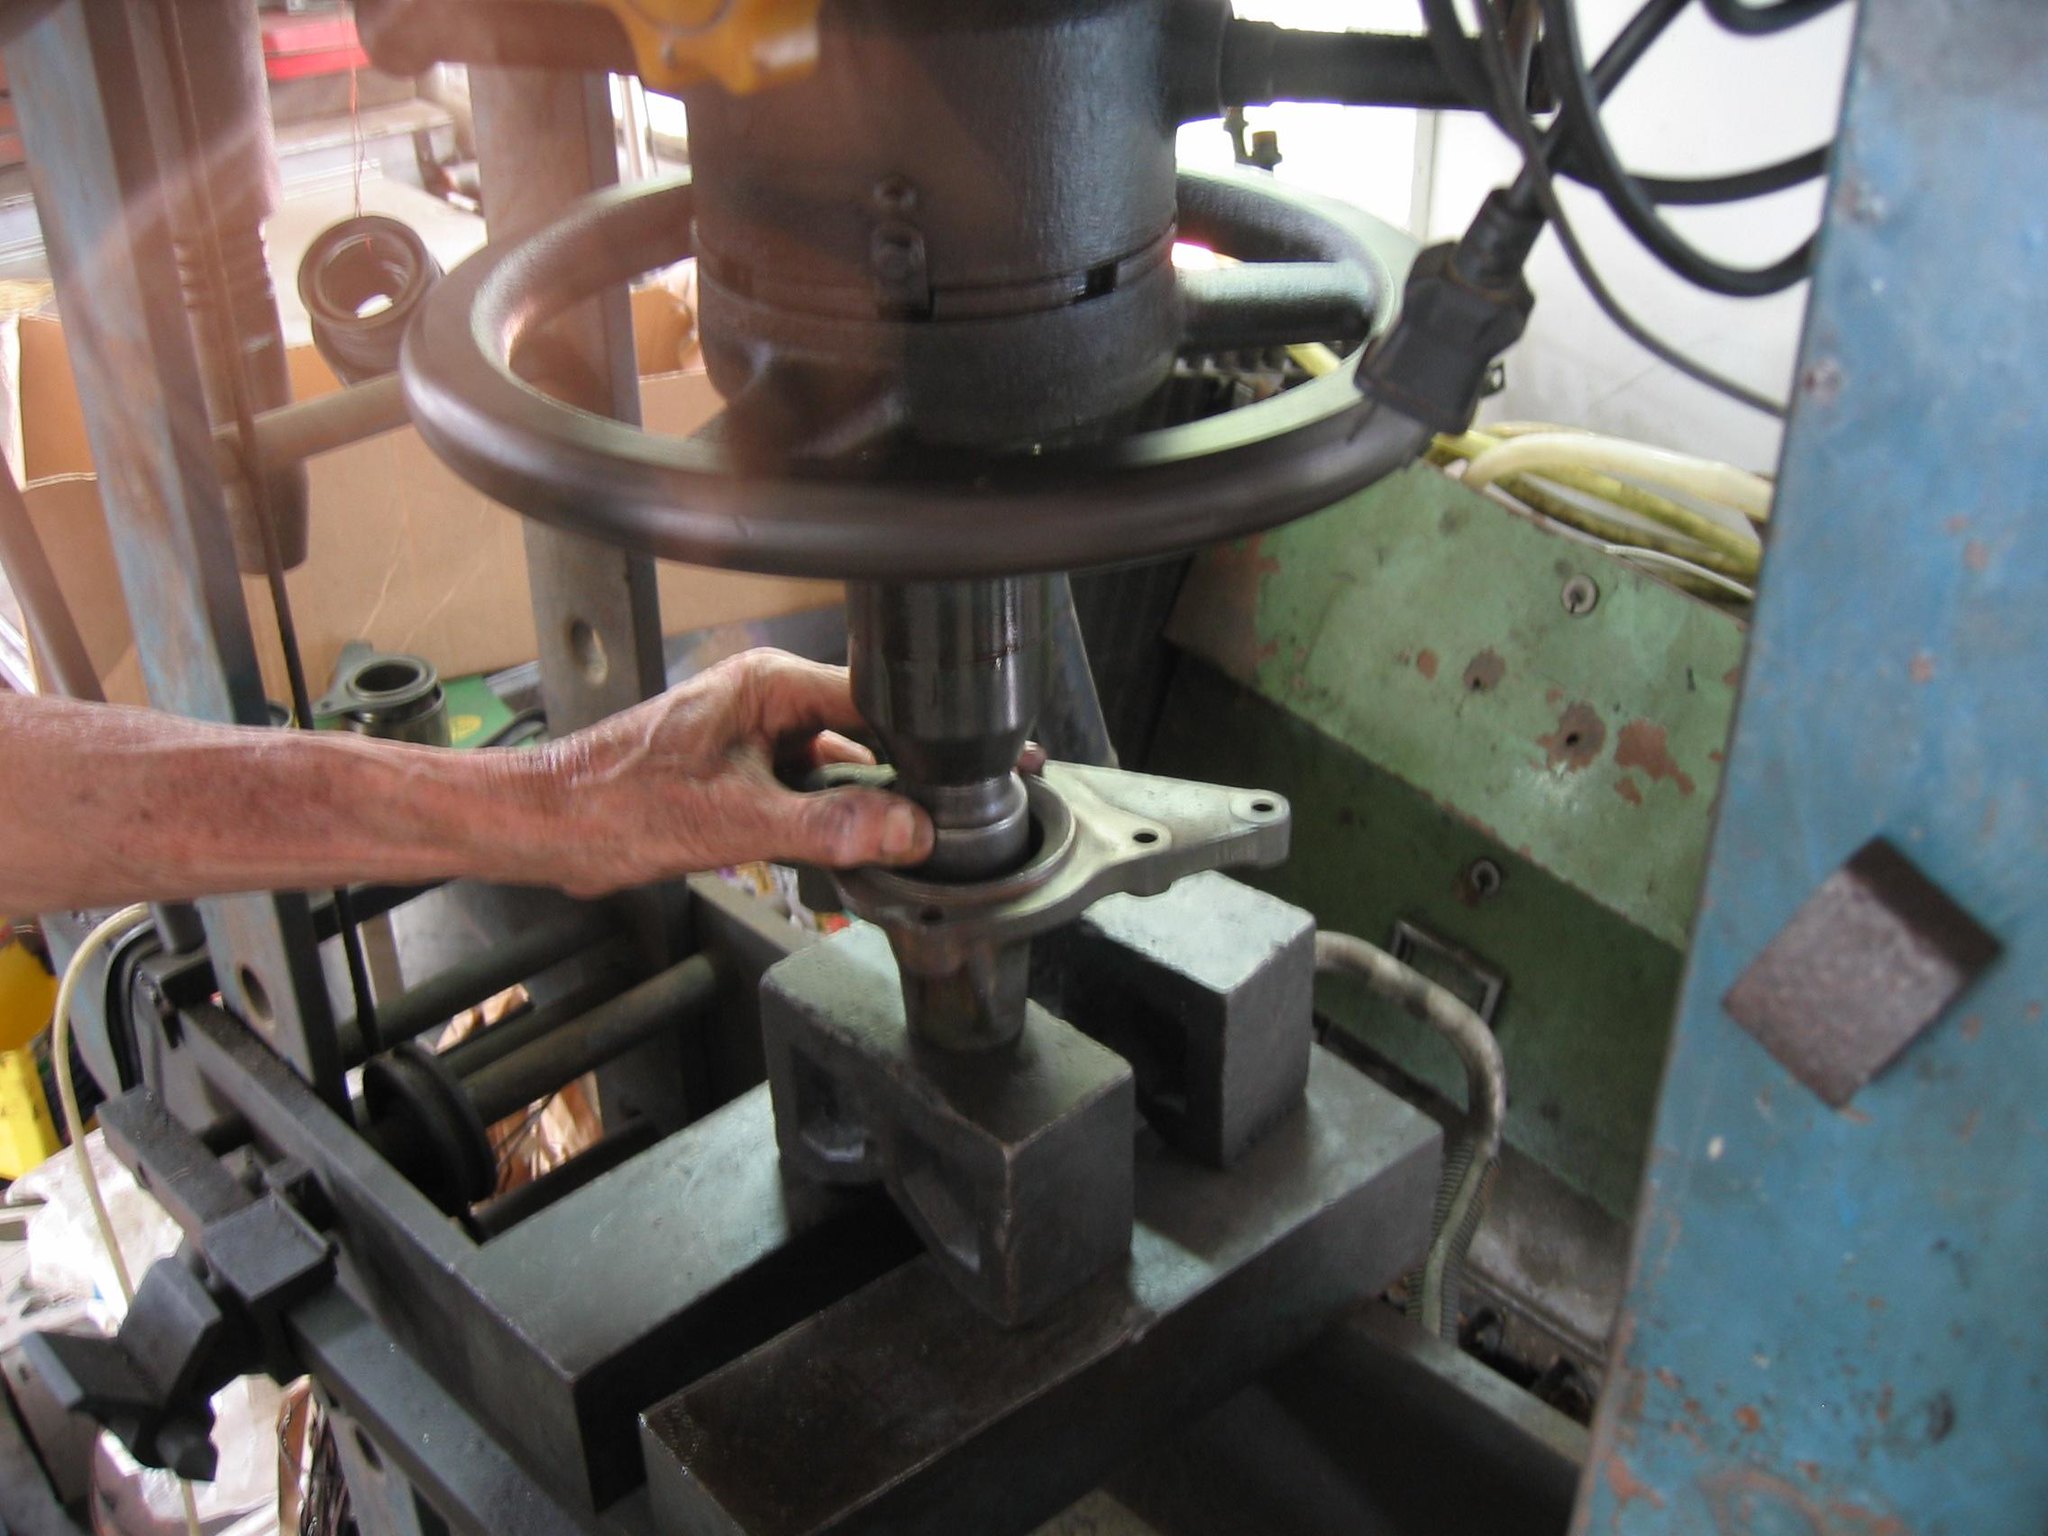 Install the seal to its position by using pressing machine. 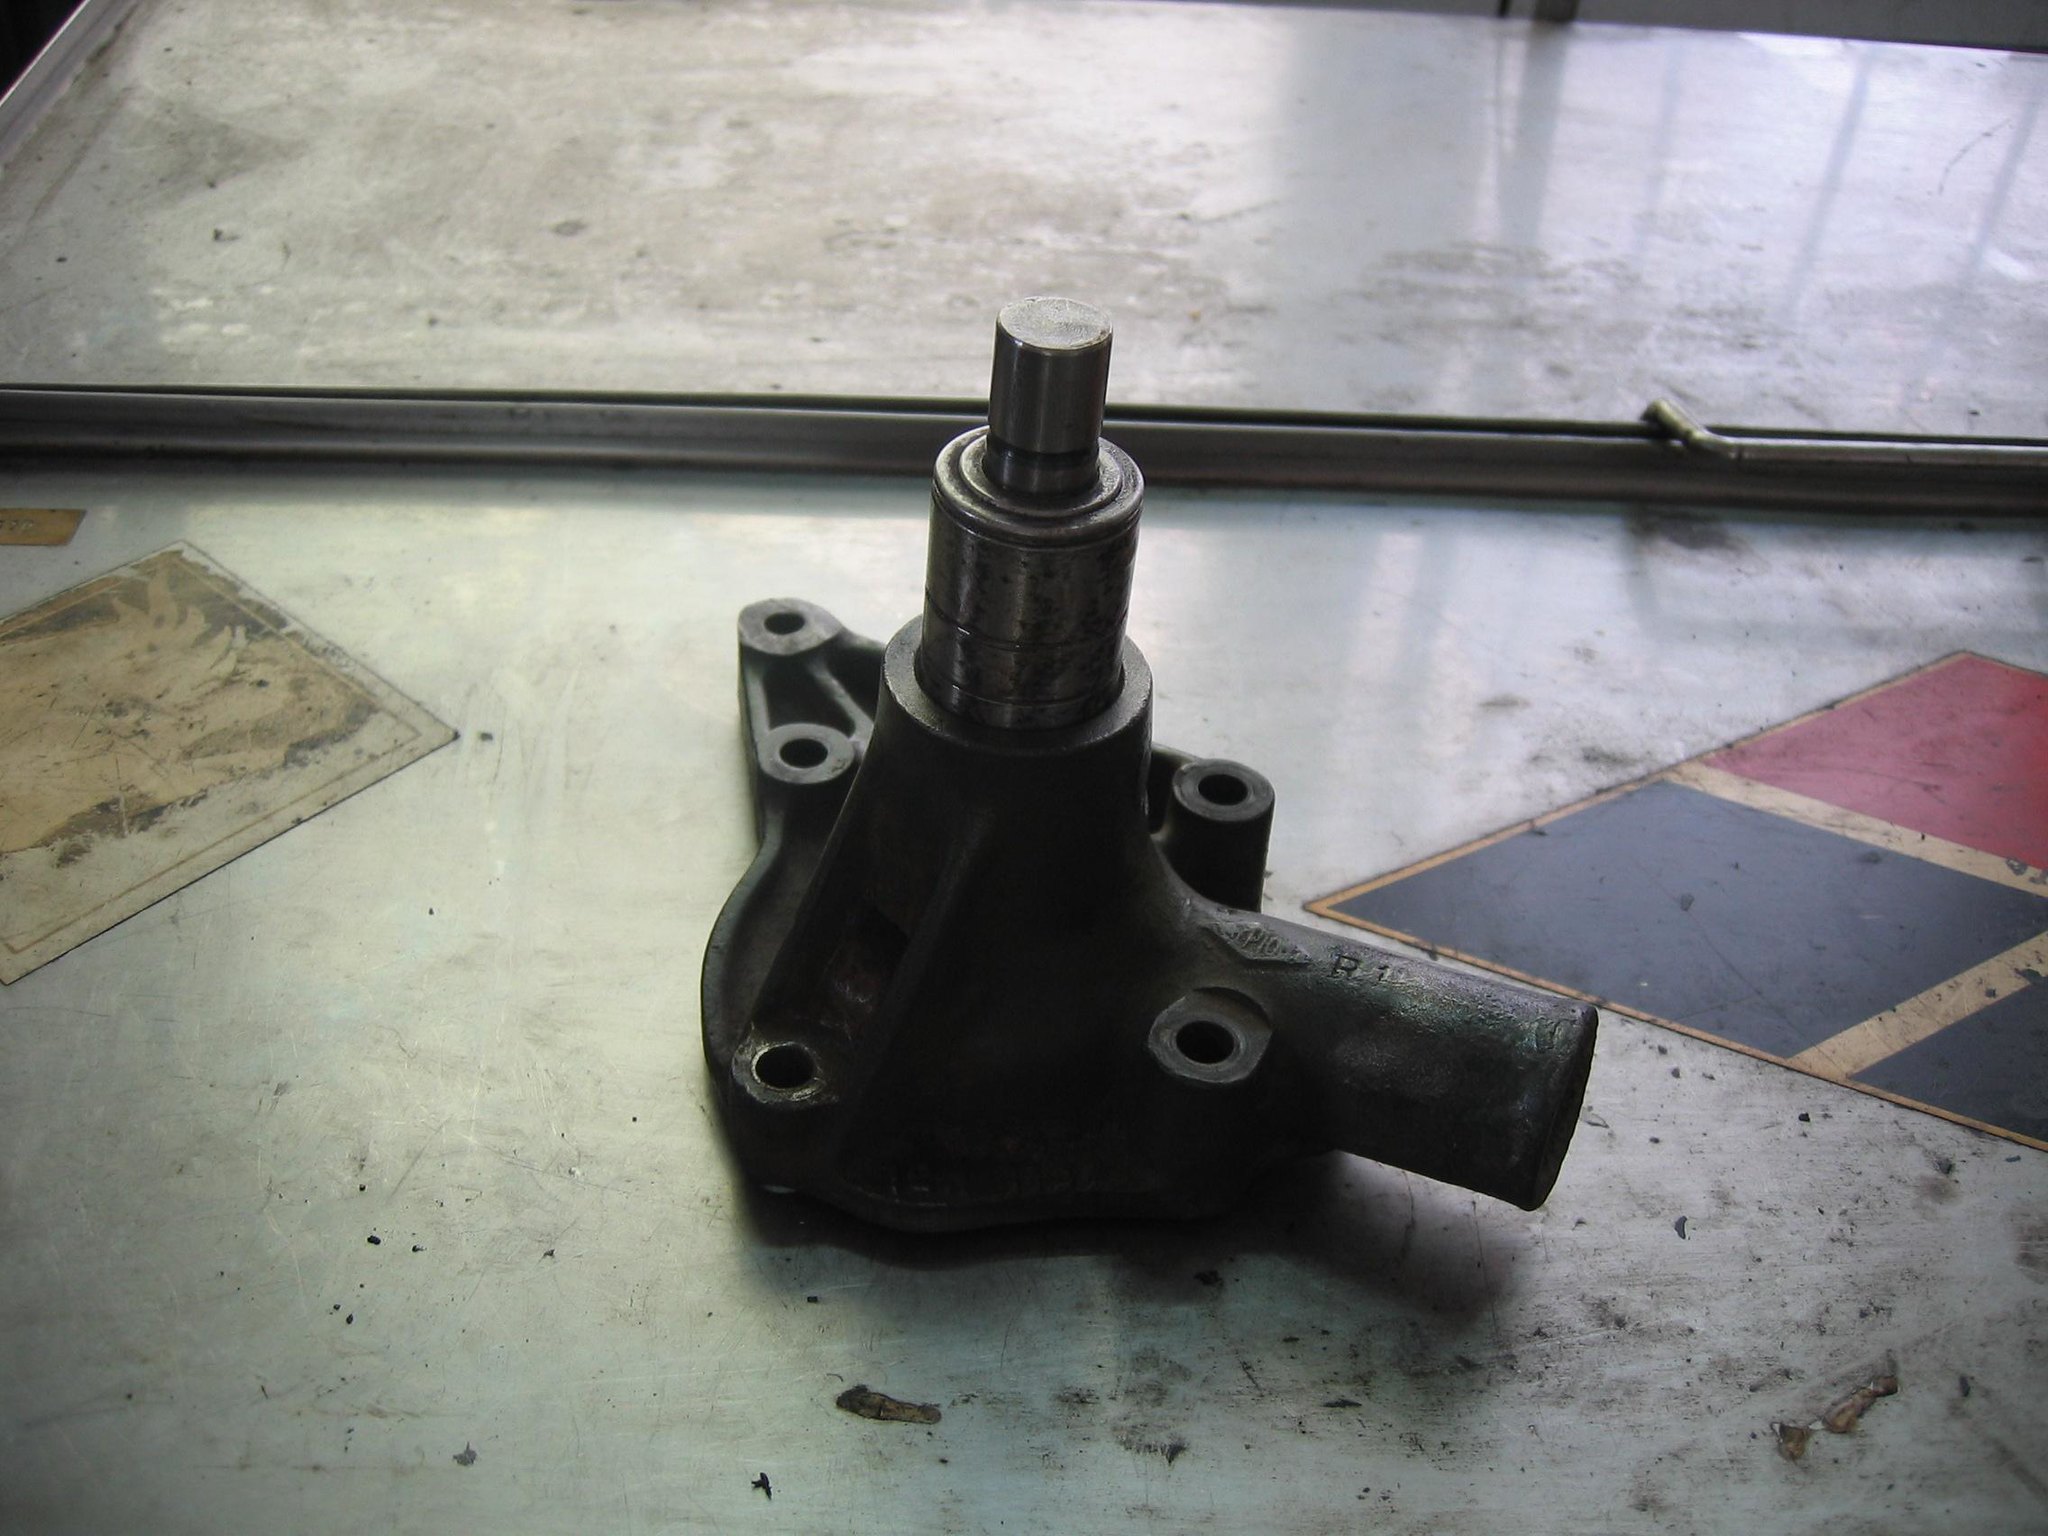 And then the bearing, use a copper hammer to slightly hit it in order to make sure it has gone at the right angle. 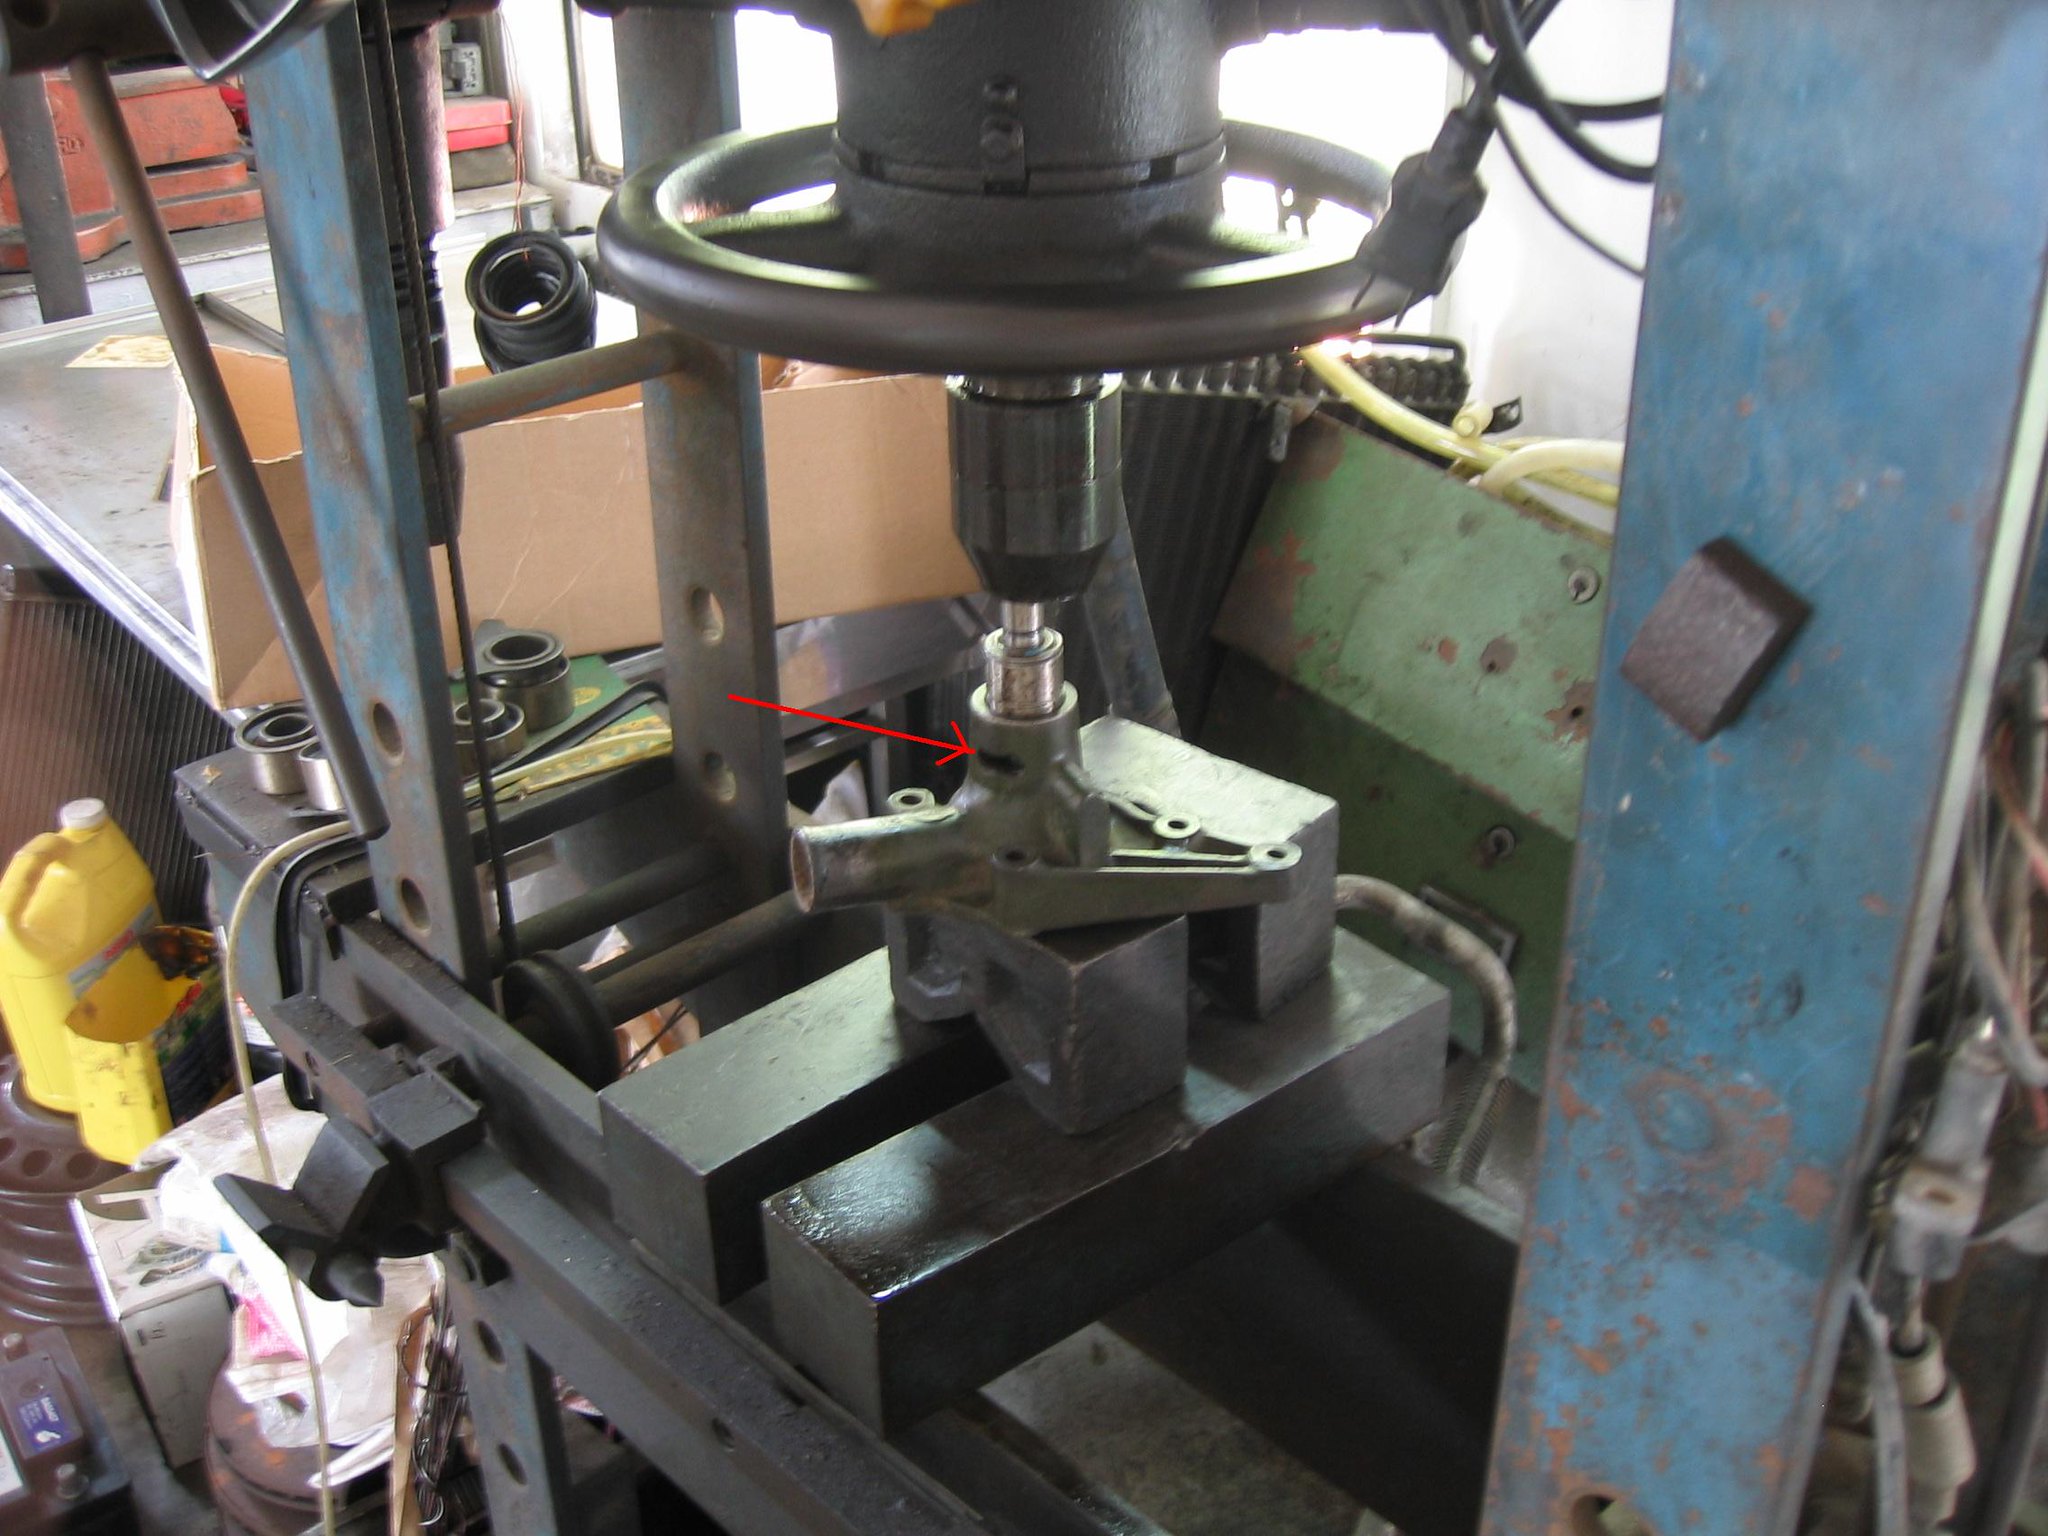 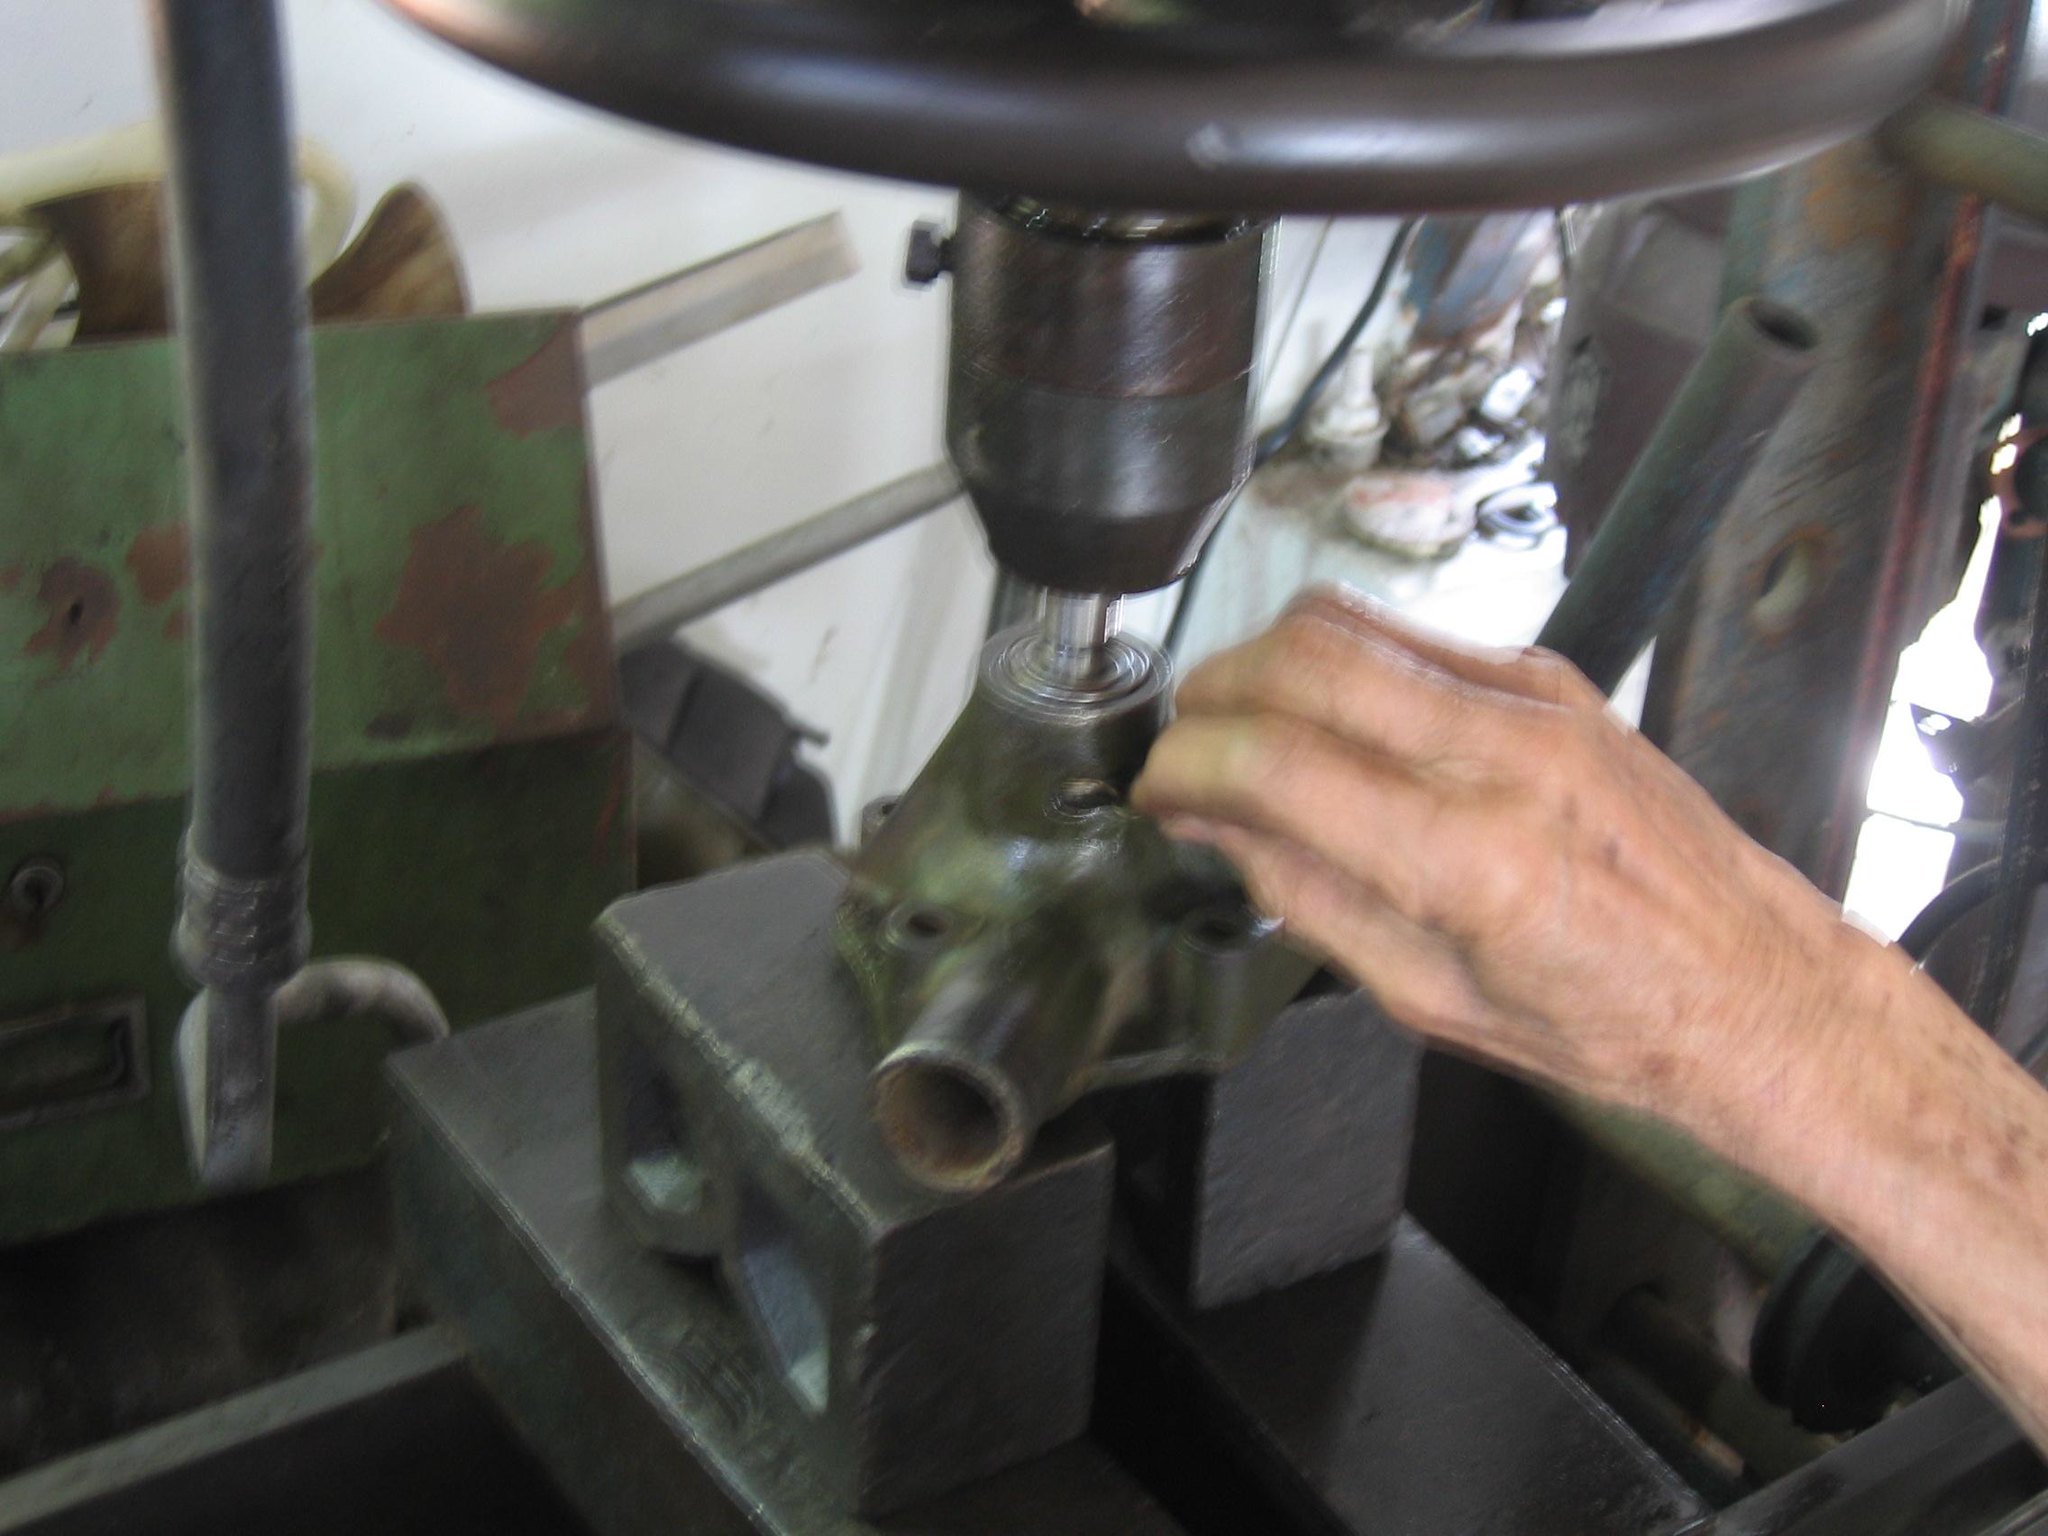 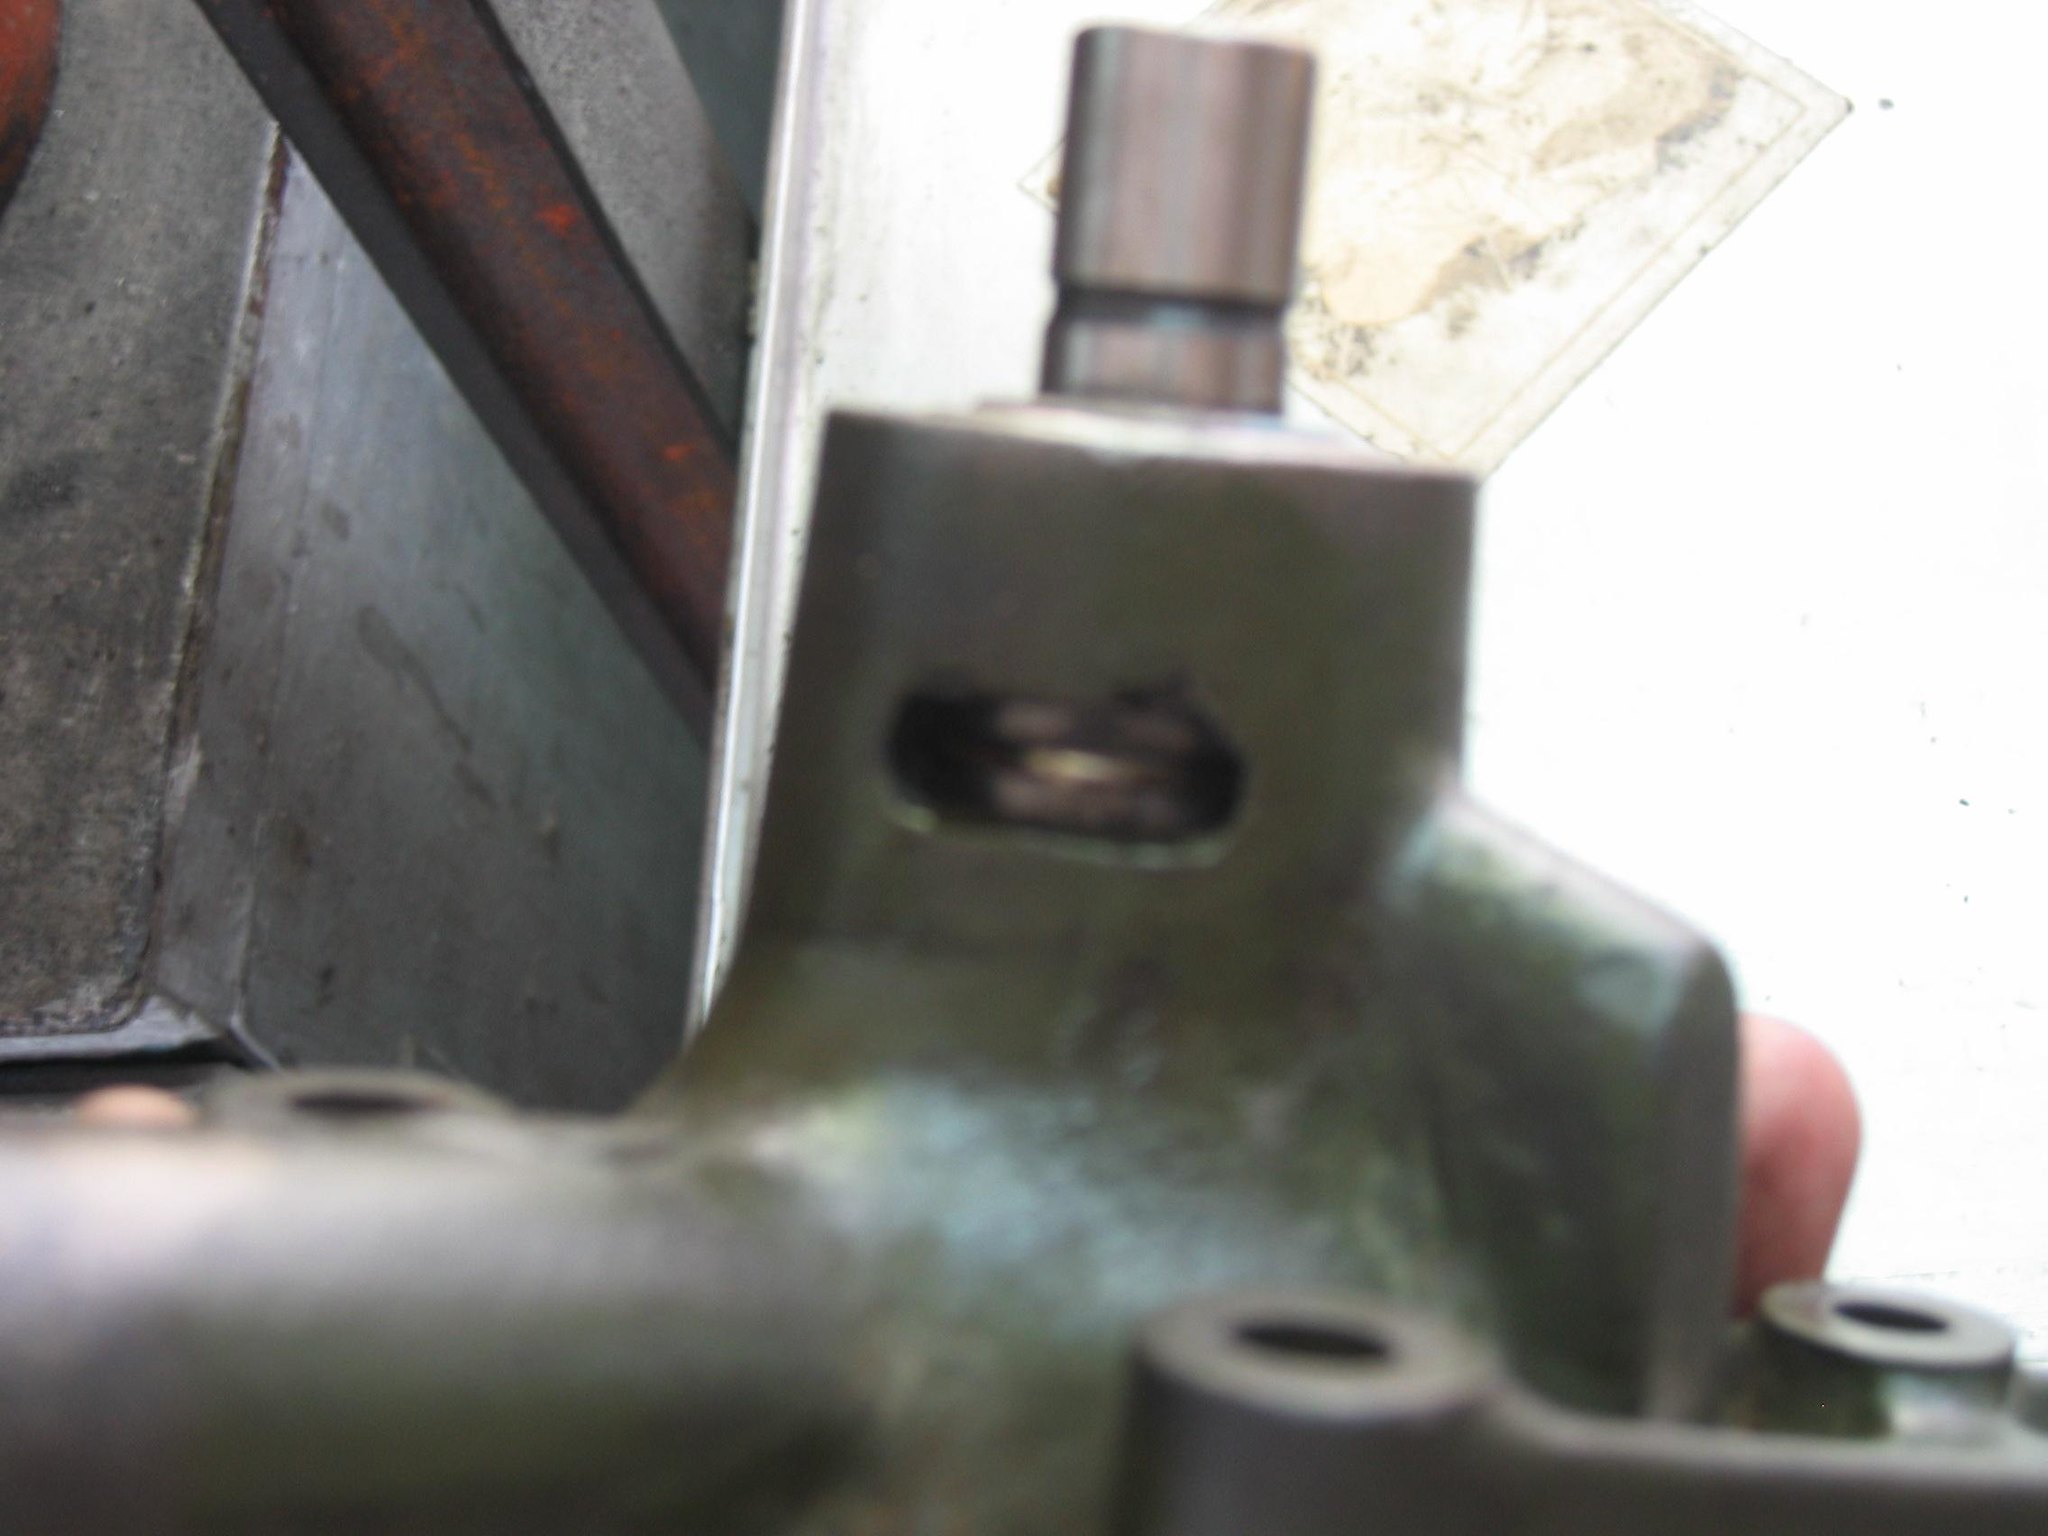 Press the bearing down until it reach the position you can insert the pin. Sometimes press it down just closer and then use the copper hammer to hit the bearing to the right position. Try to insert the pin. When pin is installed to secure the bearing's position. Next is install the pulley boss by using the pressing machine. Sorry I don't have any pictures here! 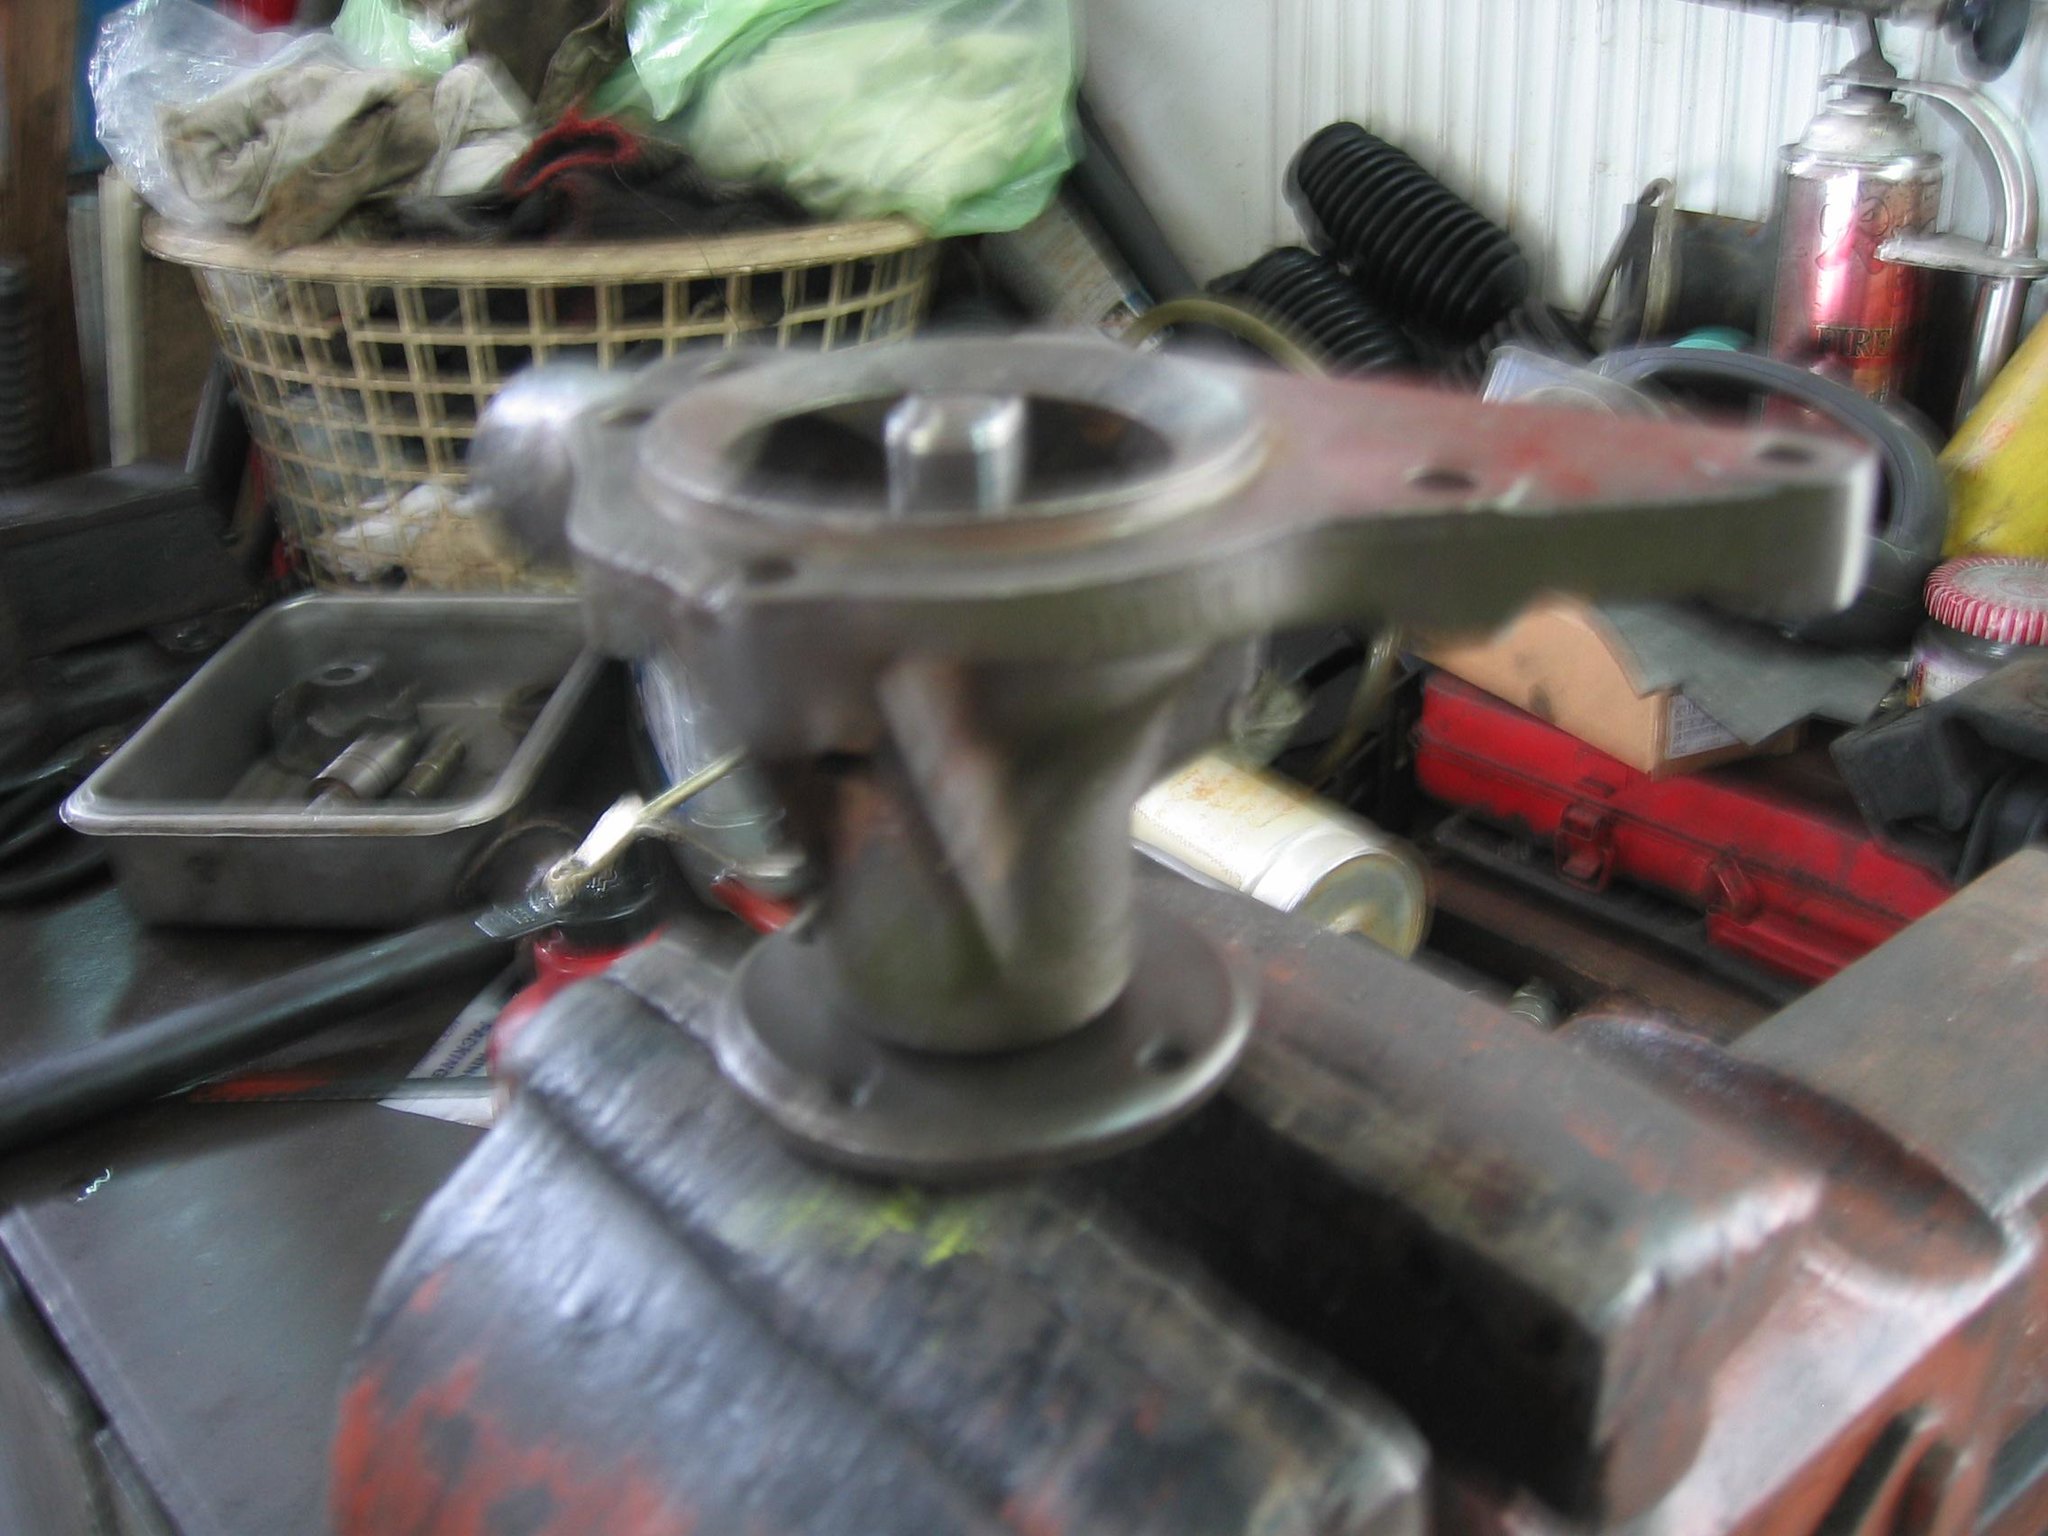 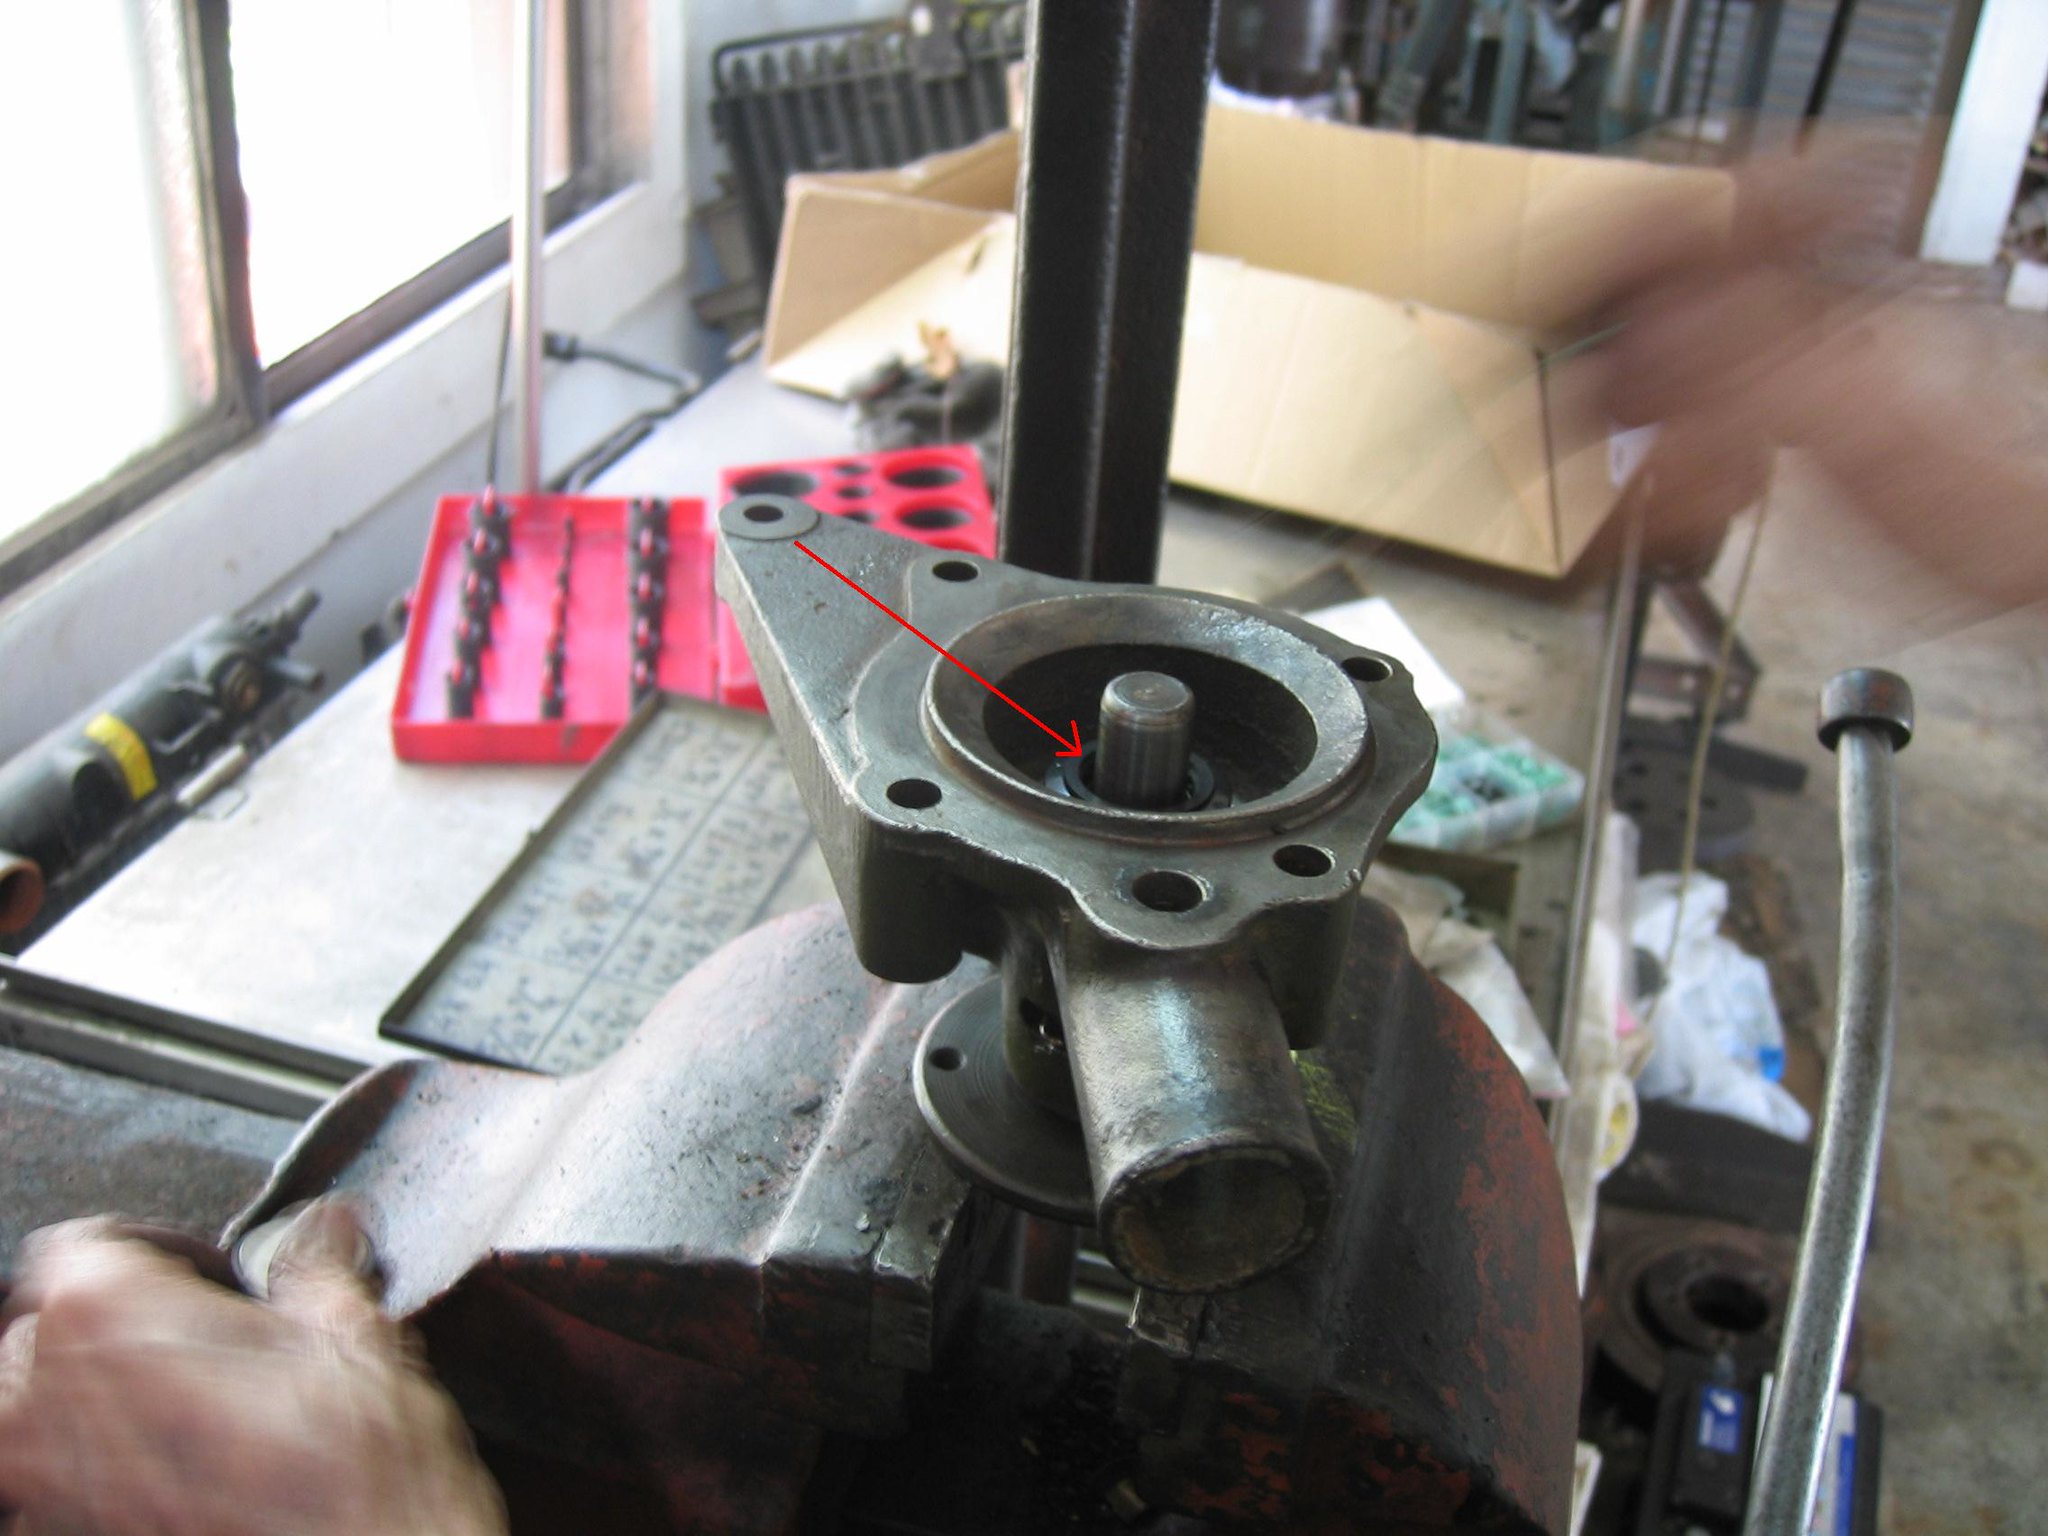 There is a gap here ( red arrowed ) 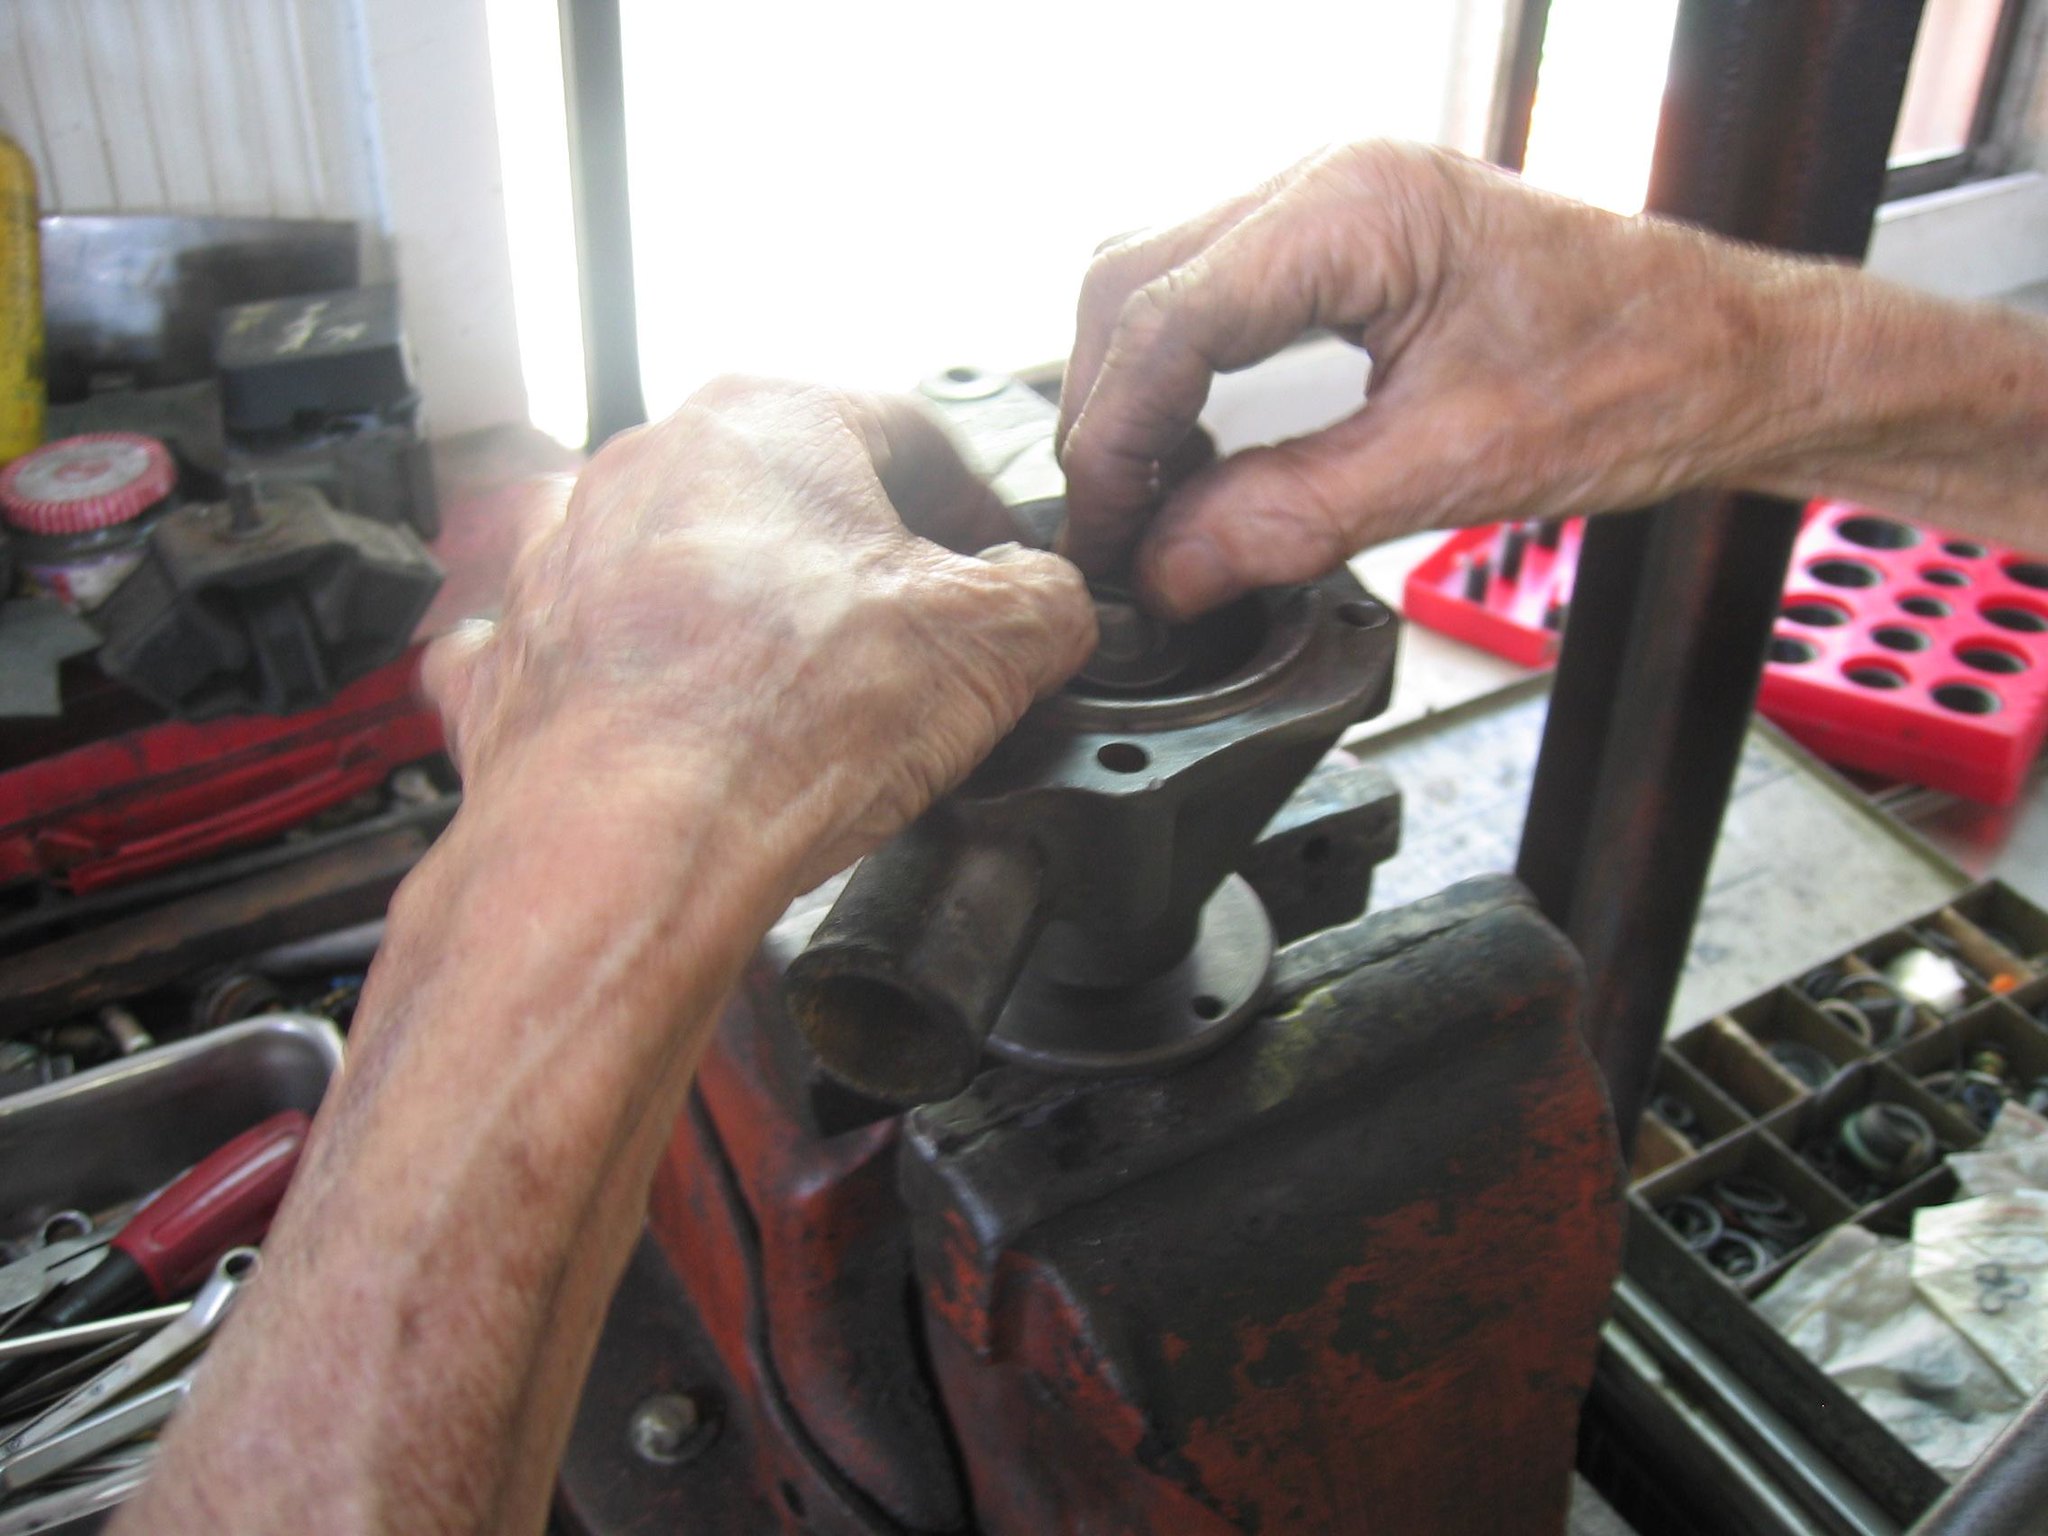 We installed the washer and then put the right O ring to secure the washer. The washer won't move any more and will stay at the right central position. Of course, remember before installing the washer, put a little bit grease on the downside surface of washer to the SEAL's surface. 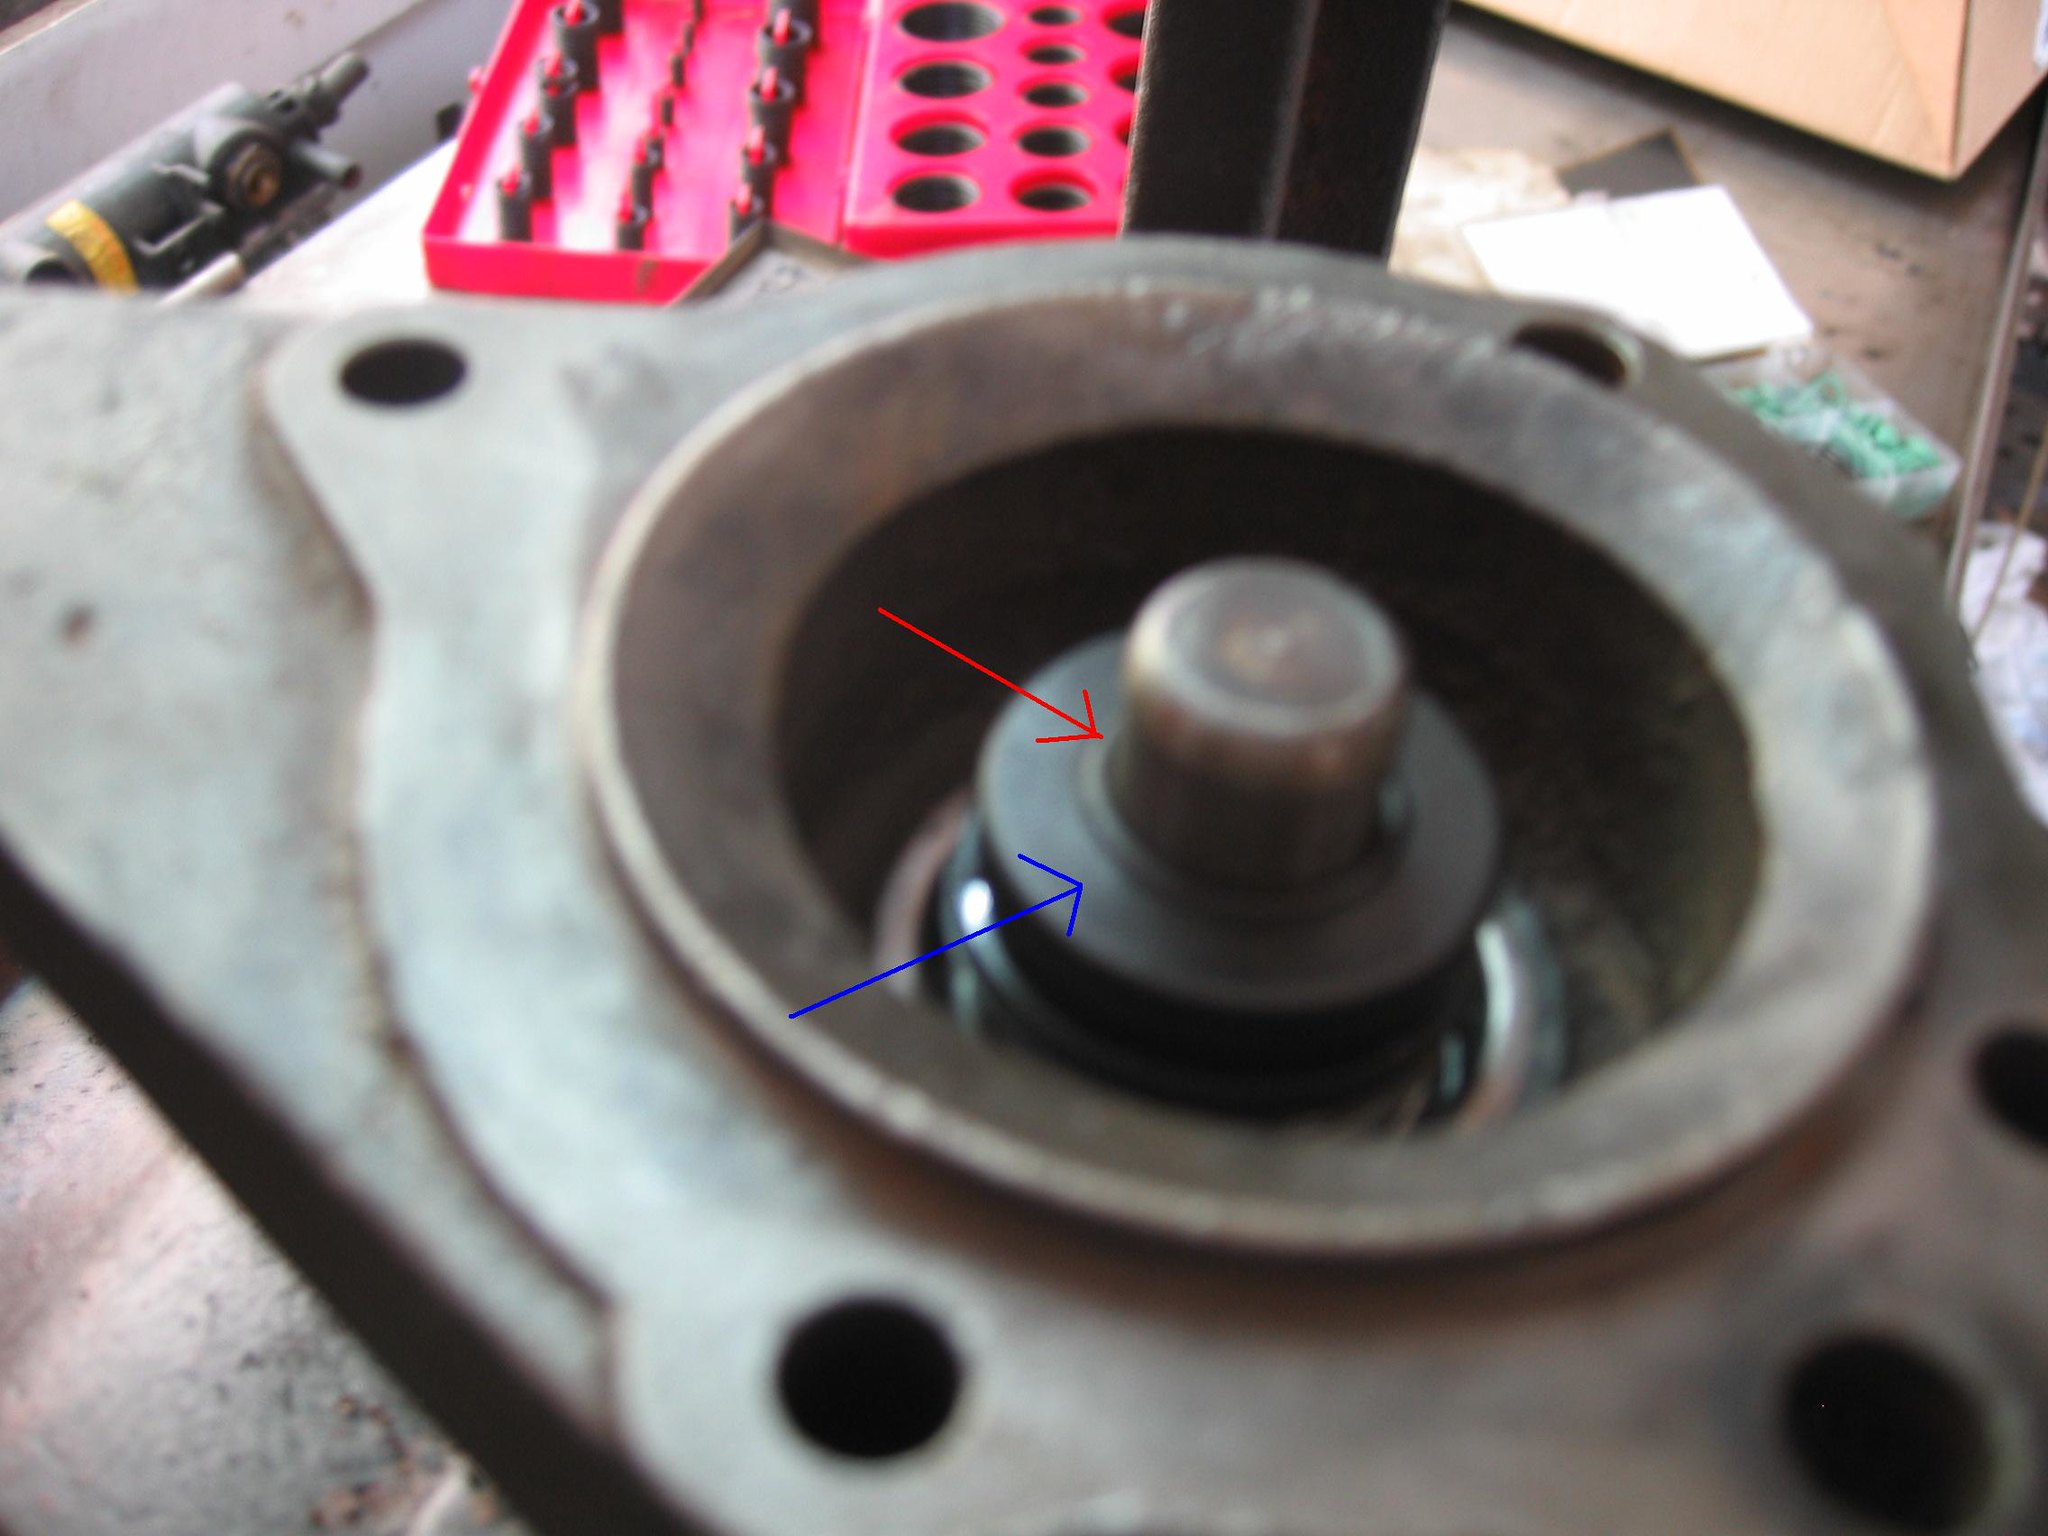 The O ring is done ( Red arrowed ). Put some glue on this upside surface of the washer ( the blue arrowed )  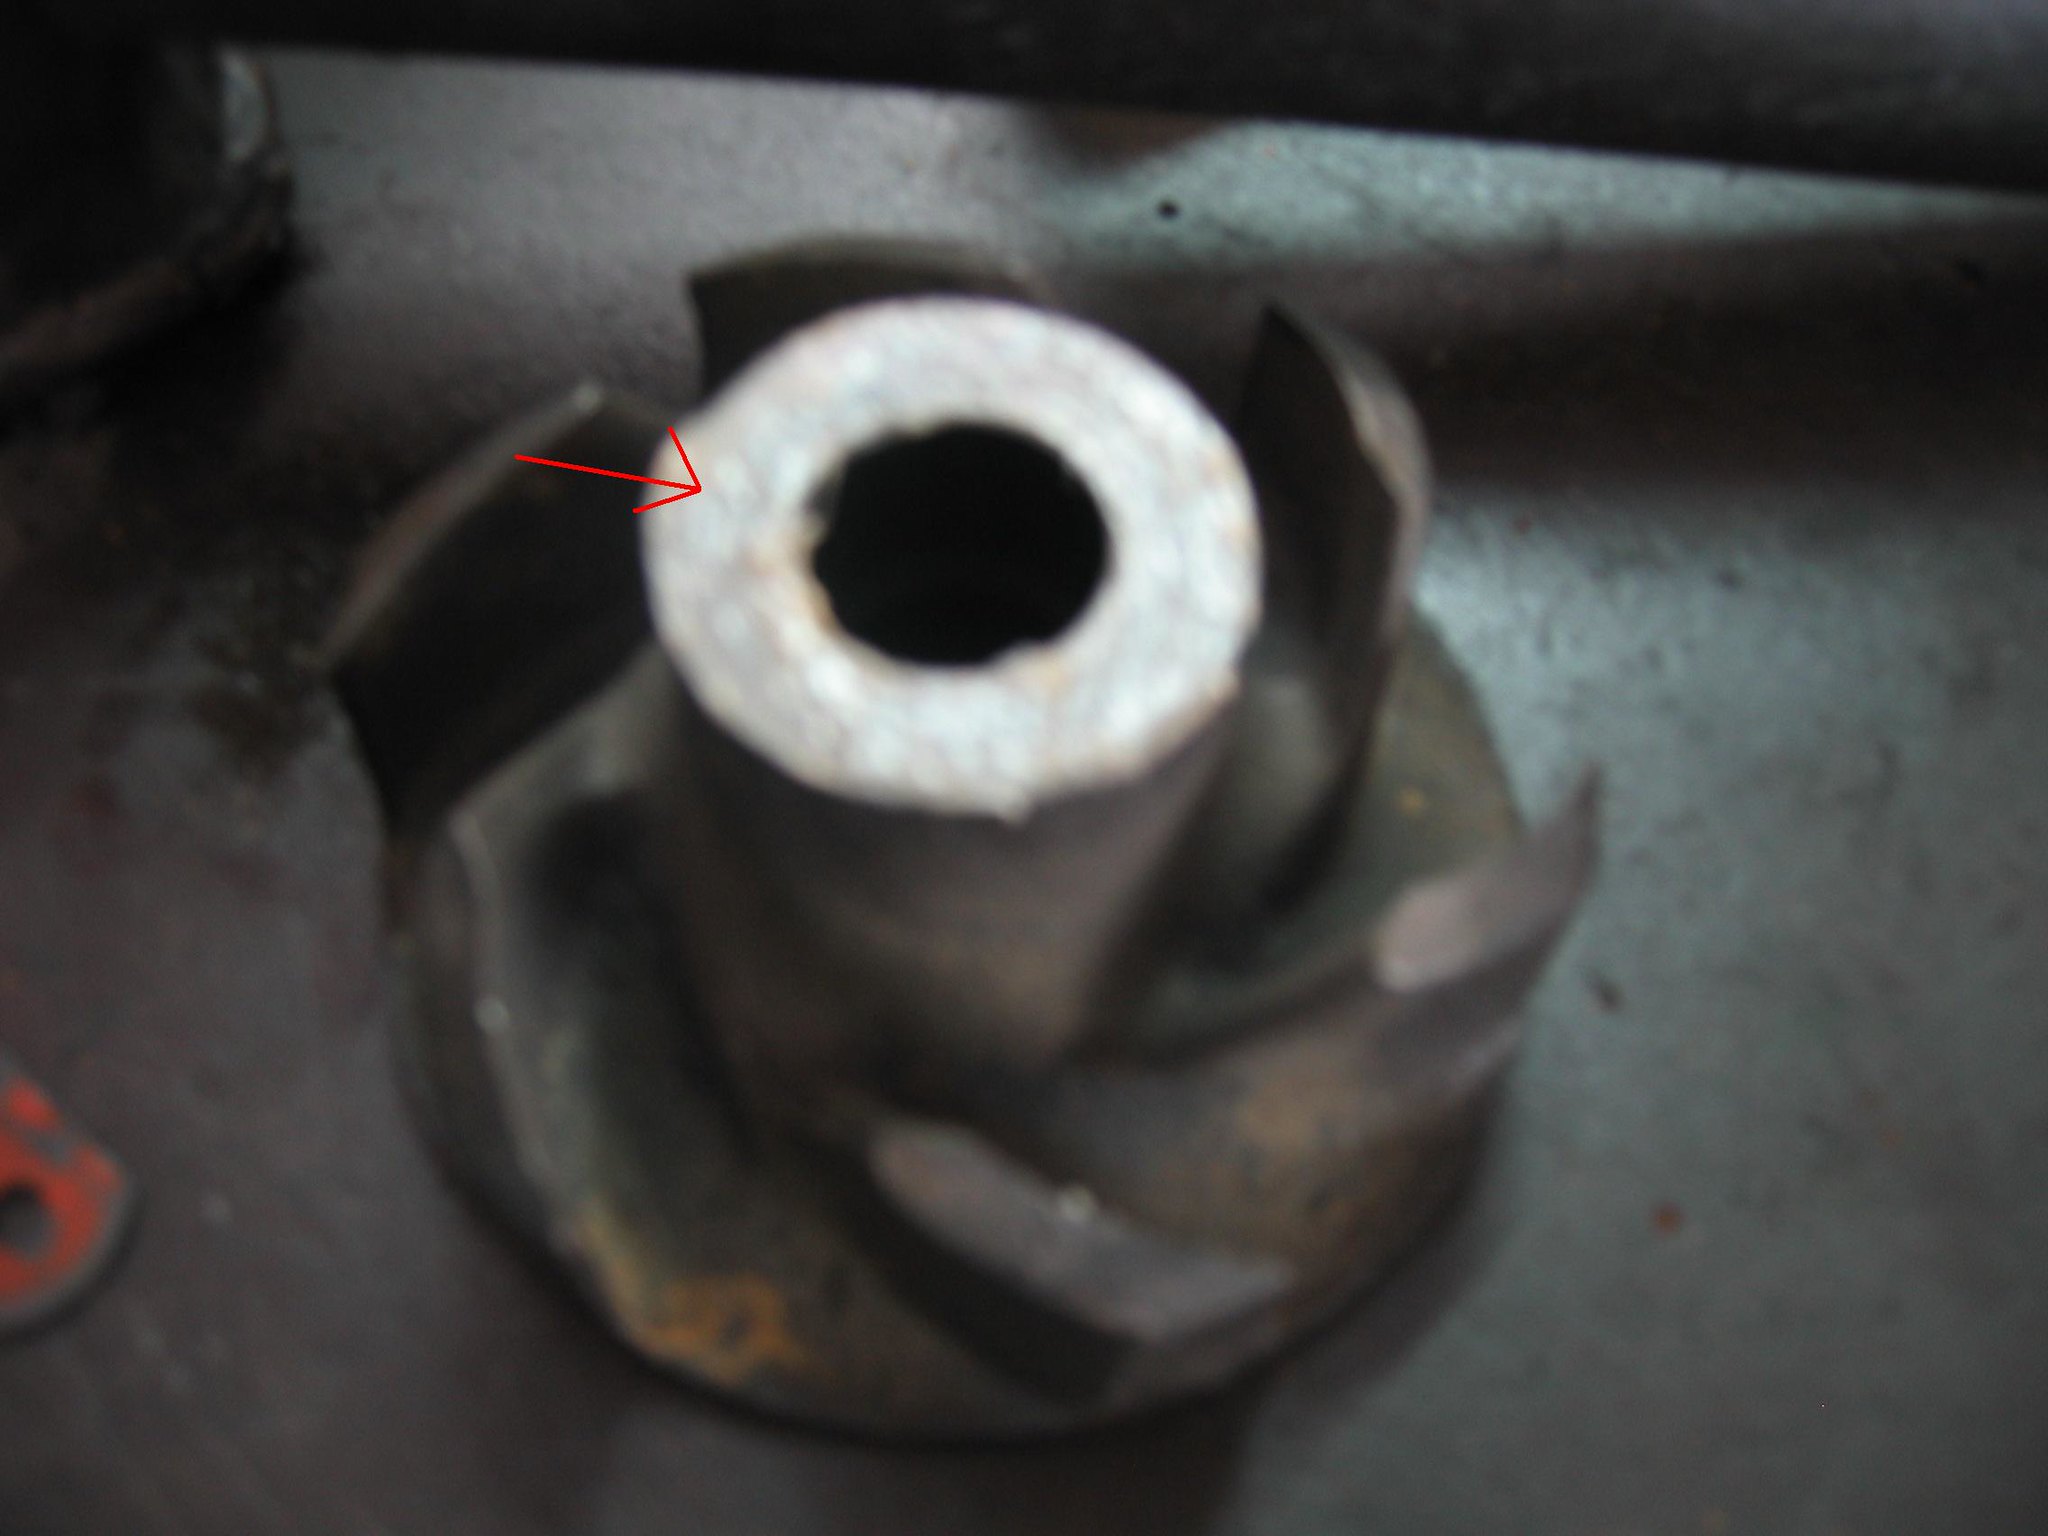 Also some glue on this surface of the impeller.  Install the impeller. 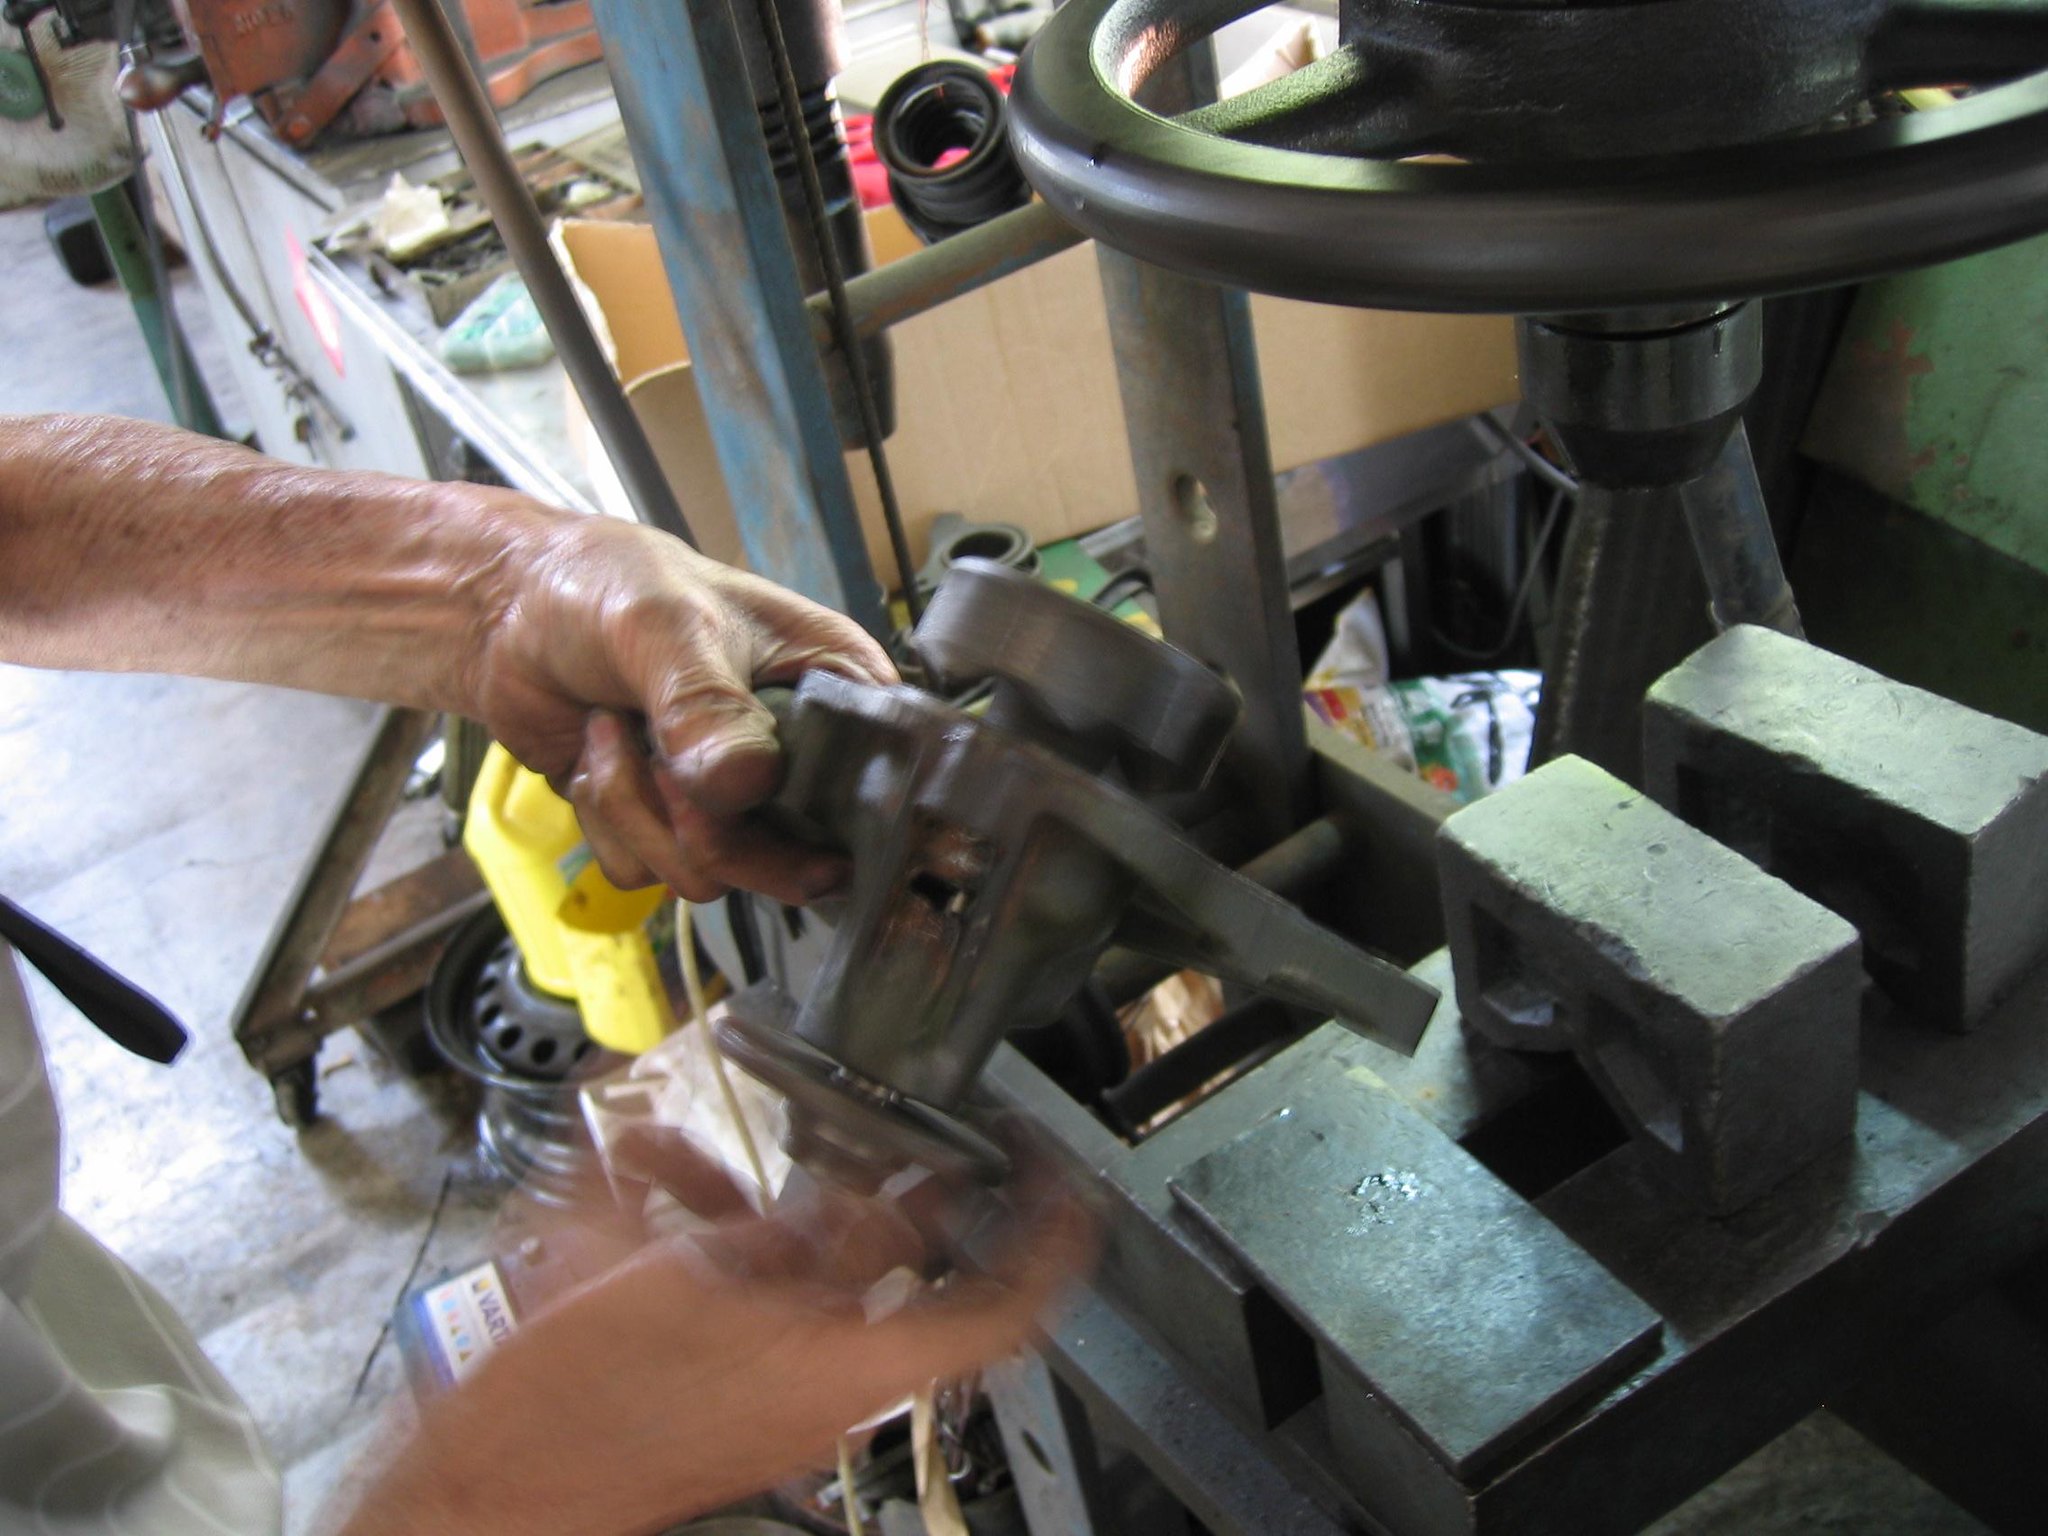 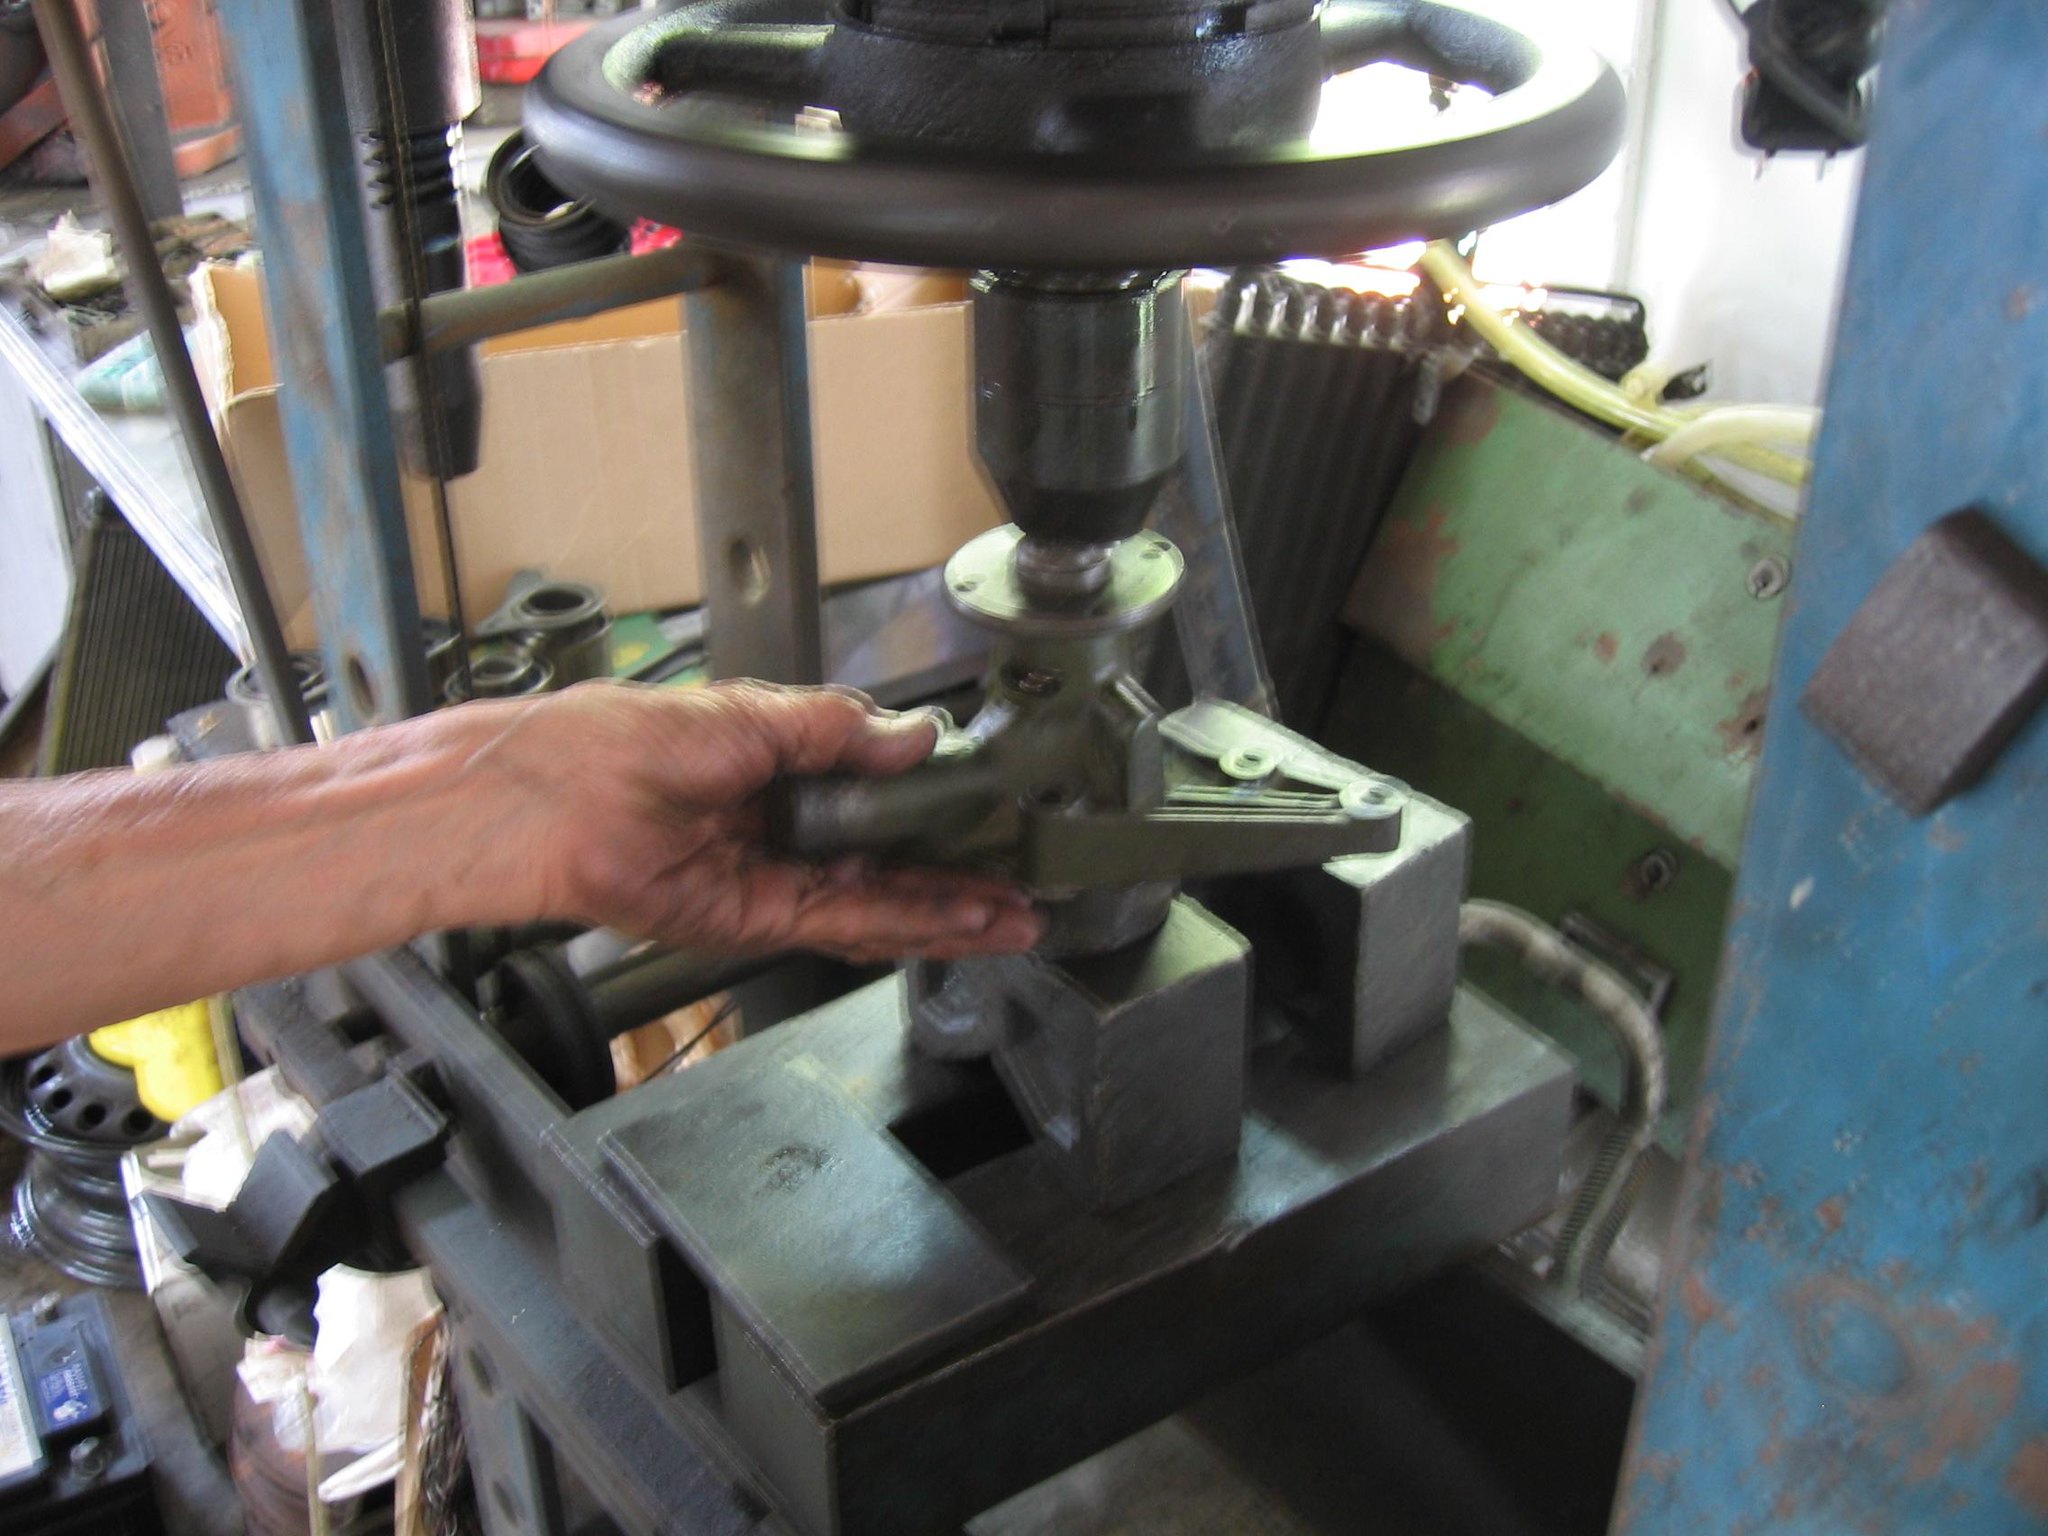 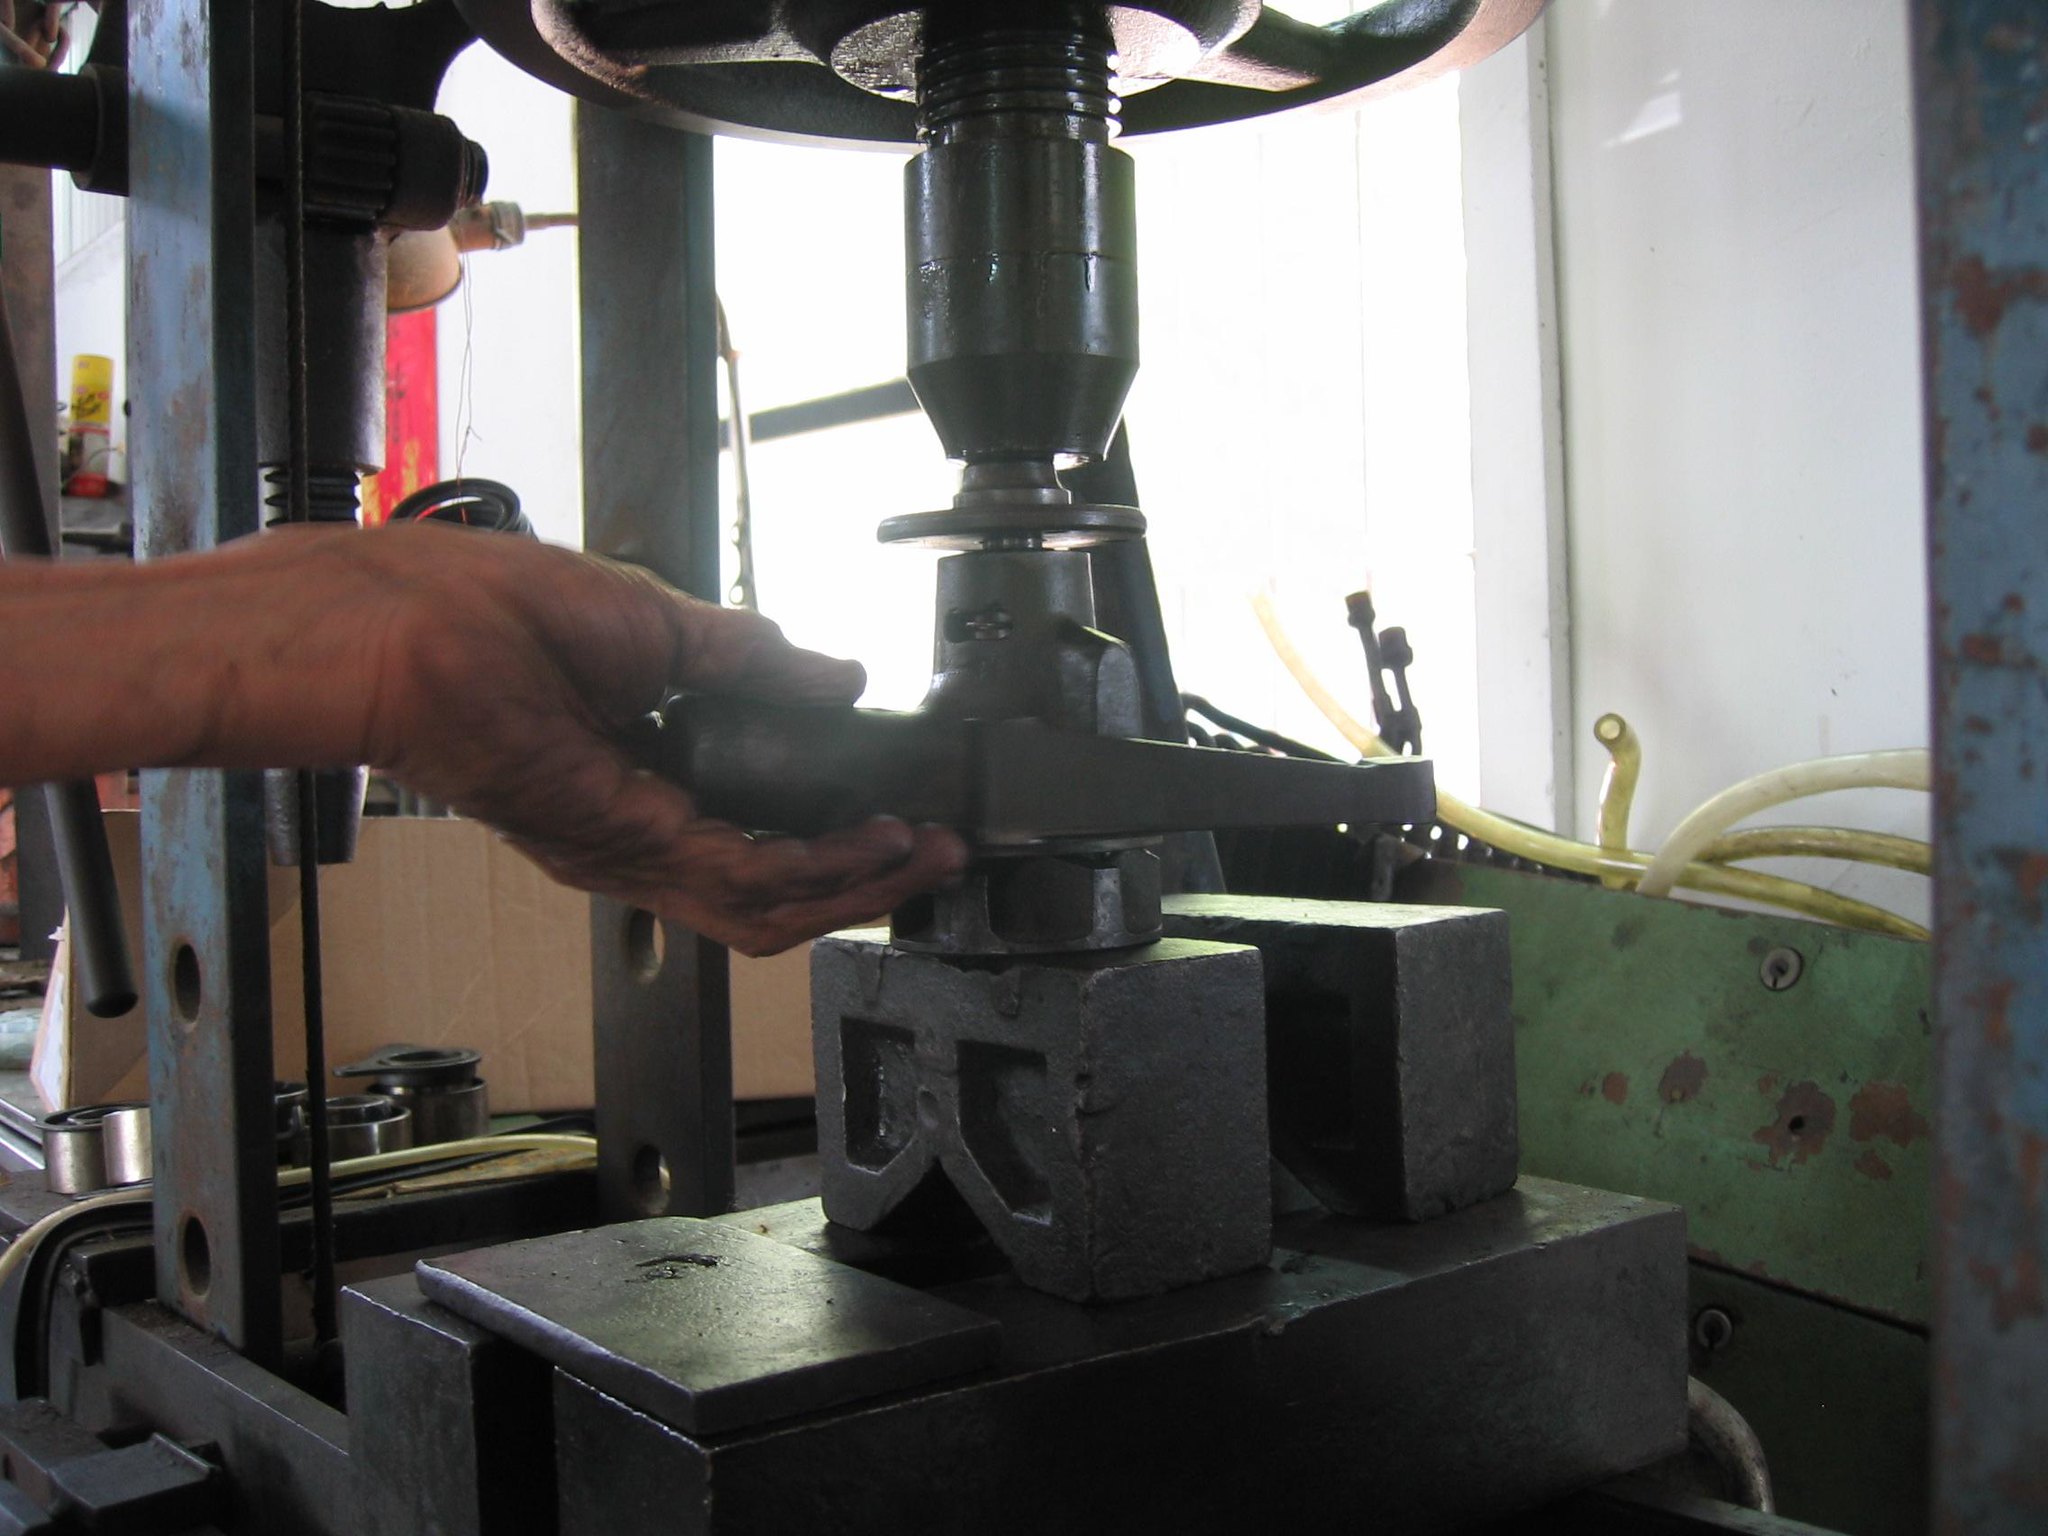 Make sure it has reached the position by checking it. Almost done the job, but need to make sure the water pump will work in the future by checking 3 steps. 1. Check the distances you have measured before. 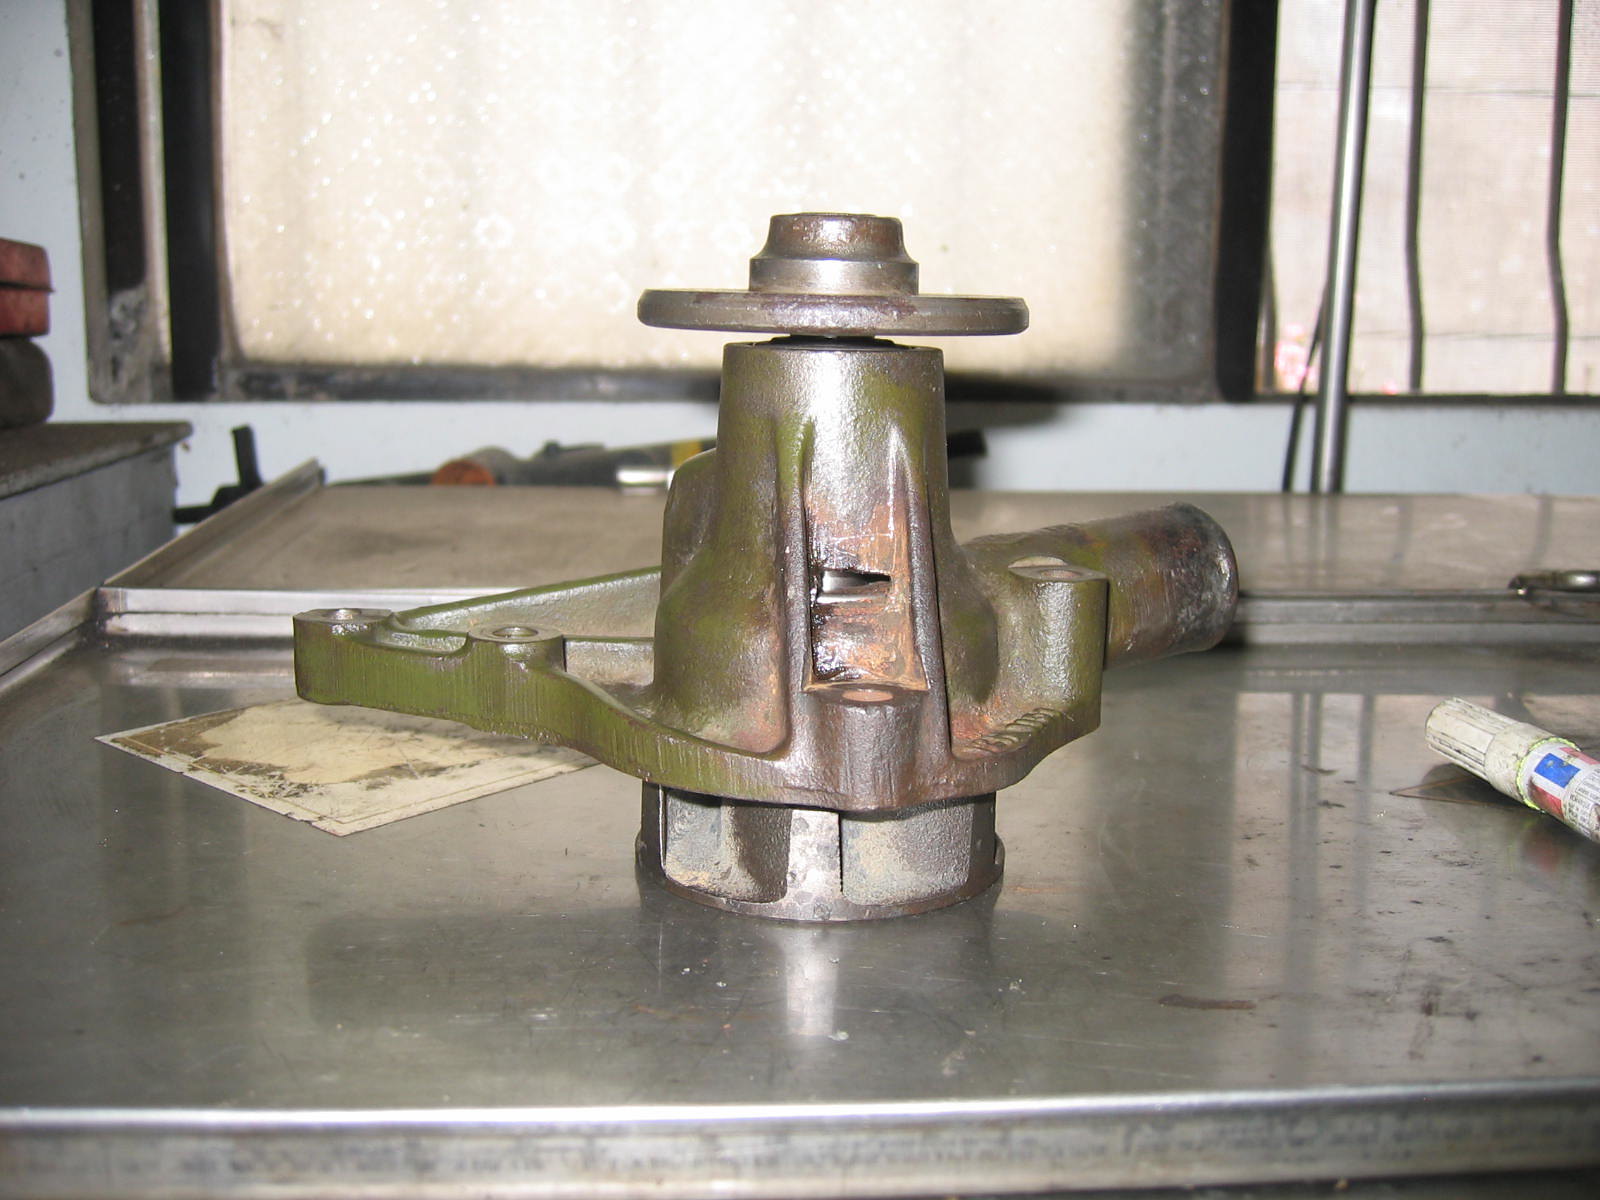 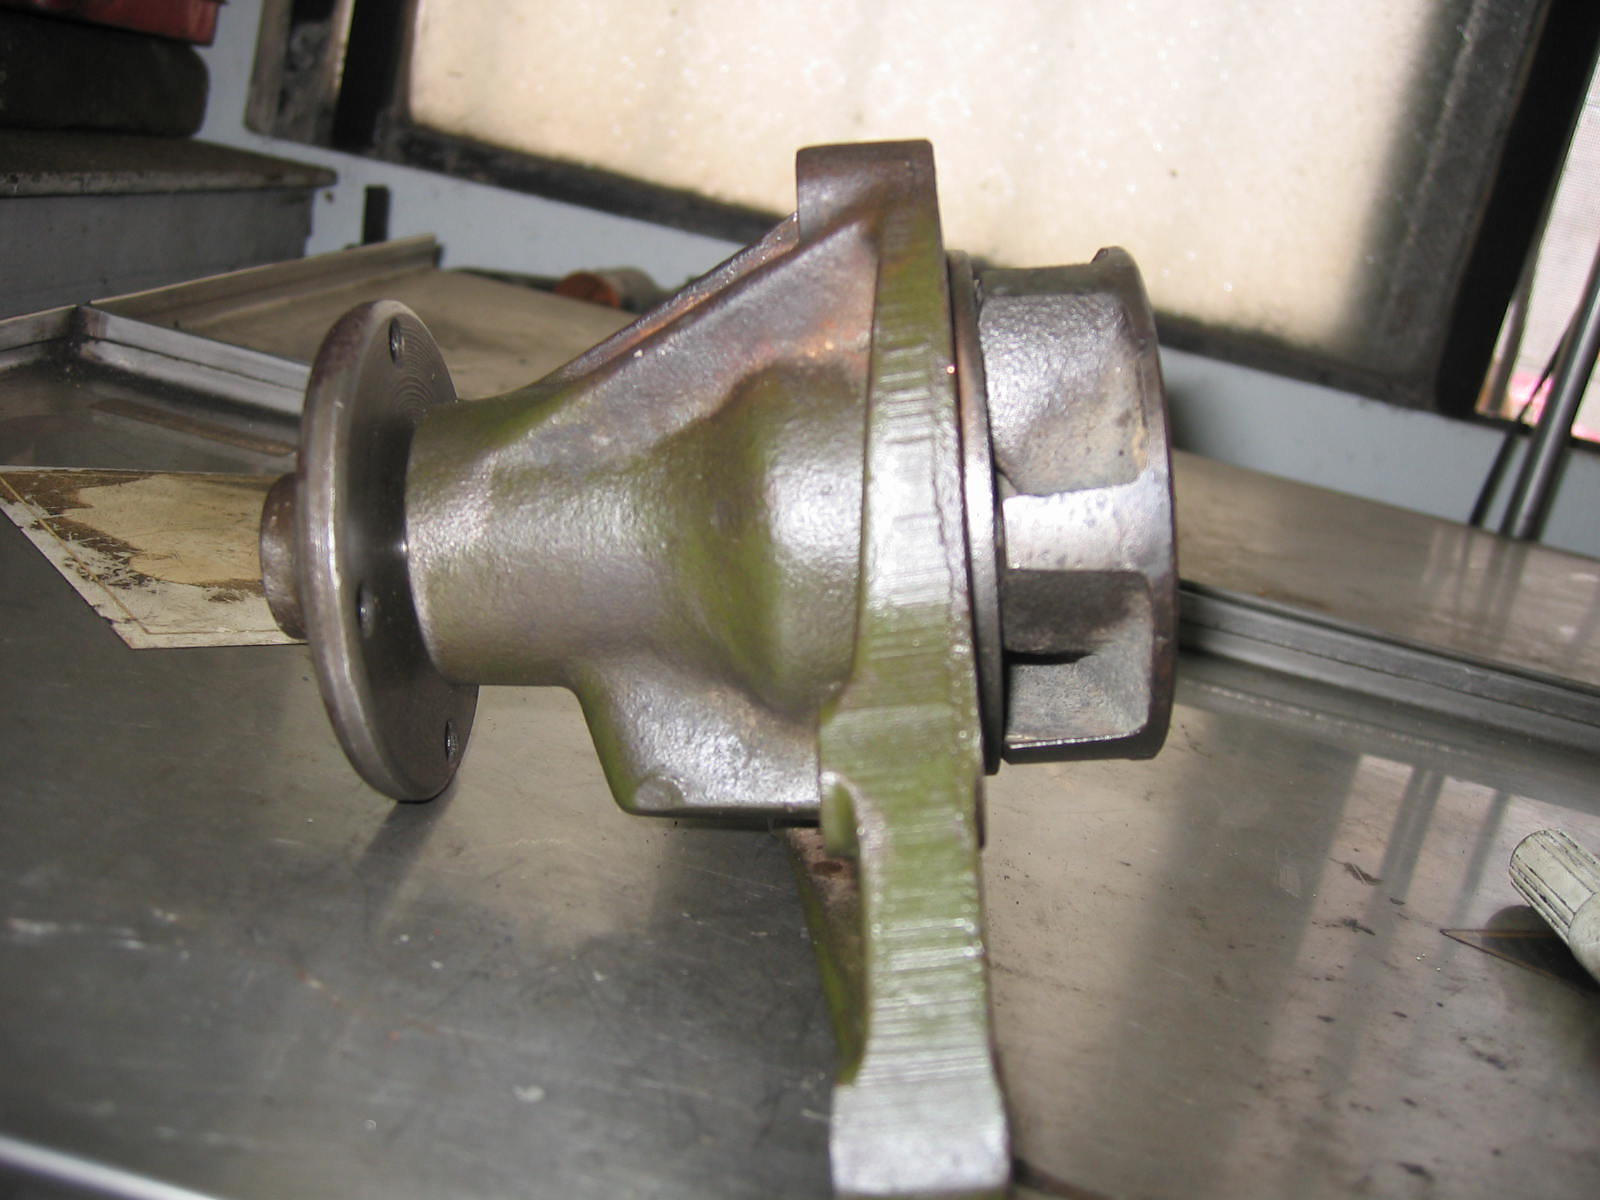 2. Red arrow --- yellow mark on the impeller and washer. Blue arrows --- the impeller and washer. Green arrow --- the seal. One hand holds the water pump and use another hand to rotate the pulley boss. Make sure the YELLOW MARK ( on the impeller and the washer) will rotate simultaneously. 3. 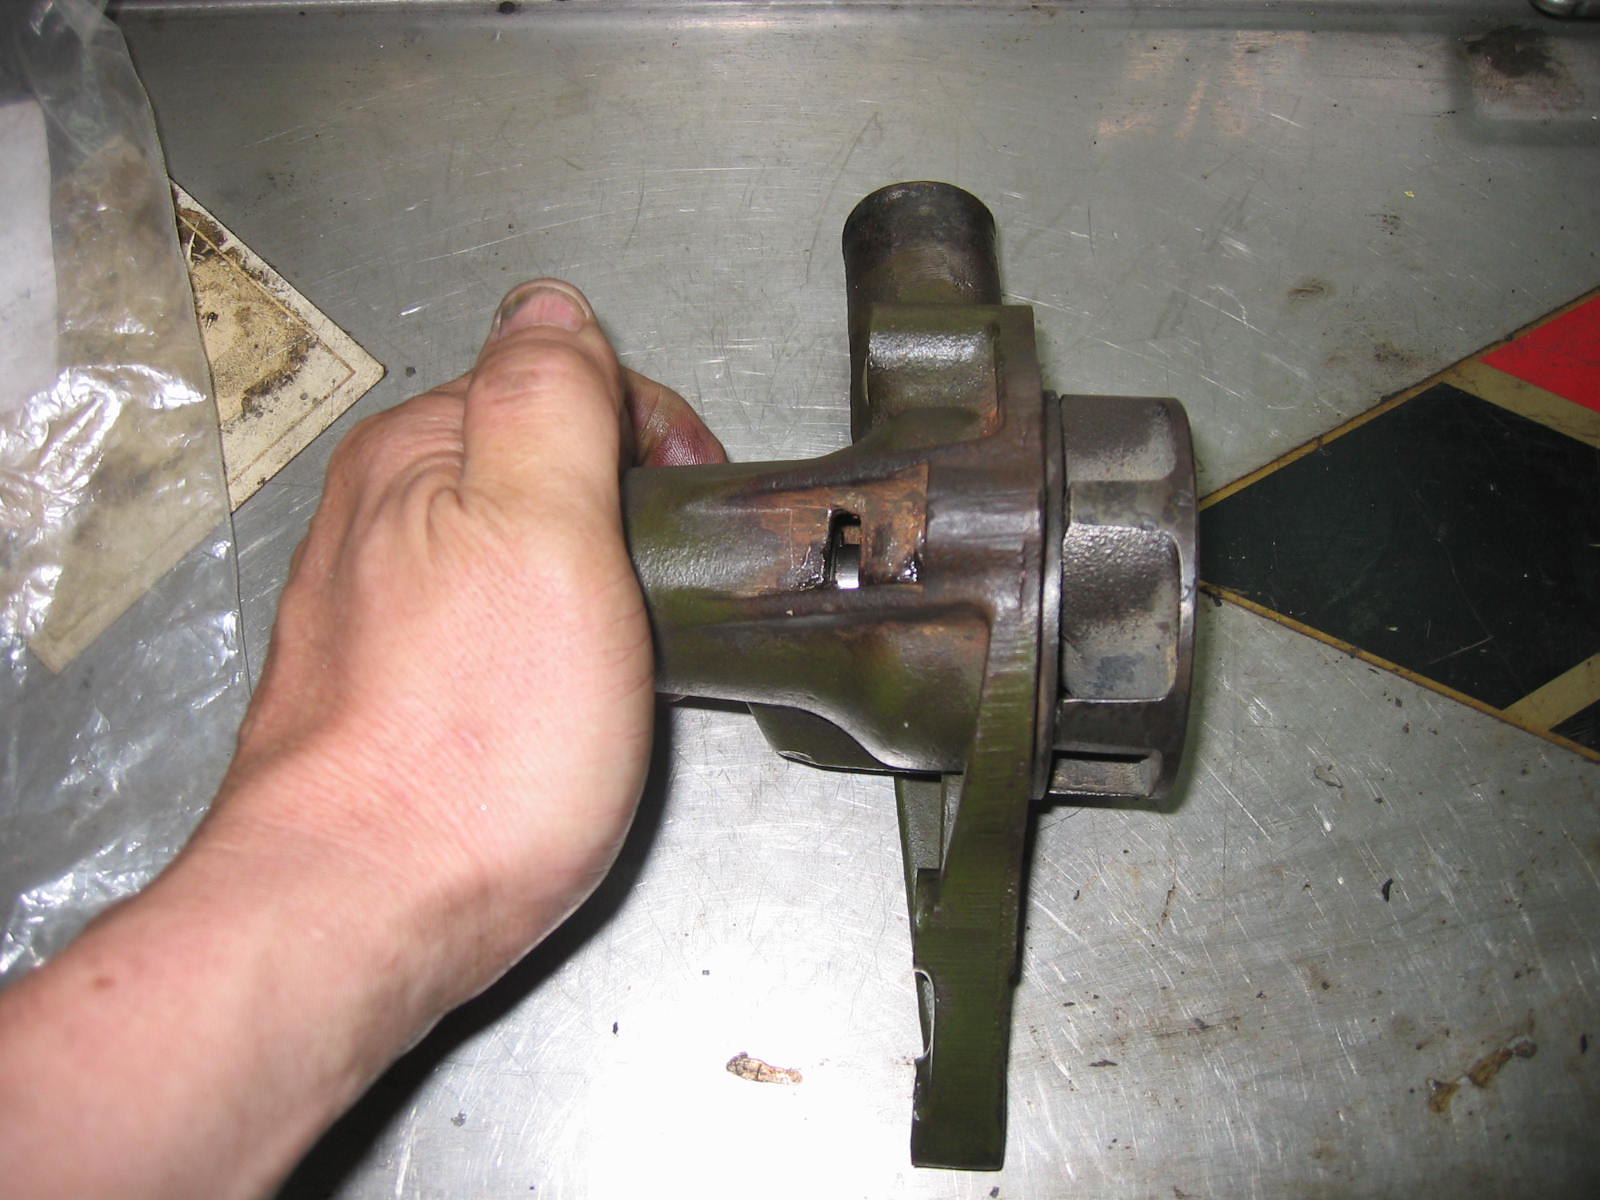 Hold and stop the pulley boss with one hand, and use another hand to rotate the impeller, if it refuses to rotate. The job is done.  Before storing it somewhere dry, use some oil on a piece of clothe to wet the water pump's surface. Of course, it needs a gasket in the future. Now it's a spare part I believe. |
|
|
|
Post by tony on Apr 28, 2015 2:18:18 GMT
Thanks, Chris. I know there are some easy ways to get a water pump. Sometimes it's very exciting to know how to repair and do it yourself like you have done to your Red Morris. Sometimes the cost of delivery and time have to be taken into account. We are not in a hurry to repair the water pump as we do have a spare one. If needed, I'll contact Tony, UK. Luckily we live in an industrial city and there are some old parts shops that might still store some pieces of components to buy. We have already got the SEAL --- NOK made in Japan, which is quite expensive about 7 GBP. We have been told there is a bearing some people have. We went to one of them last evening after work. We know it will have to be modified as it is too longer somewhere. We didn't buy it as it's too expensive than the seal's price, which shouldn't be. It used to cost about 2 or 3 GBP , made in USA is the best here. All prices have gone up, strange??? If we don't buy it, how can it be gone in the future? We still store some bearings and seals for the water pumps of some other vehicles like old USA vehicles. These bearings were given by an old part shop without any penny. Because there were few chances to sell them. Vehicles have been changed recently. Now the shop just sells Volvo parts. 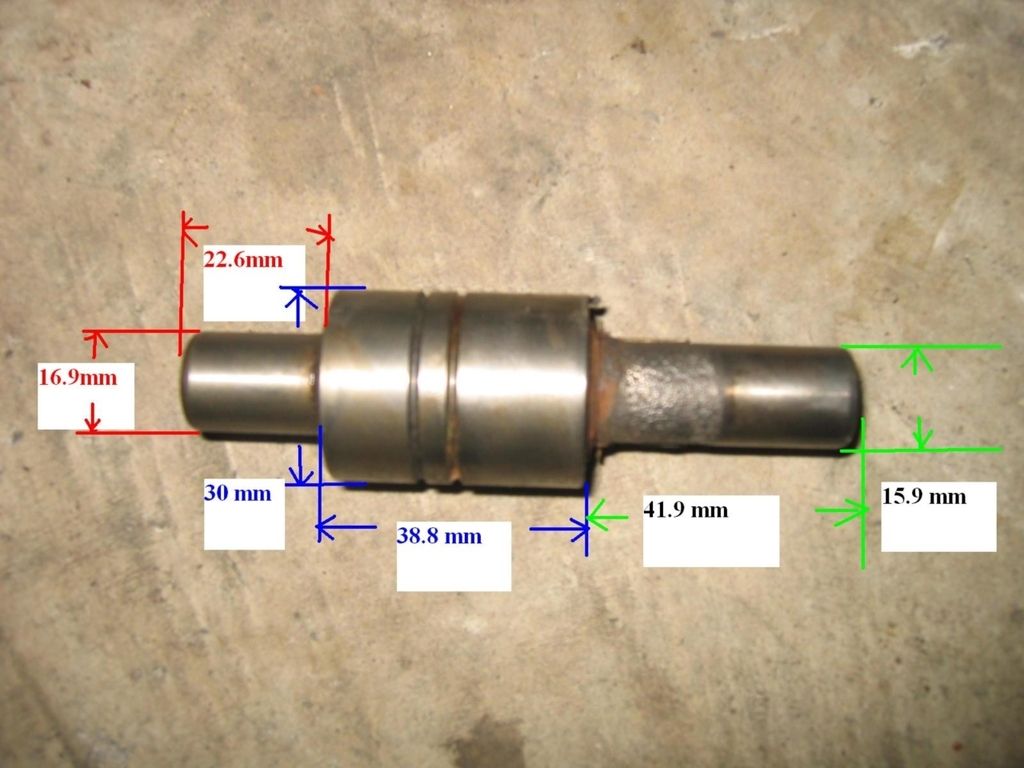 The picture shows the figures of the bearing. --- Sorry. I lost it. Regards Tony Good stuff, Tony. The water pump failed on the Austin just after I got it running again. I did buy a replacement pump for about £28 from MOSS EUROPE. Our cars use what is called the "short nose" pump - it is short because of the radiator being so close to the engine. I was unable to find the bearing and seal to fit ours. Good luck! Chris. |
|
|
|
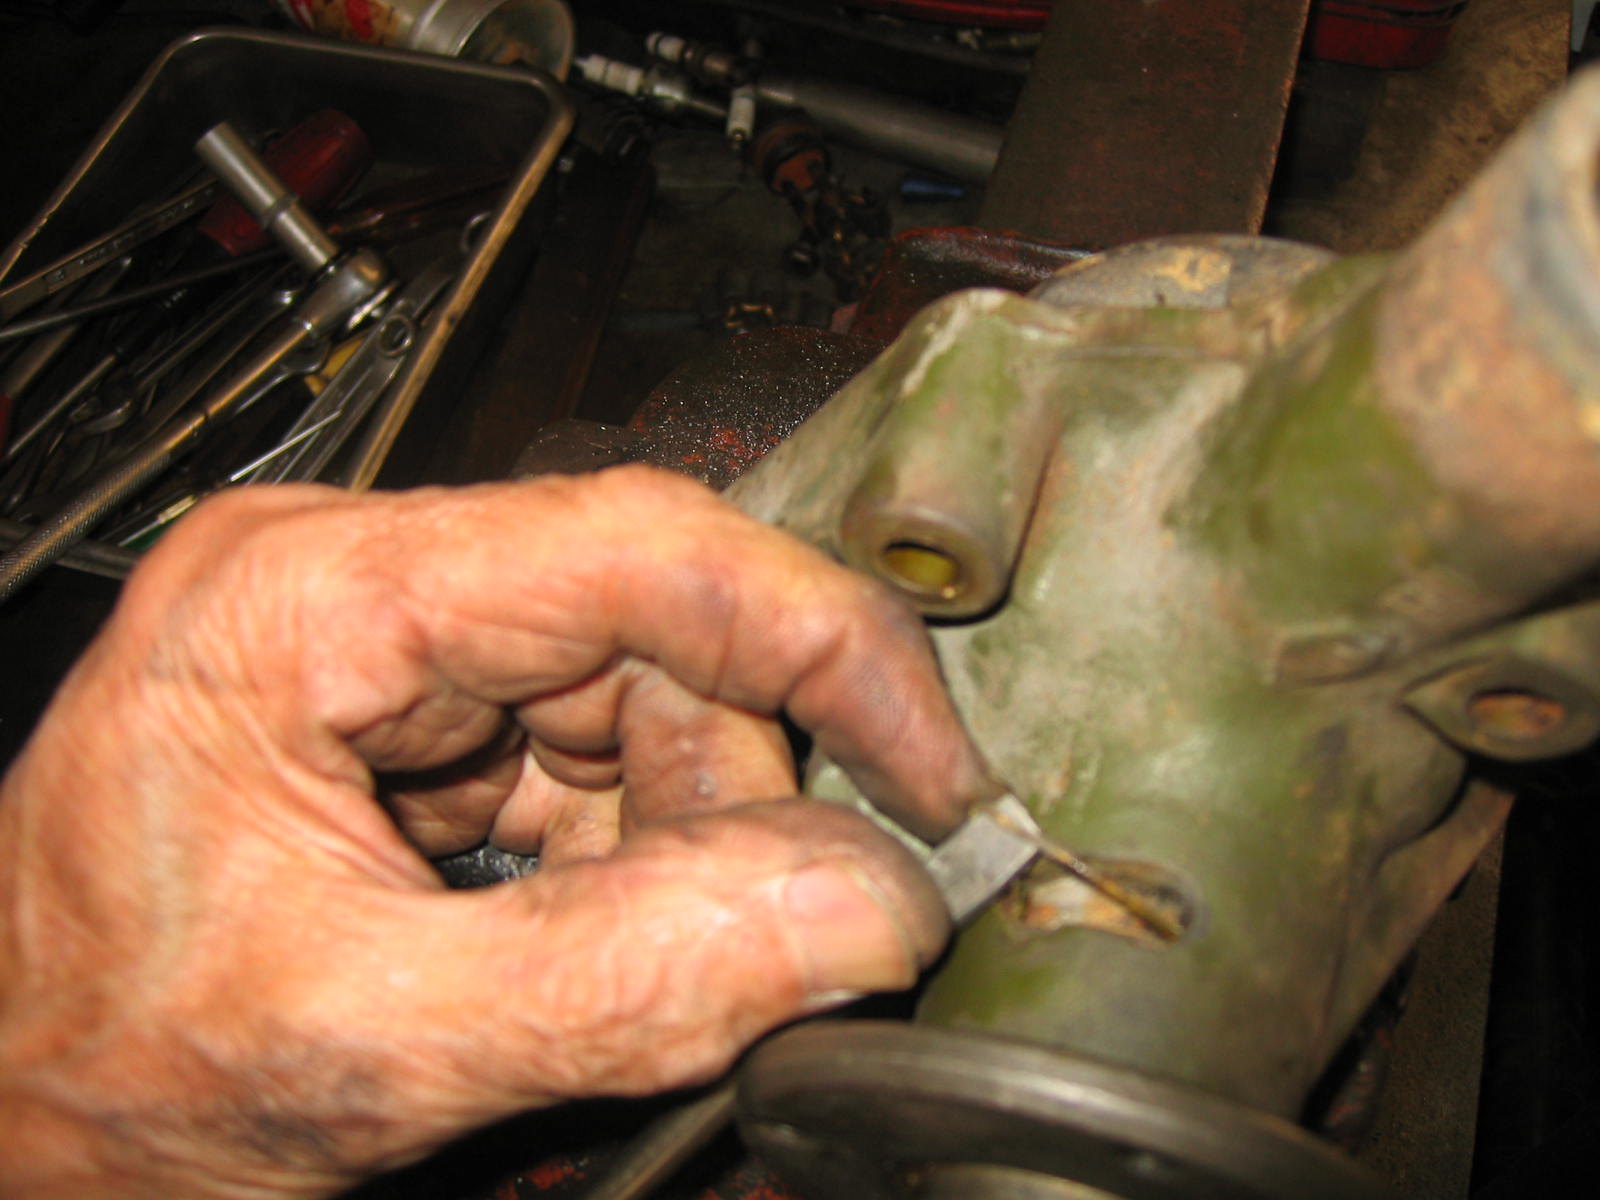
Post by tony on Apr 27, 2015 9:33:20 GMT
Our Morris got a noise recently that came from the water pump, which father found and had made sure by examining. There was no water leak from the water pump. Actually I didn't hear that even on the road. Yesterday father and I took her to attend a meeting and I found it was OK and easy to reach the speed of 60 kilometer per hour. This morning father decided to remove the water pump and check its condition. After removing it, it sounds to run fine by hand, just a little bit noise I thought. This item was new and bought in 1997 in London by me and we wonder what caused it. It has been just installed recently just for a few years. A few mileages. Leave it! We started to installed another repaired spare water pump, which result comes fine. No noise nor coolant leak! This afternoon we tried to disassemble the making noisy water pump like we have done before. We found the bearing was a little bit rusty and seal is not in a good condition. Our water pump is a sealed type here. 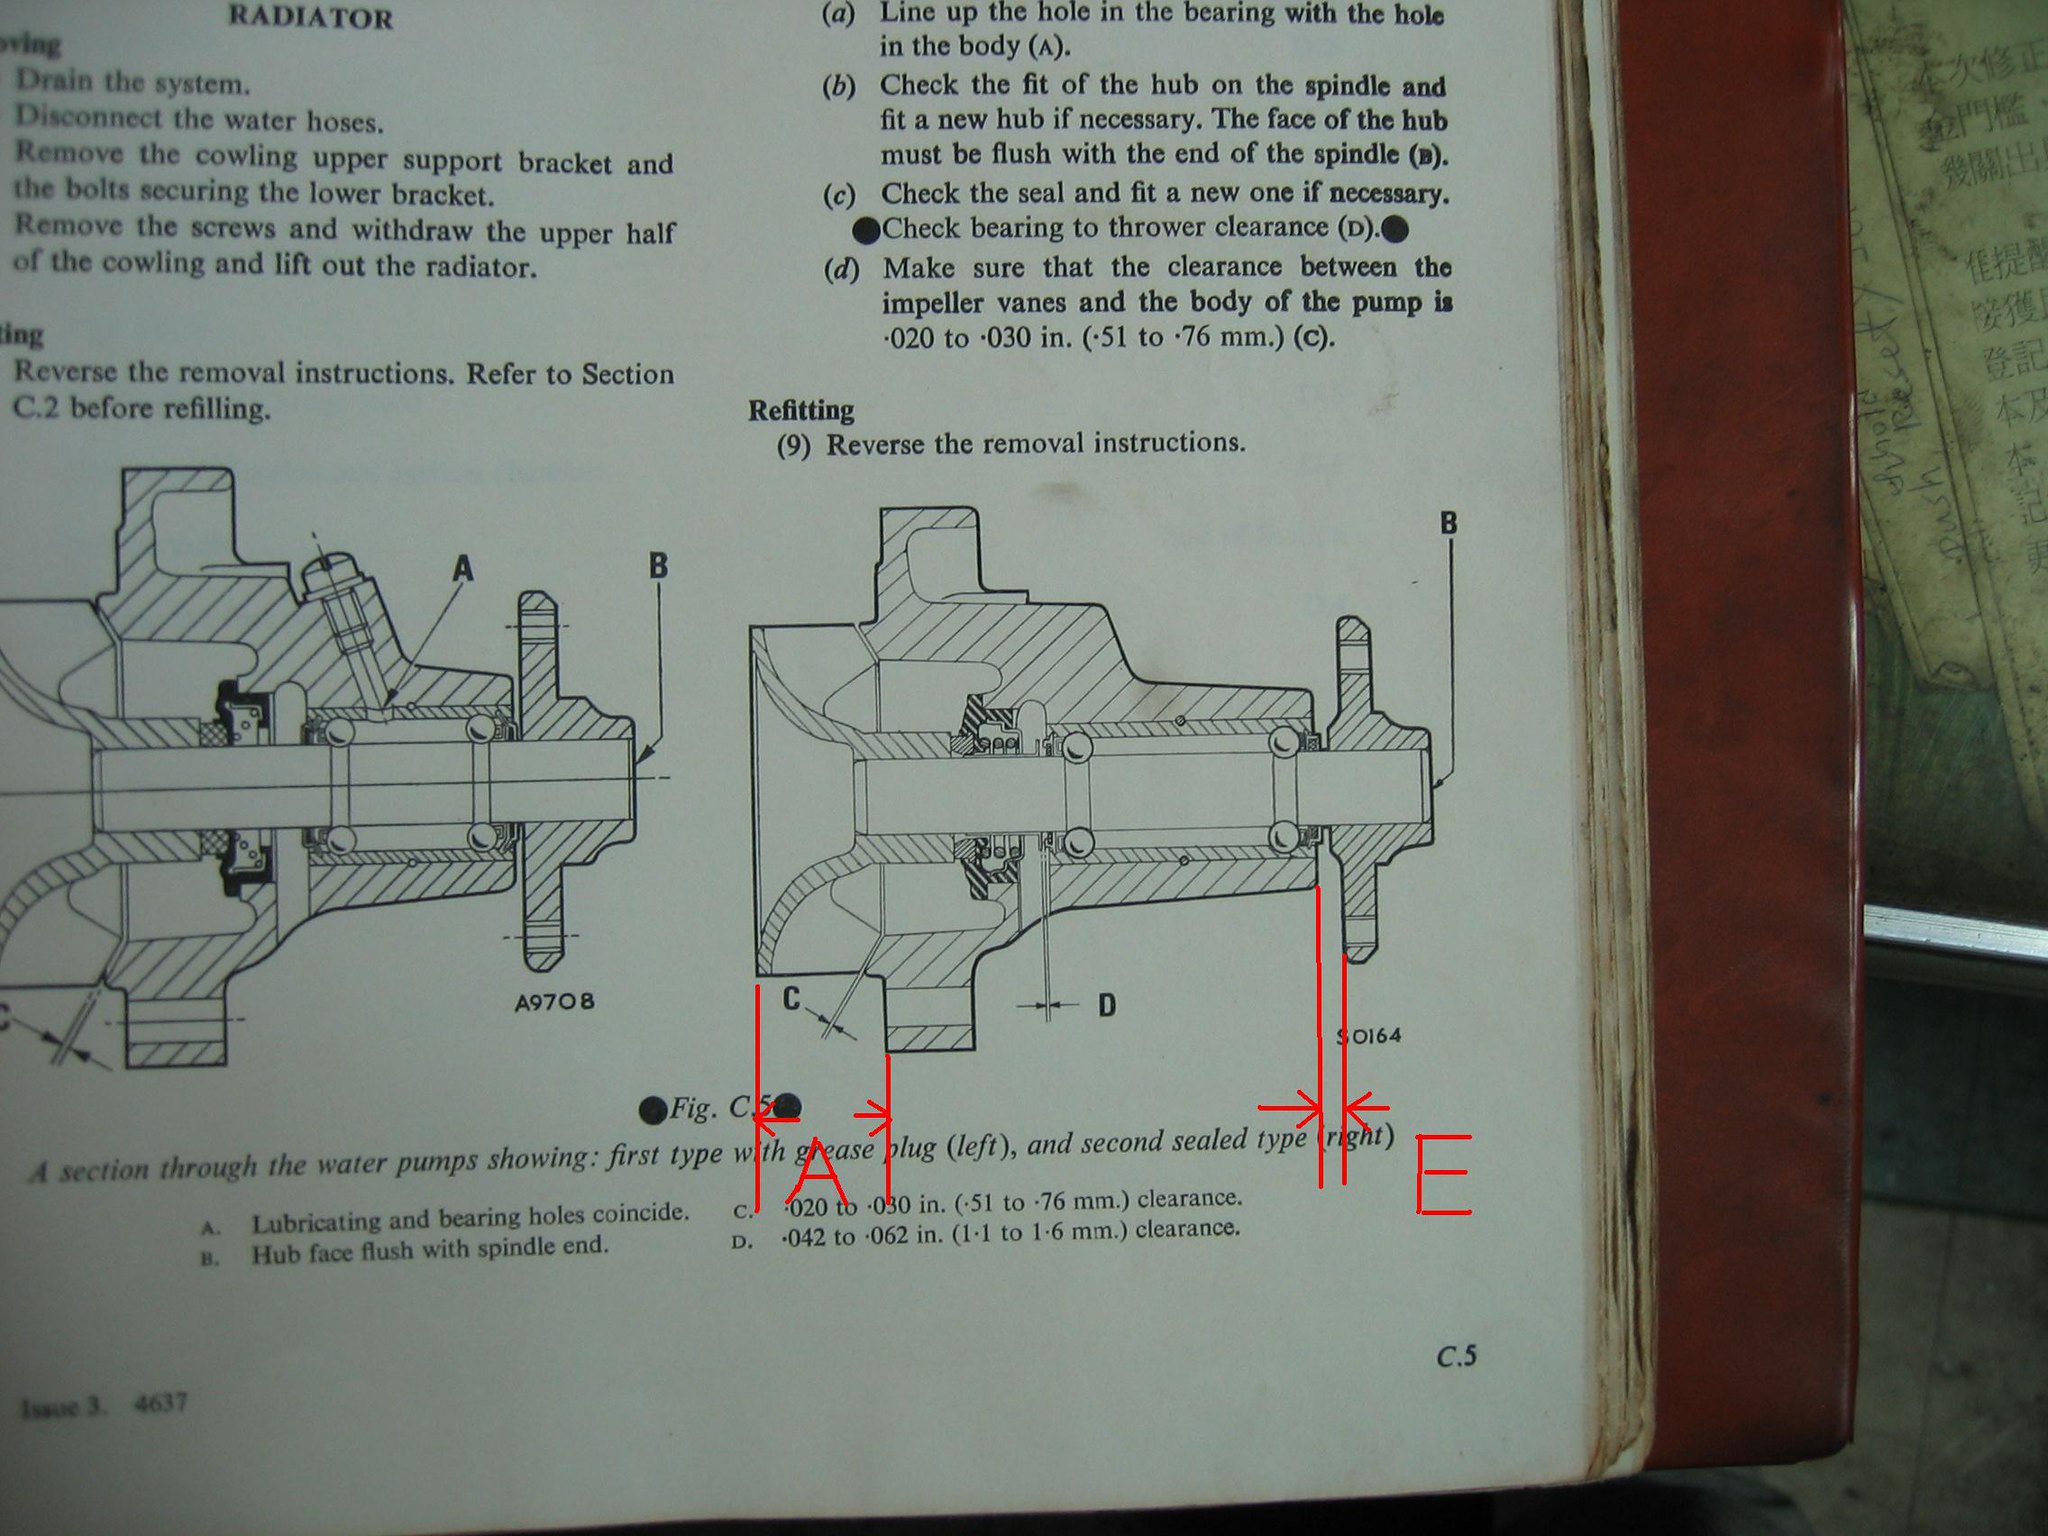 I am very sorry that I have to add some information here before doing the work. The picture above shows there are 2 figures we have to measure before disassembling the water pump. I first took the measures of A and E. In fact you shall measure the gaps of C and D. But in the end we did some modification on the surface of impeller, which reduced the gap of C a little bit.
 First of all, remember to remove the inserted pin of this kind of water pump. 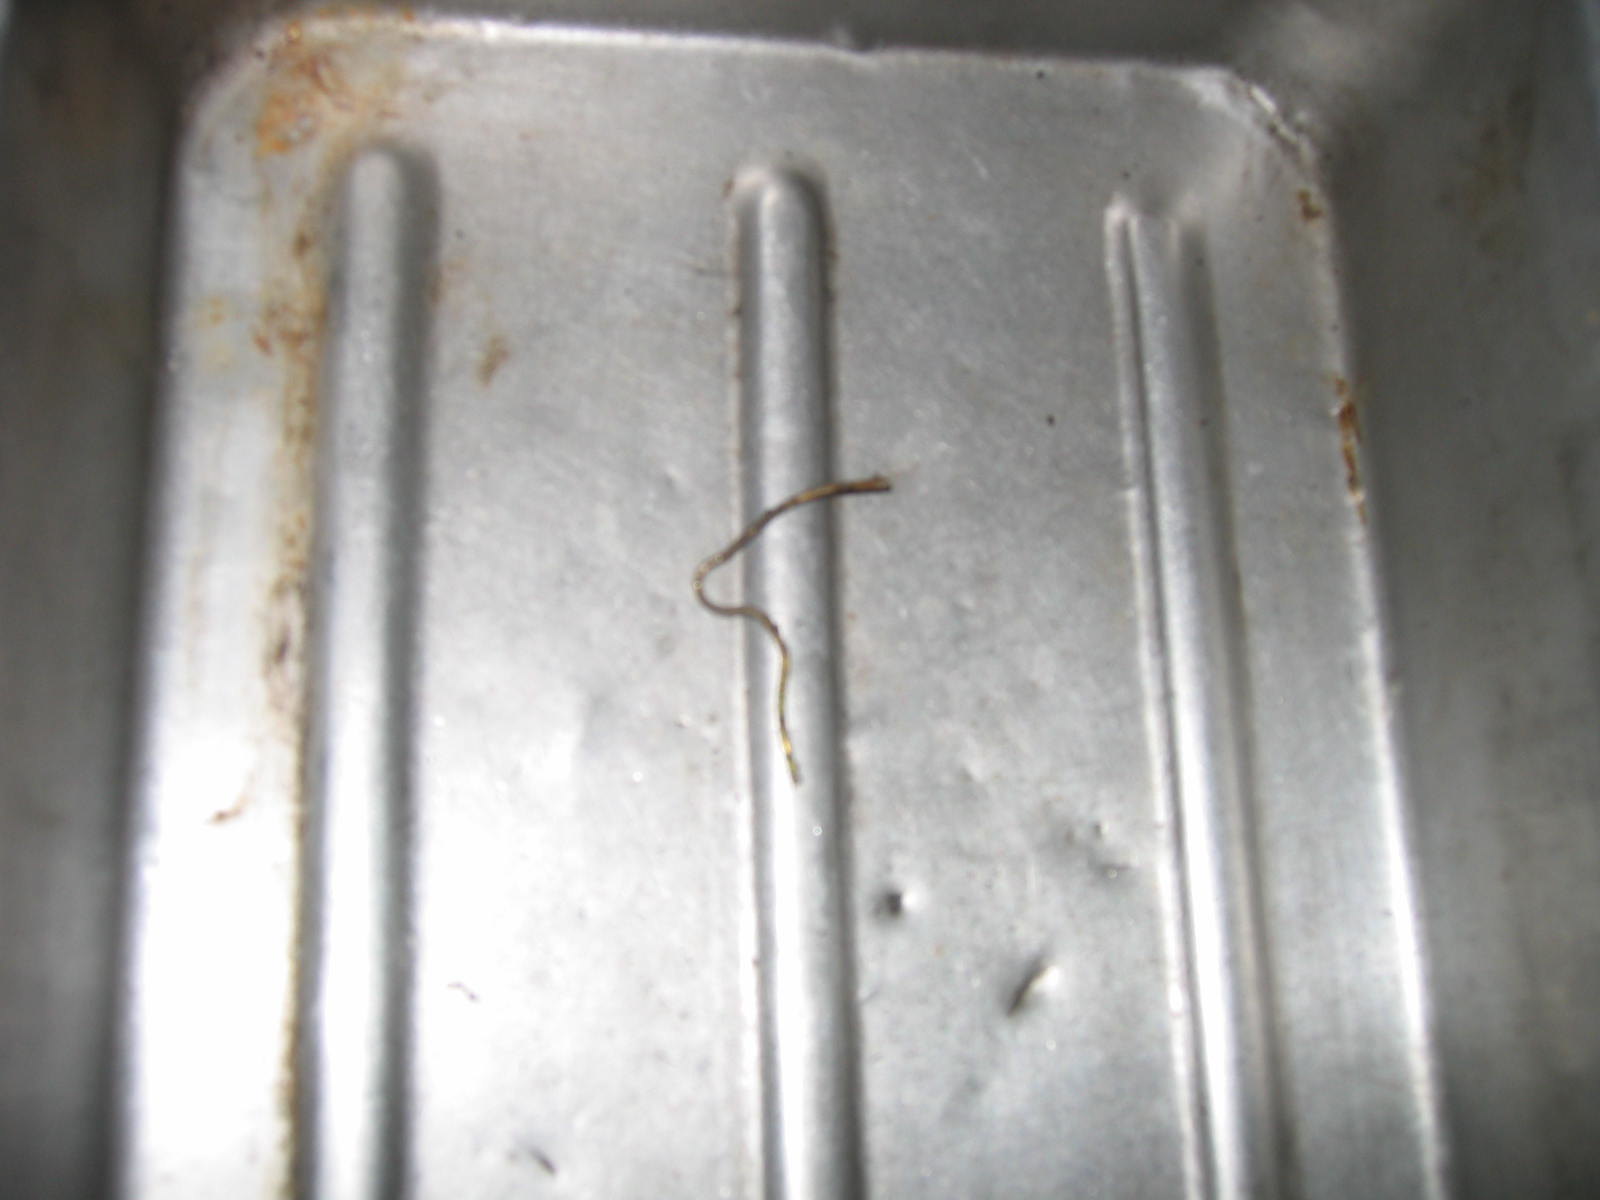 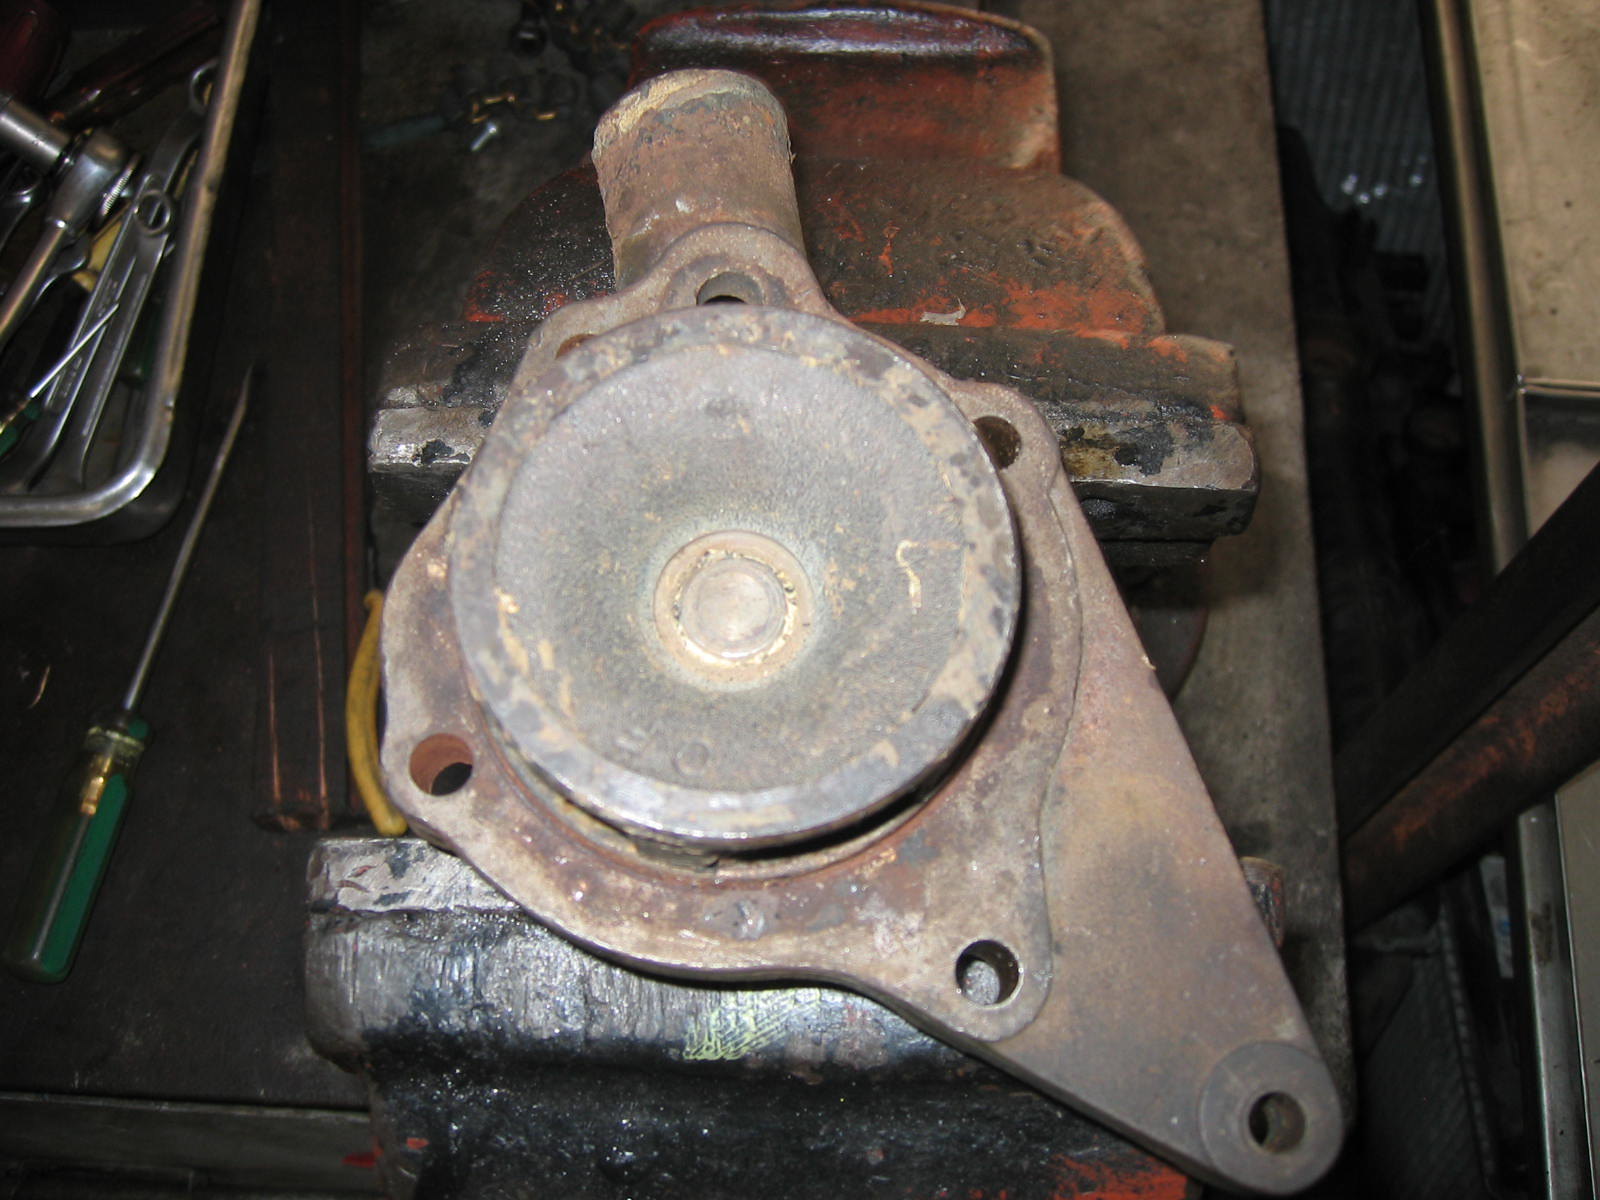 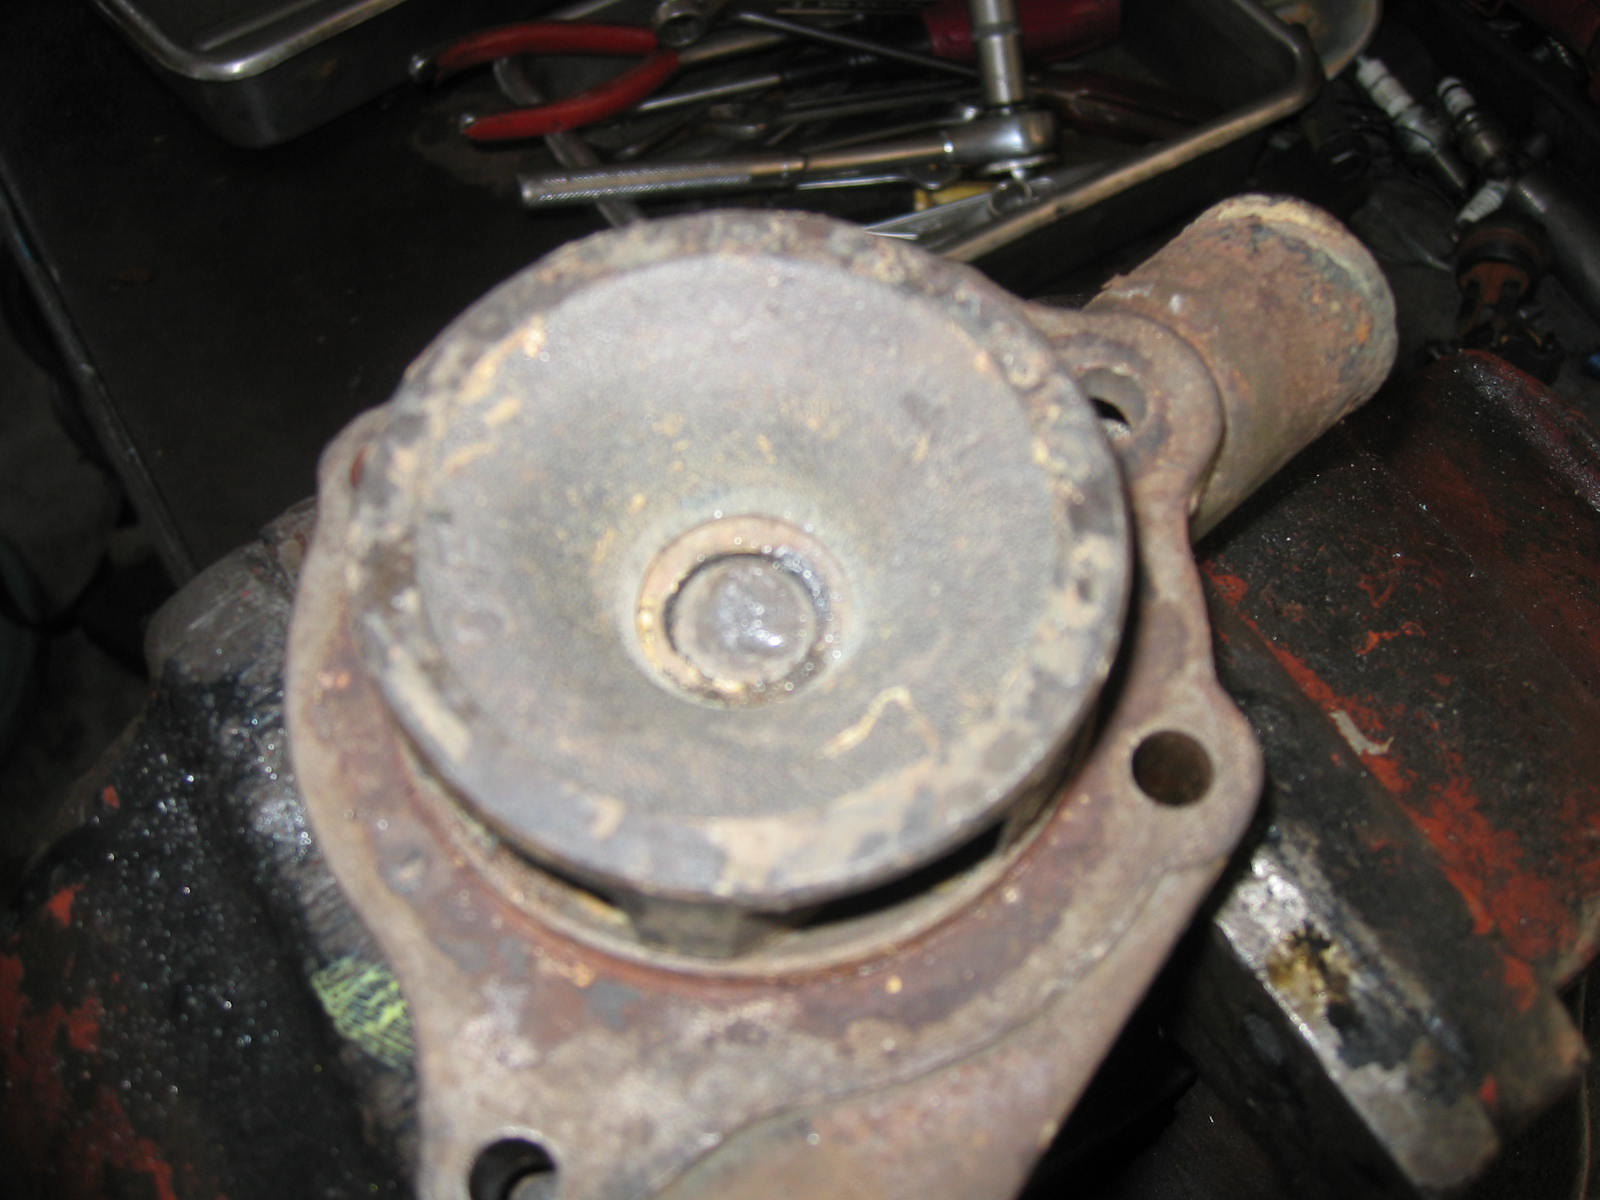 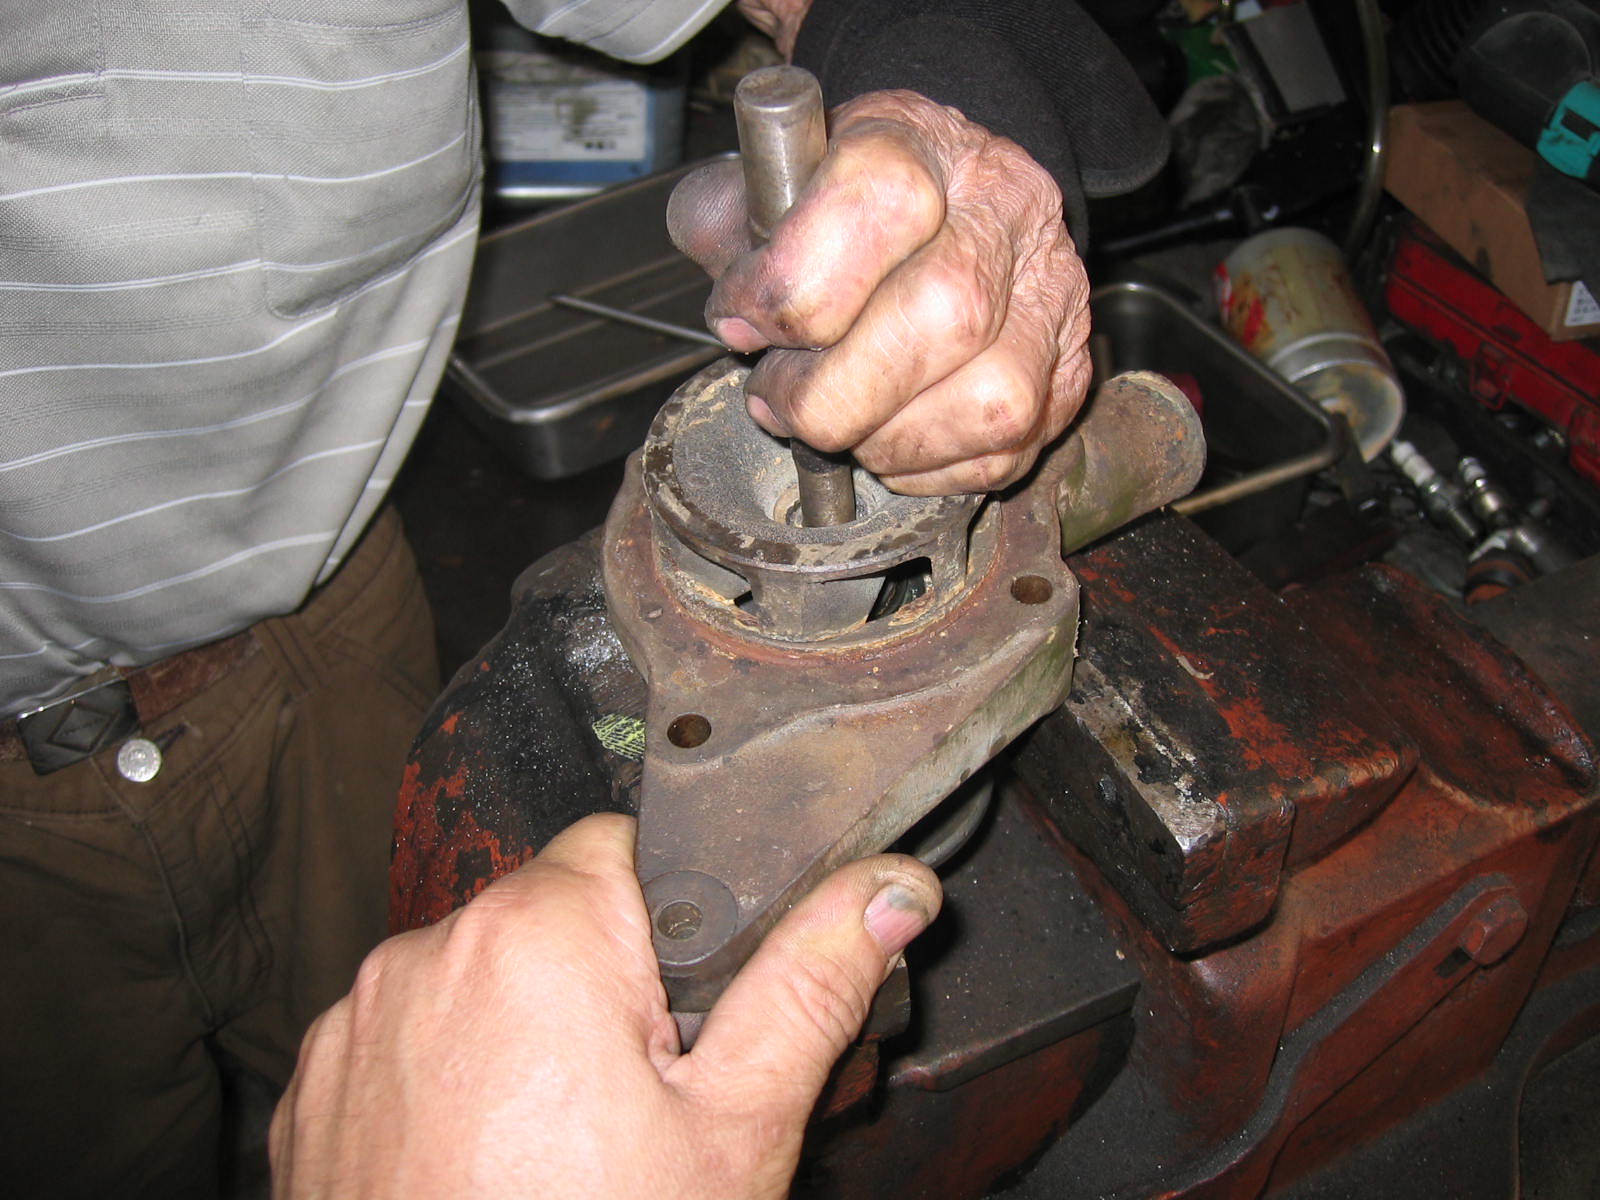 Now you need to remove the impeller, which is not difficult to do so. If not, you need to put the water pump at the right angle in a pressing machine and try to heat the impeller with fire and than press the bearing down very slowly. This time we just got it out by hammer and a little tool with a little force as we have done it before. But we never do the same job on a RR or Jaguar as the material has to be taken into account. 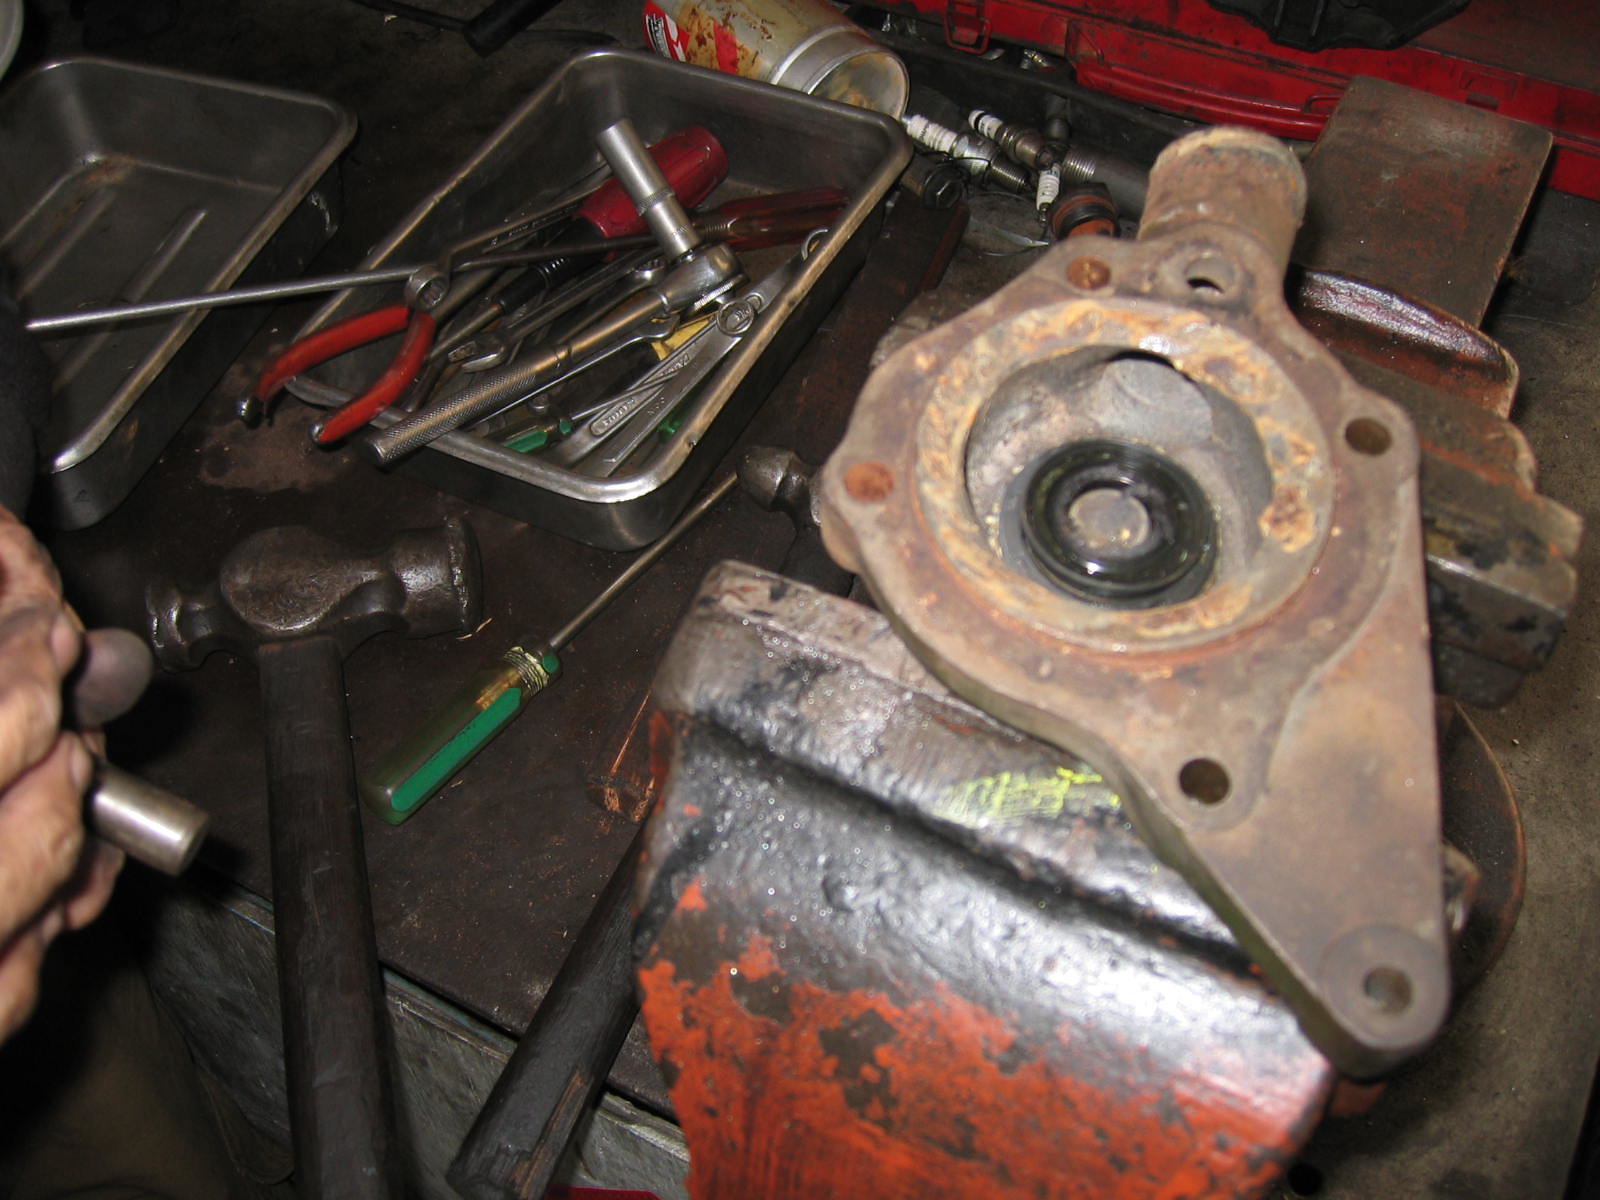 The impeller is removed. You can continue to hit the bearing very slowly with a hammer and a tool until the bearing with pulley boss comes apart. Or you use a pressuring machine to do so very slowly. Sorry for not having pictures of taking them apart here.My both hands holded the water pump tight in the air and father did the hitting job slowly. 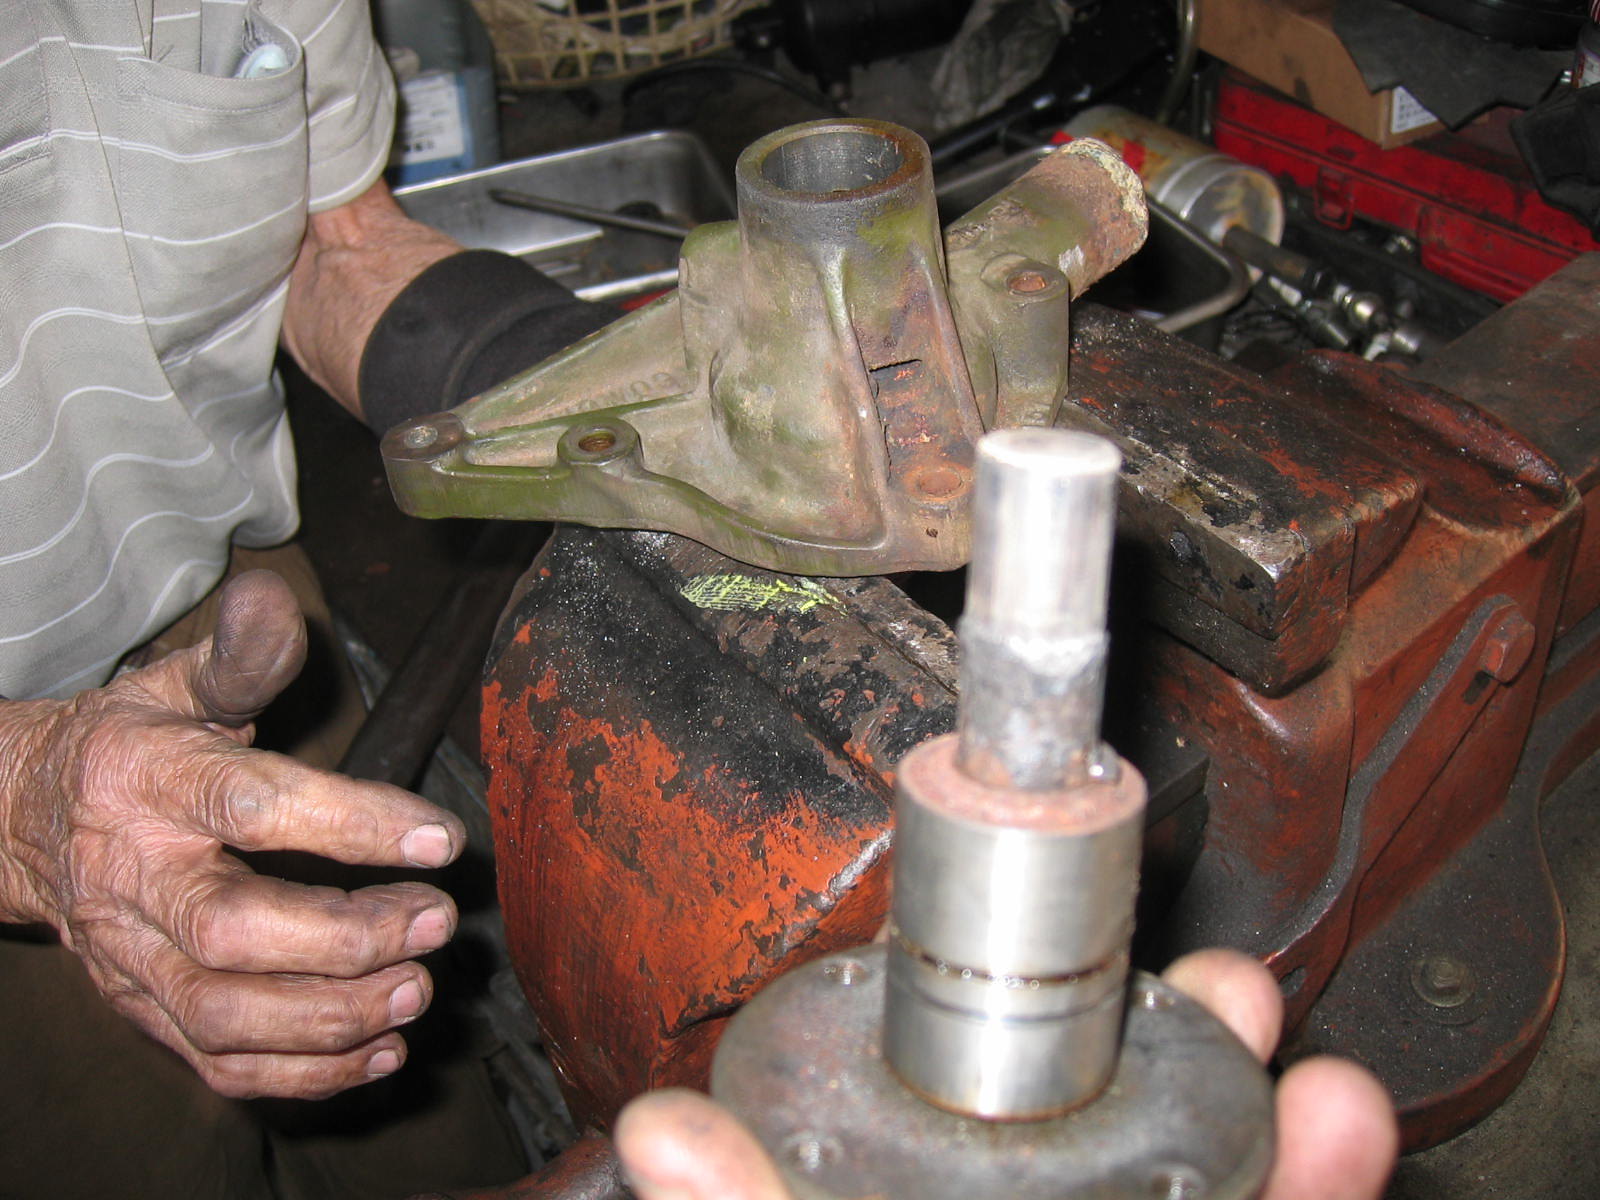 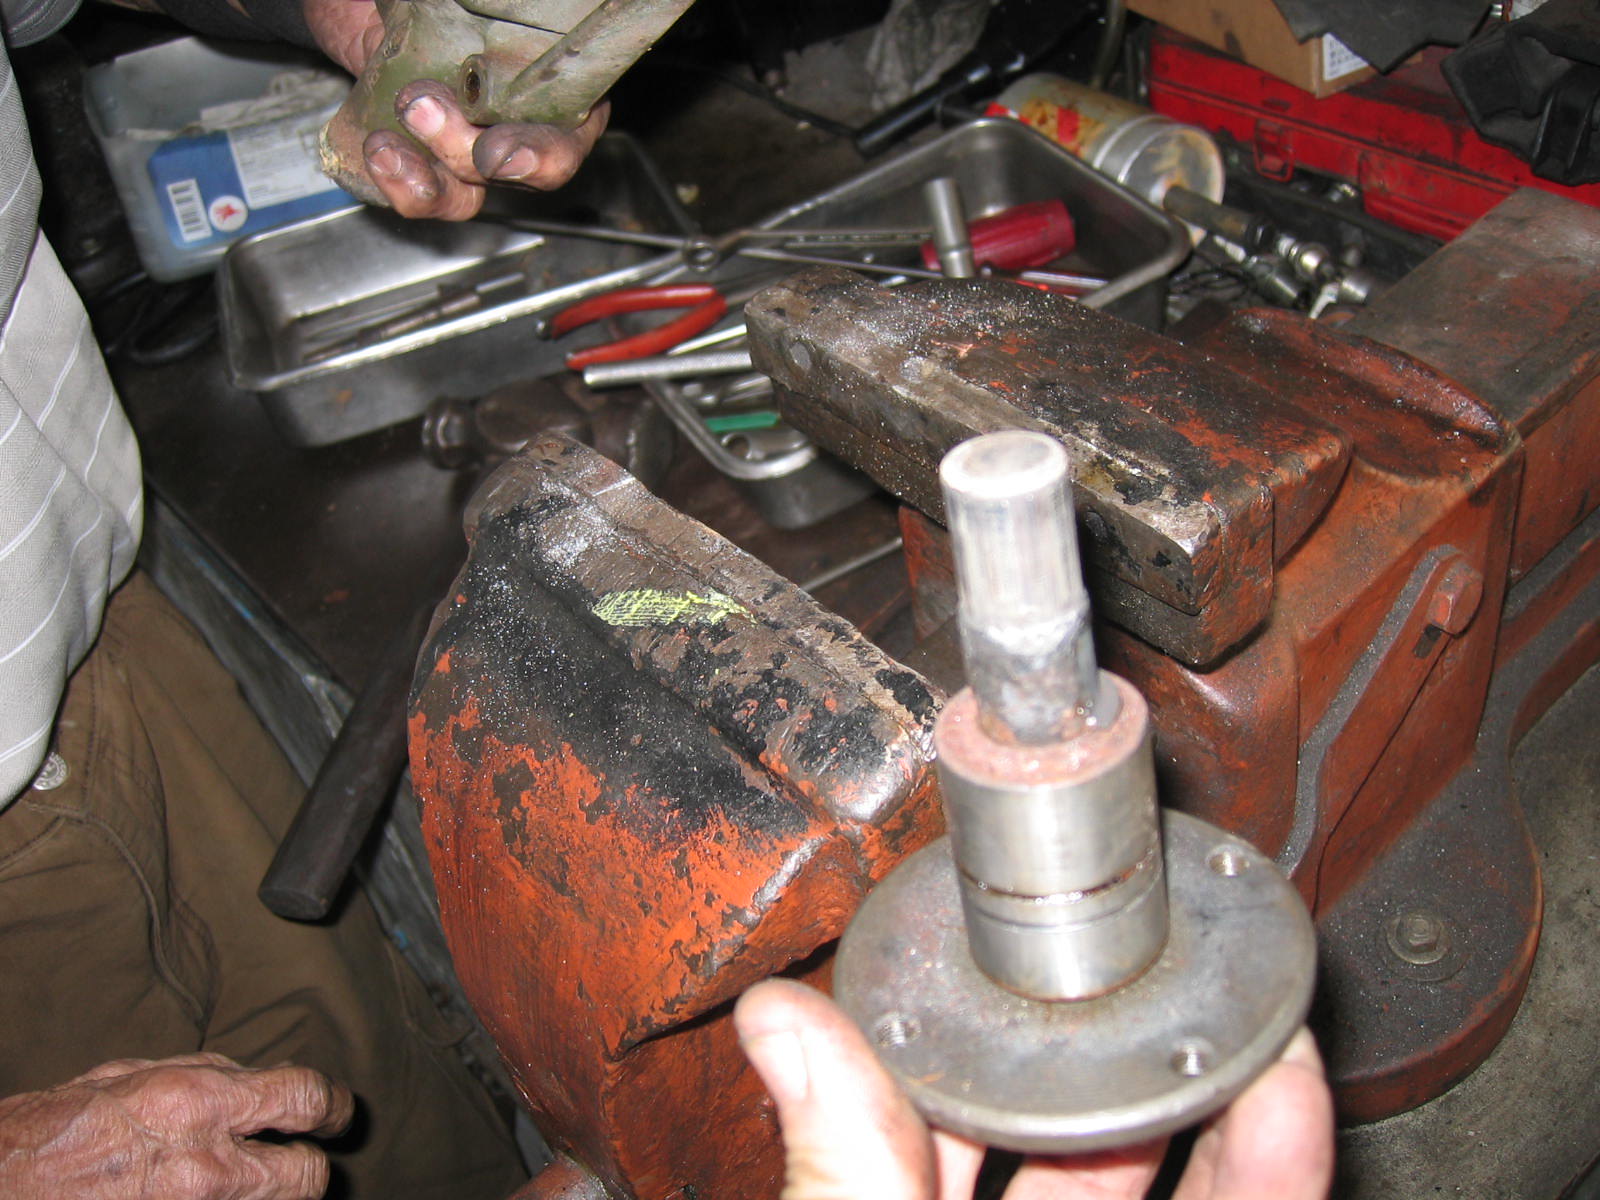 The bearing and pulley boss are also taken off together. 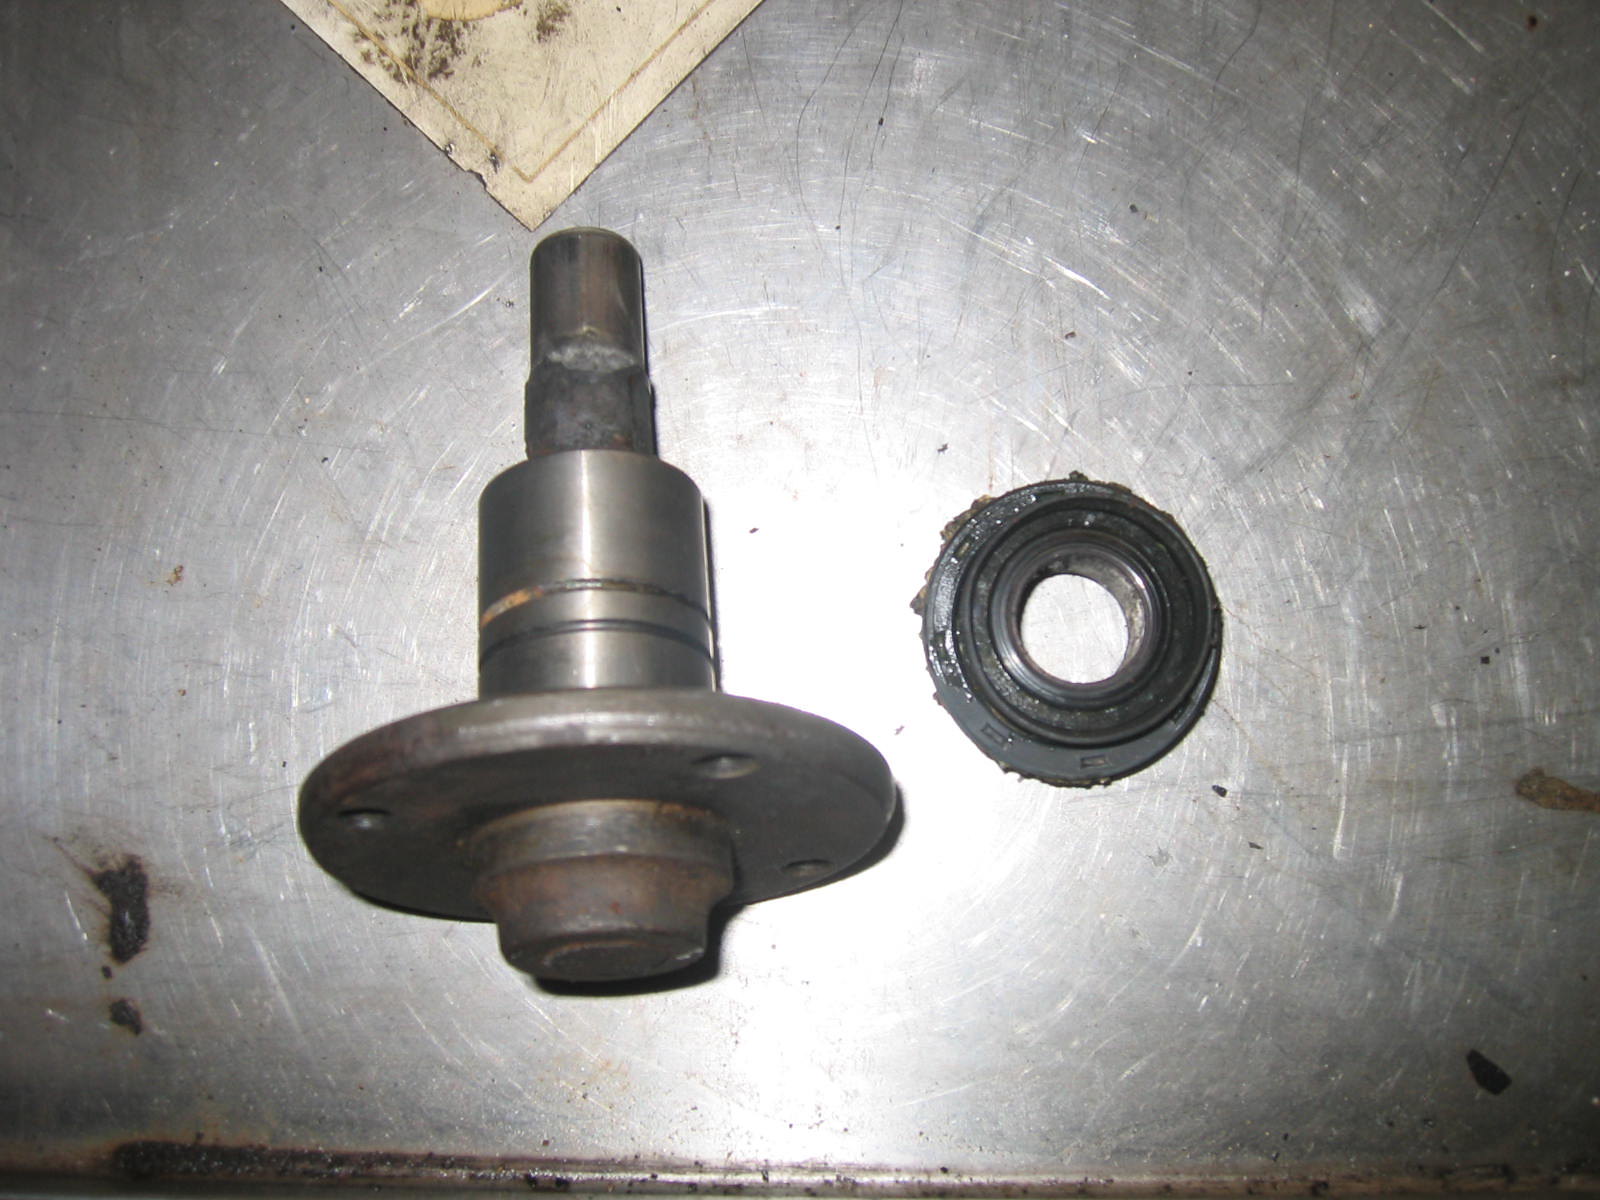 Bearing with pulley boss and the seal. Now the next is to remove the pulley boss from the bearing. 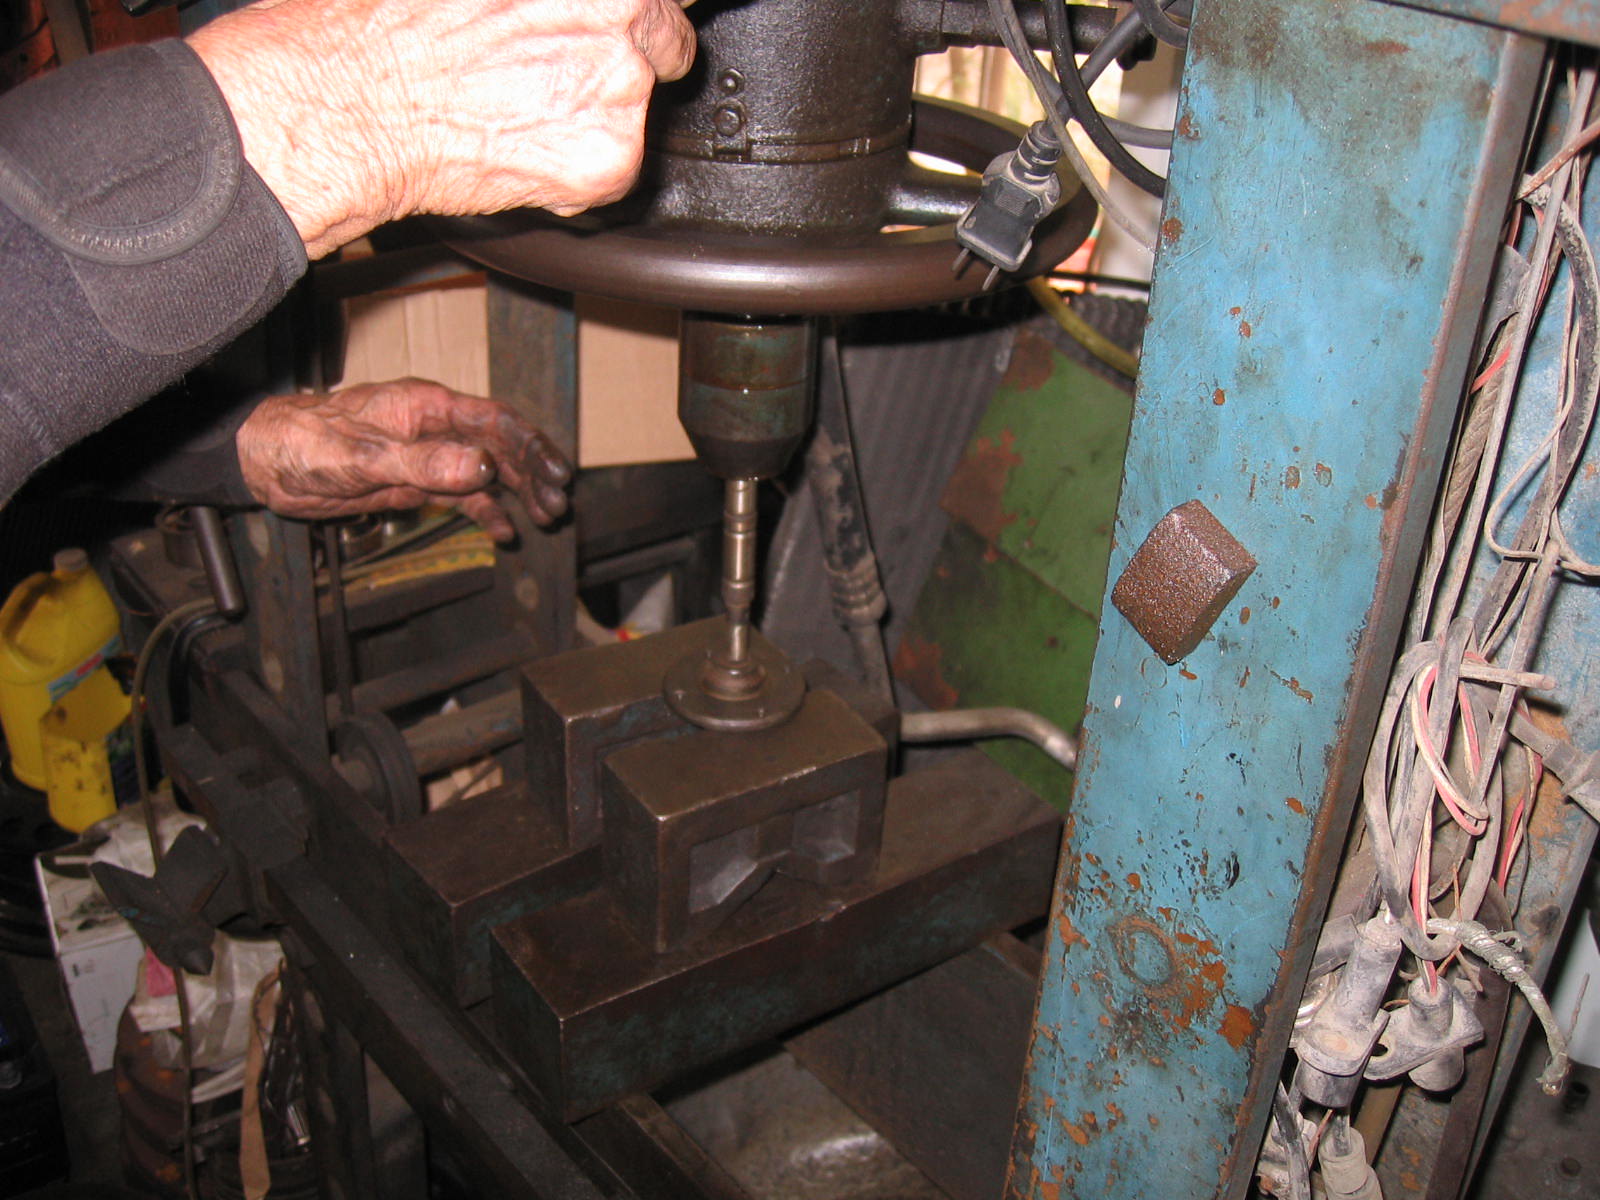 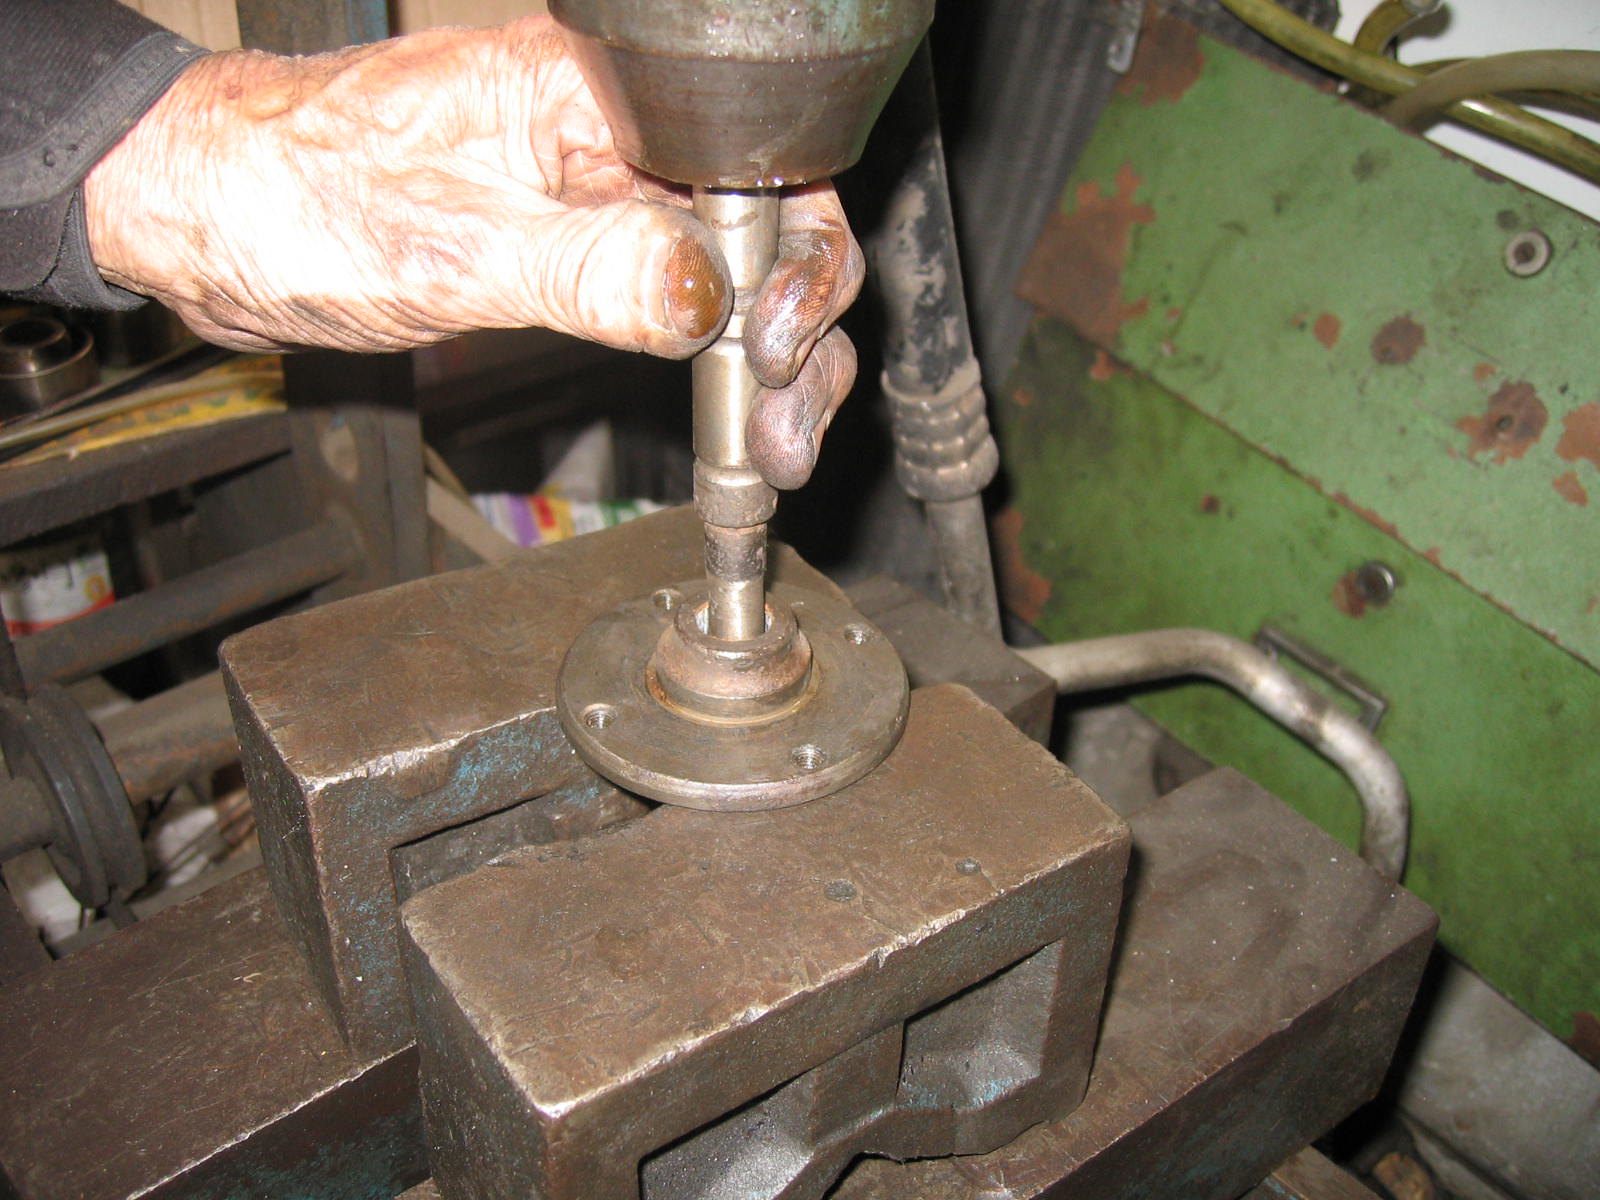 We didn't want to make any mistake. We had to use a pressing machine. 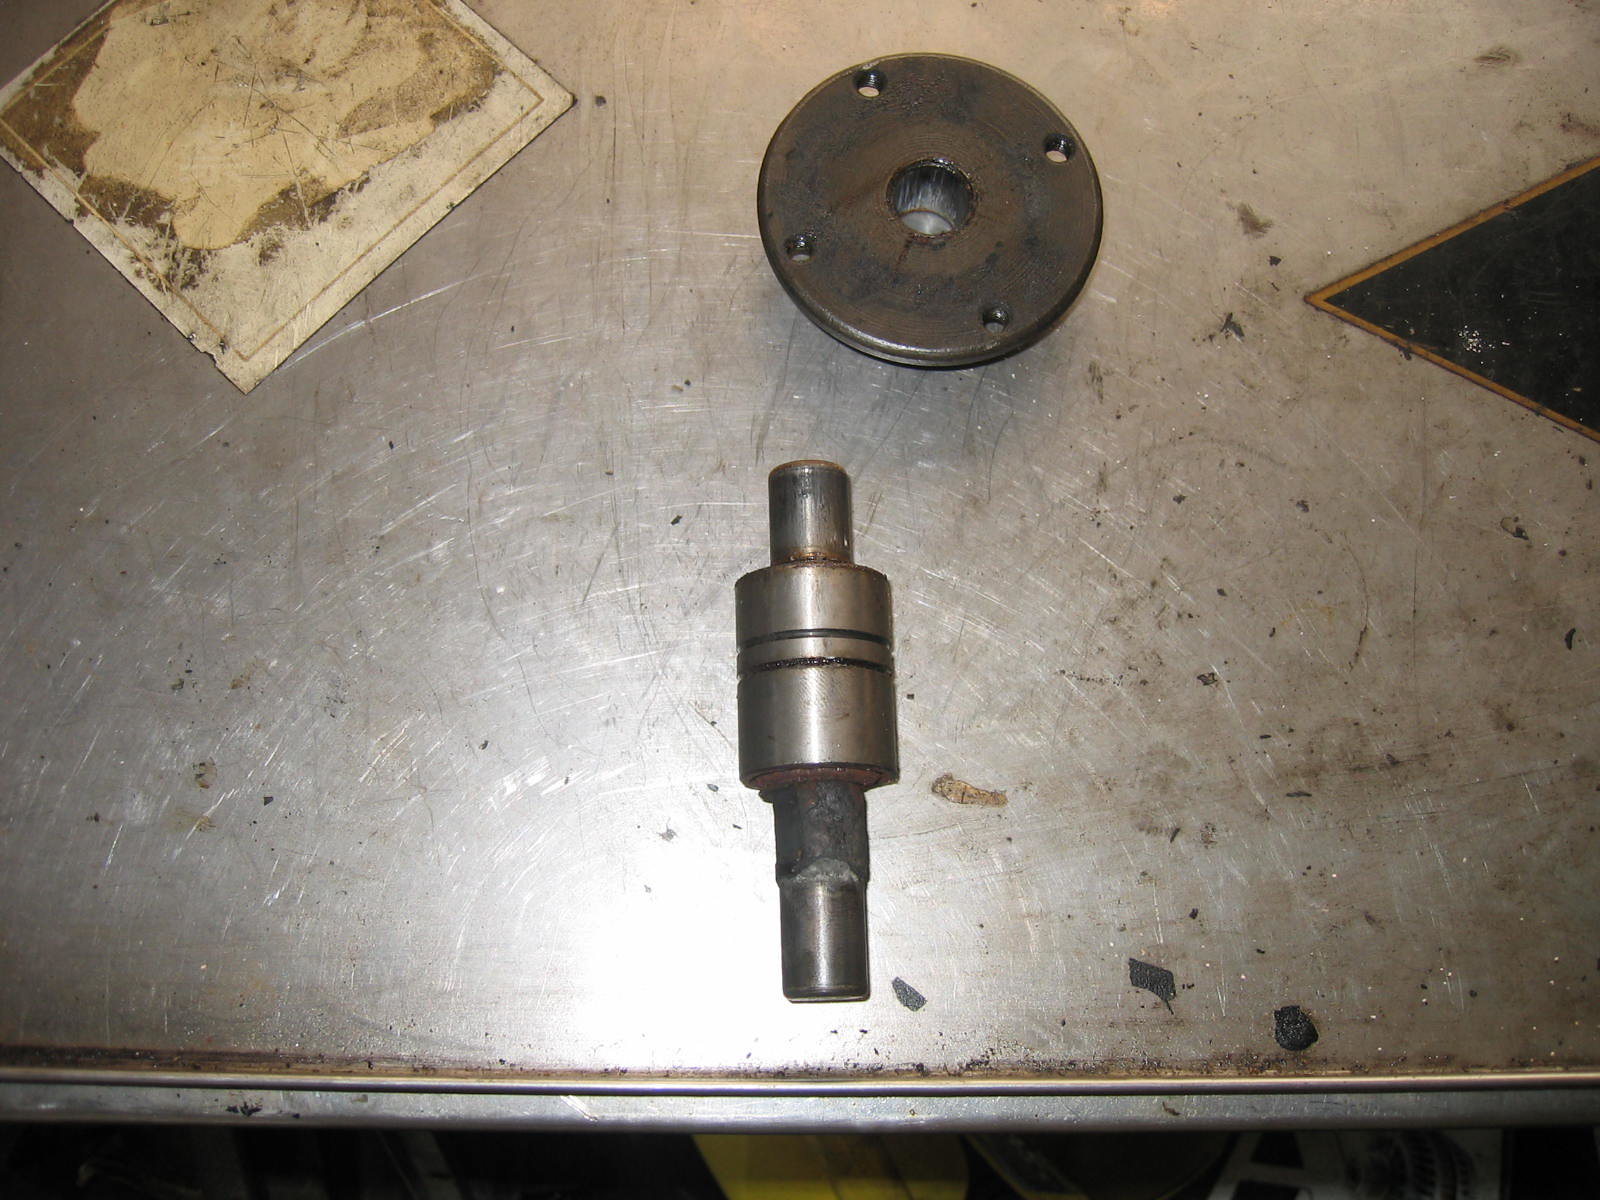 Came apart. 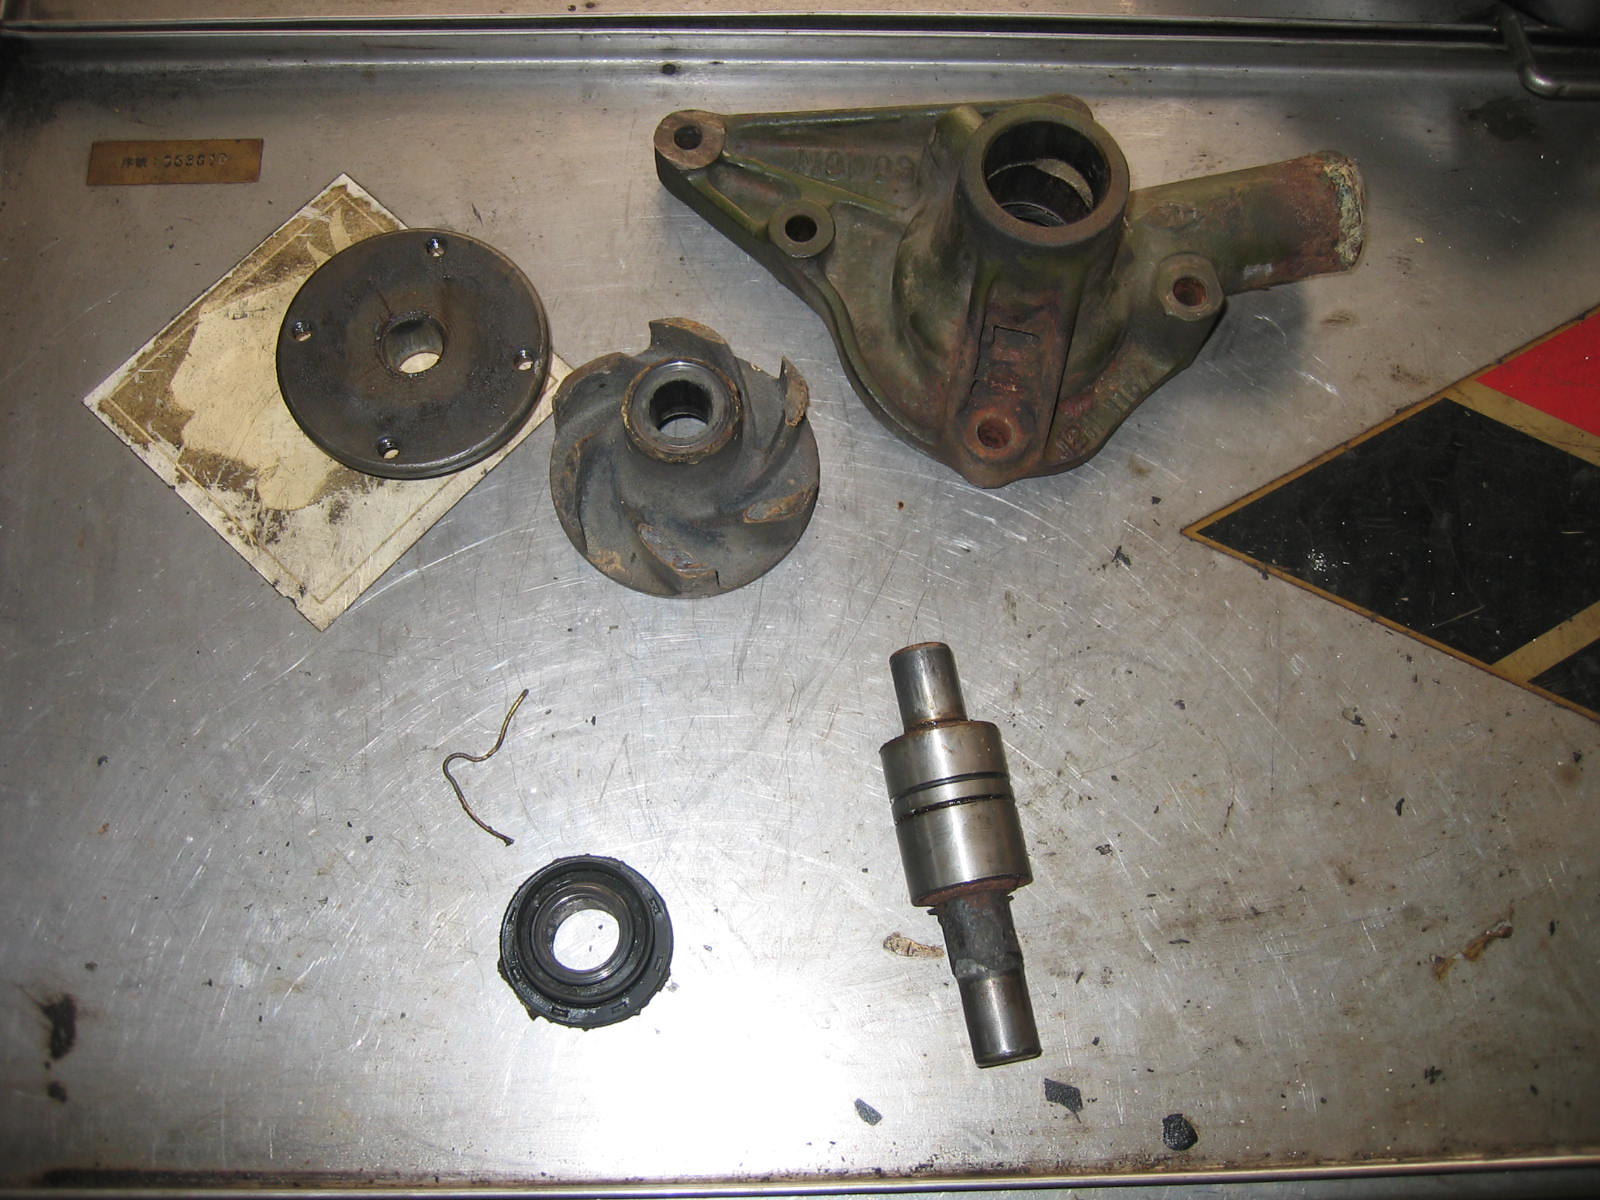 There are just 6 item that can be assembled to be a water pump. Now we have to buy the bearing and the seal. |
|
|
|
Post by tony on Mar 24, 2015 0:33:37 GMT
I just got a reply from Matt telling me they can delivery any item to my country, which is a good thing.
Regards
Tony
|
|
|
|
Post by tony on Mar 21, 2015 7:41:30 GMT
Thanks, Chris.
But they DON'T delivery any item to my country. I have written them a letter.
Regards.
Tony
|
|
|
|
Post by tony on Dec 29, 2014 1:41:51 GMT
Thanks for sharing the amazing story. To me, it's really cold in your place.
Regards
Tony
|
|


