|
|
Post by mistersocks on Jan 4, 2014 20:46:04 GMT
Hi All,
Ive just treated myself to another landcrab. My initial plan was to break it and use the spares liberated from it to continue the restoration of my other two crabs. But I didnt have the heart to take the axe to it when it arrived, so its now being worked on...
Does anybody have experience of, or an idiots guide to, remove and replace the o/s/f displacer unit?
I'm thinking it may have to go to the local garage (as I no longer have a garage or workshop), but if it can be done relatively straightforwardly then I'd have a go myself.
Thanks in advance
Rich.
|
|
|
|
Post by Penguin45 on Jan 4, 2014 21:09:28 GMT
Hello Rich, where have you been hiding?
Dead easy to fix - disconnect brake line and hydro line. Disconnect tie-rod. Undo nuts around the suspension housing and pull it outwards as an assembly. Displacer will be revealed, pull it out.
Chris.
|
|
|
|
Post by mistersocks on Jan 4, 2014 21:42:25 GMT
Hi Again Chris,
Many thanks for your speedy and informative reply, it almost sounds too easy! I'm off with a torch and some axle stands to make a start on it now, even if its just spraying bits with duck oil to ease the dis assembly process tomorrow!
I have been rather quite it seems for about two years, sorry I havent had a greater input into the forum. We had to sell our farm 18 months ago and have moved to a small house with no garage, and we now have a 2 year old son who keeps me on my toes. His favourite toy is a vanguards 18/85 and at 2 years old he knows the difference between a wolseley 18/85 and an austin 1800! my other crabs and 1300's are in storage. luckily the neighbours arent adverse to a bit of spannering and choice language from my house.
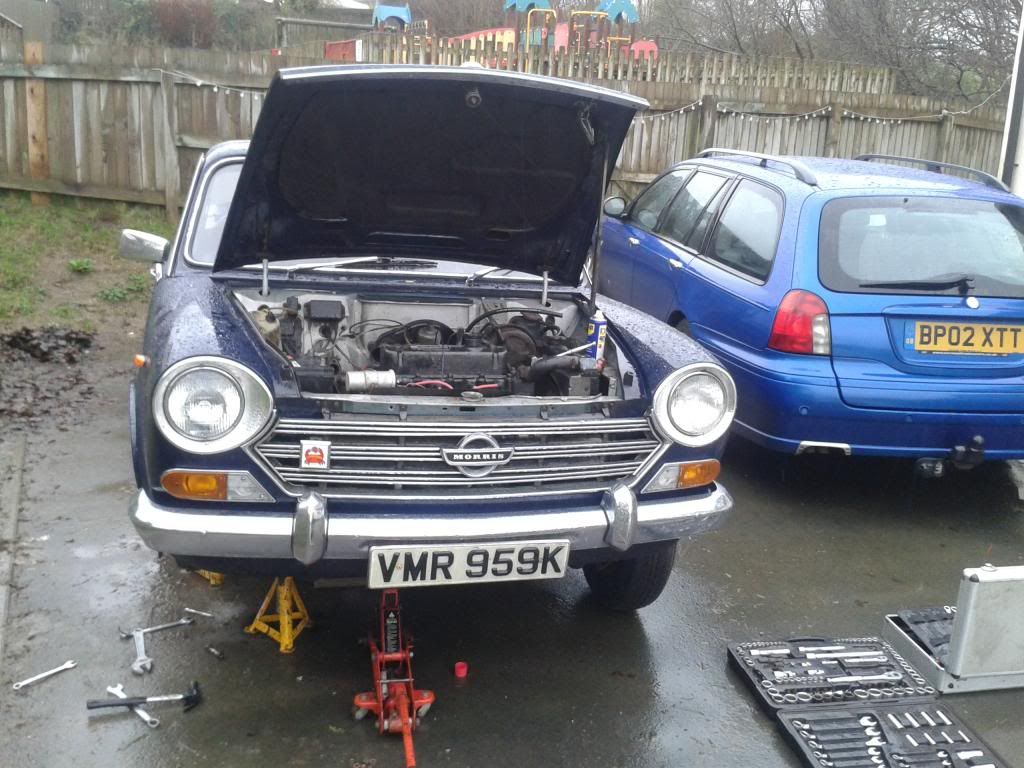
I bought the blue morris 1800 that was recently on ebay, and its spurred me on to get stuck back into my projects!
Hopefully I'll have more of an input on the forum again!
Hope you are well,
Best Regards
Rich.
|
|
|
|
Post by dave1800 on Jan 5, 2014 2:01:30 GMT
Easy peasy  . Probably worth spraying with WD40 I seem to recall problems with the lower housing bolt requiring heat to free it one of the cars I dismantled. David Hello Rich, where have you been hiding? Dead easy to fix - disconnect brake line and hydro line. Disconnect tie-rod. Undo nuts around the suspension housing and pull it outwards as an assembly. Displacer will be revealed, pull it out. Chris. |
|
|
|
Post by mistersocks on Jan 5, 2014 12:41:29 GMT
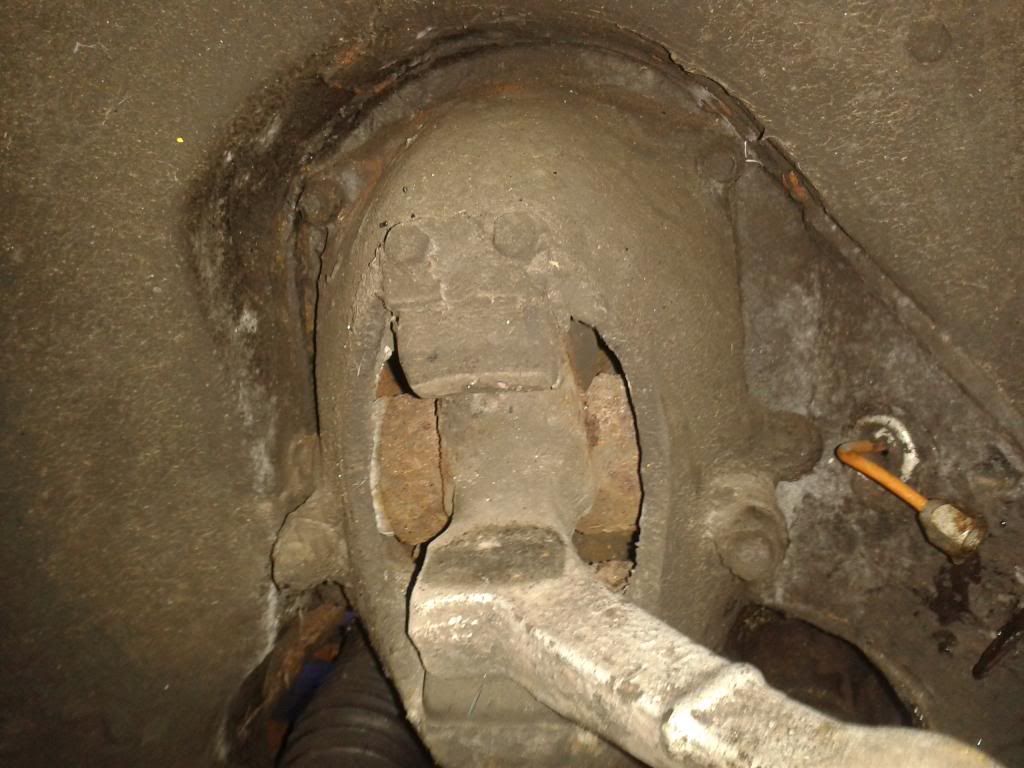
Hi Again, Removal is going slowly in not exactly ideal working conditions... Think I'm heading down the right route, but could anybody tell me if the four nuts visible in this pic are the ones I need to undo to remove the suspension housing? two above small ones one either side of the bumpstop and two bigger ones one either side of the upper arm? cheers! rich.  |
|
|
|
Post by dave1800 on Jan 5, 2014 13:12:10 GMT
Yes, the four you have described PLUS the big one at the bottom below the suspension lower arm that goes through the body strengthening. That's the one I had problems with and needed a blowtorch as the long bolt corrodes. Use plenty of WD40 or equivalent. regards David Hi Again, Removal is going slowly in not exactly ideal working conditions... Think I'm heading down the right route, but could anybody tell me if the four nuts visible in this pic are the ones I need to undo to remove the suspension housing? two above small ones one either side of the bumpstop and two bigger ones one either side of the upper arm? cheers! rich.  |
|
|
|
Post by tommydp on Jan 5, 2014 13:31:40 GMT
Perhaps obvious, but disconnect the two U-clamps holding the drive shaft to the rubber drive coupling. You could of course leave them and withdraw the coupling and short shaft going into the differential too, but risk damaging the splines and losing oil.
The assembly is rather heavy. Pay attention to the drive shaft as you pull it out. It's easy to damage the sliding joint rubber boot, as the drive shaft rubs against the body. Yes, talking from experience:-) Not a bad idea to have an assistant.
Good luck! This is easier than you would think.
Tommy
|
|
|
|
Post by mistersocks on Jan 5, 2014 13:42:08 GMT
Hi Again, Thanks David and Tommy! Just popped in for a quick brew which is probably a big mistake as I'm cold and wet.... Got the four nuts undone and am psyching myself up for the big'un. I'll disconnect the driveshaft as I'm working alone and want to make it as easy as possible. Probably jinxing it, but so far everything has come undone easily! Cheers Rich.  |
|
|
|
Post by tommydp on Jan 5, 2014 14:11:46 GMT
Oh, what a beauty! The twin of my blue one, I think:-)
In my experience, except once, all nuts involved in this work have come off easily. Looked like it had been undersealed too, which gives better odds for it.
On the bottom one, unscrew the nut first so it covers the threads of the screw. Try tapping it lightly. Use lots of WD40 etc around the screw head and at the joint between the housing and body of the car. Don't panic if the screw itself won't turn. There is a chance its corroded to the housing, and not the car's body. In this case, the housing could still come off, with the screw still in it.
I could be wrong, but in my experience the screw is often stuck in the housing, rather than the body. I always grease this screw when reassembling in case it will have to come off later..
I'd mark the drive shaft to coupling orientation, for the same reassembly. Perhaps not necessary, but you never know. Don't tighten up the U- clamps until the ride height is correct.
T
|
|
|
|
Post by mistersocks on Jan 5, 2014 18:45:09 GMT
Hi Tommy,
Thankyou again for your tips, they are all very much appreciated!
I'm really pleased with my latest acquisition, especially as it was only bought to break for spares to enable me to complete my other two cars. It is the Bath car that Chris posted on here a few weeks ago. When it arrived it was much better than I was expecting. All thats left to do is the brakes, clutch hydraulics and to get it running. Ive got a nice spark at the plugs and have cleaned the fuel system, so it should be a runner soon! Mrs Socks has told me it was either to be broken for parts or to be sold once it is MOT'd, but I think it might be my 40th birthday present to myself. Besides, my other two are austins, so I dont have any Morrises....
Had to stop dismantling when the rain became to bad this afternoon, but all is apart and loosely re-assembled so I dont lose any parts. Hopefully it will all be back together next weekend!
And you're right, our cars could be twins. Morris variants seem to be less common than the Austins, but they're all good as far as I'm concerned!
Cheers
Rich
|
|
|
|
Post by dave1800 on Jan 6, 2014 6:25:55 GMT
Yes, a fine looking car. Tommy's suggestion of greasing the bottom bolt is a good one. I found that changing the bushes in the lower suspension arm could often be difficult especially the early type; my solution was to loosen the nuts and bolts holding the housing allowing it to move out enough to make the removal of the lower arm easier. Also don't overtighten the U clamps. good luck David Oh, what a beauty! The twin of my blue one, I think:-) the bottom one, unscrew the nut first so it covers the threads of the screw. Try tapping it lightly. Use lots of WD40 etc around the screw head and at the joint between the housing and body of the car. Don't panic if the screw itself won't turn. There is a chance its corroded to the housing, and not the car's body. In this case, the housing could still come off, with the screw still in it. I'd mark the drive shaft to coupling orientation, for the same reassembly. Perhaps not necessary, but you never know. Don't tighten up the U- clamps until the ride height is correct. T |
|
|
|
Post by indianajones on Jan 19, 2014 0:19:08 GMT
Oh is that an MG ZT I see?  -Andrew |
|
|
|
Post by Penguin45 on Jan 25, 2014 0:36:49 GMT
Have you done it yet, Rich?
Chris.
|
|
|
|
Post by mistersocks on Jan 25, 2014 20:36:07 GMT
Andrew - Yes indeed, its a ZT-T CDTi, I'm a glutton for punishment... Its my second ZT, had to sell the original one (a 2.5 V6) as I couldnt stomach the sub 30 mpg on a daily basis. Its a really nice car but it might be on its way. I originally bought the latest landcrab to break for spares but its almost ready for MOT now and I'm thinking of using it as my daily driver. Just gotta convince mrs socks its the way forwards...
Progress has been slow and steady, but its certainly looking alot less lopsided now! Ive replaced the displacer and re-pumped the suspension, looking better although the rear end is a bit reluctant to come up. More investigation required there so I'll be picking your brains again on that one!The dispacer I took out had a ruptured pipe, but the unit itself looked brand new, so I'll be speaking to a local agricultural merchants about having the split hose replaced.
All in all I've spent about 22 hours on the car so far and have managed the following:
1) Replaced the front displacer.
2) Given the engine a full service (oil, oil filter, plugs, leads, points, condensor, rotor arm and distributor cap).
3) Drained and flushed the fuel tank and line and fitted an in line fuel filter.
4) Rebuilt the brake master cylinder, bled brakes.
5) Rebuilt clutch slave cylinder, fitted new clutch master cylinder and bled clutch hydraulices.
6) Stripped, cleaned and rebuilt the carb.
7) Drained flushed and refilled the cooling system.
With the exception of the oil, antifreeze and clutch master cylinder, all the parts I needed were in the boot of the car. And to top it off, as I was packing my tools away this evening my next door neighbour carted a big roll of burgundy carpet towards the bins. Needless to say its now in the landcrabs boot and I'll be buying some contact adhesive next week...
I finally got it running today and considering it hasnt run for 12 years it all went surprisingly well. Tomorrow (weather permitting) I'll run the engine up to full temperature, set the carb up properly and have a go at freeing the stuck clutch!
Cheers
Rich
|
|


 . Probably worth spraying with WD40 I seem to recall problems with the lower housing bolt requiring heat to free it one of the cars I dismantled.


