|
|
Post by dave1800 on Aug 28, 2022 13:24:44 GMT
Sorry to see the tin worm hasn't taken a holiday it's a never ending battle. Hope the skimming goes well.
David
|
|
|
|
Post by Penguin45 on Aug 28, 2022 16:18:25 GMT
Cheers. Out of context, but one N. Young nailed it with his 1979 album - "Rust Never Sleeps". Anyway:  AFewMomentsLater AFewMomentsLater by Penguin 45, on Flickr Actually, it was a mornings work to get it vaguely correct.  VOF707J VOF707J by Penguin 45, on Flickr A little bit more filler work than I expected.  VOF707J VOF707J by Penguin 45, on Flickr Three coats of high build primer, followed by a thorough flatting back with 400 grit.  VOF707J VOF707J by Penguin 45, on Flickr With an immaculate sense of timing, the sun crept round the end of the garage in time for the top coats. Three coats of Damask. Meanwhile:  VOF707J VOF707J by Penguin 45, on Flickr Petrol flap got dealt with. Needed a surprising amount of work before three coats of primer.  VOF707J VOF707J by Penguin 45, on Flickr And after three coats of Damask. Looks almost respectable. All for today, Chris. |
|
|
|
Post by Penguin45 on Aug 29, 2022 16:32:01 GMT
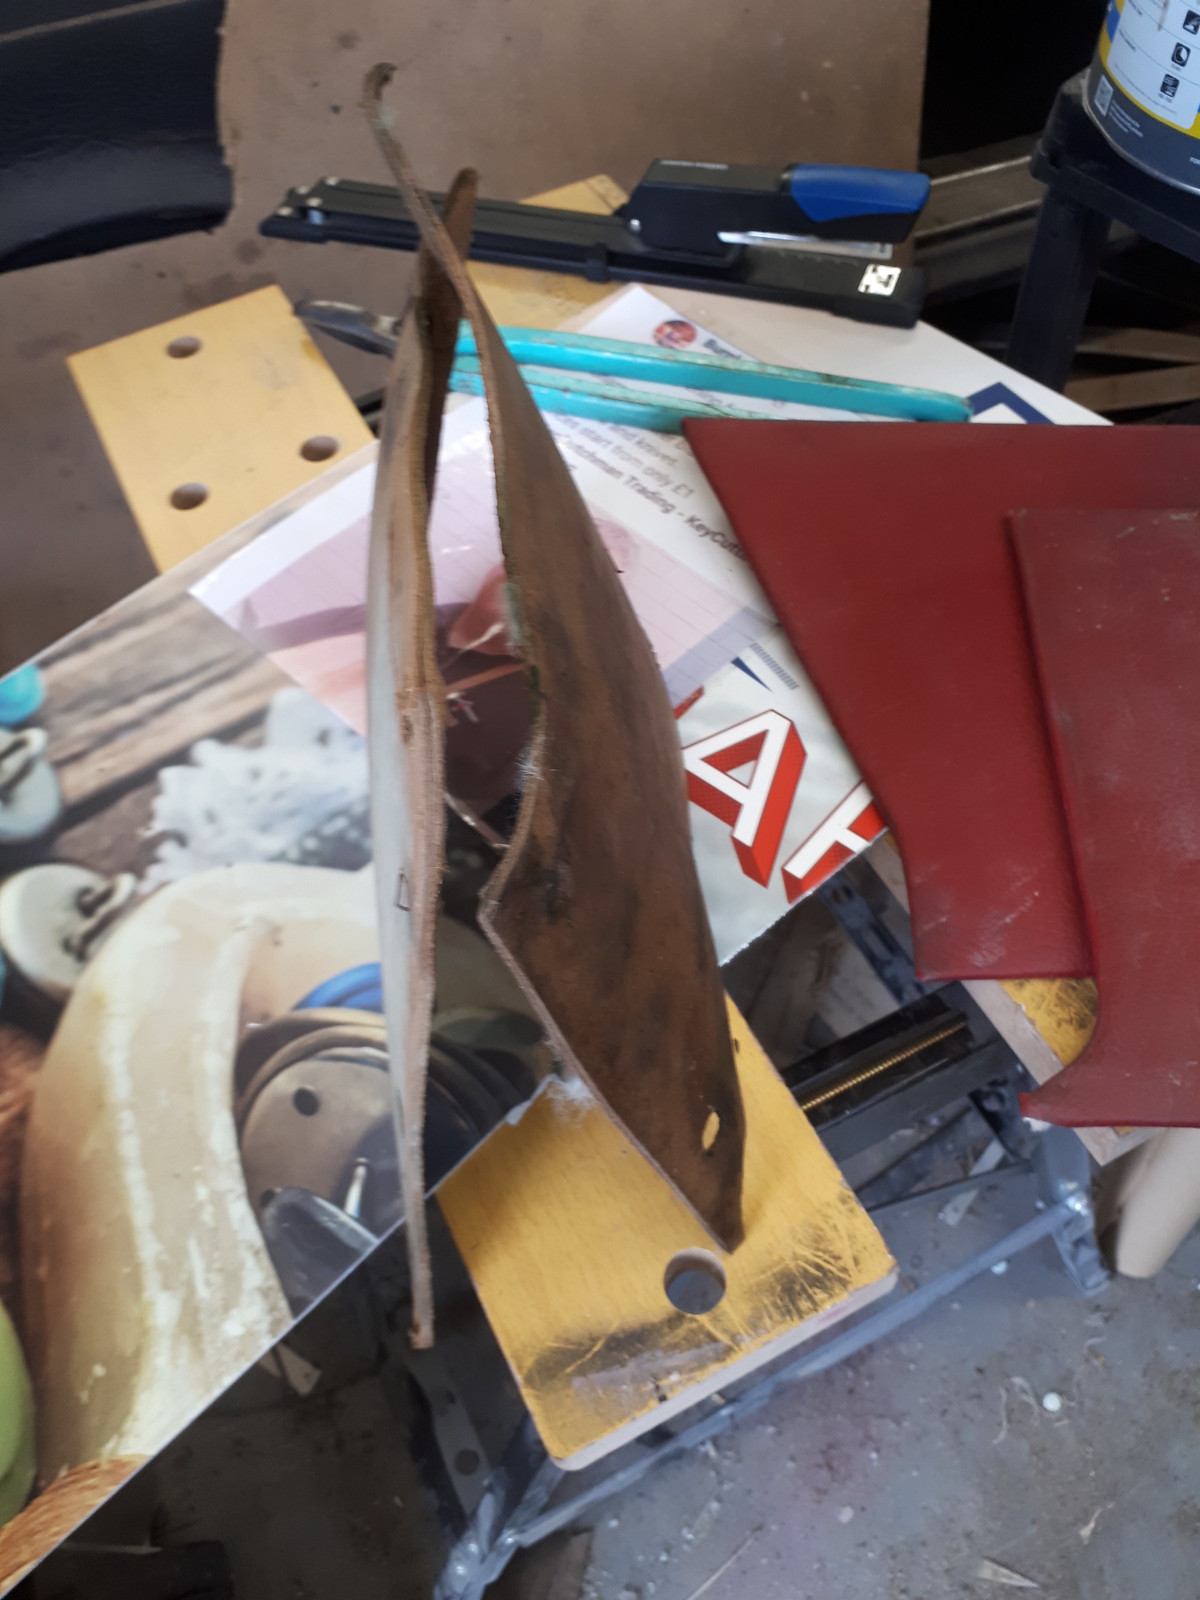
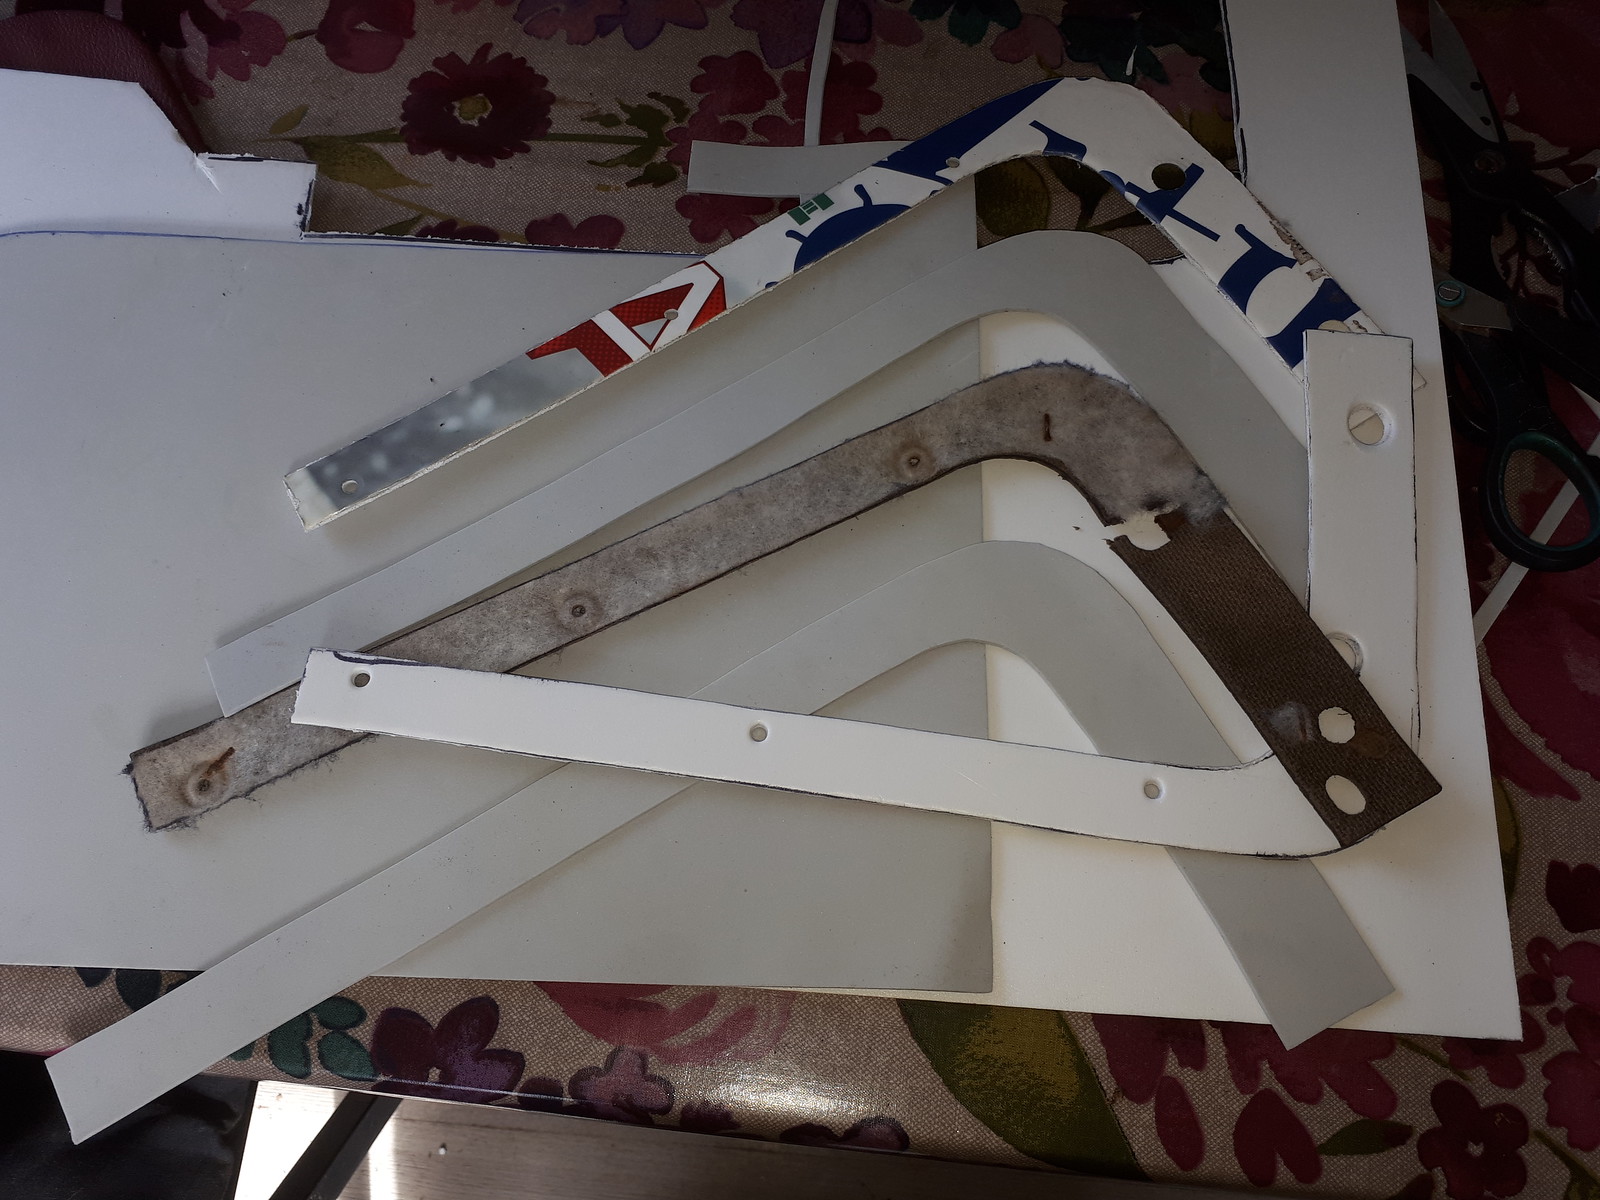
 VOF707J VOF707J by Penguin 45, on Flickr Masking removed this morning, flap back on and it doesn't look too bad. The rest of the car is covered in filler dust, so that will have to go. But not today. I fancied something a little more sedate after the last couple of days. Trim panels, then.  VOF707J VOF707J by Penguin 45, on Flickr "A" post trim panels to be precise. Look at them - warped to blazes. No wonder they keep falling off. They've only lasted 52 years. Shocking.  VOF707J VOF707J by Penguin 45, on Flickr Out with a plastic advertising board MrsP saved from Burnley market. The Gilbows and wad punch made pretty short work of it.  VOF707J VOF707J by Penguin 45, on Flickr Bang in some staples.  VOF707J VOF707J by Penguin 45, on Flickr Give them a damn good scrub with the kitchen surface cleaner and a scourer. Before and after quite surprising.  VOF707J VOF707J by Penguin 45, on Flickr And back home again. Unfortunately shows up how faded other areas are! Still, these won't warp if they get damp, so hopefully a permanent fix. Started doing some work on seats, but there's nothing to see yet. Chris. |
|
|
|
Post by Penguin45 on Sept 4, 2022 19:29:41 GMT
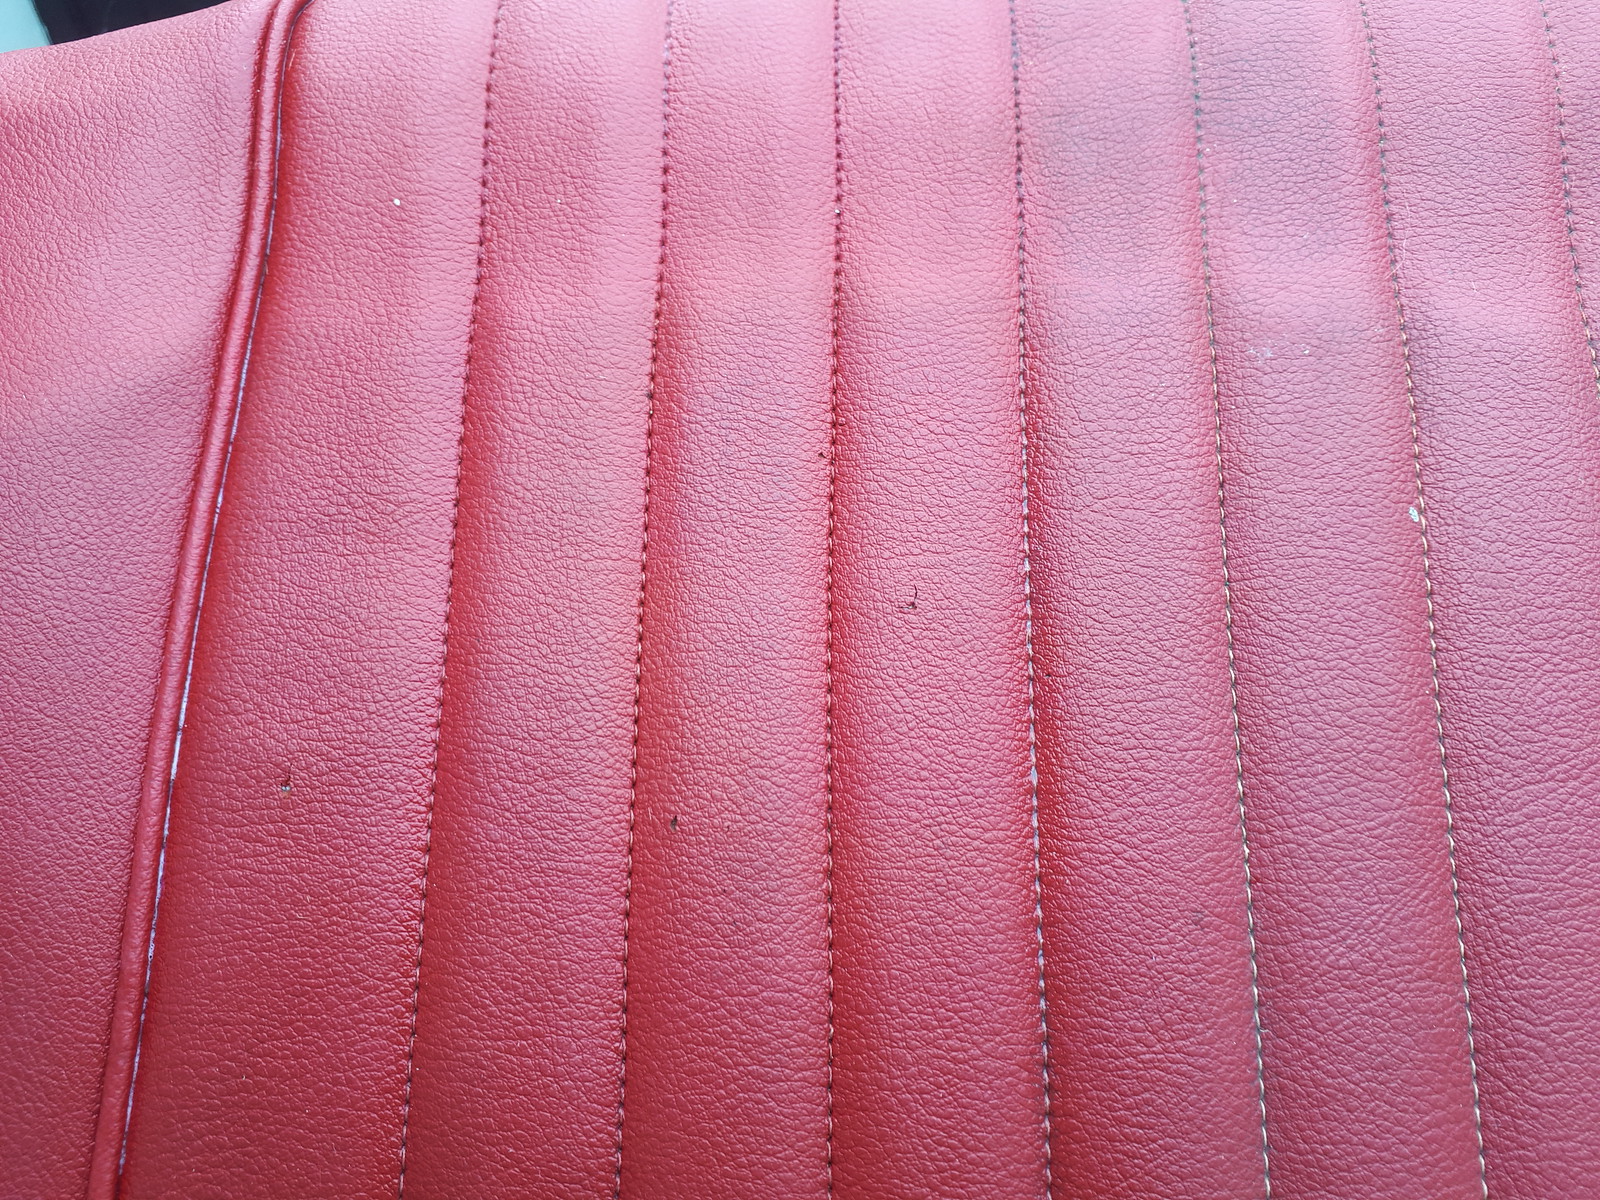
Plenty to see with seats in this update. So much so, I fully expect the "Shock Horror Penguin Does Cleaning" comments from Snoopy! The front seats then. The drivers side has a split bolster in the back, which has been artfully concealed by a picnic blanket for several years now. The passenger side has a rather obvious large repair in the seat base. I have spare seats, which will yield suitable replacement covers. The trouble is, they're disgusting. Nearly as bad as the ones already in the car, in fact. Discussions on "Another Forum" led to all sorts of ideas, most of which involved spending money and waiting for stuff to arrive. Anyway, I didn't spend thirty years of my life repairing washing machines without finding out a few things about ultimate cleaners. In this instance, Ariel. Yes, the laundry detergent... Mix up a thick paste using warm water. It's a biological powder, so needs some heat for the enzymes to activate. Using a nail brush, work it in all over the panel you wish to clean. Then, scrub gently with the nail brush. Then vigorously when nothing appears to be happening. Small circles across the material, and long sweeps down the seams and stitching. Rinse freely and towel dry. Be amazed at the results. I certainly was.  VOF707J VOF707J by Penguin 45, on Flickr This wasn't too bad, but you can see the ingrained dirt clearly.  VOF707J VOF707J by Penguin 45, on Flickr And after. Quite a difference. But, read on some of what was dealt with was really horrible.  VOF707J VOF707J by Penguin 45, on Flickr Before and after of the replacement covers.  VOF707J VOF707J by Penguin 45, on Flickr Look at the state of that seat base. Fortunately, it's being replaced, so I'm not even going to try cleaning it.  VOF707J VOF707J by Penguin 45, on Flickr This is the drivers side seat base and it's staying. Side bolster only cleaned so far. Amazing difference.  VOF707J VOF707J by Penguin 45, on Flickr And the completed result. A remarkable difference. Cleaning each cover took about an hour, then there was stripping the seats and refitting the better covers, so this was about seven hours work all told. I rather think it was worth it. Chris. |
|
|
|
Post by dave1800 on Sept 5, 2022 0:21:43 GMT
You could have appeared on one of those old detergent ads, far more interesting and impressive!
David
|
|
|
|
Post by steve4487 on Sept 5, 2022 16:46:57 GMT
Your seats look great Chris. All I've got to do is find another classic that I can start cleaning
Steve
|
|
|
|
Post by snoopy11 on Sept 6, 2022 15:01:43 GMT
|
|
|
|
Post by Penguin45 on Sept 9, 2022 12:43:45 GMT
With everything fully dried out, I found the finish on the seats to be "flat". No real shine to them, despite the cleanliness. Just as well I'd ordered some Gliptone GT10 vinyl cleaner then. It didn't make any real difference to the materials already cleaned, but did impart a rather pleasant sheen, as may be seen below.  VOF707J VOF707J by Penguin 45, on Flickr Drivers seat wiped over, passenger seat not yet done. But, does it actually clean anything?  VOF707J VOF707J by Penguin 45, on Flickr  VOF707J VOF707J by Penguin 45, on Flickr Yes, yes it does. No scrubbing, just spray on, agitate and wipe off. Not bad at all.  Glove box Glove box by Penguin 45, on Flickr Made a new one of them to replace the shambles under the steering wheel. Not quite as simple as it seems, at least in large part to the shelf being rivetted to the crash rail along the front edge. It won't be going back in like that... The actual boxy bit is easy enough. Box board, knife, patience, spray glue and punch is about all that's required. C. |
|
|
|
Post by Penguin45 on Sept 9, 2022 17:18:54 GMT
 Glove box Glove box by Penguin 45, on Flickr Lovely. My advice to anyone contemplating doing this is.... PAY SOMEONE TO DO IT FOR YOU!Nightmare job, absolute nightmare. It's obviously meant to be done with the dashboard out and partially disassembled to give access. Inaccessible rivets is the principle problem. This has gone back together with self tappers and Spire clips as appropriate. I'm not going through that again. Being on the smaller side was useful for rolling about under the dash. Anyway, looks nice. Chris. |
|
|
|
Post by 1800heap on Sept 9, 2022 20:58:43 GMT
Nice job Chris. The seats look great. Totally agree with the dash. Absolute pain and I didn't bother to put back the top section! Nick  Glove box Glove box by Penguin 45, on Flickr Lovely. My advice to anyone contemplating doing this is.... PAY SOMEONE TO DO IT FOR YOU!Nightmare job, absolute nightmare. It's obviously meant to be done with the dashboard out and partially disassembled to give access. Inaccessible rivets is the principle problem. This has gone back together with self tappers and Spire clips as appropriate. I'm not going through that again. Being on the smaller side was useful for rolling about under the dash. Anyway, looks nice. Chris. |
|
|
|
Post by Penguin45 on Sept 10, 2022 17:44:10 GMT
Cheers chaps. The top section adds a surprising amount of rigidity to the box, so worth considering making sure it's in place. That's what started this little episode off. The top covers were found in the garage, so I replaced the n/s one with no problems and was then confronted by the warped, broken and delaminated mess on the drivers side.  Glove box Glove box by Penguin 45, on Flickr Chris. |
|
|
|
Post by Penguin45 on Sept 11, 2022 14:53:41 GMT
There's always been a missing trim on one of the rear doors. The one I've got has got disintegrating hardboard. Now that I have some spare vinyl from the scrap seat covers, now is the time to deal with it.  Door trim. Door trim. by Penguin 45, on Flickr New foamboard backing panels.  Door trim. Door trim. by Penguin 45, on Flickr Micro foam pieces for the padding instead of the cellulose wadding. This is the 21st Century after all; and I haven't got any.  Door trim. Door trim. by Penguin 45, on Flickr All wrapped up and ready to go.  Door trim. Door trim. by Penguin 45, on Flickr  Door trim. Door trim. by Penguin 45, on Flickr There we go. That'll do nicely. Chris. |
|
|
|
Post by Penguin45 on Oct 21, 2022 19:08:47 GMT
Those of you with super power memories may recall that one of the last jobs I did in my old garage in Yeadon was to refurbish what was thought to be a MkIII heater box, as the one in the Red Dog is pitiful. Three years later and with winter once again imminent, I thought I ought to really get on with it. I had a word with Snoopy about borrowing his garage one Saturday as mine is blocked by Eugenie. "What's involved?" he said. "Four nuts, two hoses and two cables" I replied. "OK then", he said. Last Saturday was the day. I even remembered to take the replacement heater box with me.  Heater box Heater box by Penguin 45, on Flickr First order of business, remove front seats and carpets. Mr Tidy says "Look at all that mess". Out with the vacuum cleaner. Followed by the wire-brush-in-the-drill for the surface rust. Followed by the rust converter. Followed by a coat of red paint.  Heater box Heater box by Penguin 45, on Flickr So, by mid afternoon, we'd realised that the bottom half of the dash board has got to go.  Heater box Heater box by Penguin 45, on Flickr By this point, there were repeated dark mutterings of "Four nuts, two hoses, two cables he said" from my normally calm and imperturbable friend.  Heater box Heater box by Penguin 45, on Flickr And, I wasn't wrong. When disconnected (and the electrical plug I'd forgotten about), it came straight out. Then the wheels came off, big time. It took the pair of us to manhandle the new one onto the lugs, whilst simultaneously hanging onto rubber grommets and spacer tubes. We finally got it hung up there, with a couple of nuts started. Surveying our handiwork, we realised that the pipes hadn't popped through the bulkhead. Take it all back out again and do some measuring. MkII pipes: 1/2". MkIII pipes: 5/8". Well, thank you very much. Out with the files and enlarge the holes. Fight heater box back in. Again. Couple up hoses. Um, no, they're 1/2". They were eventually persuaded back on with a combination of tapered wedges and boiling water. And Snoopy's brute force. Then we found that the vent hose outlets were in the wrong place, the controls were different, the switch gear wasn't going to work on the existing set up and that the earth was probably revolving backwards. We were into late afternoon by this point, so we put the dashboard back together so that I could drive back home, defeated in Round 1. It's a nice fast 20 mile run back up to Padiham and I thought I was going to melt by the time I got there. Heater's in place with the vents open and no controls... Proof of concept though. Sunday, I took it all out again and built the MkIII motor and matrix into the MkII body with new foam seals for the flaps. Bought some 5/8" heater hose and appropriate clips. Monday I put it all back together once again and a test run revealed totally excessive amounts of heat - BUT - controllable. There is an old joke that says the build of any car on the production line starts with the heater box hanging on a string from the ceiling. I am now inclined to believe that. Big thanks to Mark. Chris. |
|
|
|
Post by dave1800 on Oct 23, 2022 2:08:50 GMT
Not sure Snoopy will believe you next time you say a job is easy. Now you know why the MK111 cars were much warmer than the earlier versions, it wasn't just the motor polarity change! Who told you it was a joke that the production line started with the heater. It was perfectly true as verified by my friend Brian who worked on the Longbridge assembly line. David There is an old joke that says the build of any car on the production line starts with the heater box hanging on a string from the ceiling. I am now inclined to believe that. Big thanks to Mark. Chris. |
|
|
|
Post by Penguin45 on Oct 23, 2022 17:50:50 GMT
Not sure Snoopy will believe you next time you say a job is easy. Now you know why the MK111 cars were much warmer than the earlier versions, it wasn't just the motor polarity change! I suspect that he's scarred for life after this little episode. The job just got bigger and bigger and bigger .... Who told you it was a joke that the production line started with the heater. It was perfectly true as verified by my friend Brian who worked on the Longbridge assembly line. I'm not sure if I'm happy to know that or not! |
|


