|
|
Post by tommydp on Jul 29, 2012 22:48:04 GMT
Hi all! I'm in the process of renewing the rubber boots on all balljoints on the 1800. While at it I'm investigating the state of all joints.
Now, I must admit I've never been confident when it comes to the correct fitting and adjustment of the upper and lower ball- joints, with the use of the shims and checking end play etc.
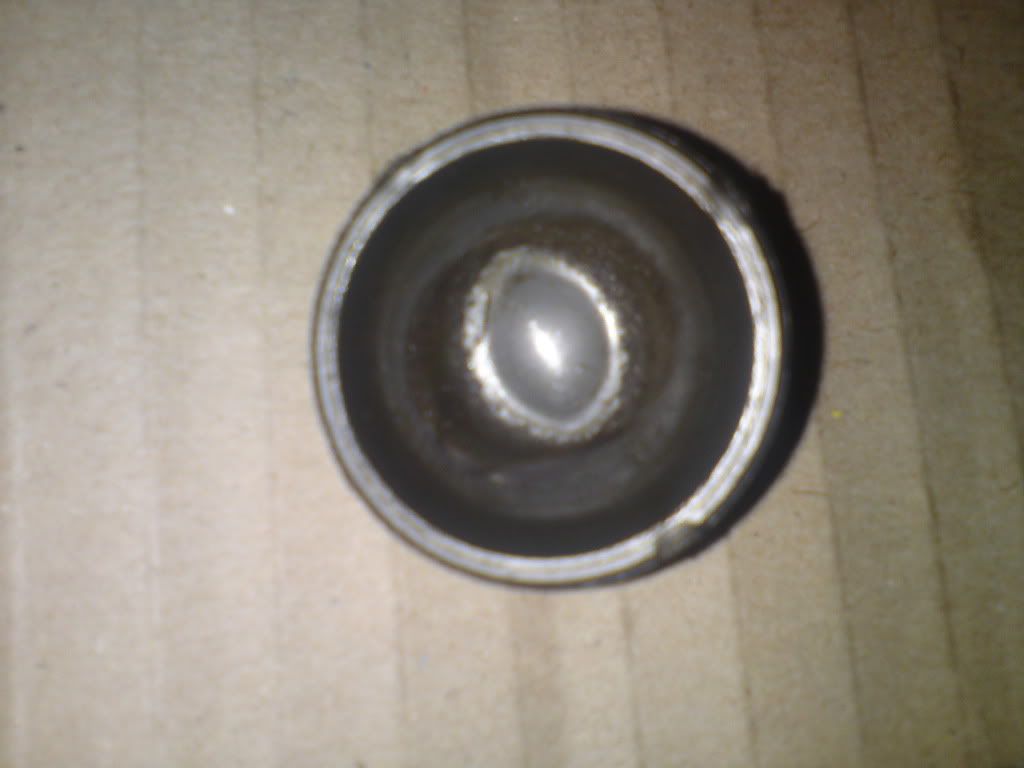
One upper joint was very loose, though I didn't notice any play between the ball and upper and lower seat. Turning it from side to side made it stick somewhat and once I dismantled it I noticed the upper seat was rough with a large groove in it. It was quite dry too.
I started wondering if this has to do with the low speed shake, so I decided changing it. I have most manuals available for the 1800 I think, and the procedure is clear but I'm still not sure..
First of all, are you supposed to knock out the upper plastic seat to lubricate/ grease the ball and then put the seat back again?
Then, I believe I should screw the assembly, without lock washer and shims gradually until end play is eliminated and then measure the gap where the washer and shims go. Now, this is where I'm lost, end play... I guess we're talking of free movement but where? I mean, it cant be the vertical movement of the ball between the seats, as on a new assembly there's no play here..
So, how far to screw the assembly before I measure. Is it when it takes some force to move the joint sideways or when you can't turn the ball around by hand, or what...
One manual says the correct gap is 1.193 mm. If less, renew joint if more use shims. My plan is to tighten to the correct point, if I find out when that is, then measure the gap by using the lock washer and a 0.25 mm gauge (Preload) and fill the remaining gap with shims. Does this sound OK.
So, all in all, it's a question of finding when the end play is eliminated.
Any help on this is more than welcome and I guess this could be of use to others as well. I'm planning to check, grease and adjust all four of them an fit new boots. Taking it on a long yourney on Thursday, going to a classic car show and autojumble in the city of Lillehammer (Winter Olympics 1994:-) Looking forward to that. This car is really getting where I want it now, at last:-)
Regards, Tommy
|
|
|
|
Post by dave1800 on Jul 30, 2012 3:03:12 GMT
Hi Tommy
You have asked some very good questions here that I think are not at all clear in any of the manuals I have read.
My interpretation is based on my experience of changing ball joints on a total of seven 1800s without knowingly experiencing any problems - and I stand to be corrected.
1. I assembled the joints dry to establish the pre-load, only adding the grease at the final assembly. It is important to check for and remove any highspots.
2. There seems no good guidance as to how tight to screw down the joint to establish the end float. Ie should you still be able to move the swivel joint easily or require a gloved hand? If it is too loose then I found by experience you will soon need to re-shim - too tight and the steering will be notchy. I was taught by an ex BL mechanic to tighten so that it takes quite a lot to move it, ie using a gloved hand, but it should be smooth in all directions. Not much help as a description, I guess, hopefully someone has a more scientific approach - and I was never certain if his advice was totally sound!
3. The preload is then set exactly as per the manual, but it is very important to make sure that the housing is done up to the correct torque , I have seen an 1800 where the top ball joint housing could be rotated by hand and the locking tab isn't that strong! .
4. Whenever possible a new joint should be used rather than re-shim an old one from a safety perspective.
It will be interesting to hear others' views as it is something most owners will have needed to do, more than once.
Regards
David
|
|
|
|
Post by kelsham on Jul 30, 2012 7:28:54 GMT
David has given good advice. If you fit them on the loose side you will have to reshim soon after.
So that is two who agree, I tried in the past to measure the gap without much success and ended up fitting them as David describes.
Regards Kels.
|
|
|
|
Post by tommydp on Jul 30, 2012 7:44:17 GMT
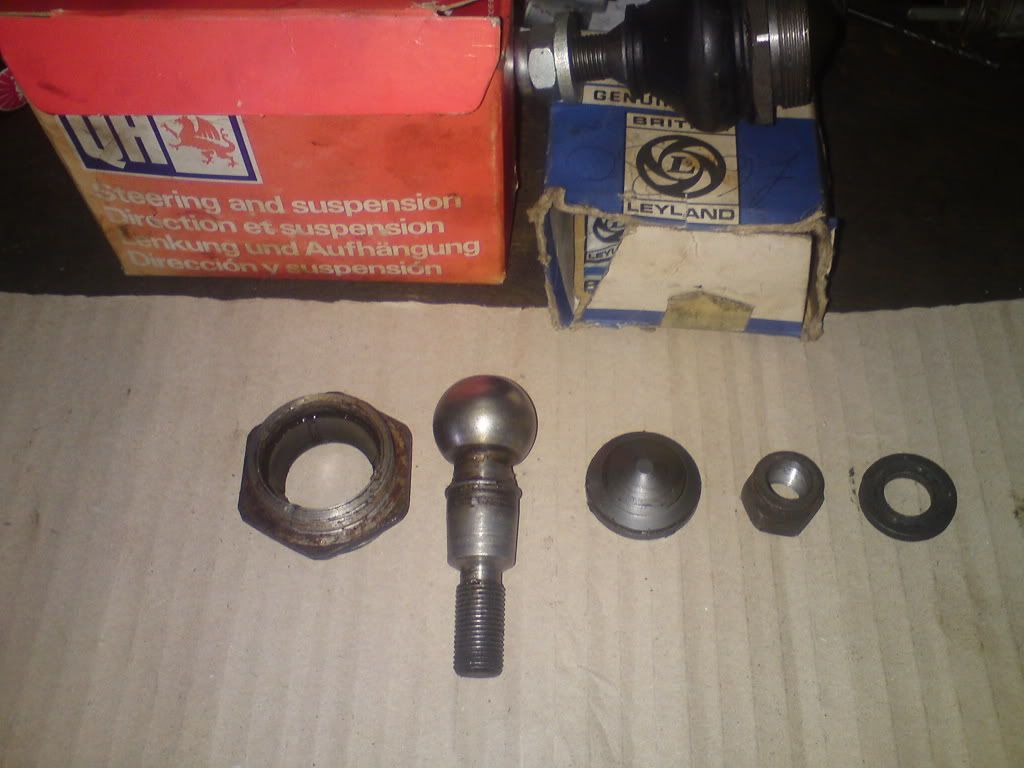
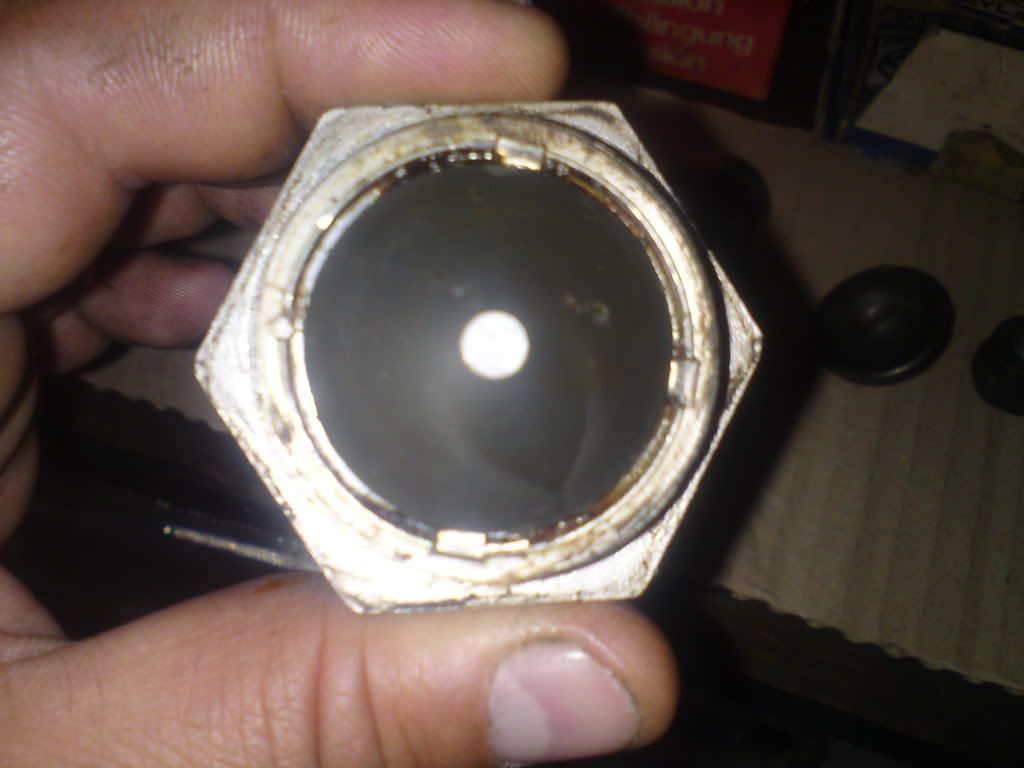
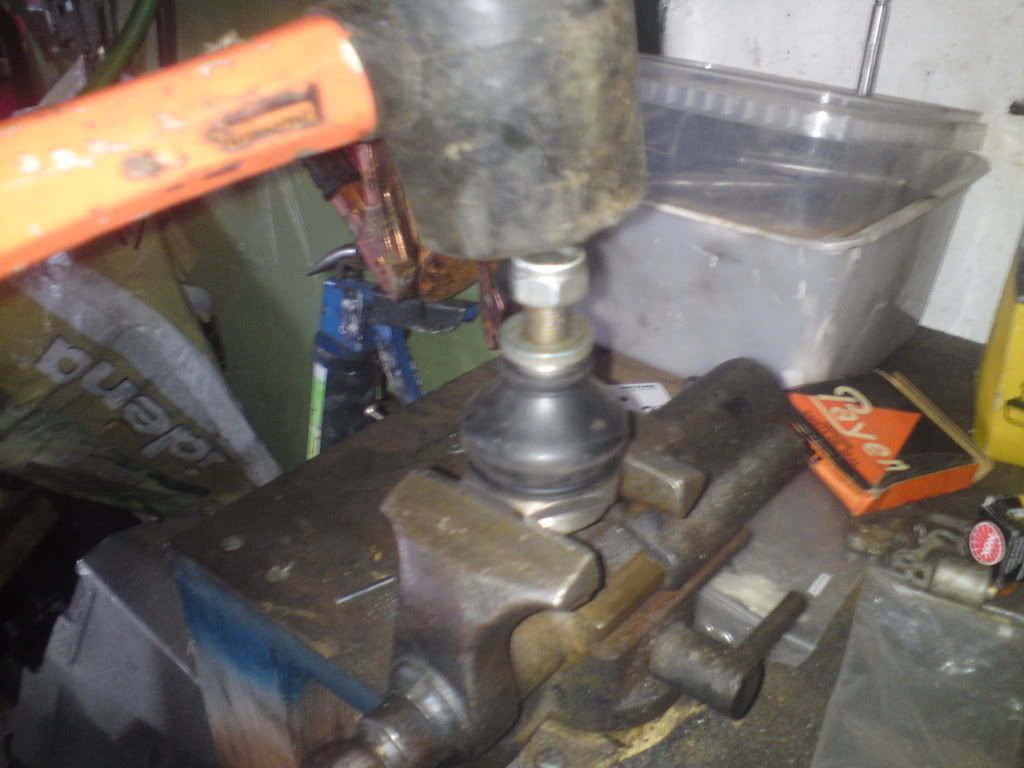
Hi Tommy You have asked some very good questions here that I think are not at all clear in any of the manuals I have read. My interpretation is based on my experience of changing ball joints on a total of seven 1800s without knowingly experiencing any problems - and I stand to be corrected. 1. I assembled the joints dry to establish the pre-load, only adding the grease at the final assembly. It is important to check for and remove any highspots. 2. There seems no good guidance as to how tight to screw down the joint to establish the end float. Ie should you still be able to move the swivel joint easily or require a gloved hand? If it is too loose then I found by experience you will soon need to re-shim - too tight and the steering will be notchy. I was taught by an ex BL mechanic to tighten so that it takes quite a lot to move it, ie using a gloved hand, but it should be smooth in all directions. Not much help as a description, I guess, hopefully someone has a more scientific approach - and I was never certain if his advice was totally sound! 3. The preload is then set exactly as per the manual, but it is very important to make sure that the housing is done up to the correct torque , I have seen an 1800 where the top ball joint housing could be rotated by hand and the locking tab isn't that strong! . 4. Whenever possible a new joint should be used rather than re-shim an old one from a safety perspective. It will be interesting to hear others' views as it is something most owners will have needed to do, more than once. Regards David Thanks Dave! I had a look in a Princess manual. It has the same type of balljoints, though not interchangeable. It says: "Tighten until ball pin is just nipped but is still free to swivel without any endplay. OK, I think I'll just "feel" for the correct movement. Firm, but still moving freely all around. I tried yesterday, tightening to what I believe is ok movement of the ballpin when it takes some force to move it around by three fingers on the threaded part of the pin. I then used the lock washer, a 0.25 mm gauge (preload) and shims to fill the remaining gap, as feeler gauges. I then removed the assembly and installed the washer and shims and torqued to 70 as per manual. I would say it feels fine. It's firm, but can be moved in any direction. Now: greasing the assembly, what's correct? I believe it would be of interest to pack even a "new" assembly with fresh grease, after 40 years on a shelf.. Is it then correct to dismantle the assembly as in the first picture below, clean out the upper and lower seats and the ball then pack it all together with grease? Funny the manuals don't mention this.. I mean, you will have to remove the upper seat (second picture) to gain access to the ball which is the part you would need to grease. There's no point in putting grease inside the top suspension arm/ hub for lower, where the upper seat makes contact or is it? What would be the correct way of removing the upper seat (second picture)? As far as I can see, picture 3 shows the easiest way.. The assembly shown is the one which felt odd. Loose whith ball pin straight down, but catching and far from smooth when moving the ball pin around. As you may see in fourth picture, there is a large groove inside the upper seat. Tommy     |
|
|
|
Post by tommydp on Jul 30, 2012 7:49:02 GMT
David has given good advice. If you fit them on the loose side you will have to reshim soon after. So that is two who agree, I tried in the past to measure the gap without much success and ended up fitting them as David describes. Regards Kels. Great, Thanks Kels! T |
|
|
|
Post by dave1800 on Jul 30, 2012 12:54:25 GMT
Now: greasing the assembly, what's correct? I believe it would be of interest to pack even a "new" assembly with fresh grease, after 40 years on a shelf..
Is it then correct to dismantle the assembly as in the first picture below, clean out the upper and lower seats and the ball then pack it all together with grease? Funny the manuals don't mention this.. I mean, you will have to remove the upper seat (second picture) to gain access to the ball which is the part you would need to grease. There's no point in putting grease inside the top suspension arm/ hub for lower, where the upper seat makes contact or is it?
As I mentioned, I always packed the joint with grease after determining the preload, ie grease the ball and seat interface and then the stem so that rubber bellows were nearly full. I'm not sure if this is correct, but it felt right! Putting grease inside the top arm etc would cushion any imperfections but may encourage the seat to rotate - perhaps a thin smear isn't a bad compromise?Hopefully we will get a ball joint expert comment soon, I would like to know for sure as well. I like the action photo! Regards David |
|
|
|
Post by Penguin45 on Jul 30, 2012 16:56:59 GMT
I did one recently - advisory on MoT test.
I re-packed the cup as per comments above, other than that went by the book and it all seemed fine. My only problem was not being able to set it to a torque setting, so "nice and tight" for the threads had to do.
Chris.
|
|
|
|
Post by tommydp on Aug 1, 2012 12:15:15 GMT
I've now checked, greased and fitted new rubbers to all the ball joints. Turned out one of the upper had quite some play in it so renewed that one. And yes, the shake is now gone:-)
Great, all set for the yourney tomorrow then:-)
T
|
|


