Post by Penguin45 on Apr 7, 2012 0:36:03 GMT
I was unable to obtain a working clutch pedal when putting the engine bay back together. Extensive testing led us to the clutch master cylinder...... It was a strange fault - stamping on the pedal allowed the clutch to work perfectly, whilst a gentle application of the pedal met with no resistance at all - the pedal simply went straight to the floor.
This was narrowed down to the clutch master cylinder.

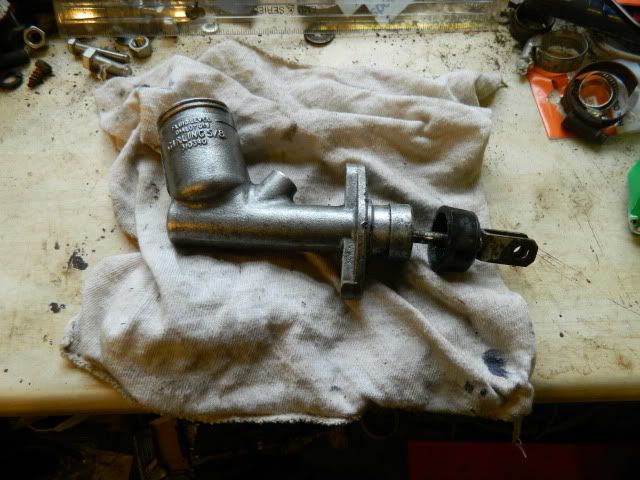
This is a Girling 5/8" set up. Doubtless there are hundreds of variants fitted to cars of the period. The front dust cover is off to allow access to the circlip which retains the input rod, and also stops the piston popping out.

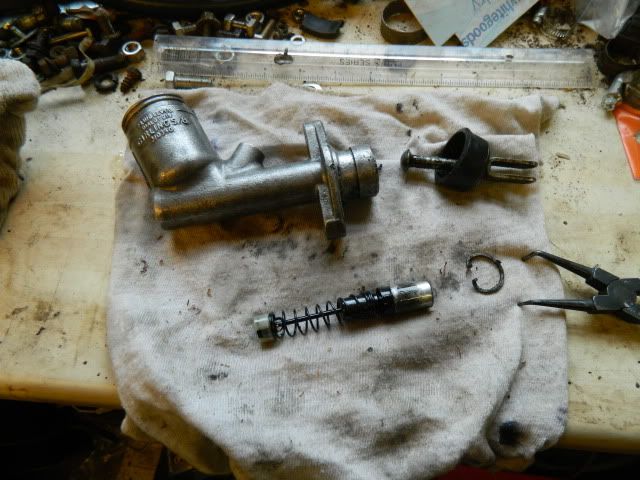
With the circlip removed, the rod can be pulled clear. A couple of sharp taps on the workbench and the piston slipped free.

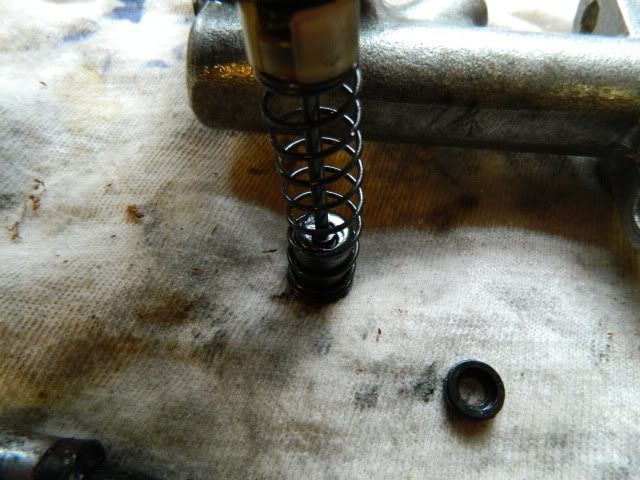
Bit of a "Zebedee" moment with this shot. The thin rod needs to be removed and then the cap on the main piston. The rod is a "key hole" fitting, so wiggling it to one side releases it. The picture isn't all that clear, unfortunately. The cap has a locking tab on the side. Lifting it with a suitable screwdriver allows it to slip off the piston.

You now have this collection of bits. Two seals to be fitted - one on the piston itself and another at the end of the rod - this is the valve seal. Lots of rubber grease and perfect cleanliness is essential.

Shot down the bore - perfect. Gave it a thorough clean and otherwise left it strictly alone.
Reassembly is the reverse of.........
The hardest part fo the whole job is to fit the new dust cover - this ahs to be persuaded to fit over the yoke of the input rod.
Chris.
This was narrowed down to the clutch master cylinder.

This is a Girling 5/8" set up. Doubtless there are hundreds of variants fitted to cars of the period. The front dust cover is off to allow access to the circlip which retains the input rod, and also stops the piston popping out.

With the circlip removed, the rod can be pulled clear. A couple of sharp taps on the workbench and the piston slipped free.

Bit of a "Zebedee" moment with this shot. The thin rod needs to be removed and then the cap on the main piston. The rod is a "key hole" fitting, so wiggling it to one side releases it. The picture isn't all that clear, unfortunately. The cap has a locking tab on the side. Lifting it with a suitable screwdriver allows it to slip off the piston.

You now have this collection of bits. Two seals to be fitted - one on the piston itself and another at the end of the rod - this is the valve seal. Lots of rubber grease and perfect cleanliness is essential.

Shot down the bore - perfect. Gave it a thorough clean and otherwise left it strictly alone.
Reassembly is the reverse of.........
The hardest part fo the whole job is to fit the new dust cover - this ahs to be persuaded to fit over the yoke of the input rod.
Chris.
