Post by Penguin45 on Dec 13, 2010 22:08:30 GMT
The C40 dynamo was a common fitment on 'Crabs through the 60's before being superceded by the alternator. A while back, the one fitted to my car became noisy due to bearing failure at the fan end.
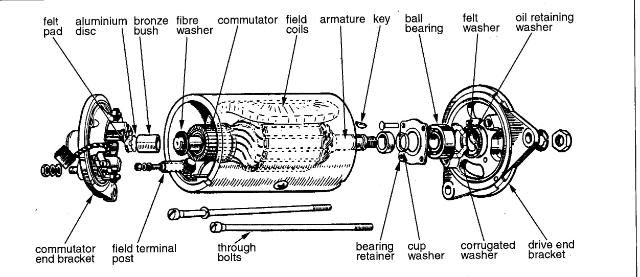
Using an old belt wrapped around the pulley and trapped in the jaws of the vice, remove the 18mm nut. It's tight - very tight. In retrospect, it would have been simpler to have removed the armature, end frame and pulley and locked the armature itself in the vice. Next, remove pulley, fan and spacer and prise out the Woodruff key (Put it somewhere very safe.......)
Next, the tie-bolts holding the dynamo together need to come off. Again, these are exceedingly tight. Mine needed a dose of penetrating fluid and a wallop with a copper mallet before they came free. It essential to use a straight bladed screwdriver which actually fits the slot to avoid ruining the heads. Once they're out, the end frames can be removed with a few taps from the mallet.
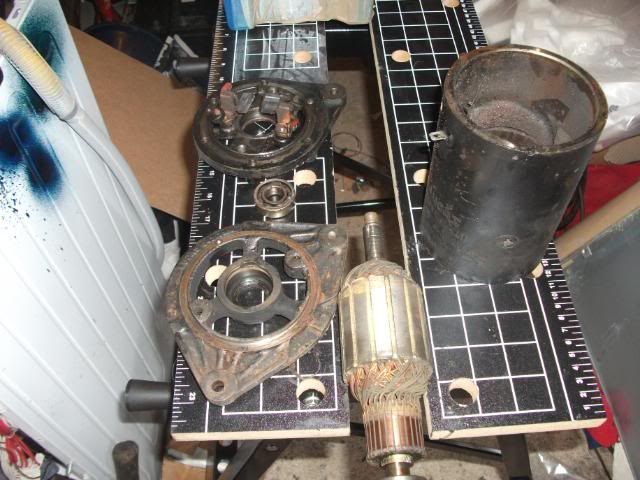
You would normally now have the brush plate, the field coils and the front plate/armature separated. The ball bearing had collapsed in the housing on my dynamos, so, with a bit of manipulation, the balls were persuaded to fall out, allowing the armature to be pulled straight through.
Otherwise - the ball bearing is a push fit into the end-frame and a very tight interference fit on the armature shaft. To remove the armature with the bearing attached is a fiddle, but can be done.
Type1/ Circlip retainer. Using several smallish straight bladed screwdrivers, prise the circlip up and out.
Type2/ Retaining plate - drill the rivet heads off from the outside.
Then, tap the armature trough with the mallet.
To remove the bearing, you need a puller.
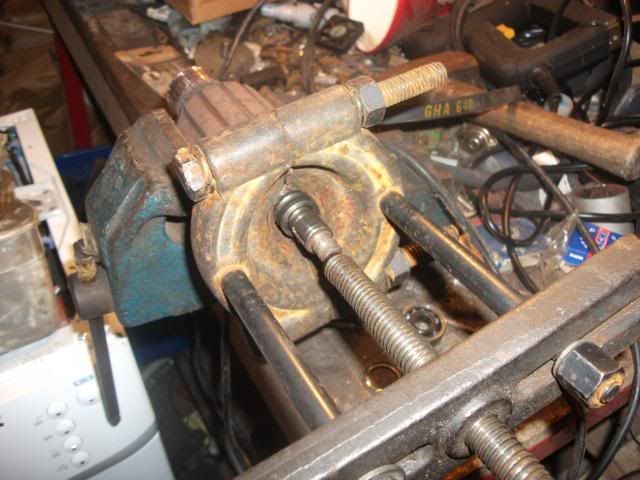
That little beastie can load up to about 3 tonnes - the remaining race wasn't interested in the slightest. I had to grind it off with the bench grinder. Use extreme caution not to score the shaft......
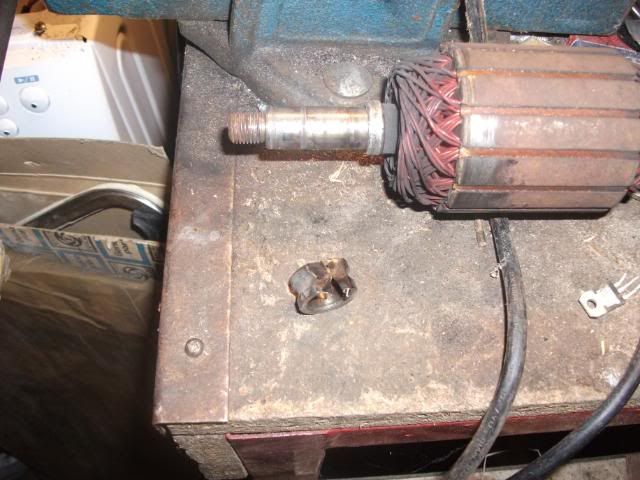
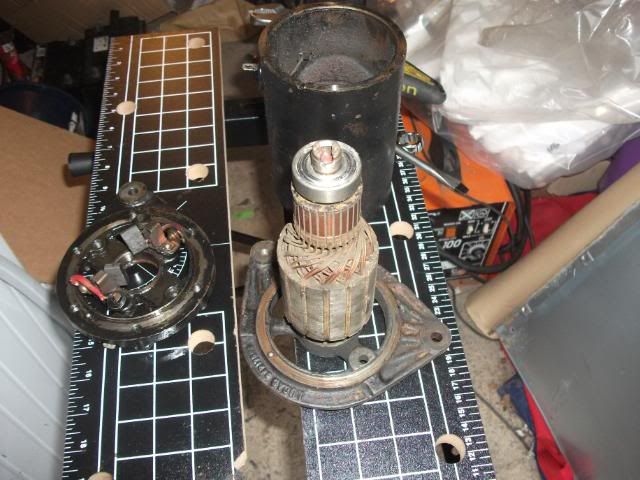
Commutator needs to be cleaned:
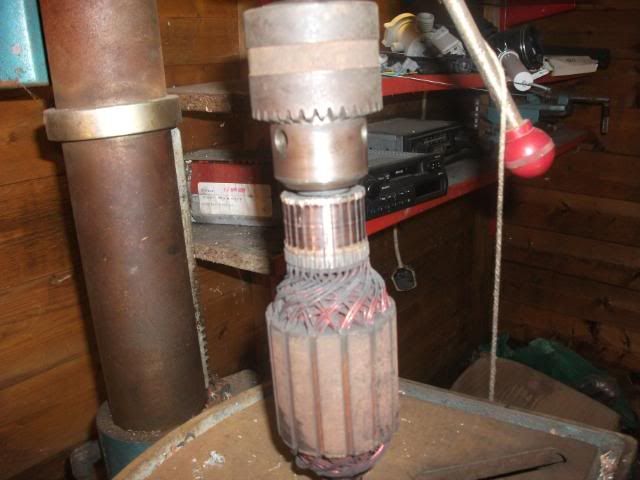
I set it up on the pillar drill and used a strip of fine glass paper with the drill running at about 400rpm to clean it up. Don't use carborundum paper - the bits of carbon conduct and can short circuit the commutator.
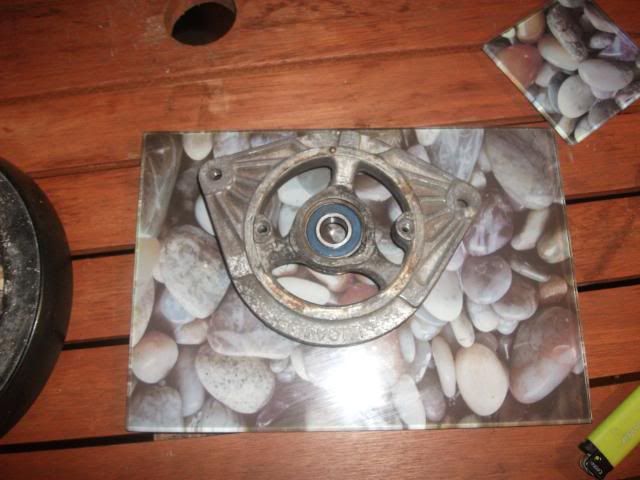
A new 6201 ZR bearing was fitted into the end frame and clipped home. The armature was then driven through the bearing with the end frame very carefully supported on the vice.
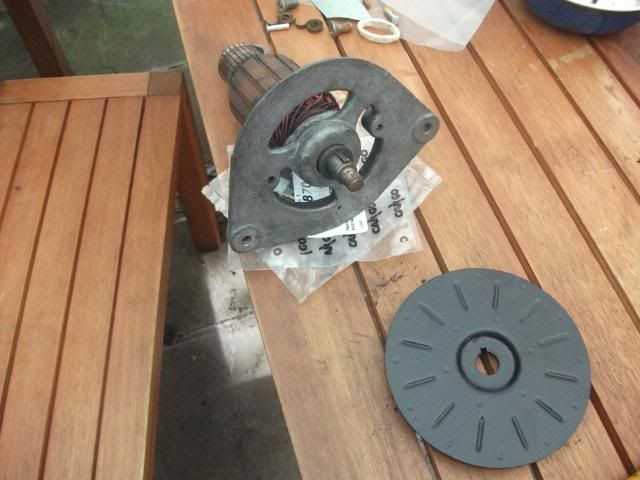
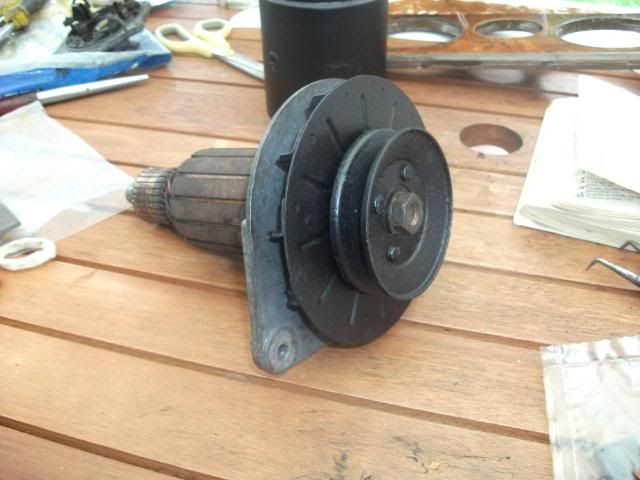
I put the armature in the vice to refit the fan, pulley and nut - much simpler.
That left the brush end frame. A new bush bearing was included in the rebuild kit and had been soaking in oil for 24 hours prior to starting this operation. To get the old one out of the end frame, you are supposed to drive a large tap into the old bush and use that to haul it out. I had nothing suitable that large, so another means was found.
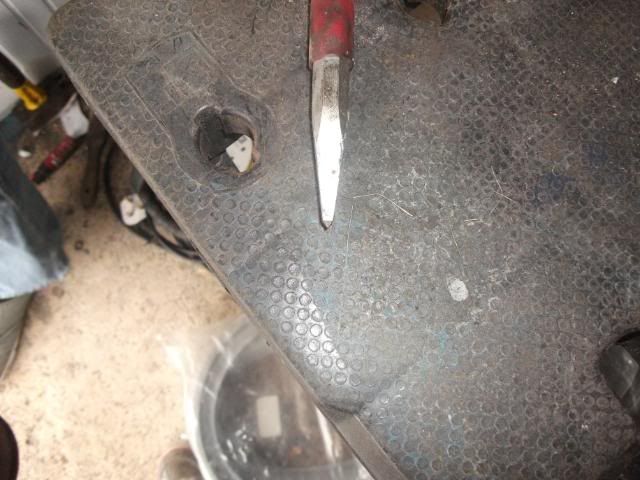
Square point chisel. Applied very carefully between the bush and the housing, the bush obligingly shattered and was easily pulled out. The new bush was driven home with a suitable drift (12mm deep socket in this instance). Note that the bush is fitted just under-flush, leaving room for the oil felt to be fitted under it.
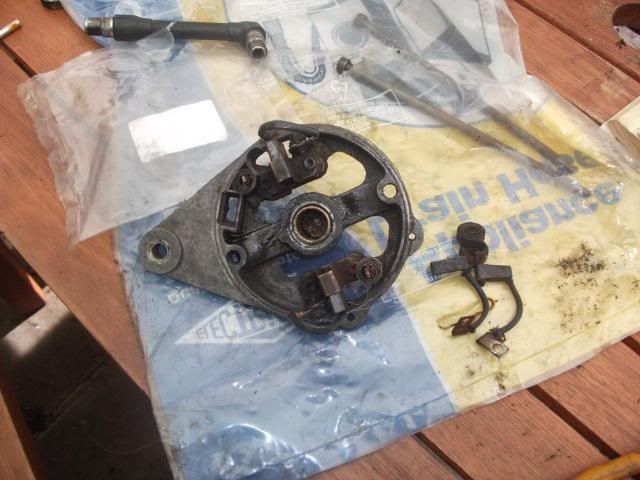
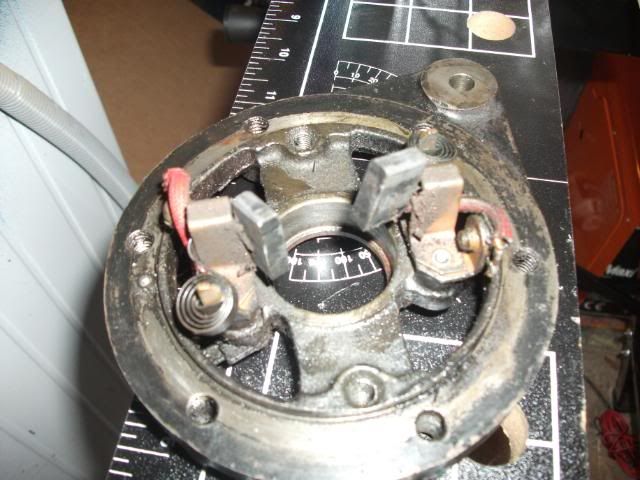
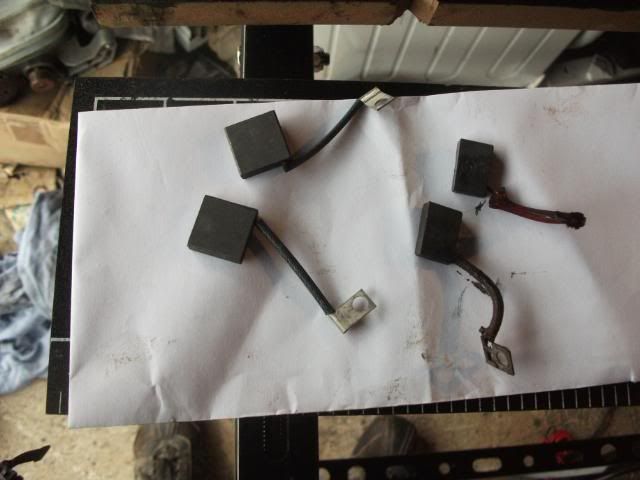
New carbon brushes and springs were fitted at this point. The brushes screw home, but need to be locked in the "up" position for re-assembly. To do this, push the brushes up the brass sleeve, until the spring rests against the side of the brush.
Back on with the end frame, fit the tie bolts good and tight.
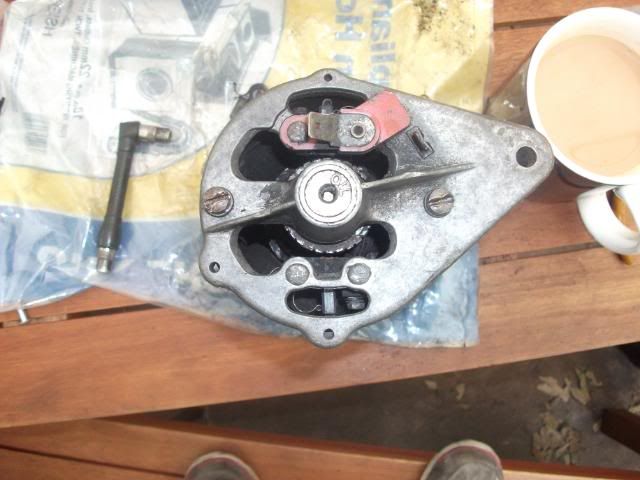
You can just see the springs holding the brushes up. Use a small screwdriver to lift the spring and allow the brushes to drop down onto the commutator.
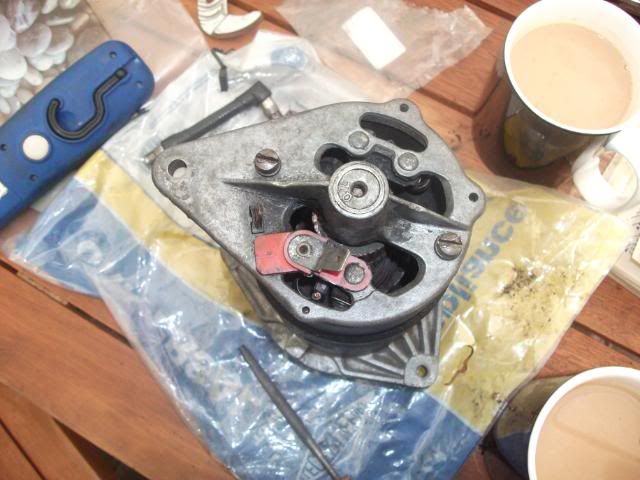
I took the opportunity to give everything a good clean and painted various parts. Jobs a good 'un.
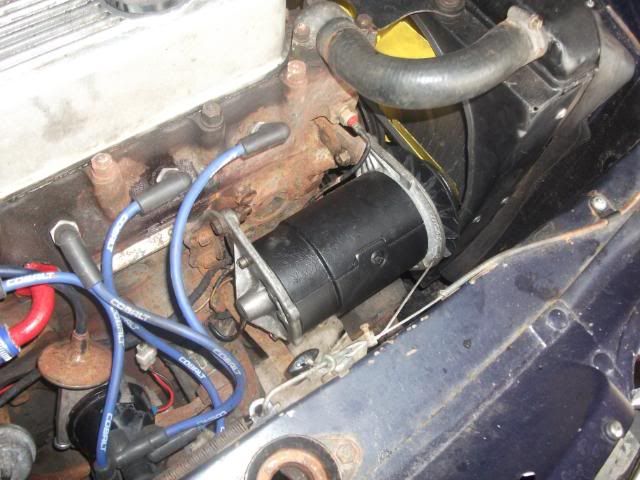
Back on the car - a quick test revealed she was knocking out 14.25vDC at fast idle; spot on.
The rebuild kit was purchased from:
J.C.R. Supplies, 380 Forest Road, Walthamstow, London E17 5JF TEL: 0208-5216494 FAX: 0208-5037258 Email: jcrsupplies@tiscali.co.uk .
Total time involved was about 5 hours, spread over two afternoons. It's a pretty straightforward job, with a couple of fiddly aspects to it.
Chris,
Penguin45.

Using an old belt wrapped around the pulley and trapped in the jaws of the vice, remove the 18mm nut. It's tight - very tight. In retrospect, it would have been simpler to have removed the armature, end frame and pulley and locked the armature itself in the vice. Next, remove pulley, fan and spacer and prise out the Woodruff key (Put it somewhere very safe.......)
Next, the tie-bolts holding the dynamo together need to come off. Again, these are exceedingly tight. Mine needed a dose of penetrating fluid and a wallop with a copper mallet before they came free. It essential to use a straight bladed screwdriver which actually fits the slot to avoid ruining the heads. Once they're out, the end frames can be removed with a few taps from the mallet.
You would normally now have the brush plate, the field coils and the front plate/armature separated. The ball bearing had collapsed in the housing on my dynamos, so, with a bit of manipulation, the balls were persuaded to fall out, allowing the armature to be pulled straight through.
Otherwise - the ball bearing is a push fit into the end-frame and a very tight interference fit on the armature shaft. To remove the armature with the bearing attached is a fiddle, but can be done.
Type1/ Circlip retainer. Using several smallish straight bladed screwdrivers, prise the circlip up and out.
Type2/ Retaining plate - drill the rivet heads off from the outside.
Then, tap the armature trough with the mallet.
To remove the bearing, you need a puller.

That little beastie can load up to about 3 tonnes - the remaining race wasn't interested in the slightest. I had to grind it off with the bench grinder. Use extreme caution not to score the shaft......

Commutator needs to be cleaned:

I set it up on the pillar drill and used a strip of fine glass paper with the drill running at about 400rpm to clean it up. Don't use carborundum paper - the bits of carbon conduct and can short circuit the commutator.
A new 6201 ZR bearing was fitted into the end frame and clipped home. The armature was then driven through the bearing with the end frame very carefully supported on the vice.


I put the armature in the vice to refit the fan, pulley and nut - much simpler.

That left the brush end frame. A new bush bearing was included in the rebuild kit and had been soaking in oil for 24 hours prior to starting this operation. To get the old one out of the end frame, you are supposed to drive a large tap into the old bush and use that to haul it out. I had nothing suitable that large, so another means was found.

Square point chisel. Applied very carefully between the bush and the housing, the bush obligingly shattered and was easily pulled out. The new bush was driven home with a suitable drift (12mm deep socket in this instance). Note that the bush is fitted just under-flush, leaving room for the oil felt to be fitted under it.

New carbon brushes and springs were fitted at this point. The brushes screw home, but need to be locked in the "up" position for re-assembly. To do this, push the brushes up the brass sleeve, until the spring rests against the side of the brush.
Back on with the end frame, fit the tie bolts good and tight.

You can just see the springs holding the brushes up. Use a small screwdriver to lift the spring and allow the brushes to drop down onto the commutator.

I took the opportunity to give everything a good clean and painted various parts. Jobs a good 'un.

Back on the car - a quick test revealed she was knocking out 14.25vDC at fast idle; spot on.
The rebuild kit was purchased from:
J.C.R. Supplies, 380 Forest Road, Walthamstow, London E17 5JF TEL: 0208-5216494 FAX: 0208-5037258 Email: jcrsupplies@tiscali.co.uk .
Total time involved was about 5 hours, spread over two afternoons. It's a pretty straightforward job, with a couple of fiddly aspects to it.
Chris,
Penguin45.


 and I'll throw one in the post for you.

