Post by Penguin45 on Nov 25, 2018 17:34:49 GMT
This has been an annoying repetative problem. Every few hundred miles, the budgies started tweeting in the cars front o/s hub. Pulling the pin and nipping up the nut restored silence for a while. The recent collapse of a driving flange led to more serious investigations.
I have a good Wolseley chum called Ron, who is something I'm not - a professional motor mechanic. Whilst now retired, he does have a lifetime of experience. He had a look at what was going on and made the following observations.
1/ The hub nut is pinned, so it isn't coming loose.
2/ When the hub was nipped up, but not fully tightened, there was noticable rotational play between the shaft and the flange.
3/ The drive shaft CV joint is brand new and steel, so the cast iron splines of the flange must be worn.
4/ That rotational movement was moving the cone, which was thus wearing and allowing the hub to loosen.
Simple really. He's a clever chap is Ron. The solution therefore was to find a decent driving flange and cone. After extensive negotiations with Management, I was allowed to spend some money. A brand new BTB611 driving flange was sourced in Sweden (!) and two brand new genuine BL driving cones were sourced from Gloucestershire. It actually cost more in shipping getting the flange sent over than to buy it!
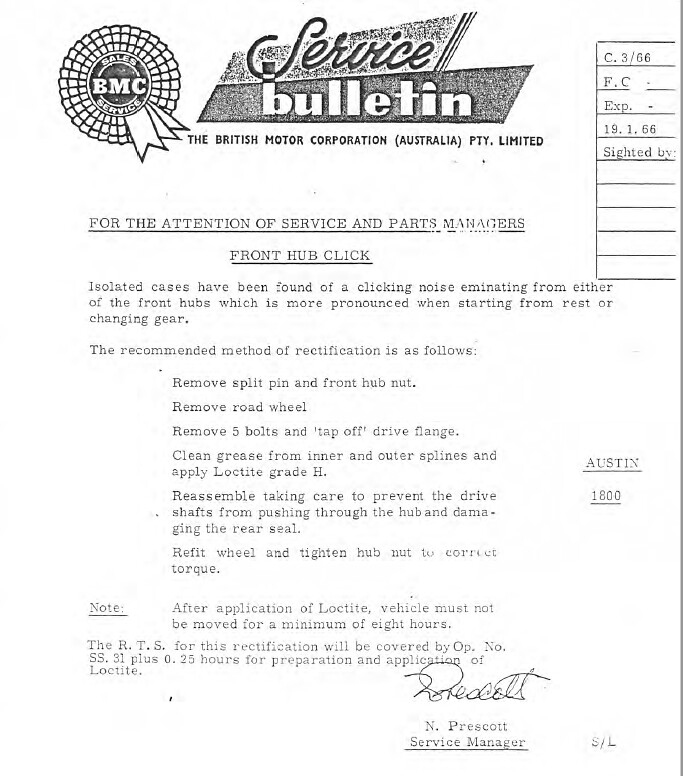
Whilst all this was happening, I was trying to remember where I'd seen a report about shafts and flanges. I eventually found what I wanted in a BMC Australia Technical Service Bulletin.
 VOF707J by Penguin 45, on Flickr
Above courtesy of Australian Austin 1800 Archives.
The main jist of the document is to use a low strength thread locking compound on the splines and leave the car for eight hours. A suitable thread lock was duly ordered.
 VOF707J by Penguin 45, on Flickr
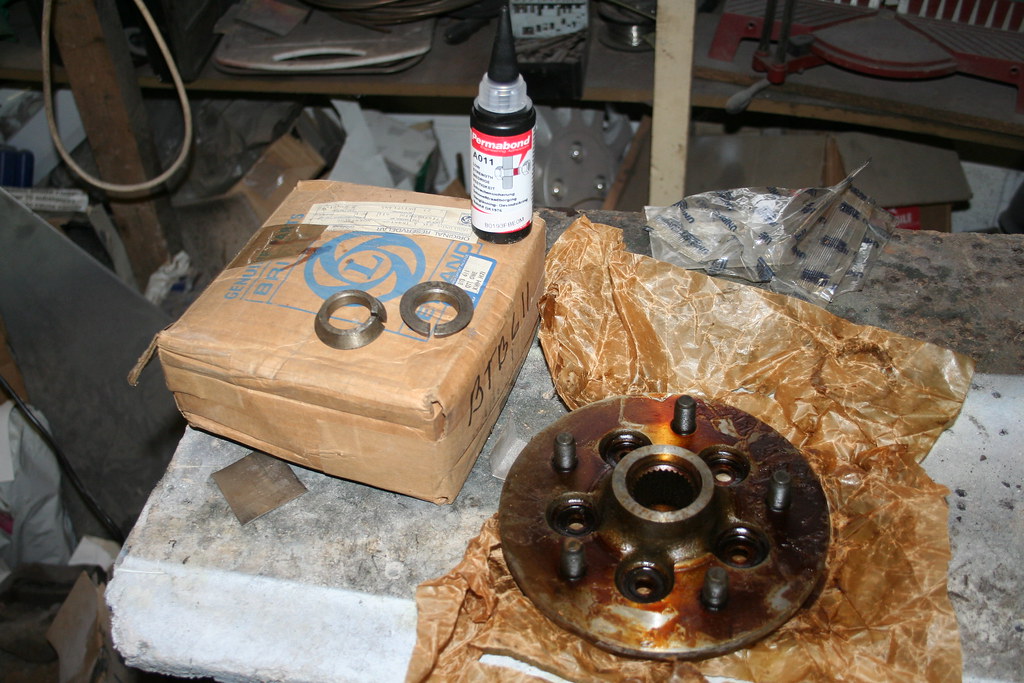
New parts. Took ages to get the storage wax off that flange. White spirit did the trick.
 VOF707J by Penguin 45, on Flickr
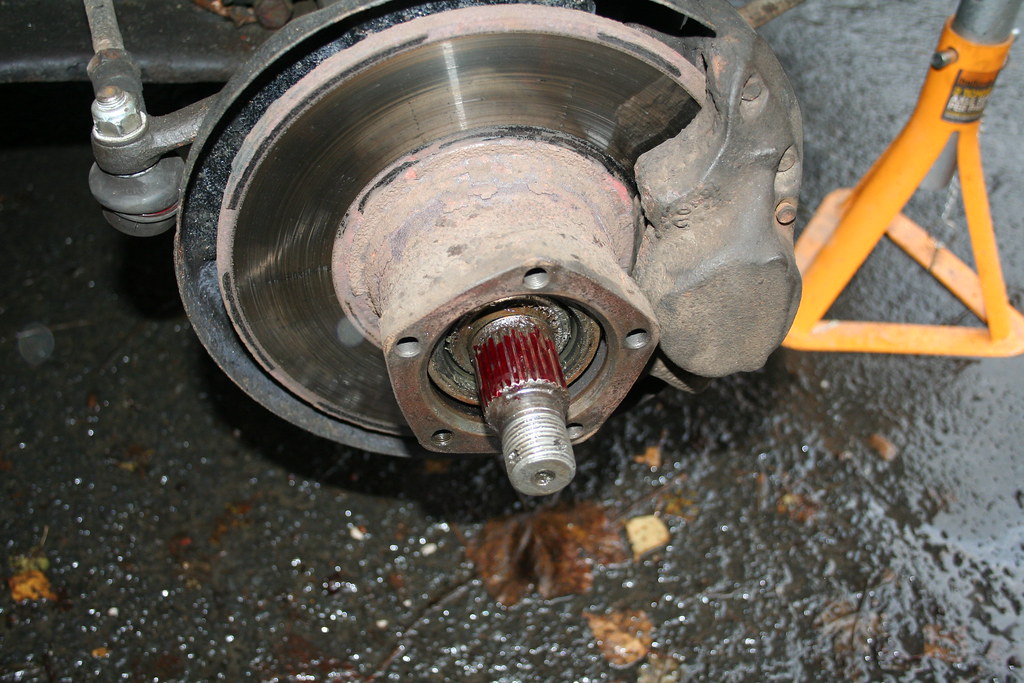
Shaft (and flange) splines thoroughly degreased. Both were coated with the thread lock compound. All then nipped up with the big washer, then the new cone dropped in and fully tightened up. I will leave the car until tomorrrow before driving again.
 VOF707J by Penguin 45, on Flickr
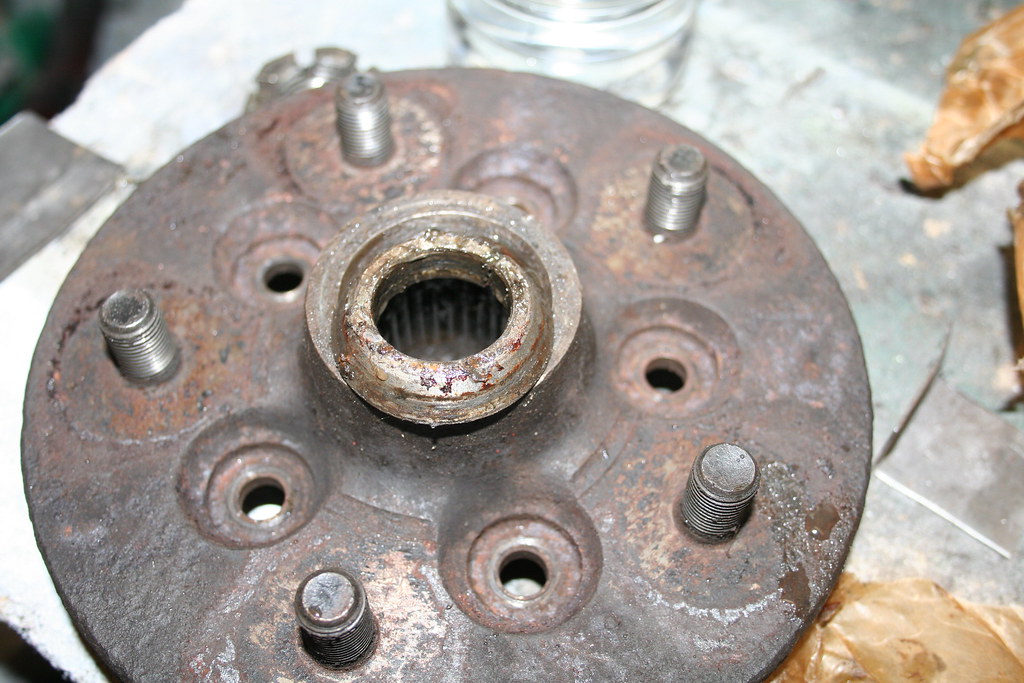
The flange and cone which have been replaced. You can see the wear lines around the cone.
Hopefully the problem is solved. The three key components are all brand new. There is no noticable rotational play on the flange, so fingers crossed.
Chris.
I have a good Wolseley chum called Ron, who is something I'm not - a professional motor mechanic. Whilst now retired, he does have a lifetime of experience. He had a look at what was going on and made the following observations.
1/ The hub nut is pinned, so it isn't coming loose.
2/ When the hub was nipped up, but not fully tightened, there was noticable rotational play between the shaft and the flange.
3/ The drive shaft CV joint is brand new and steel, so the cast iron splines of the flange must be worn.
4/ That rotational movement was moving the cone, which was thus wearing and allowing the hub to loosen.
Simple really. He's a clever chap is Ron. The solution therefore was to find a decent driving flange and cone. After extensive negotiations with Management, I was allowed to spend some money. A brand new BTB611 driving flange was sourced in Sweden (!) and two brand new genuine BL driving cones were sourced from Gloucestershire. It actually cost more in shipping getting the flange sent over than to buy it!
Whilst all this was happening, I was trying to remember where I'd seen a report about shafts and flanges. I eventually found what I wanted in a BMC Australia Technical Service Bulletin.
 VOF707J by Penguin 45, on Flickr
Above courtesy of Australian Austin 1800 Archives.
The main jist of the document is to use a low strength thread locking compound on the splines and leave the car for eight hours. A suitable thread lock was duly ordered.
 VOF707J by Penguin 45, on Flickr
New parts. Took ages to get the storage wax off that flange. White spirit did the trick.
 VOF707J by Penguin 45, on Flickr
Shaft (and flange) splines thoroughly degreased. Both were coated with the thread lock compound. All then nipped up with the big washer, then the new cone dropped in and fully tightened up. I will leave the car until tomorrrow before driving again.
 VOF707J by Penguin 45, on Flickr
The flange and cone which have been replaced. You can see the wear lines around the cone.
Hopefully the problem is solved. The three key components are all brand new. There is no noticable rotational play on the flange, so fingers crossed.
Chris.

