|
|
OKR
Feb 27, 2023 21:44:26 GMT
Post by 1800heap on Feb 27, 2023 21:44:26 GMT
Thanks Andrew Its is going to stay the same colour. I actually have a sun visor somewhere that came off the OZ crab. No plans to change the look of OKR, sorry to disappoint. I also don't want to destroy the aerodynamics of the car!  I will probably have one on the OZ car though when I get there! That’s really neat work. Any thoughts on paint colour at the end or going to stick with same colour scheme? Also can you please give her one of those exceptionally cool external sun visors…if so am presuming it’ll be to your own design, buying one off the shelf would be far to straight forward… Here are the last couple of pictures of the rear as of this weekend. Cleaned up and treated. You can still see some of the original coating.  Etch primed and painted. 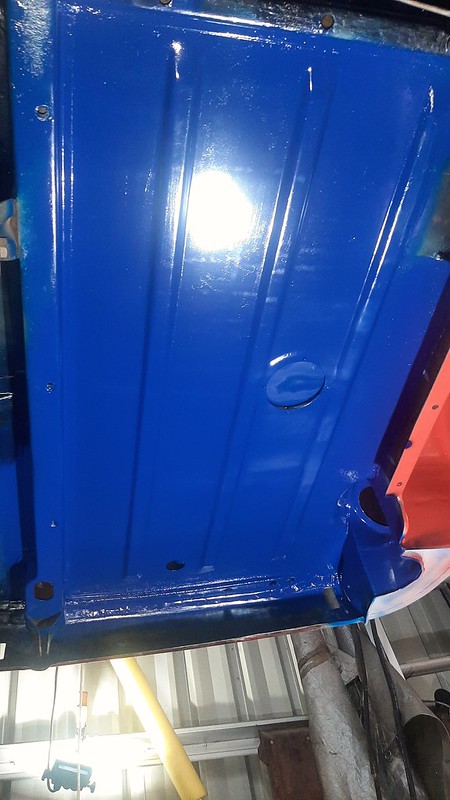 Ready for underseal.  I will leave it for at least a week to dry properly before the underseal goes on. I still have to paint the floor as you can see. Nick |
|
|
|
OKR
Feb 25, 2023 20:34:35 GMT
Post by 1800heap on Feb 25, 2023 20:34:35 GMT
I doesn't leave me much time no Andrew! Hopefully you will get your cars fixed without too much pain. Also I have to say Chris that I have a Ford and it will be the first and last Ford I ever own! The last two bits to go in to complete the fish bowl. I made them quite a while ago and finally they get to go on. I have added a drain to hopefully prevent the fish bowl effect!   Finished wing, which will require a skim of filler before paint. I am very happy with how close I got it to give minimal filler. Good old concrete! 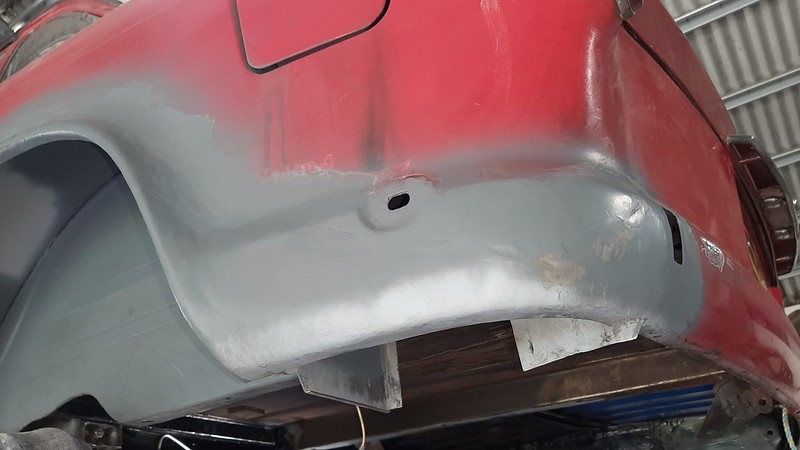 You can see the second pass inner weld a bit clearer here as I mentioned before. This adds strength as the outside is ground flush. 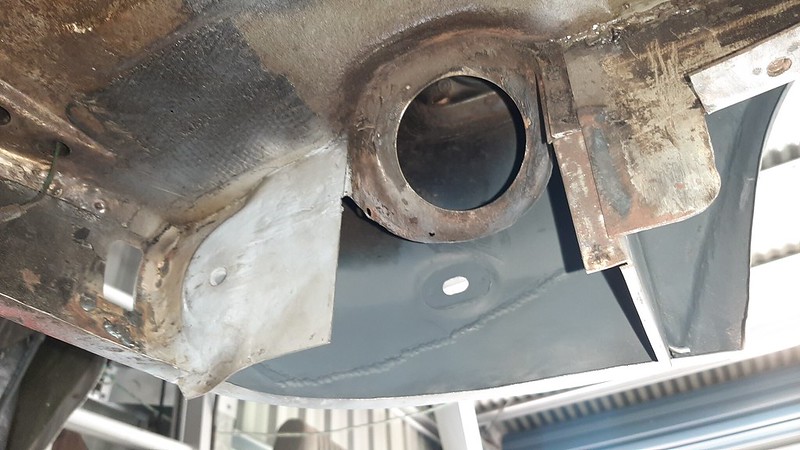 Bottom section final fit and adjust.  Plug welded in.  And the final piece, fit and adjust.   Almost there. A couple of small holes to fix with weld.  Done and painted ready for underseal. The rest of the underside is painted with blue so I might as well keep up the trend. I figure a bit of paint will help with rust prevention rather than just used underseal. 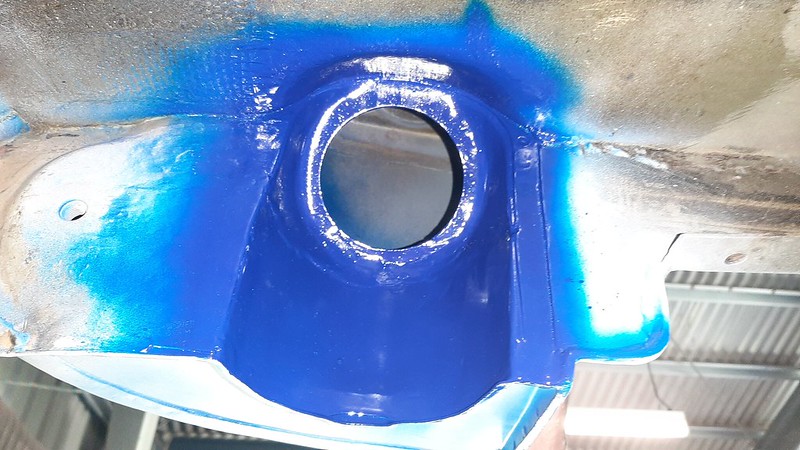 All I have to do now is clean up and paint the underside section where the petrol tank is and the back is done. Nick |
|
|
|
OKR
Feb 25, 2023 0:07:04 GMT
via mobile
Post by 1800heap on Feb 25, 2023 0:07:04 GMT
Hi Andrew
How ironic that the original part is available from a car thats pushing 90, but the newer one you have is not! What a pain. I suppose the MK2 Transit is getting on for 40 now and being a van wouldn't help for parts availability.
Is that kind of selection issue a common one with the Bristols? It sounds like a nightmare too. I hope it is not too painfull to get them sorted!
With OKR, am trying to keep up the momentum yes. The car is 50 on the 11th September this year, so I am aiming for back on the road for by the 50th!
The back is done apart from paint and underseal as of yesterday. I do have quite a bit more welding to do though.
Now I have the engine out I have noticed a couple of metalwork repairs that are needed. It wants a big clean up with the sand baster in the engine bay. I expect that will show up some other issues.
The other outstanding section is N/Side tie bar area which I started a while back.
Onwards and forwards.
Nick
|
|
|
|
OKR
Feb 24, 2023 9:37:02 GMT
via mobile
Post by 1800heap on Feb 24, 2023 9:37:02 GMT
I did the last bit of welding on it today and I am very relieved. It still needs a skim of filler and paint but thats the easy bit. Given what a pain it was to get right I am not surprised you had that feeling Chris. It seems I have now joined the fish bowl club! I have to say it was way easier to bodge it with filler. I just can't be that dodgy any more!
Nick
Good stuff, Nick. I had a huge déja vu moment with your last picture! C. |
|
|
|
OKR
Feb 24, 2023 8:09:32 GMT
Post by 1800heap on Feb 24, 2023 8:09:32 GMT
I forgot to mention in the last post that I used a large cardboard template, which is a copy from the good OZ crab wheel arch. It goes all the way from the sill to the fish bowl, following the profile. I also used another small template made of the side profile at the center of the arch. It takes in the set in the rear wing where the pin stripe goes as a datum and then goes down the profile of the arch, so that the height of the arch section is correct. I didn't take any pictures of this but will later on. With the front section in the last post, I could not get the curve to follow the correct line all the way. I had to cut off about 4 inches of it. Because of this it no longer meets the rear section, as you will see later. It seemed easier than fighting it to get right! As with the front section I seam welded the inner and outer arches together where they were close. They are touching most of the way so this was easy. It is also probably the reason the arch rusted in the first place, once water made its way in! So this picture shows the top section seam welded in place using the template. It was all tacked to where it needed to be first. You can see the tacks in the lower section. I neglected to take a photo of that being done but you get the idea I'm sure. 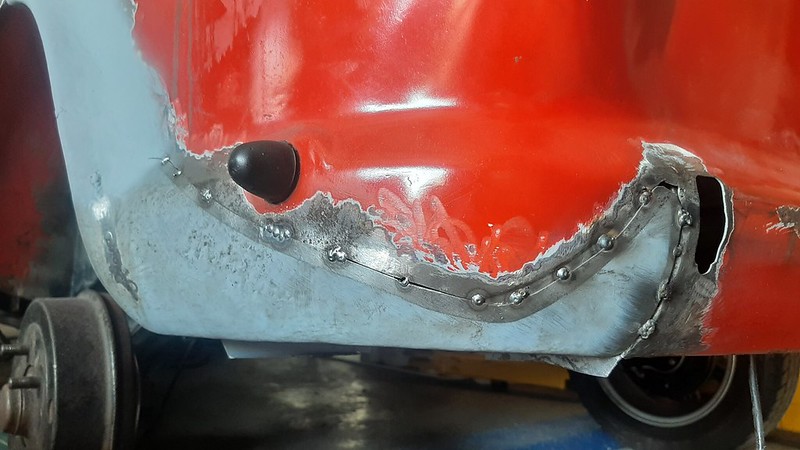 Bit more welding. Small sections at a time to stop it warping.  You can see where I have welded it to in inner arch for insurance above. I will tidy that up with a few spots of weld on the outside and some grinding. As I was going to grind the outer welds flat, I went over the inner side with a seam of weld as seen here to add strength. I do that wherever I can get to the back.  Here is the little section added back in to join up the two bits. Sometimes the welds look a bit messy but any bits you miss you redo after a flat back with the grinder. It takes a while but you end up with a nice neat job.  I try to etch prime as I go because I don't always get back to a section straight away. It saves recleaning surface rust. A bit more grinding required but the outer part is basically done. At this stage I have only primed the section and as you can see there should only be a light skim of filler to finish. This is a result of a lot of fiddling and adjusting, plus careful alignment and loads of welding and grinding!  Next time the fish bowl itself! Nick |
|
|
|
OKR
Feb 23, 2023 20:21:25 GMT
via mobile
Post by 1800heap on Feb 23, 2023 20:21:25 GMT
Hi Andrew Glad to here your house rebuild and move is done and dusted. How did you go sorting out all your gear from the old house? I expect your are glad that is over with anyway! I assume with the Model A your are trying to get rid of the slightly baggy feel you get from an old worn steering box. The two tooth boxes are adjustable I think, so I assume it has a bit of age related wear that does not adjust out? Manual shifting with the Bristol. I am sensing this is possibly your quest for a little extra speed and performance resurfacing now you have time, which sounds perfectly reasonable to me! Bummer they are both off the road at the same time though. Nick Morning Nick Thanks for the fascinating update - love the attention to detail and ingeniousness! I've just finished a house rebuild and move and am now back on the cars - dealing with a couple of issues that I've been putting off - trying to improve the steering box on the Model A and the gear selection of the Bristol (it's an auto but shifting it manually is not as positive as I'd like). Both a bit of a fools errand as Bristol fine if you leave it in drive and steering box in Model A was good enough to pass MOT. So now with Spring around the corner I find myself yet and again with two cars - neither of which I can drive.... Looking forward to next update. All the best Andrew |
|
|
|
OKR
Feb 22, 2023 21:08:42 GMT
Post by 1800heap on Feb 22, 2023 21:08:42 GMT
Thanks David It would be lovely if you could just do a quick scan of the part you need and either order one or have your own device that prints it. I expect eventually it will come to that! I admire your patience as well as your skill in making all of these complex shapes. It is a shame that 3D printing for the masses has not evolved as quickly as hoped, but then would you get the same sense of achievement? David Continuing on from yesterday's post, next up was the front section of the arch. To make the section I used the same piece of shaped round bar that I used for the off side rear arch. You bend it to the curve you are after and bash the flat piece over the top. This is a picture from the off side repair, but you can see the method.  To help with strength I seam welded the inner and outer arches together where they were close enough.  Then the curved section goes over and the back is tidied up after. I have put some plug weld holes in to give it a bit of stability while it is seam welded it in. There is a short section of joddle to make it easier to seam weld the section as I can't get to the back of it. 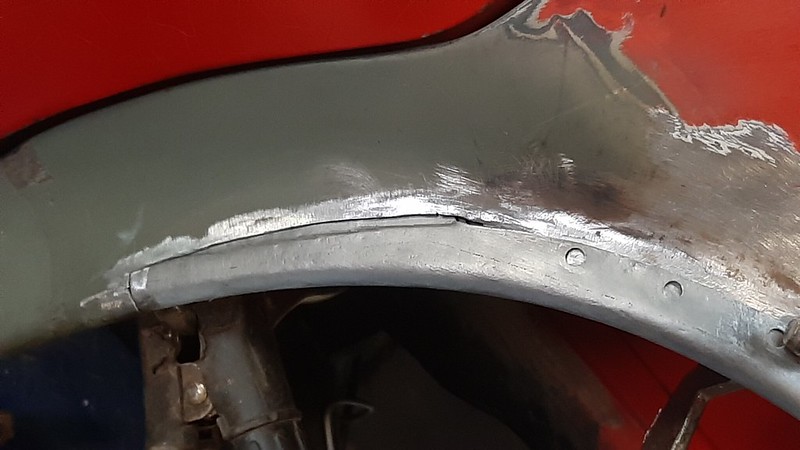
 Welded in place.  There you have it. many hour of work later its in. Move on to the rear section. Nick |
|
|
|
Post by 1800heap on Feb 21, 2023 21:37:29 GMT
Welcome Paul. I am looking forward to seeing the car on here. As Chris said you are the first Kimberley.
Nick
|
|
|
|
Dipstick
Feb 21, 2023 21:34:58 GMT
via mobile
Post by 1800heap on Feb 21, 2023 21:34:58 GMT
Thanks for the info Chris and Snoopy. I think I should be in the ball park now.
Nick
|
|
|
|
OKR
Feb 21, 2023 21:15:30 GMT
Post by 1800heap on Feb 21, 2023 21:15:30 GMT
Jigsaw puzzle! Not much left of the fish bowl as you can see. Lots of curves to get back into place! 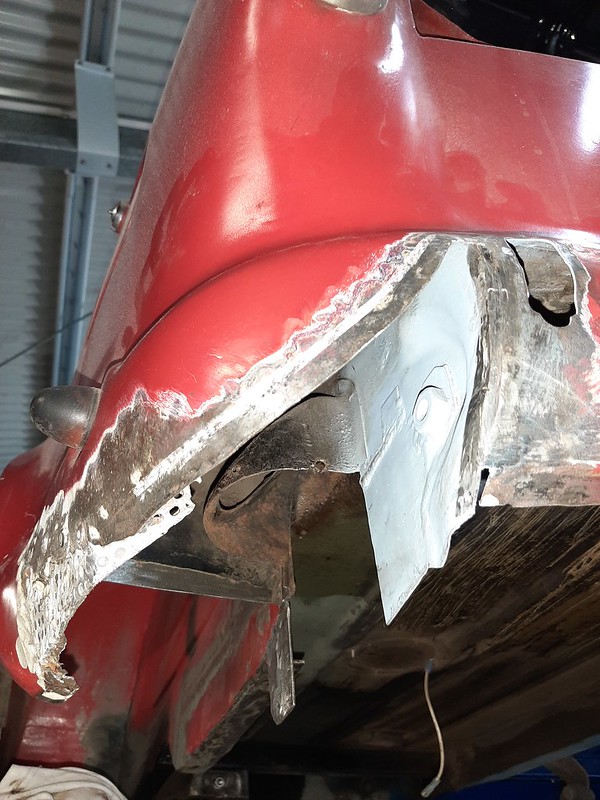 This is the small section I already made from the last time I visited the area.  More to cut out.  Start cutting. Looking a bit sad now!  Here I have started to shape the body to fit the new section.  Then I am test fitting, adjusting and adding bits to fill in the whole section.  After a considerable amount of fettling and adding bits, this is the part I end up with.   I now have to start making the front section of the arch. I need to use a template copied from the OZ car, to get the arch shape back to how it should be. Next time! Nick |
|
|
|
OKR
Feb 21, 2023 9:44:25 GMT
via mobile
Post by 1800heap on Feb 21, 2023 9:44:25 GMT
Thanks Chris I did wonder half way through if all the effort was going to be worth while! I think if I had found a new old stock rear wing I would not have wanted to cut it up for such a small piece. I must say I am impressed with your efforts in the parts reproduction department. Just shows what you can do if you put your mind to it. Nick That's a fantastic effort, Nick. Huge learning curve accomplished - very well done. You're right about release agents. I have used a variety of "official" (and expensive) ones during my own mould making, all of which gave poor results. I settled in the end on cheap aerosol beeswax furniture polish! Works a treat. Chris. |
|
|
|
OKR
Feb 21, 2023 6:29:14 GMT
Post by 1800heap on Feb 21, 2023 6:29:14 GMT
Ok so at this point I have the fiber glass copy. The plan was to make a reusable plaster copy with the fiber glass section and then use that to make the concrete formers. The concrete was going to have two parts so that the metal panel could be pressed into shape using the same method body panels are normally made. I wanted the plaster to stay attached to the plywood, so there are a couple of metal strengtheners bolted to the ply that would be inside the plaster.  Here it is sealed up ready to pour the plaster.  Plaster poured and dry.  Success, with bit of clean up required.  Cleaned up painted and polished. I took quite a bit of time here because it was going to be reusable. Unfortunately, there was a flaw in the plan!  Boxed up ready for concrete.  Vibration from an old orbital sander sorted.  Concrete poured and vibrated to get the air out.  Concrete all good but sadly at the expense of the plaster, as it had to be chiseled out! The release agent did not work but I think the main problem was no flexibility in the plaster or concrete. As I am sure Chris will agree, as our expert with these things. I was never going to get it out in one piece. I needed it to be rubber not plaster. Oh well! So having wasted time making the plaster part perfect that I had just destroyed, I decided to use the concrete as a former and not a press, and hammer the part into submission. In actual fact I should have realised that the inner part of the press needed to be a copy of the inner section of panel, not the outer section, so even if it came out it would not have been any good to me. There has to be a gap in the outer and inner parts of the press where the metal ends up getting pressed into. Doh!  Not to worry I got the part I needed, all be it with some slight damage to the concrete due to hitting the metal quite a bit in certain areas. I had hoped to be able to supply some repair panels, but that will have to wait until I get time to finish it as a press.   Here it is. All that effort for this, you might say, but it is an accurate copy of the section and as you will see in later posts it fit the car nicely. I would have never got that trying to shape it by eye.  Nick |
|
|
|
OKR
Feb 20, 2023 22:43:13 GMT
Post by 1800heap on Feb 20, 2023 22:43:13 GMT
It has been a while since I have posted on the forum, I am finally near to finishing the section that has been taking all my time so here is a quick update. I had been avoiding the fish bowl section on the near side because I thought it was going to be an extreme pain. I can say now I was right, it was! Eventually there was no choice but to get on with it though. You may remember I did post quite a while ago about making a concrete former, for the repair. I needed a section of the rear wing which is a very difficult shape to beat out of a flat piece of metal! There was a lot of different stages to the fix as the rust was in the wheel arch as well so I will have to do several posts to cover it. So here we go on the concrete former. This is the OZ crab, as previously posted, that I have prepped to make a fiberglass mould. 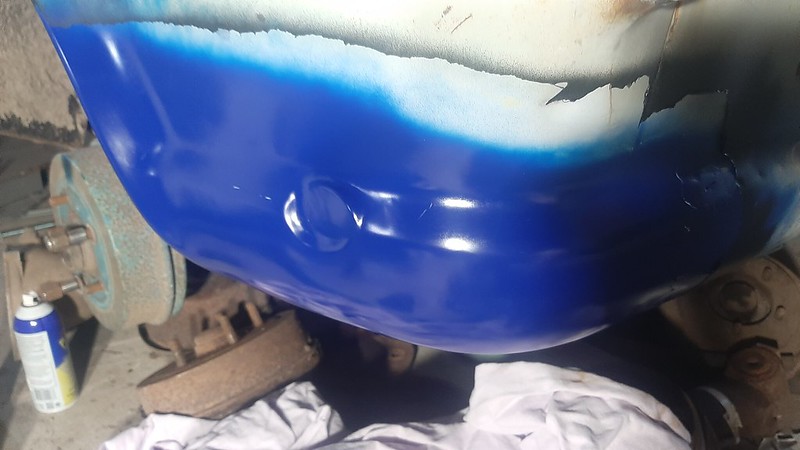 Glass going on.   As you can see my release agent did not work!  But the copy was ok after a clean up.  Well I am out of time already and have to go to work, so this will be it for the first post. I will have to catch up with all the other new posts from everybody later! Nick |
|
|
|
Post by 1800heap on Jan 10, 2023 21:20:23 GMT
Hi Chris I am honoured you called making your part doing a Nick. Why buy a part when you can spend hours making one. Well because we can, Im with you! Glad to see your workbench is as cluttered as mine Chris. The cup of tea is obligatory but Tottenham Hotspurs what!  The miss alignment of the drive shaft may have damaged your diff washers, depending on how long it has been like it. Have you got any difference in the gap between the front of the sill and the wheel when you check between sides? Sometimes its bad enough for the wheel to rub on full lock. The Oz crab was bad. A front end prang I think caused it. Actually the chassis was bent where the driveshaft goes through the body. Not easy to straighten either, but was fixed with a jack, heat and big hammer. Hopefully just the engine mounts and bottom stabliser adjustment causing it. Nick |
|
|
|
Post by 1800heap on Dec 29, 2022 20:42:26 GMT
I haven't seen anything like this on my oz mk11. I have seen it with dial circuit brakes on a Triumph. Not PBR but may be the same idea. It was a pressure differential valve. When one of the brake circuits fail, the valve senses the pressure differental, the switch clicks over and shows a brake warning light. They are a pain for bleeding the brakes and not that easy to reset! There is no mention of such a valve in the Oz crab WM that I can see. Can't think of anything else.
Nick
|
|


