|
|
Post by foglaursen on Nov 16, 2014 9:46:05 GMT
Formation of rust needs oxygen to be present. As it is a closed system air cannot enter, and therefore rust cannot be formed. The only time oxygen can enter is when the system is opened which includes adding/exchanging fluid. New Hydrolastic fluid will always contain some dissolved oxygen. Peter  |
|
|
|
Post by dave1800 on Nov 16, 2014 11:31:41 GMT
It's an interesting point you have made and the official fluid formula contained a corrosion inhibitor. Now would the process of using fresh fluid provide more corrosion protection or less? I am unsure. There may have been some corrosion inside the pipes when they were installed that "consumed" the inhibitor. "The liquid is a solution of 49% alcohol, 49% distilled water, 1 % triethanolamine phosphate and 1% sodium mercaptobenzthiazole, which is of constant viscosity and has a freezing temperature of 31 degrees C. According to BMC, the particular reason this fluid is used instead of distilled water with an antifreeze is that this fluid IS an antifreeze solution of constant viscosity containing a rust inhibitor with an agent added to make the fluid distasteful. (This last was a legal requirement.)" Regards David Formation of rust needs oxygen to be present. As it is a closed system air cannot enter, and therefore rust cannot be formed. The only time oxygen can enter is when the system is opened which includes adding/exchanging fluid. New Hydrolastic fluid will always contain some dissolved oxygen. Peter  |
|
|
|
Post by foglaursen on Nov 16, 2014 12:59:12 GMT
I think that the corrosion inhibitor, triethanolamine phosphate, would probably break down and loose its inhibiting ability in time. This could explain the corrosion. When all oxygen is used the corrosion stops. I think that the amount of rust you see looks much worse than it actually is when it is wet. After 50 years the inside of the Hydrolastic tubes still look quite good. Peter  |
|
|
|
Post by tony on Nov 17, 2014 4:36:38 GMT
Thanks to everyone here who has given advice and diagnosing work.
Sorry for being late here. My PC at home has been refusing to work for me as it suddenly shows down within a few minutes after I turn it on. I have to turn it on for about 10 times and it could work if it is happy. Now it quits.
With good luck, Anthony has found some units for me, one front and one rear.
And good news is we fixed the problem on the following day. My landcrab seems to be back although I am worried about the RIGHT rear displacer unit.
I'll show up the rest of pictures after I have another PC at home.
Regards
Tony
|
|
|
|
Post by tony on Nov 19, 2014 9:37:12 GMT
I would like to ask anyone here what kind of fluid they use for the hydrolastic displacer system of landcrabs. We used to use SHELLZONE Antifreeze/coolant plus 50% water. This time we used ABRO Dark Green Coolant as we don't have any Shellzone products . I don't know if it is fine for this time. Any suggestions? Thanks to David who suggests hydrolastic fluid should be changed very 5 years. Our left side had not be changed for more than 10 or years or more ?? and the right side had not be changed for more than 8 years until we repaired the bushing/bearing of left rear suspension arm a few weeks ago. I did change the hose of rear displacer unit 8 years ago on my own. Thanks to Tommy, too. He wrote that there could be any indication the bearing work/replacement we did to the failure, which has made me think of what kinds of the causes were this time. I had not seen a burst displacer unit before. According to my father's saying that he had been driving on the high way and went through a junction to the hospital. Speed probably was about 50 ~ 60 km per hour and he made a left or right turn. He suddenly heard a sound and felt vehicle fall down. 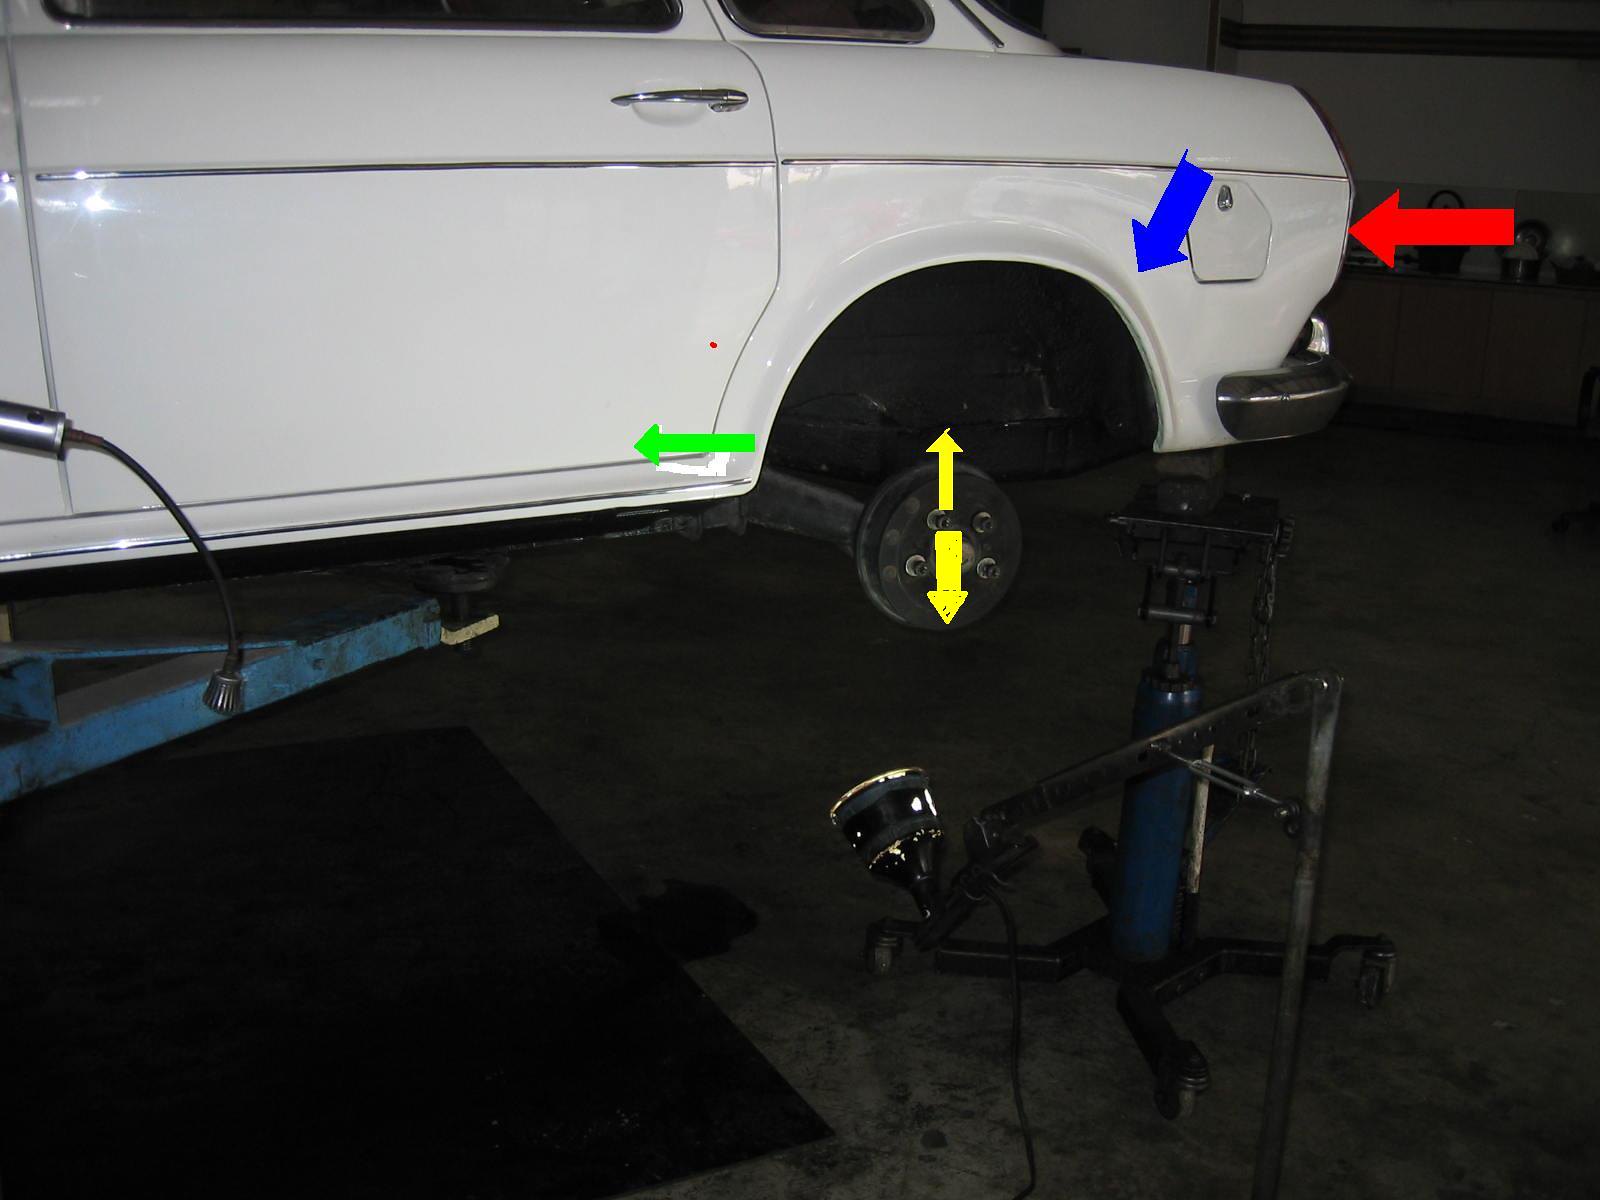 The picture above shows what I have thought about the impact. when the vehicle is hit at the end ( red arrow ), the body will try to fall down, which will reduce the distance between the body and rear suspension arm and less impact ( green arrow ) will go to the displacer unit. I also think of the impact of car accident that happened in March this year. The impact could have done something to the displacer unit. Of course I wouldn't blame on the age. There is a picture below of the burst displacer unit that may show an indication. 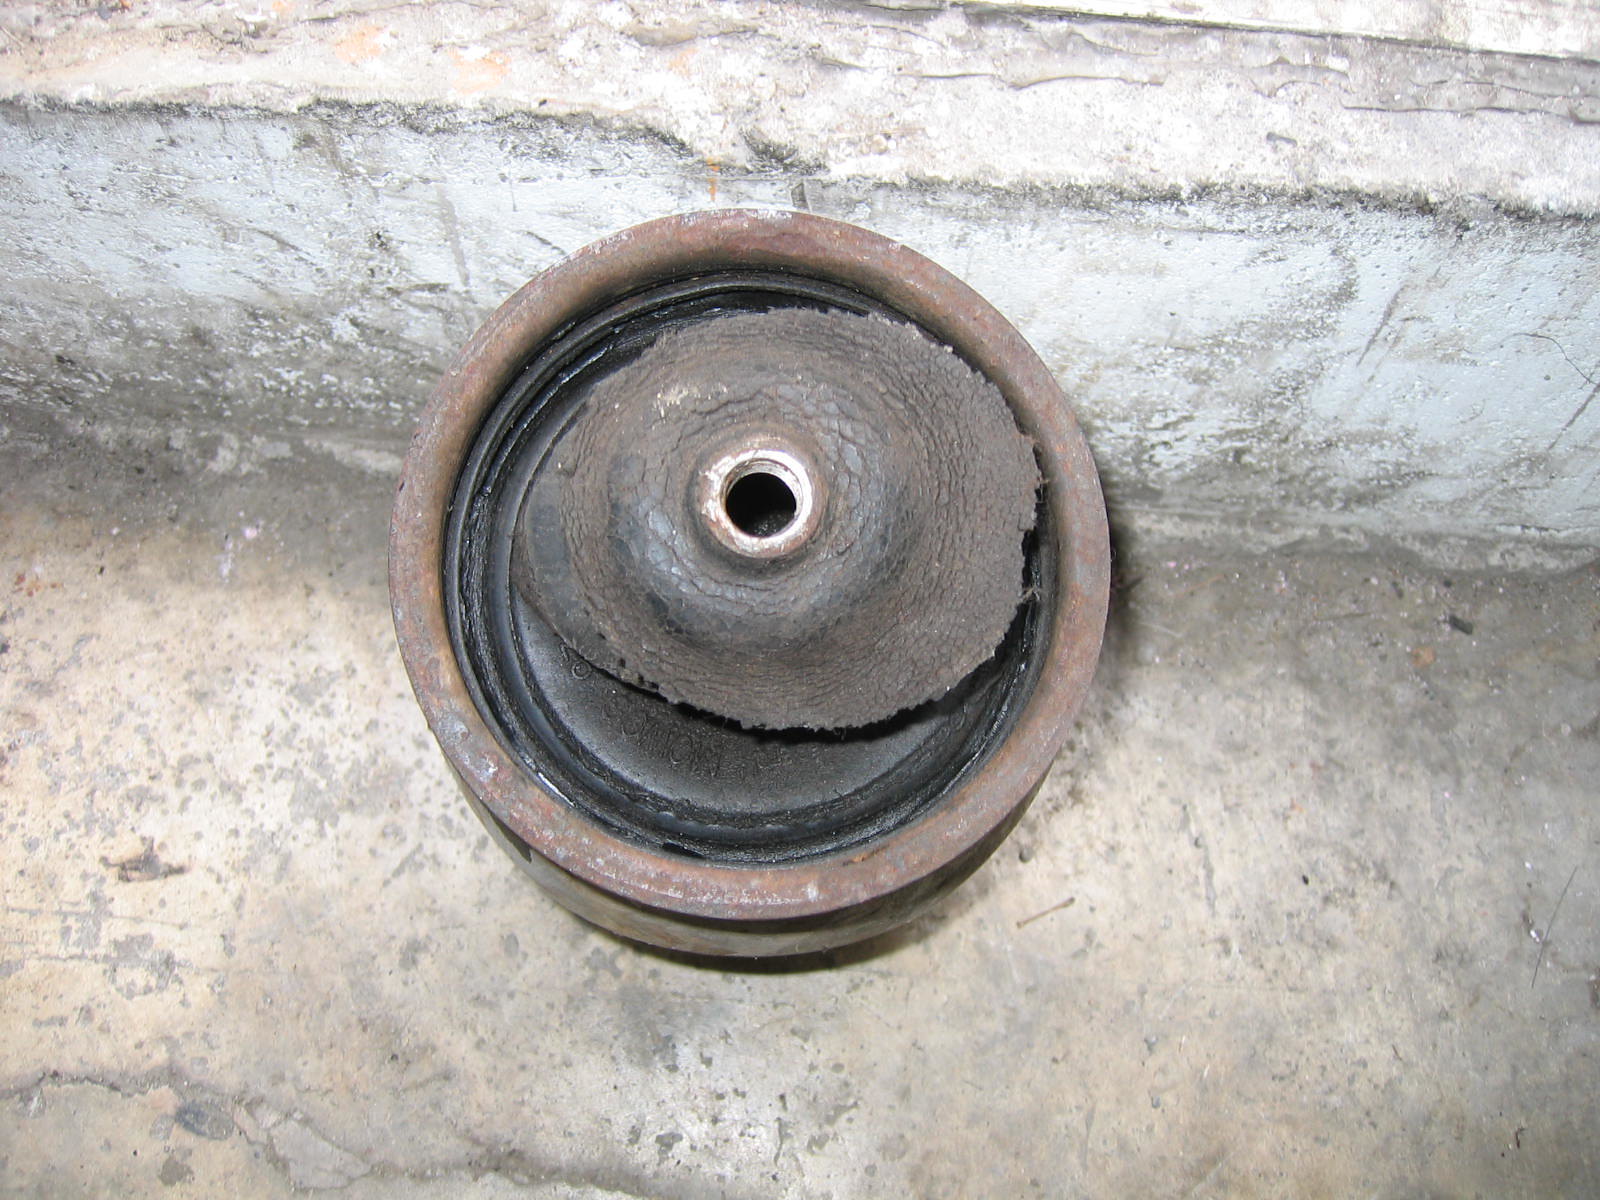 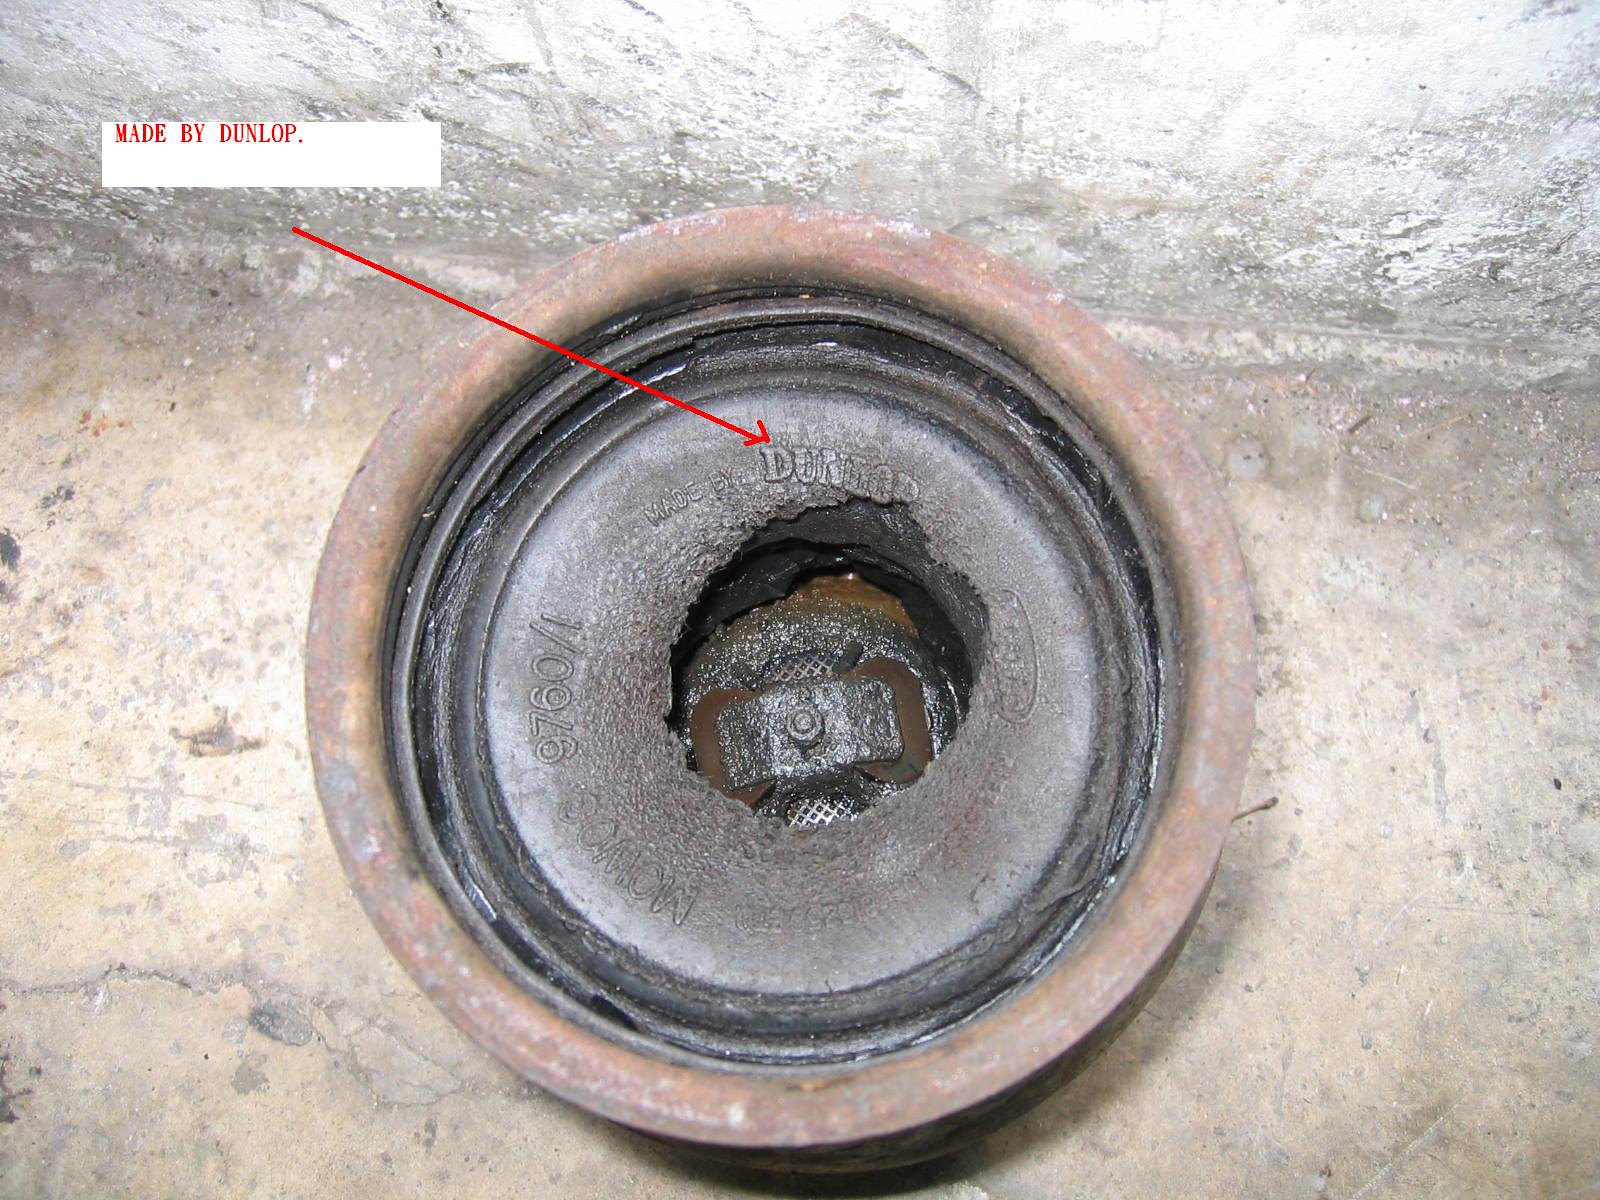 Made by DUNLOP. |
|
|
|
Post by tommydp on Nov 19, 2014 14:52:41 GMT
Tony, there's only one thing to use, and that's hydrolastic fluid!
Tommy.
|
|
|
|
Post by tommydp on Nov 19, 2014 17:21:39 GMT
Here's the recipe, if the original stuff is not available. The fluid is still made, by different manufacturers. Postage could be a problem, perhaps. I get the Morris lubricants version from local Mini parts suppliers. www.hydragas.co.uk/technical.htmlTommy |
|
|
|
Post by tony on Nov 20, 2014 4:02:20 GMT
Thanks Tommy.
Unfortunately there is probably no such hydrolastic fluid sold here, Taiwan. The car dealers have been changed to other business men who just sell and service new vehicles. The car parts sellers for Austin don't run big business here, some of them have closed their shops. Ford do the service for Jaguar here.
As David mentions that alcohol is known to attack rubber whereas coolant is compatible with the rubber hoses. He also talks about the correct viscosity to the displacer units. It doesn't snow in TAIWAN, except for the top of few high mountains. We have been using coolant for the displacer units for more than 25 years I believe. Perhaps if we use the coolant plus 60 ~ 70% water, which may meet the viscosity??? And we change the coolant every 3 or 5 years. Someone in US suggests that the thermostat should be changed every 5 years if it is often driven.
Regards
Tony
|
|
|
|
Post by tony on Nov 20, 2014 4:36:59 GMT
Sorry for showing up the picture. I also add it here. 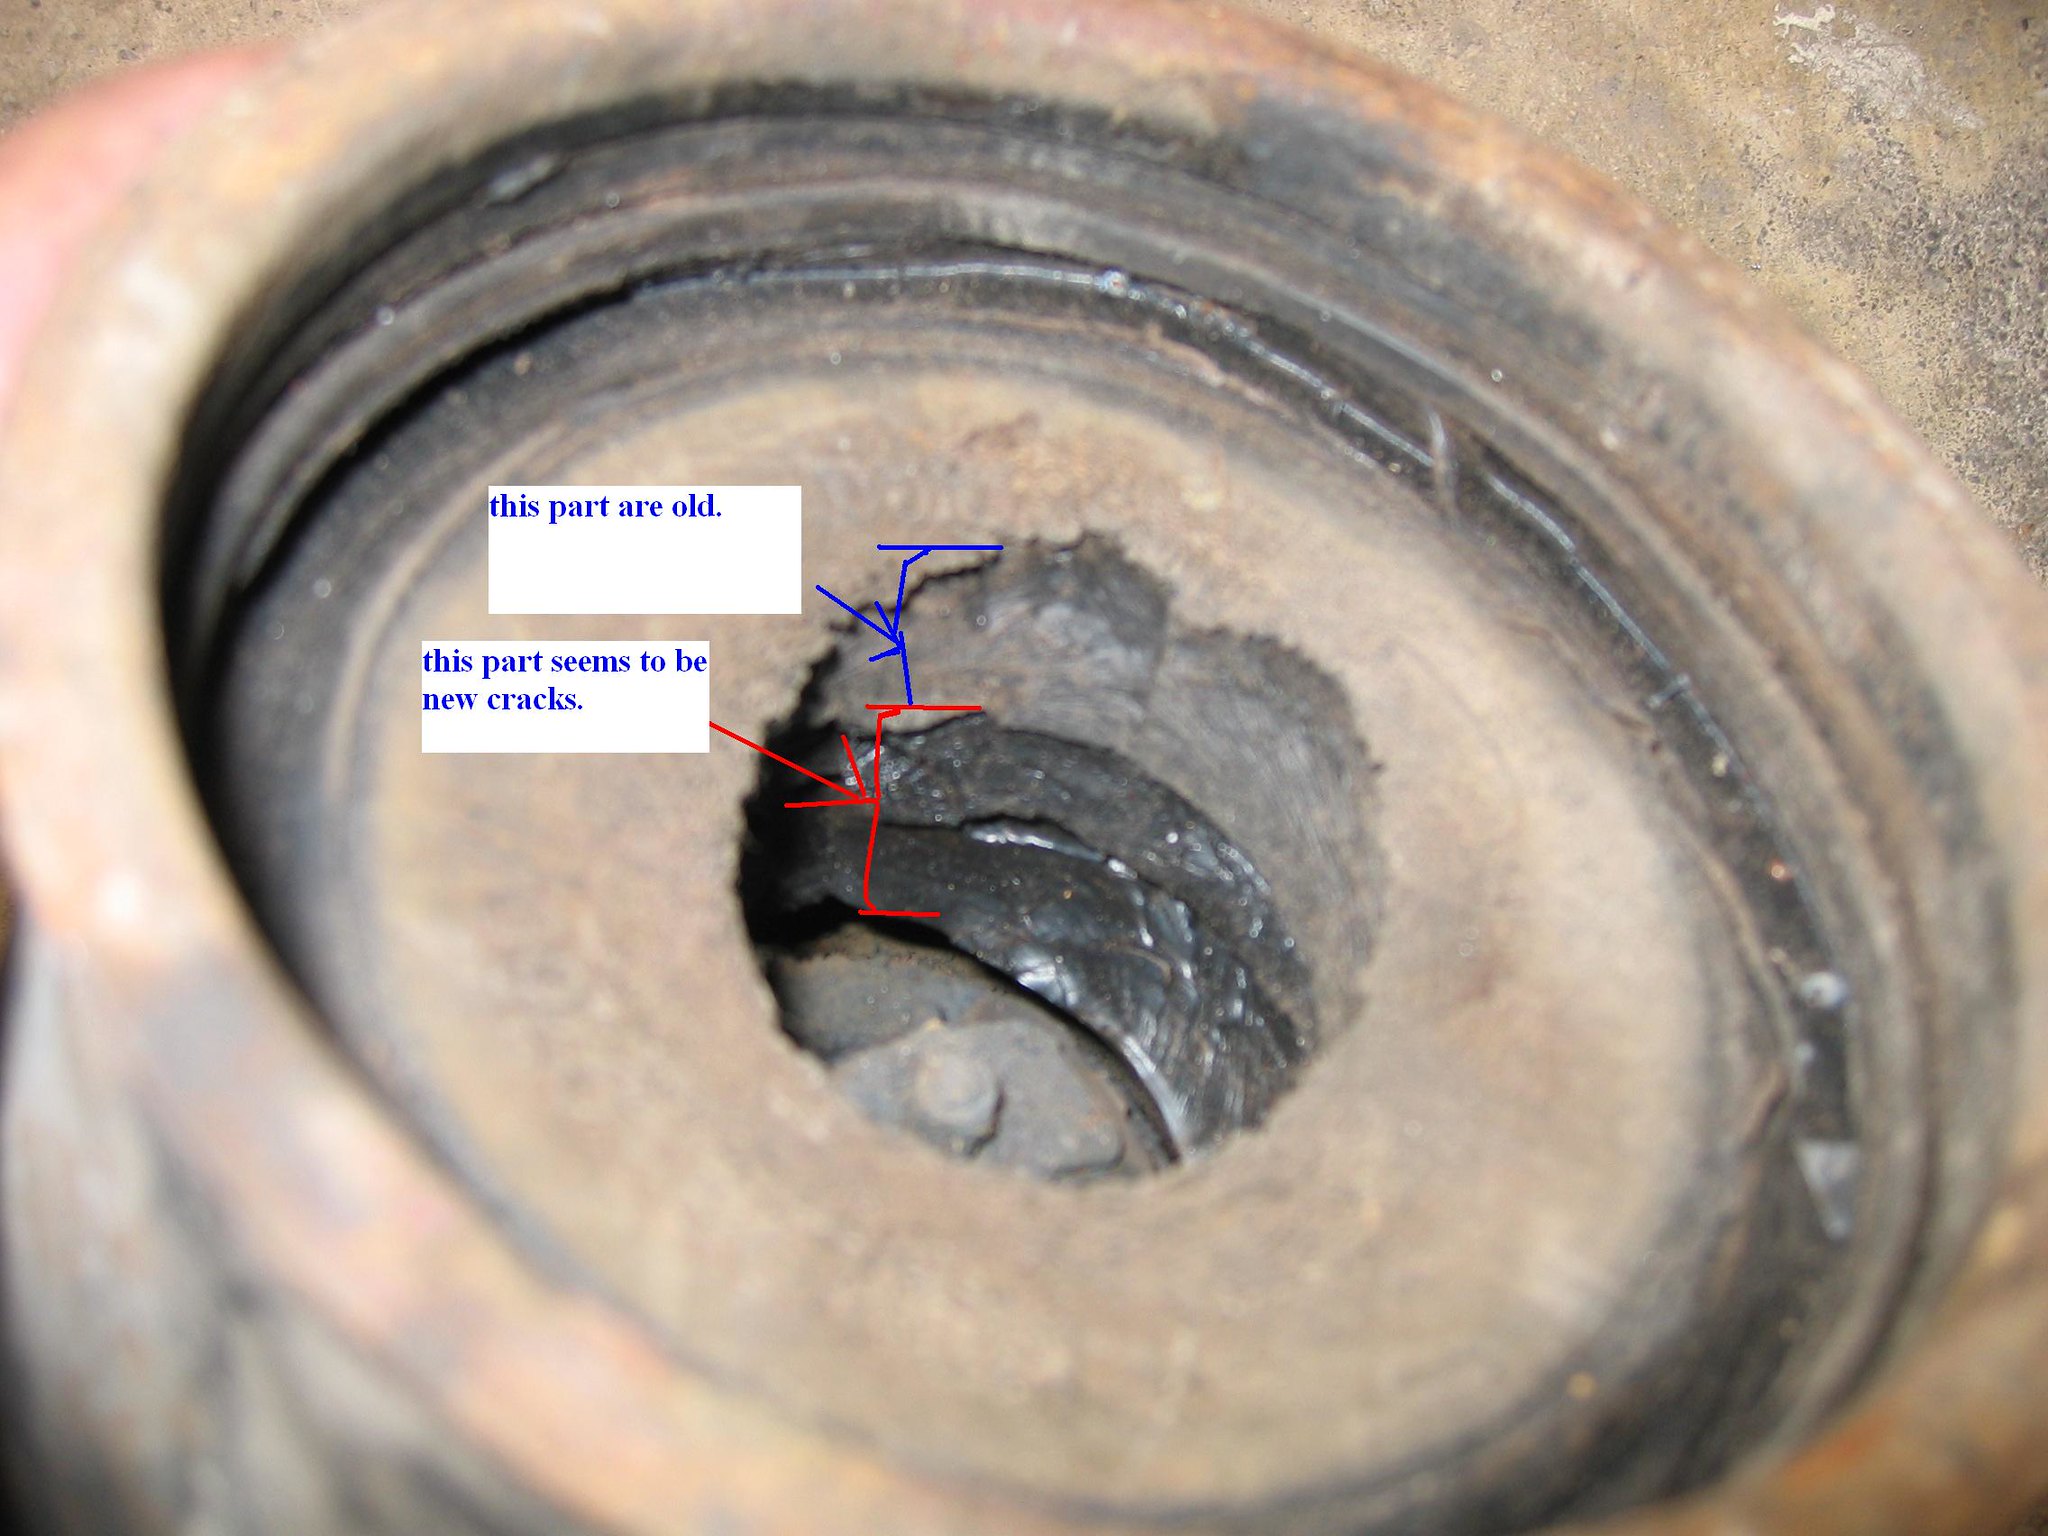 You see the two different colours, which really makes me worried about the other rear displacer unit. I don't know how long it will last after the impact. 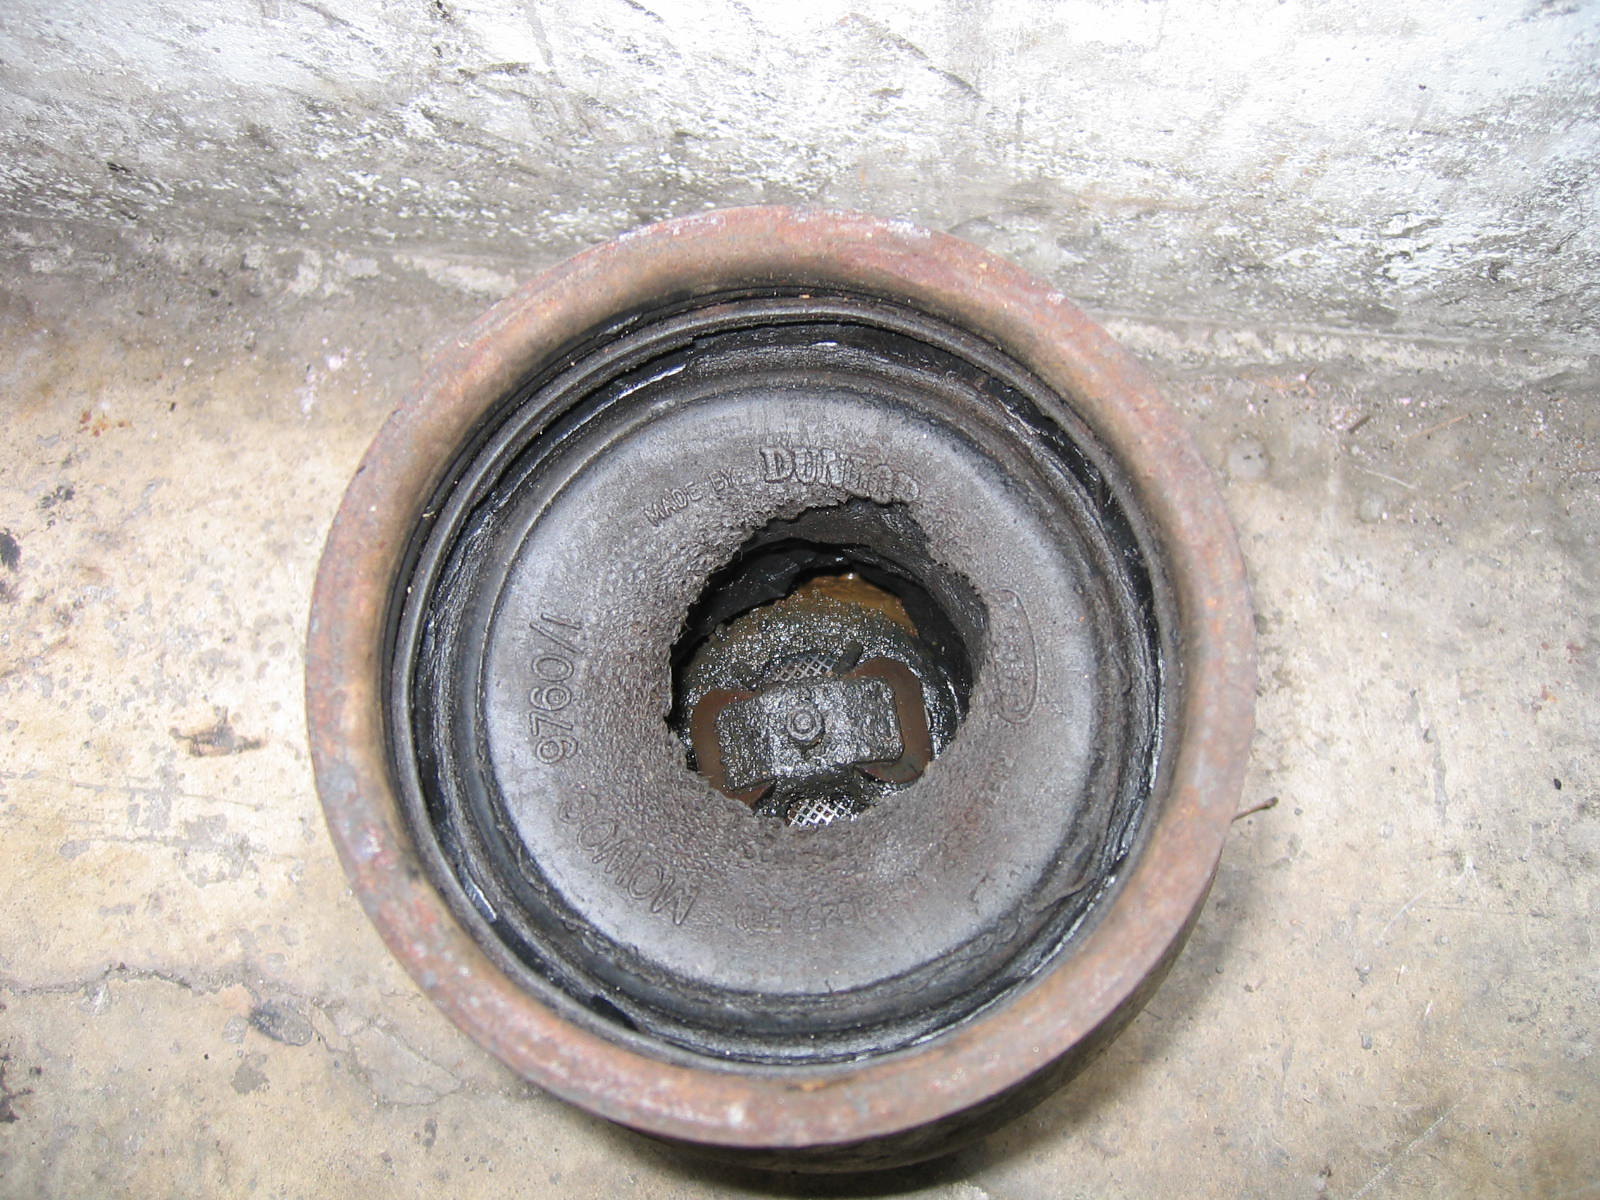 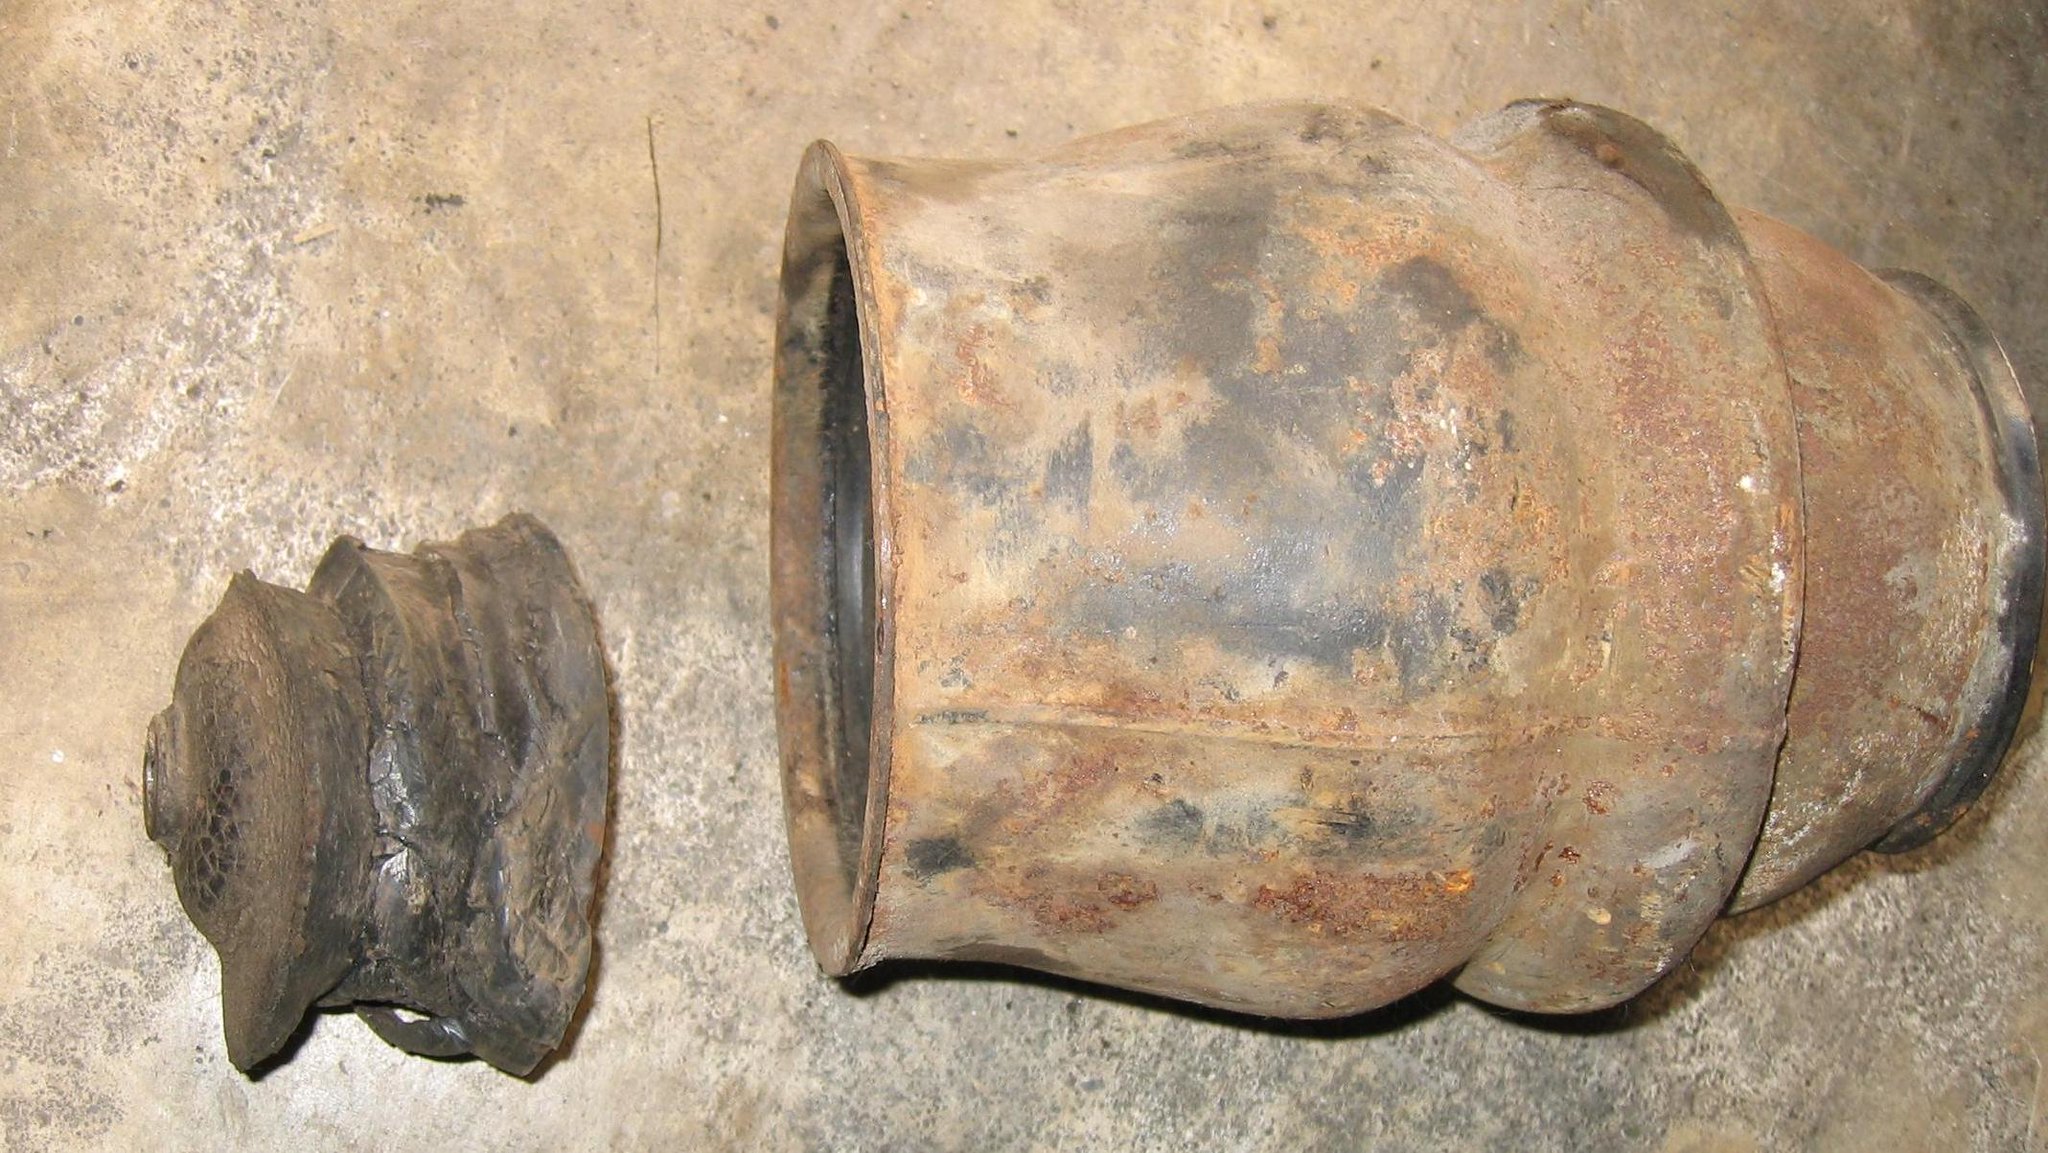 This left rear displacer unit had a its hose cracked or burst about 10 or more years ago. Father did the modification on it and taped the threads with a rebuilt new hose. The rebuilt new hose was made by a nearby hose maker. |
|
|
|
Post by tony on Nov 20, 2014 5:01:33 GMT
David has found an article in Hydrolastic Displacer repairs. Please click here. linkThis really makes me think how to repair mine. But when I took a very close look at the diagram of the unit I realise that it will be very difficult for me to do so. Mine is the No.2 which is damaged and burst. And there is a damper valve ( No 6 ). 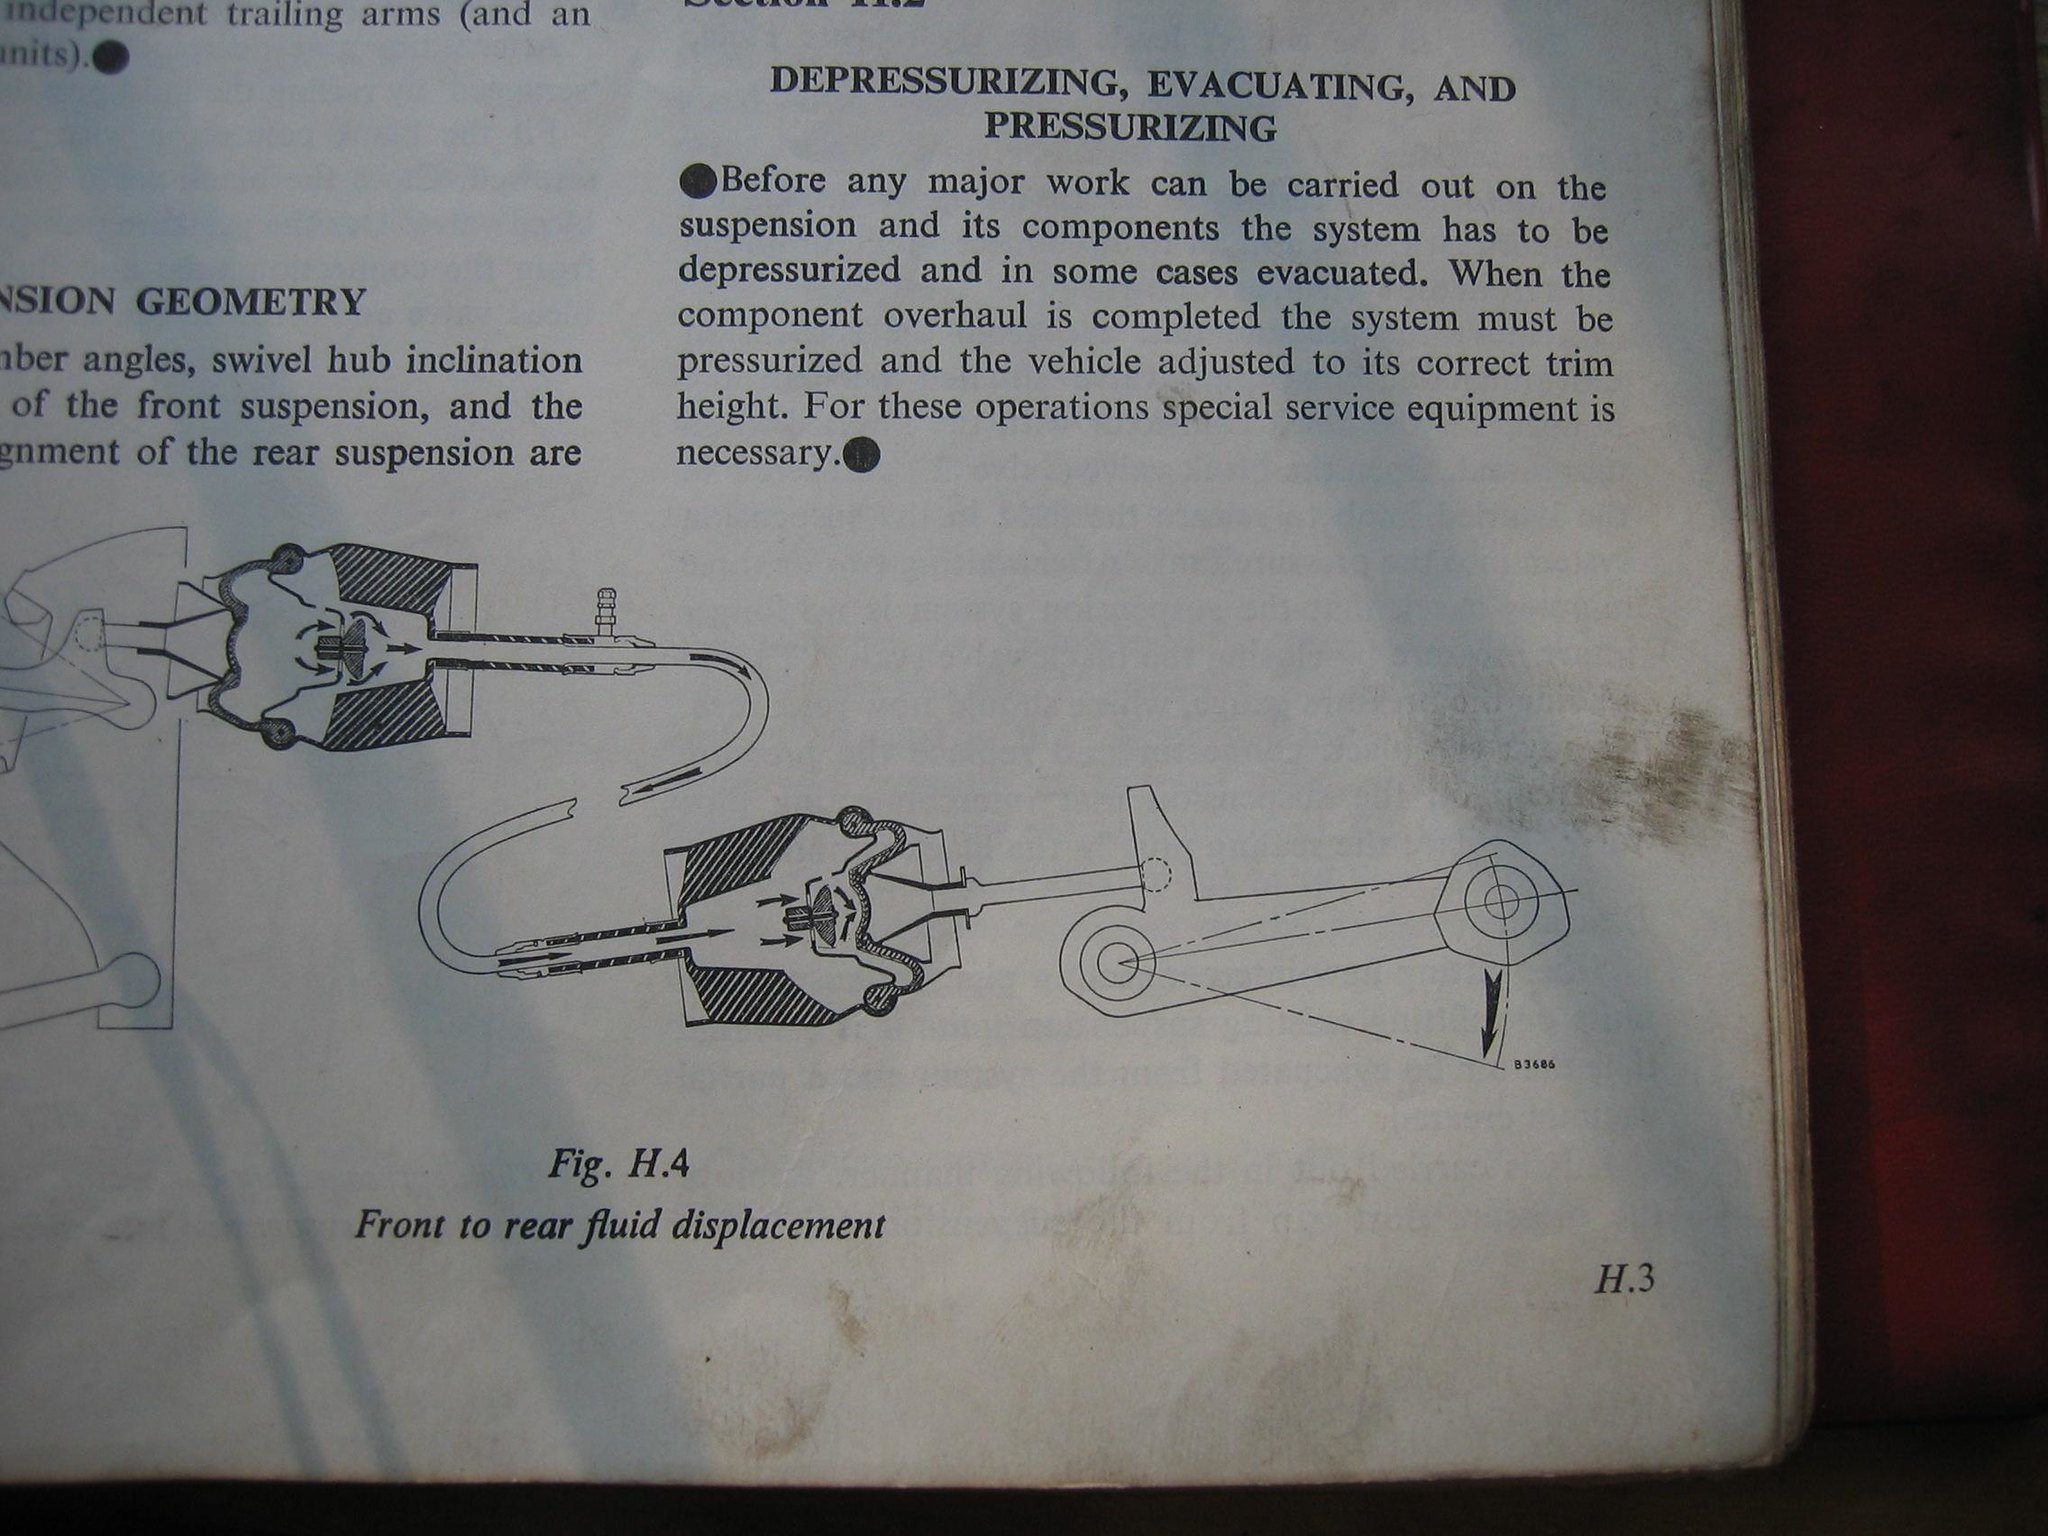 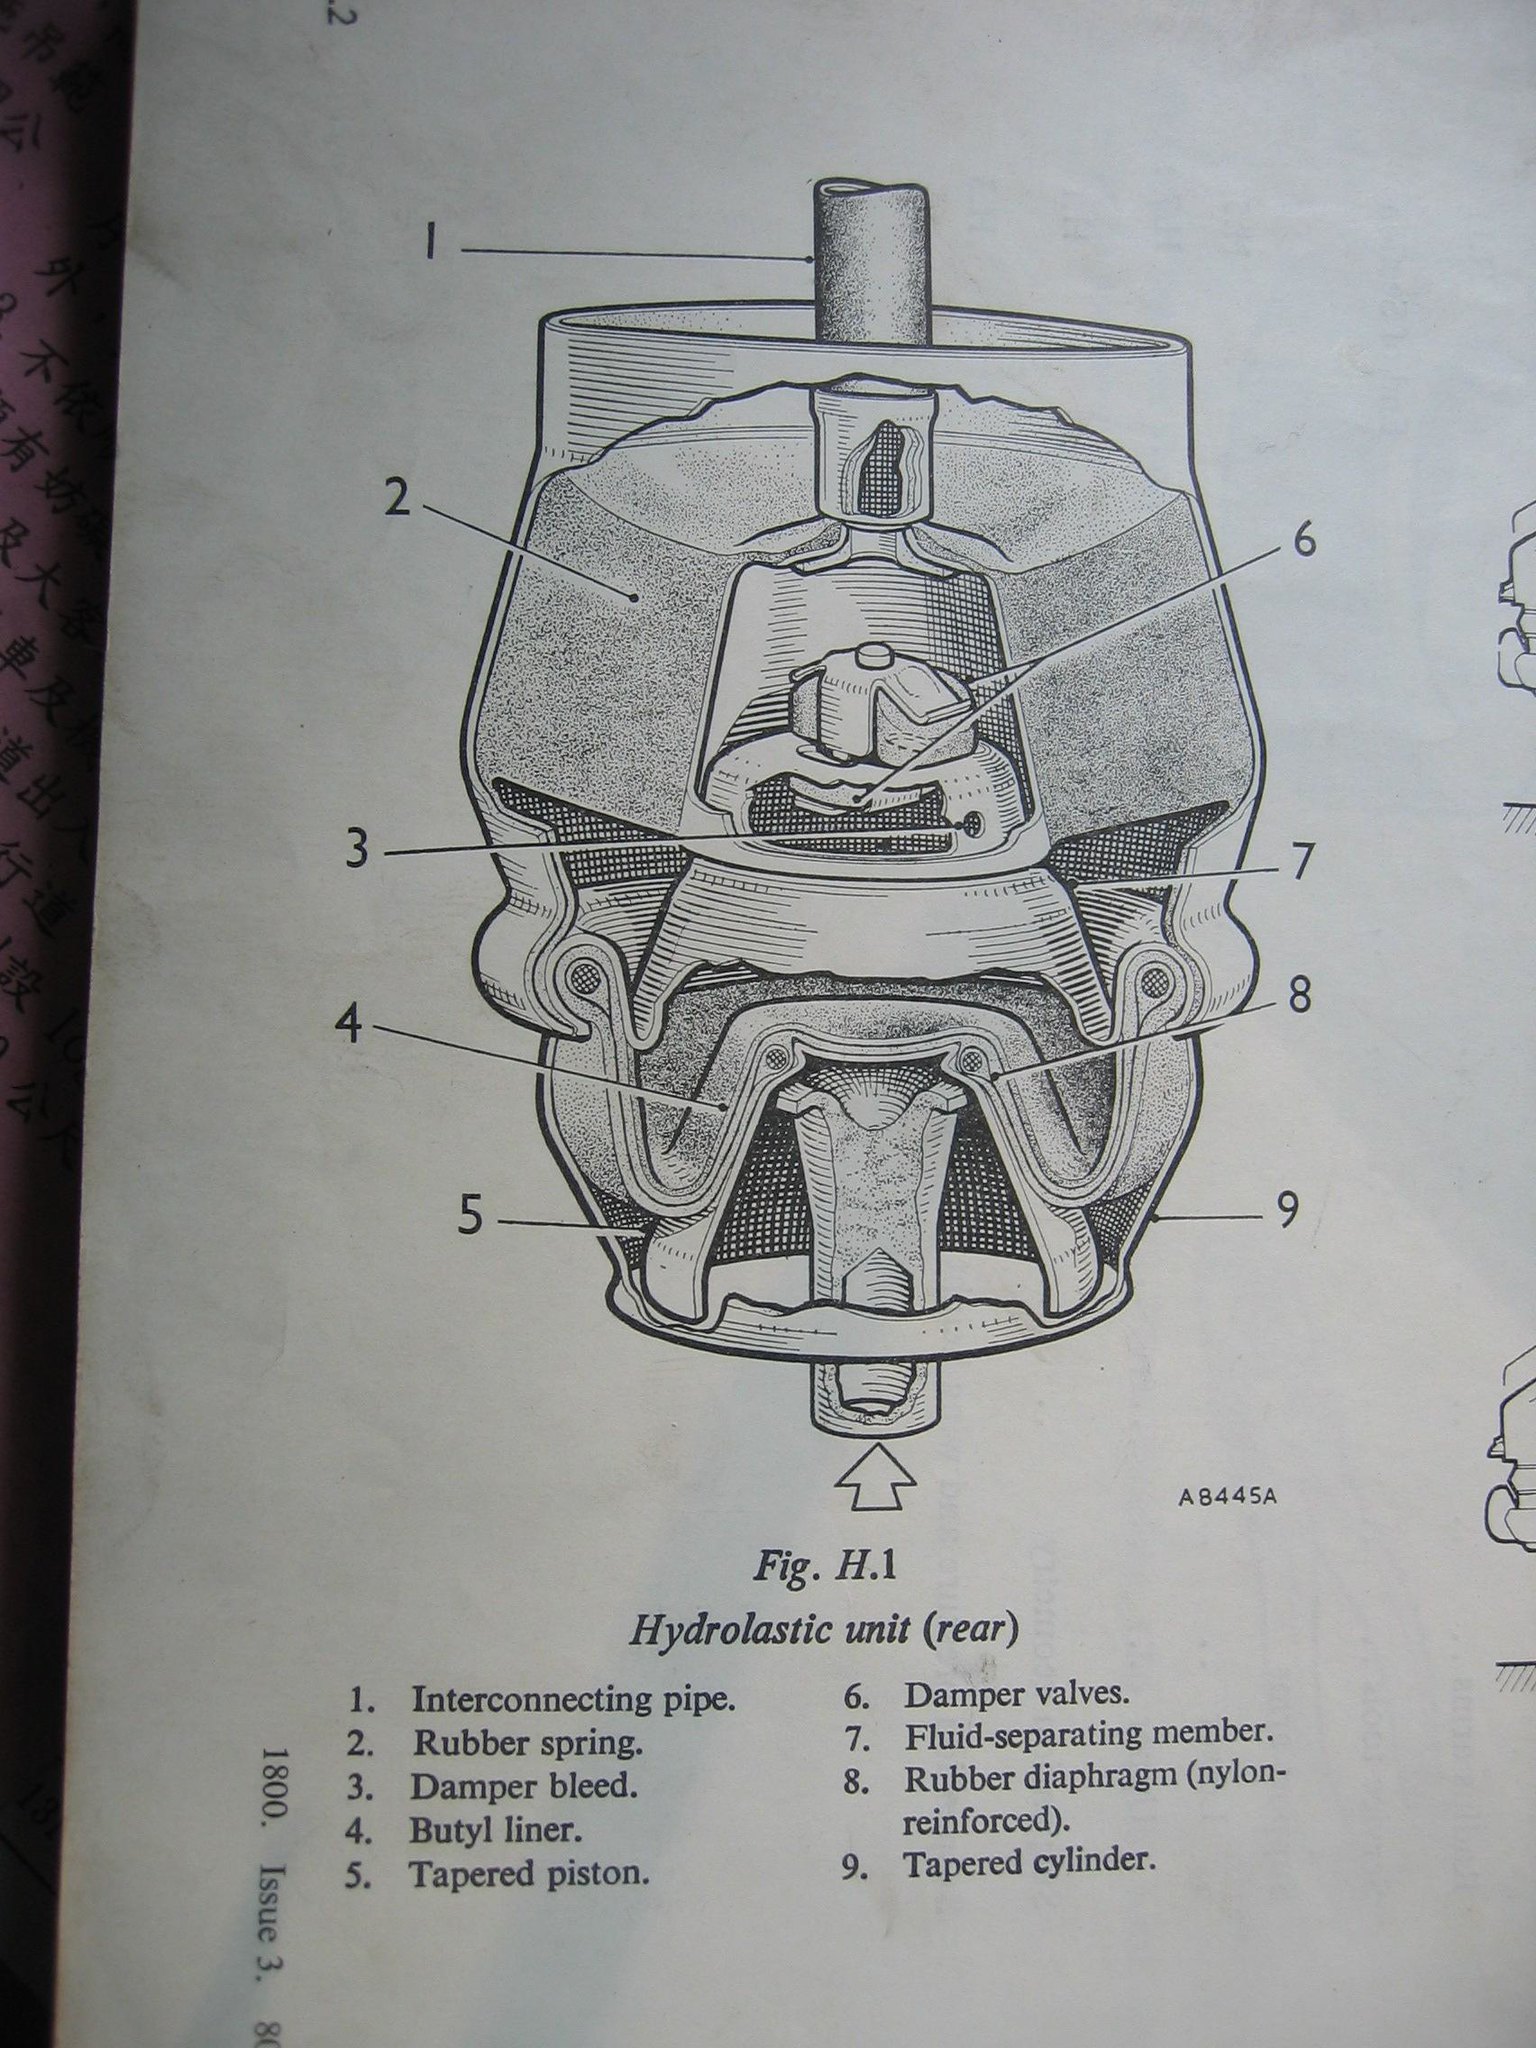 |
|
|
|
Post by dave1800 on Dec 4, 2014 0:57:24 GMT
British Pathe posted their BMC crash test videos on Youtube earlier this year. Looking at the seats in the Mini, 1100 and 1800 the damage to the crash dummies' necks even at speeds as low as 25 mph is horrendous. (Tony's headrest modification is on page 7 of this thread) headrest One thing intrigues me when I look at the video of the 1800 is that the rear of the car only rises a little on impact. BMC crash test. Looking at other Youtube crash test videos some vehicles almost stand on their nose with the rear wheels well off the ground, presumably dissipating quite a bit of energy. There doesn't appear to be correlation between the observed damage and the way the rear lifts off the ground. I cannot immediately see an obvious reason why the 1800 and to a slightly lesser extent the 1100 react this way. Any thoughts? (I am only lokin at the full frontal crash testd). David |
|
|
|
Post by tony on Dec 13, 2014 9:31:45 GMT
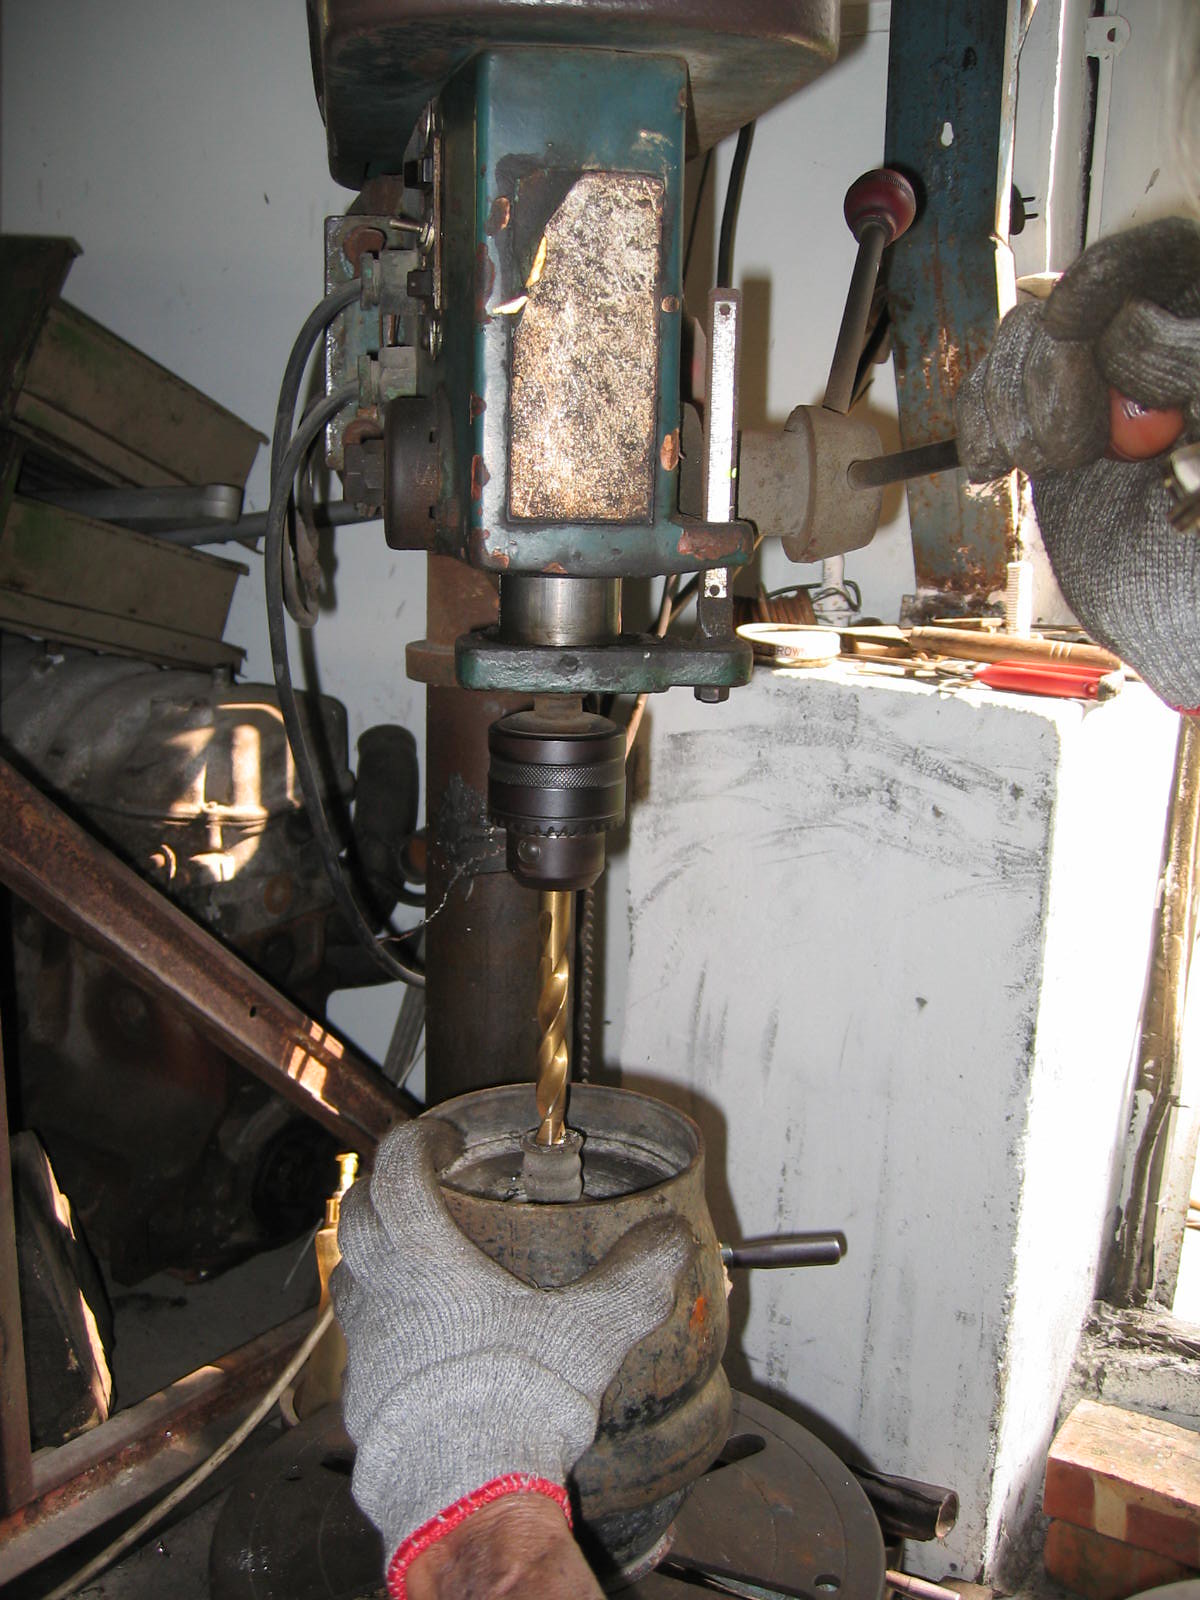
Merry Christmas to all and sorry for the delay of showing up the final displacer unit modified job here. Thank Anthony Wood who sent me few displacer units. I apology that I almost forgot the way to show up pictures here. Anyway, I searched some information about the modification of displacer unit with a broken pipe on this website, which I am not sure where to find it now, and which is not quite the same as the one father does below: First, cut the broken pipe off and do the drilling. 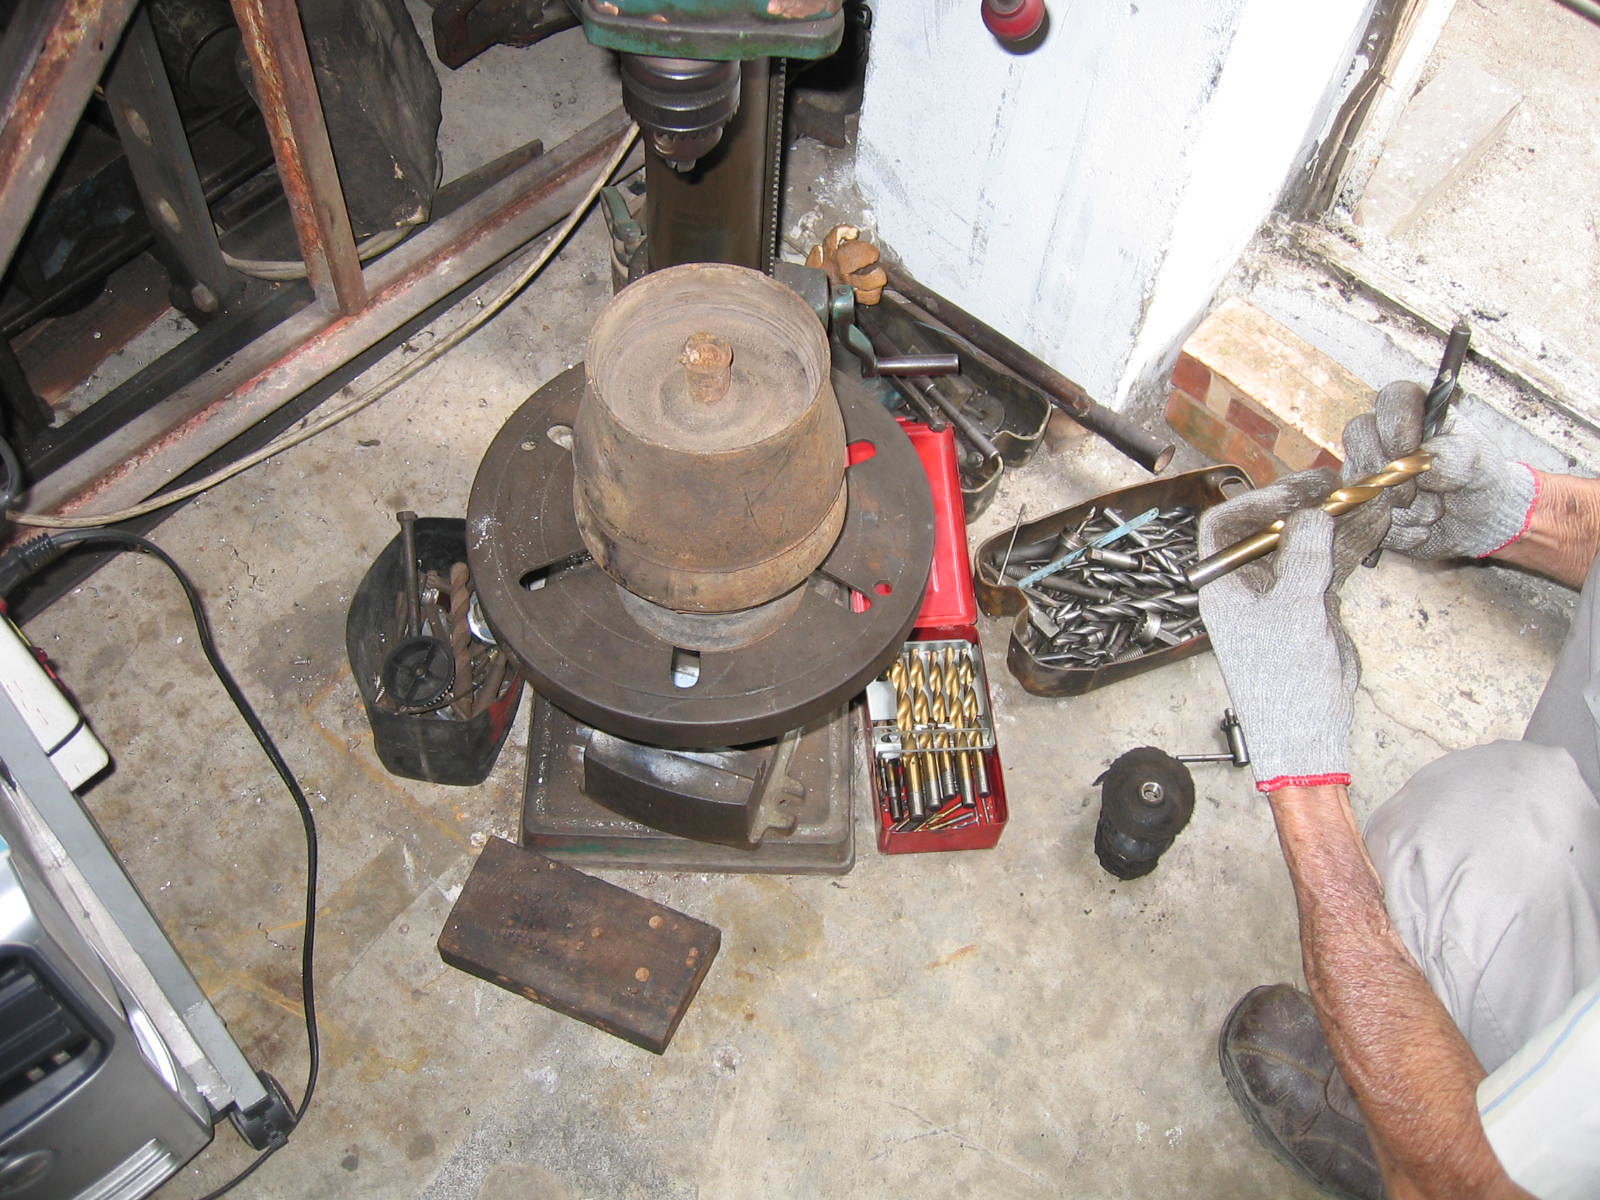 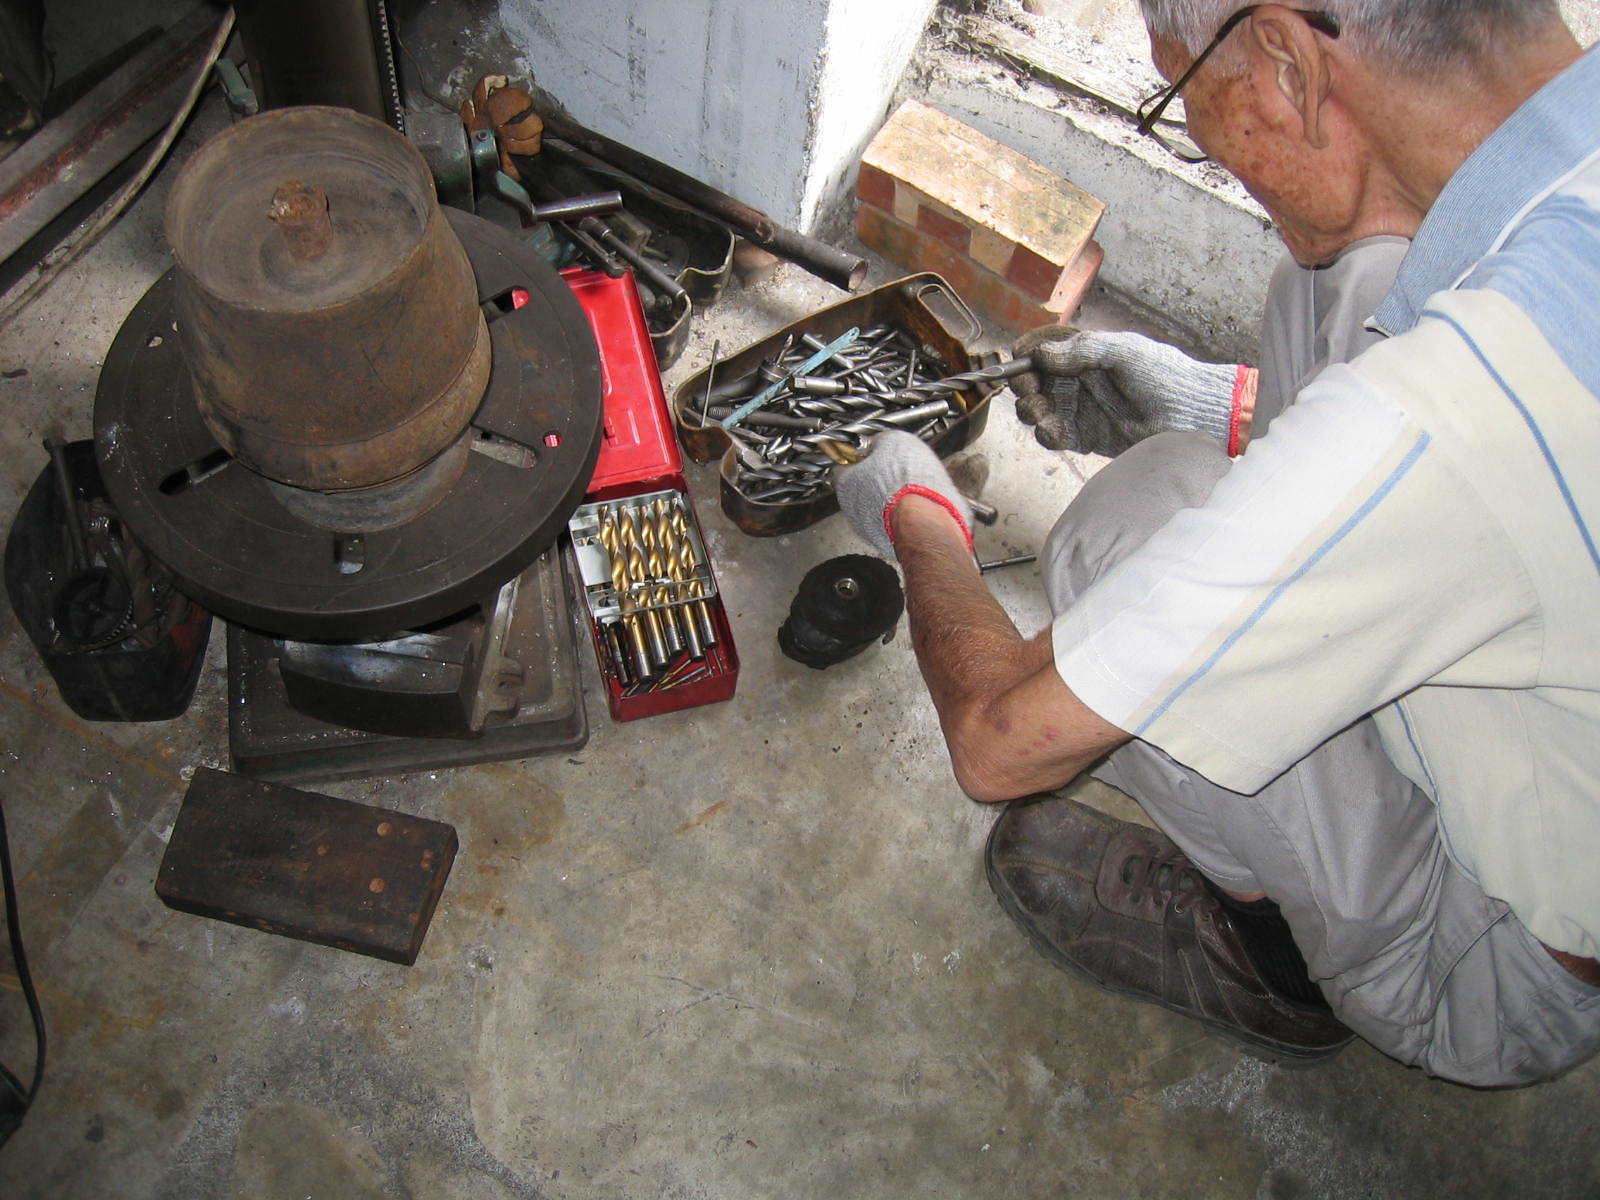 Find the right tool. We used two different sizes in diameter of drilling tools. The smaller one in diameter goes first in order to arm at the right centre point of the hole, the larger one just follow the patch so that the rest of pipe can be easily removed by a hammer after the drilling work.
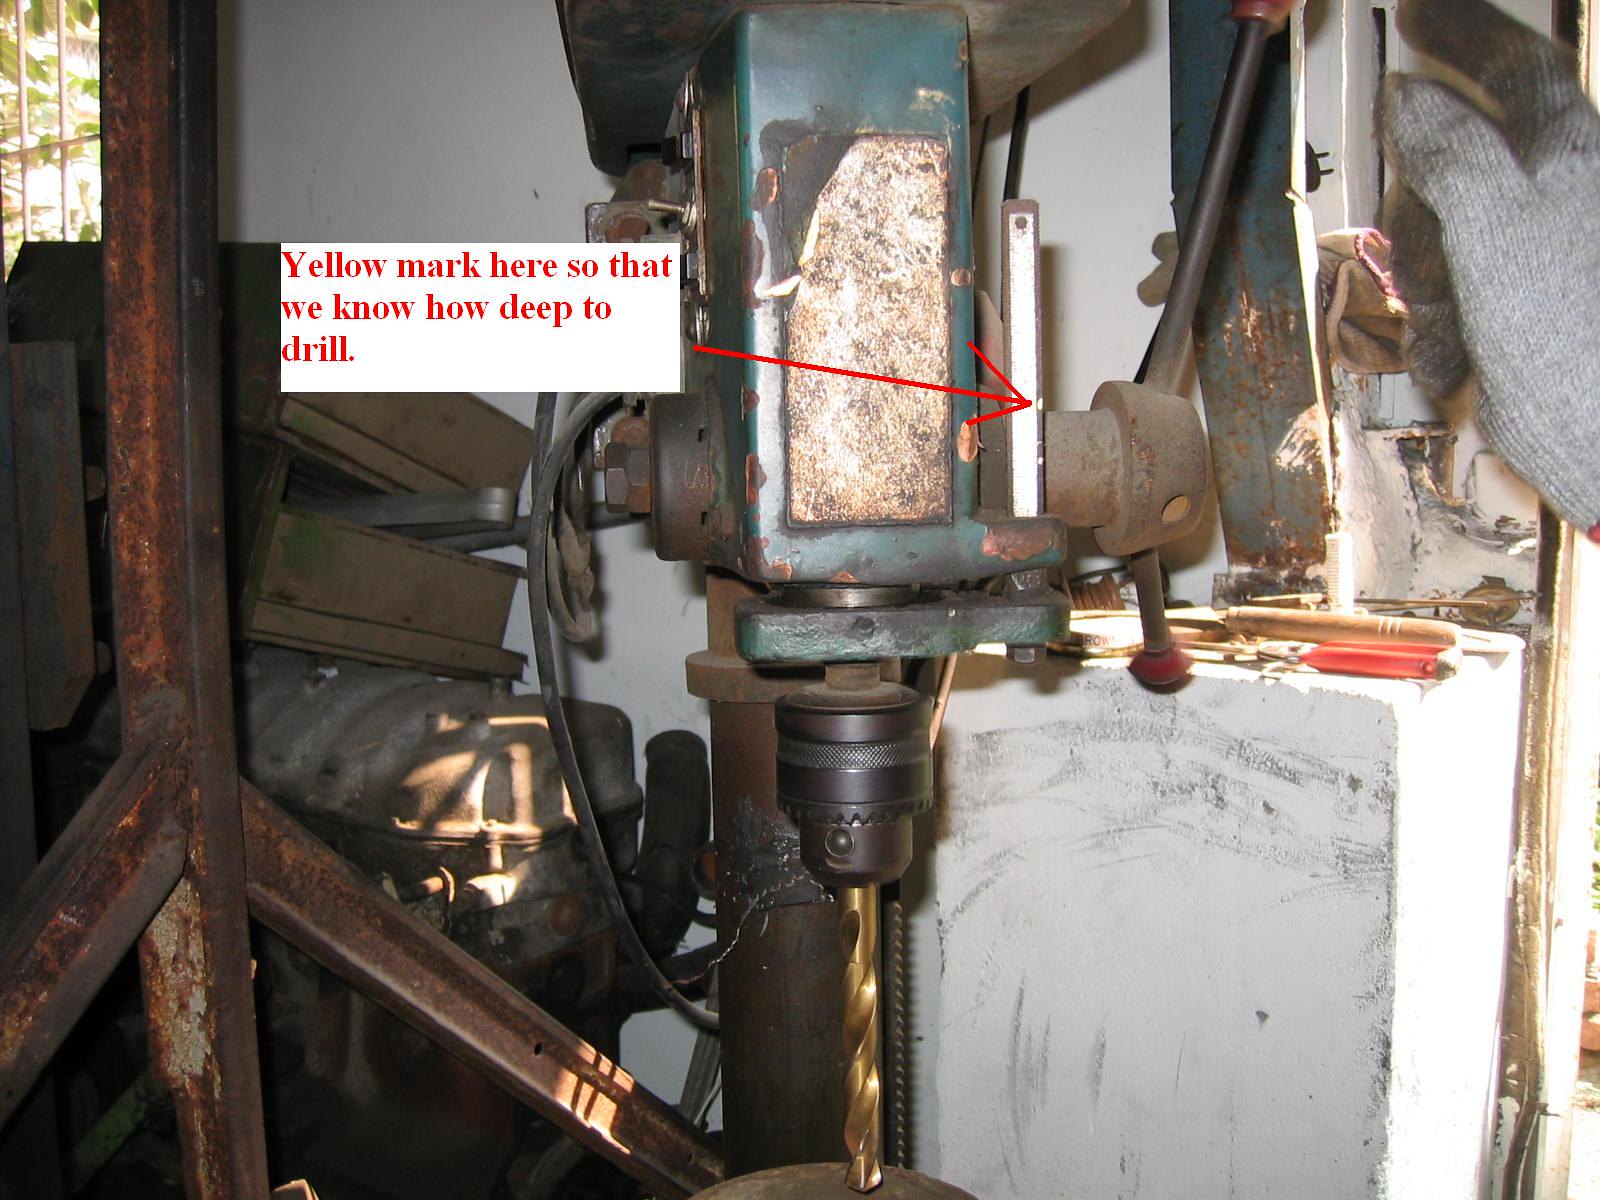 Make sure how deep you have to go.
 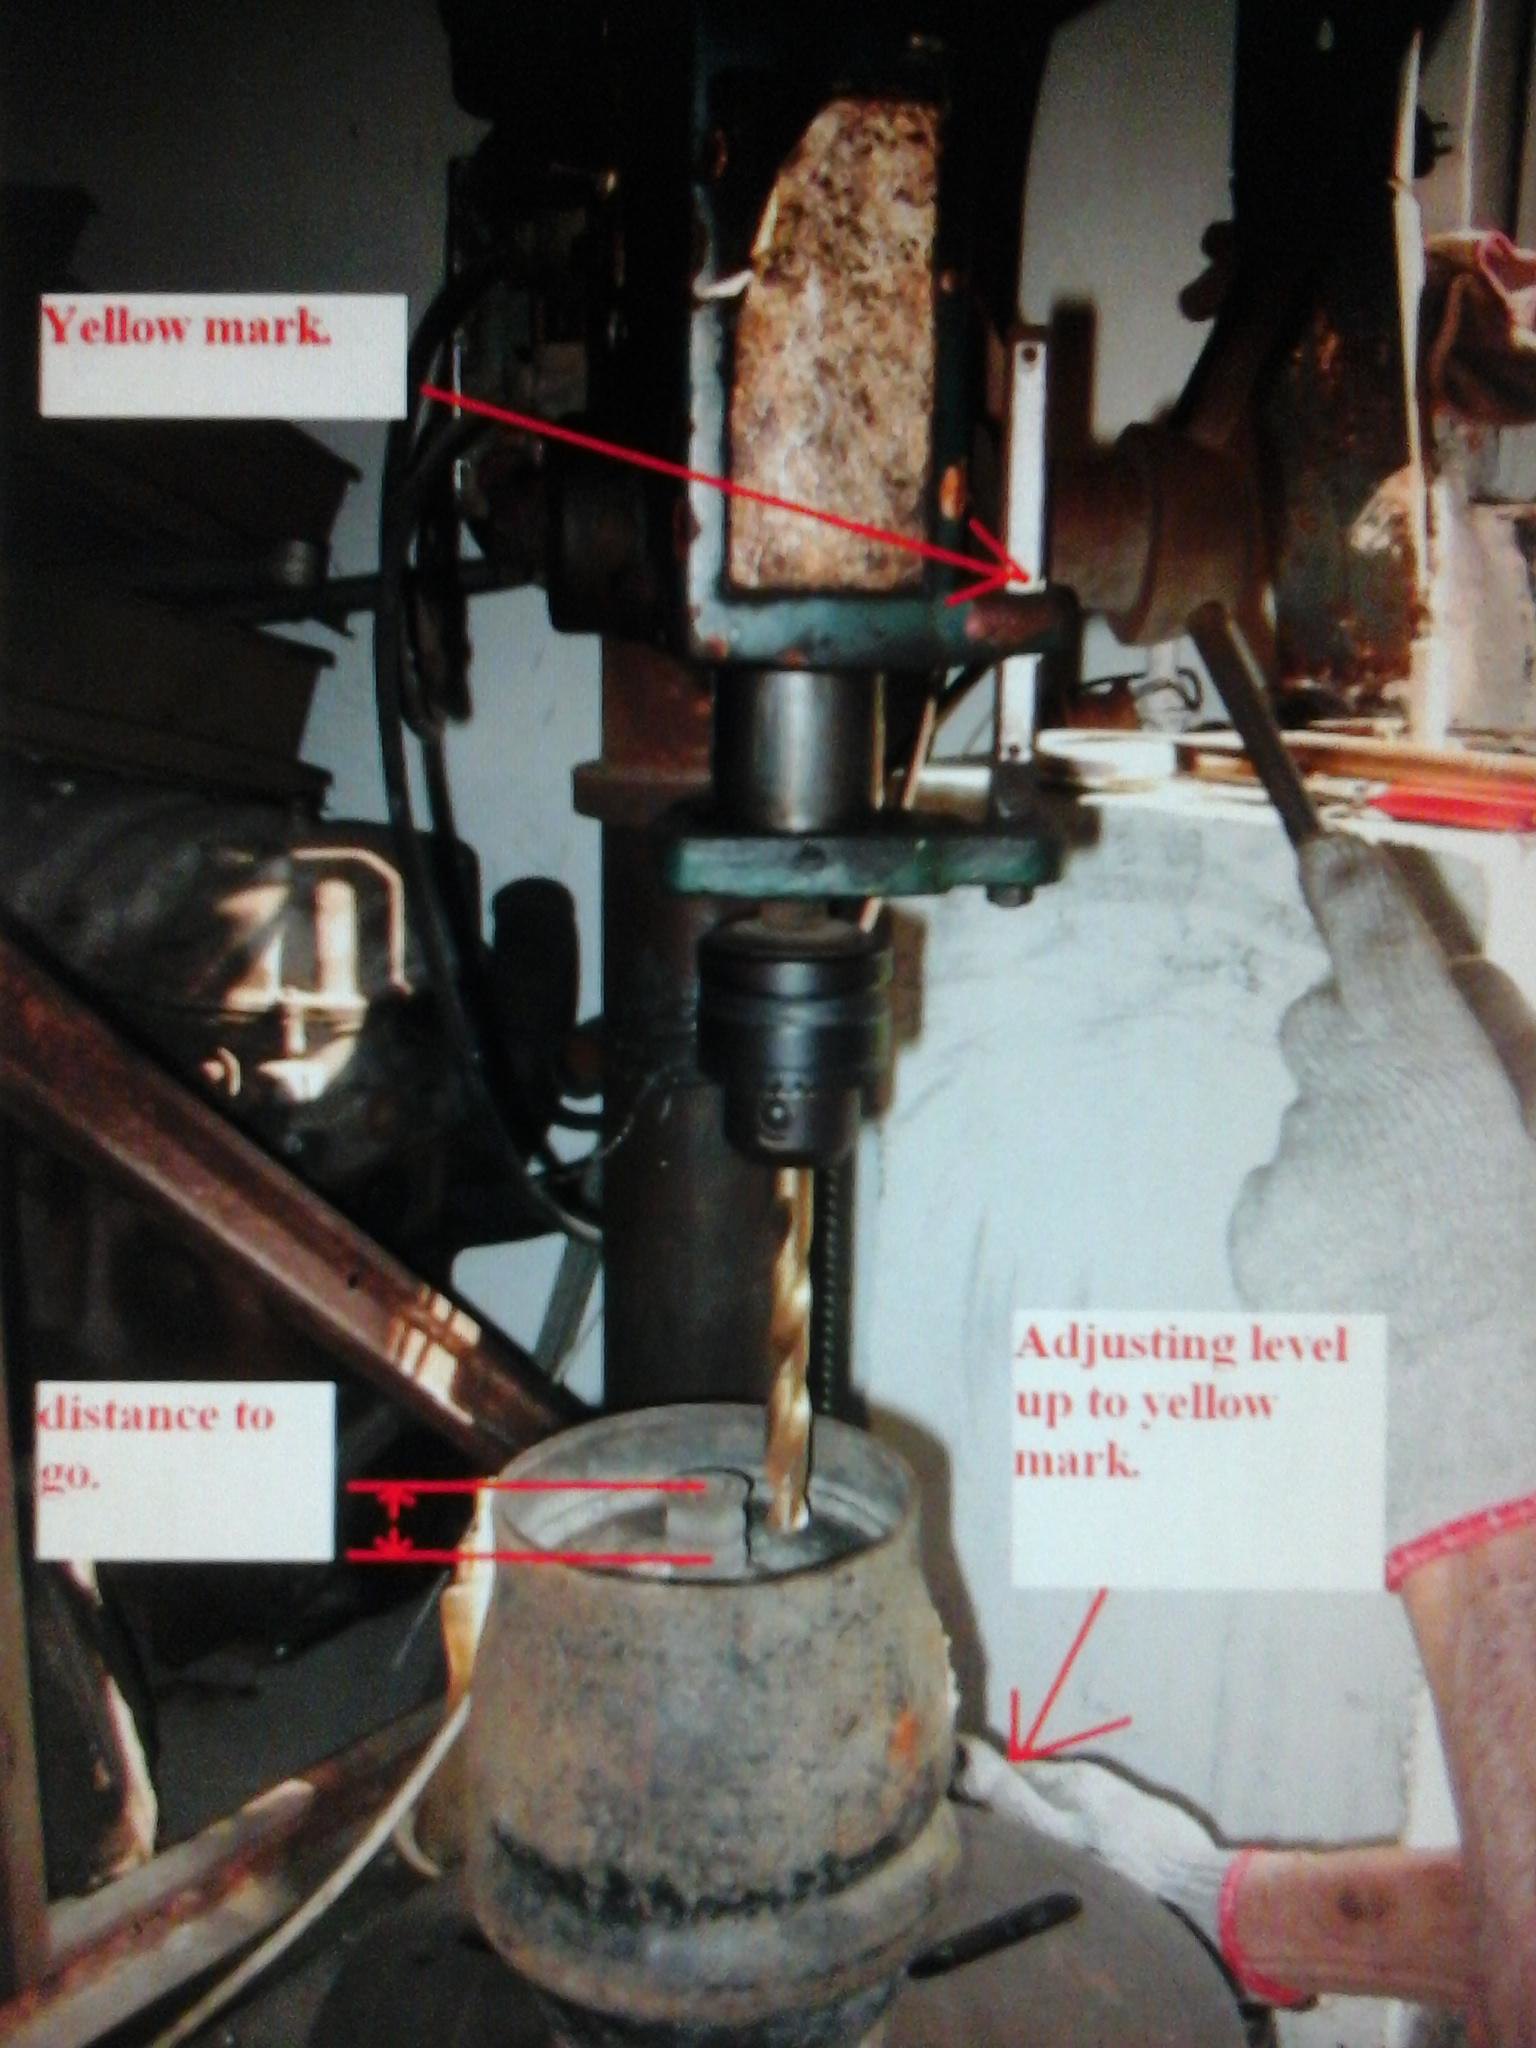
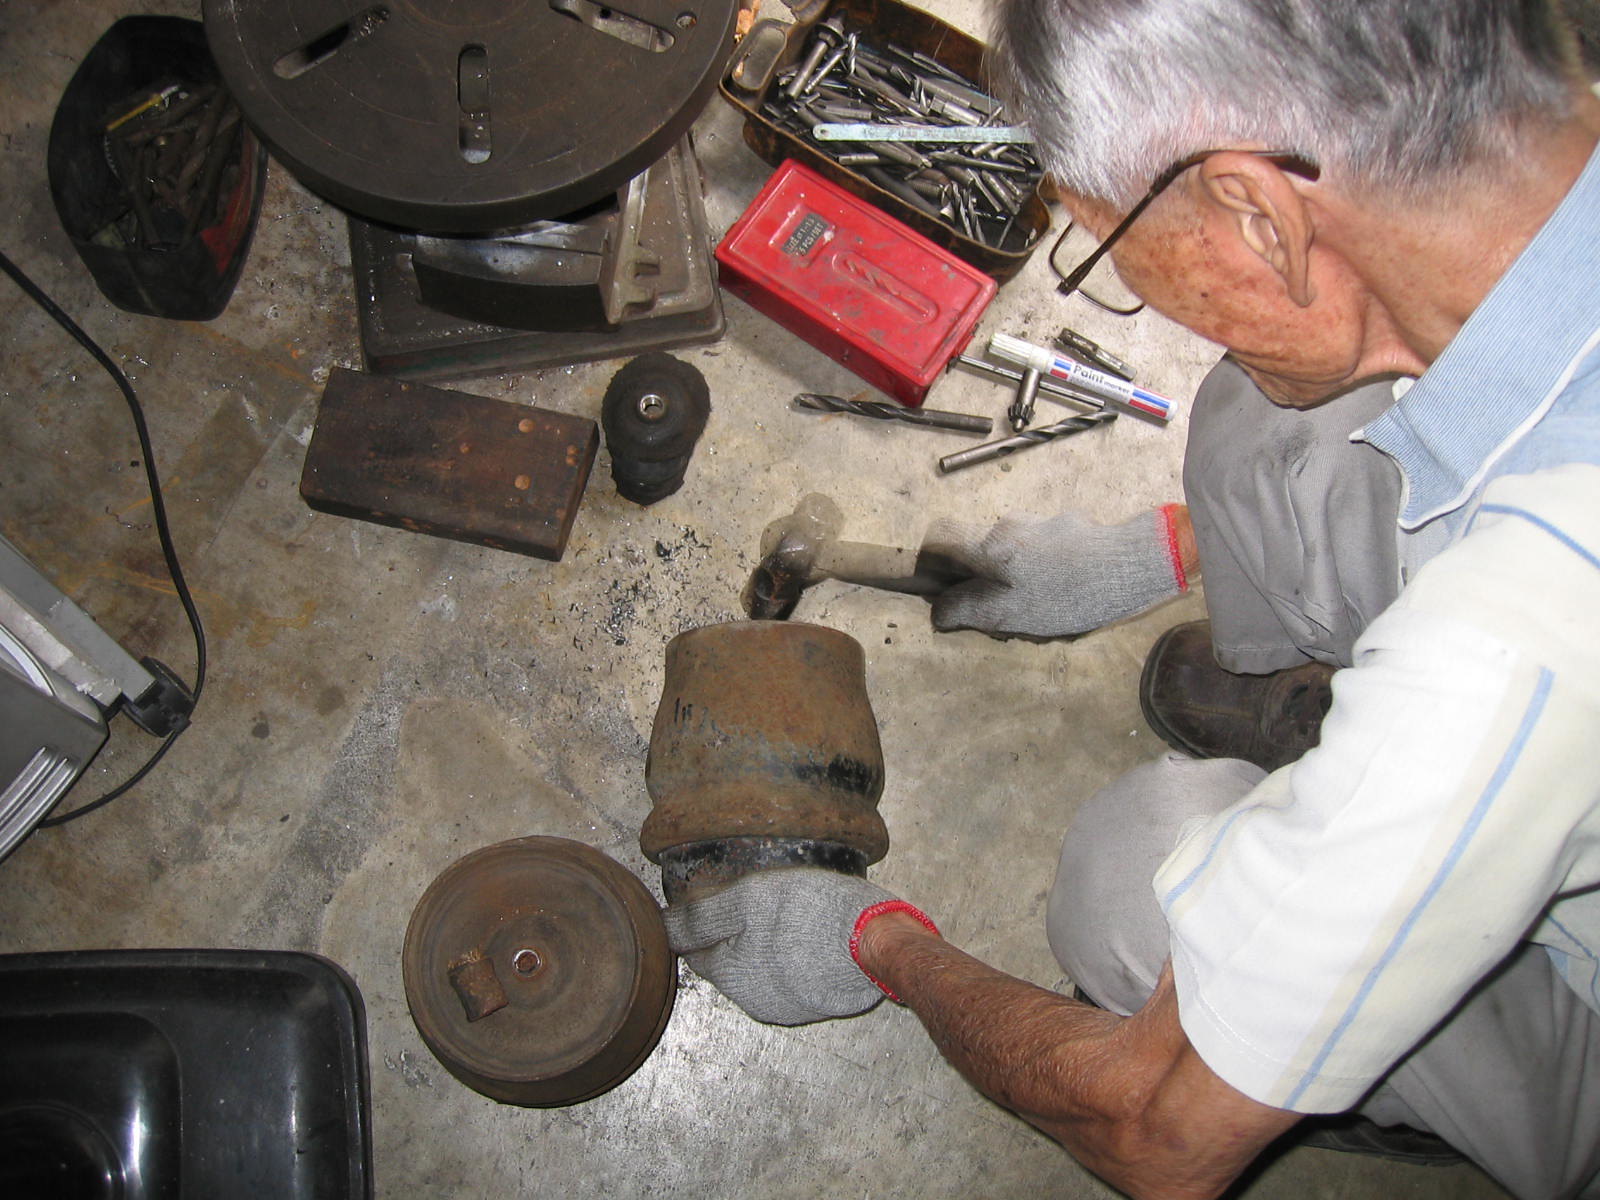
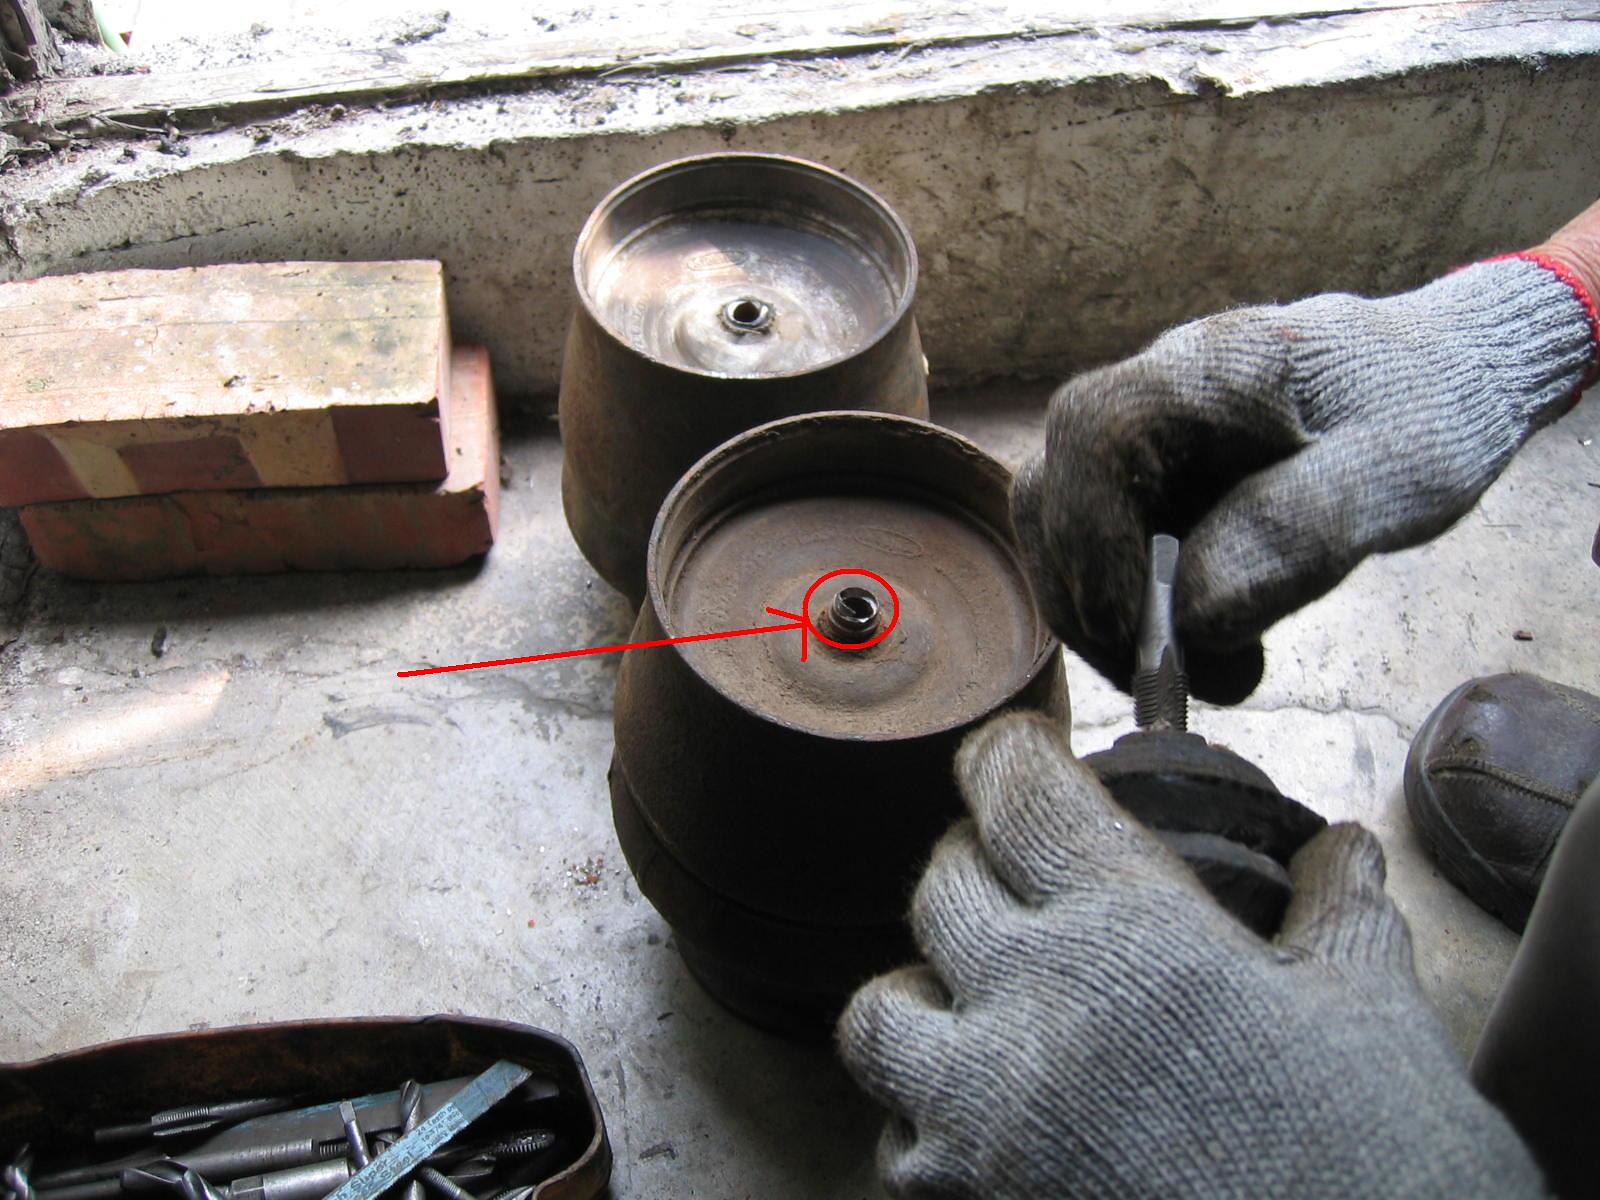
Use a grinder to remove any piece of metal left before doing the tapping work. 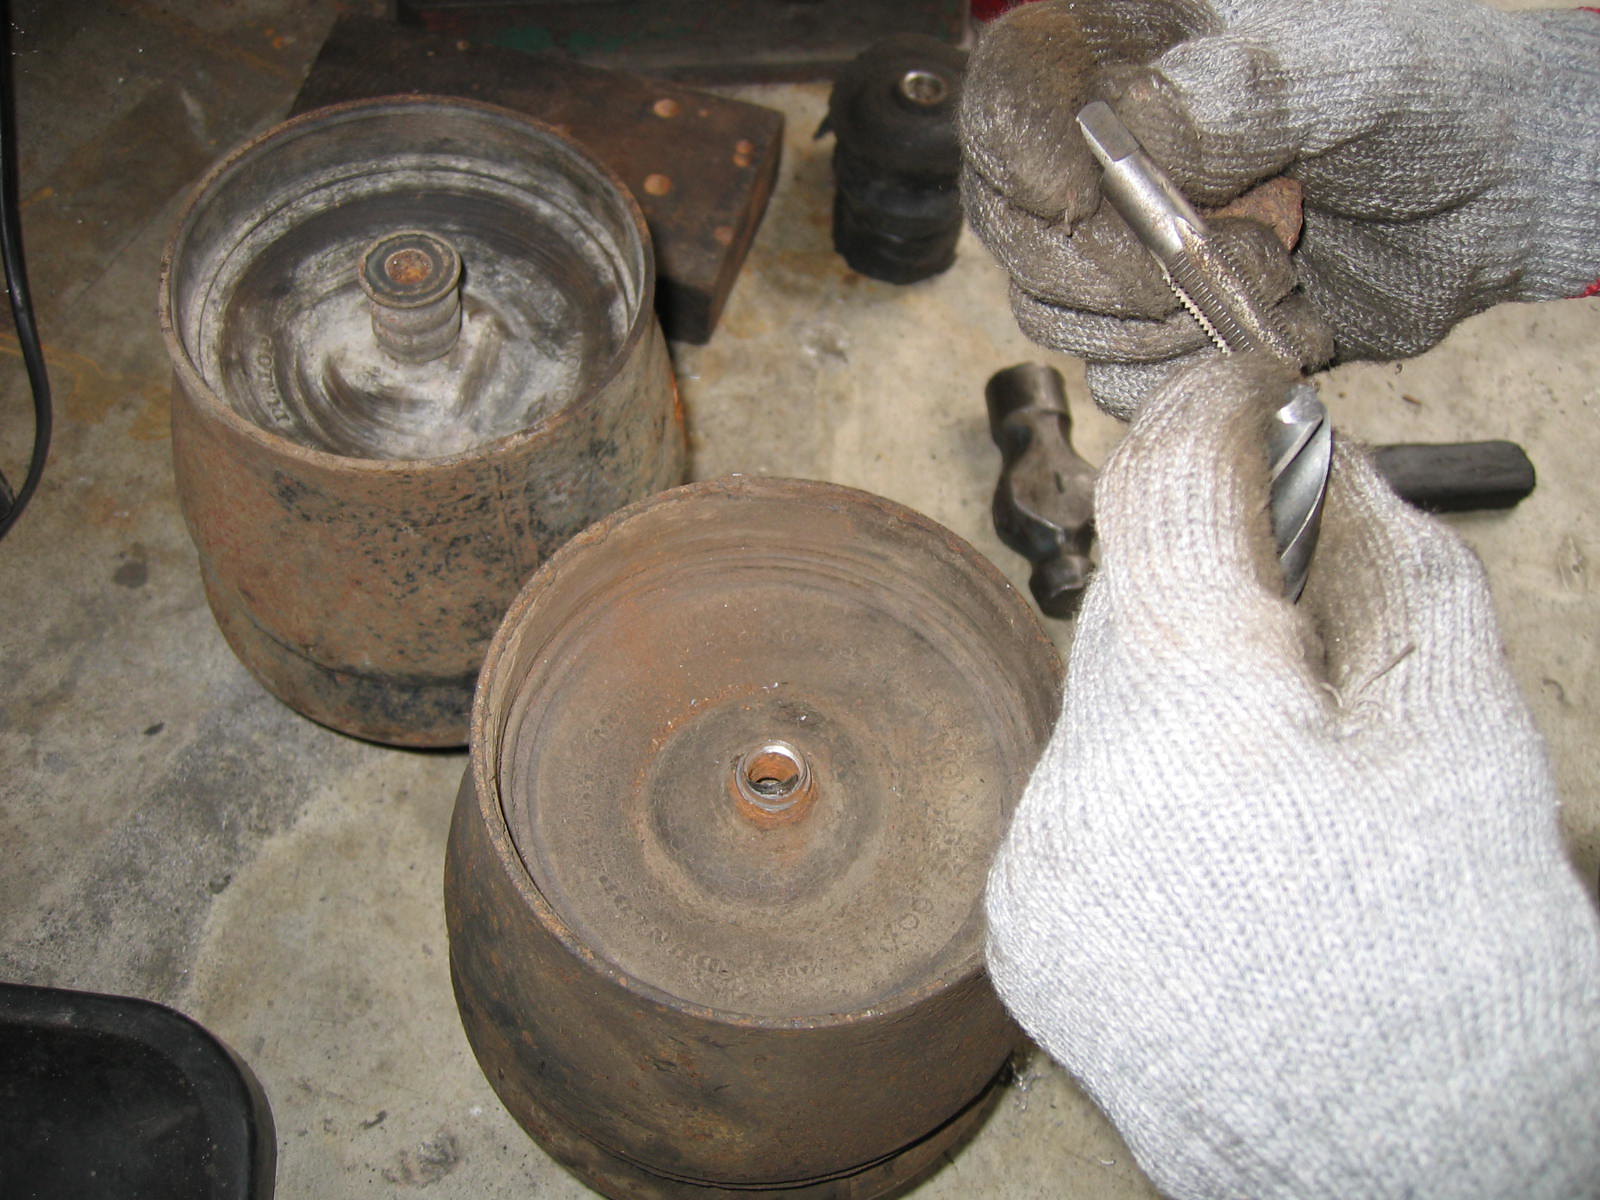 The first step is finished. 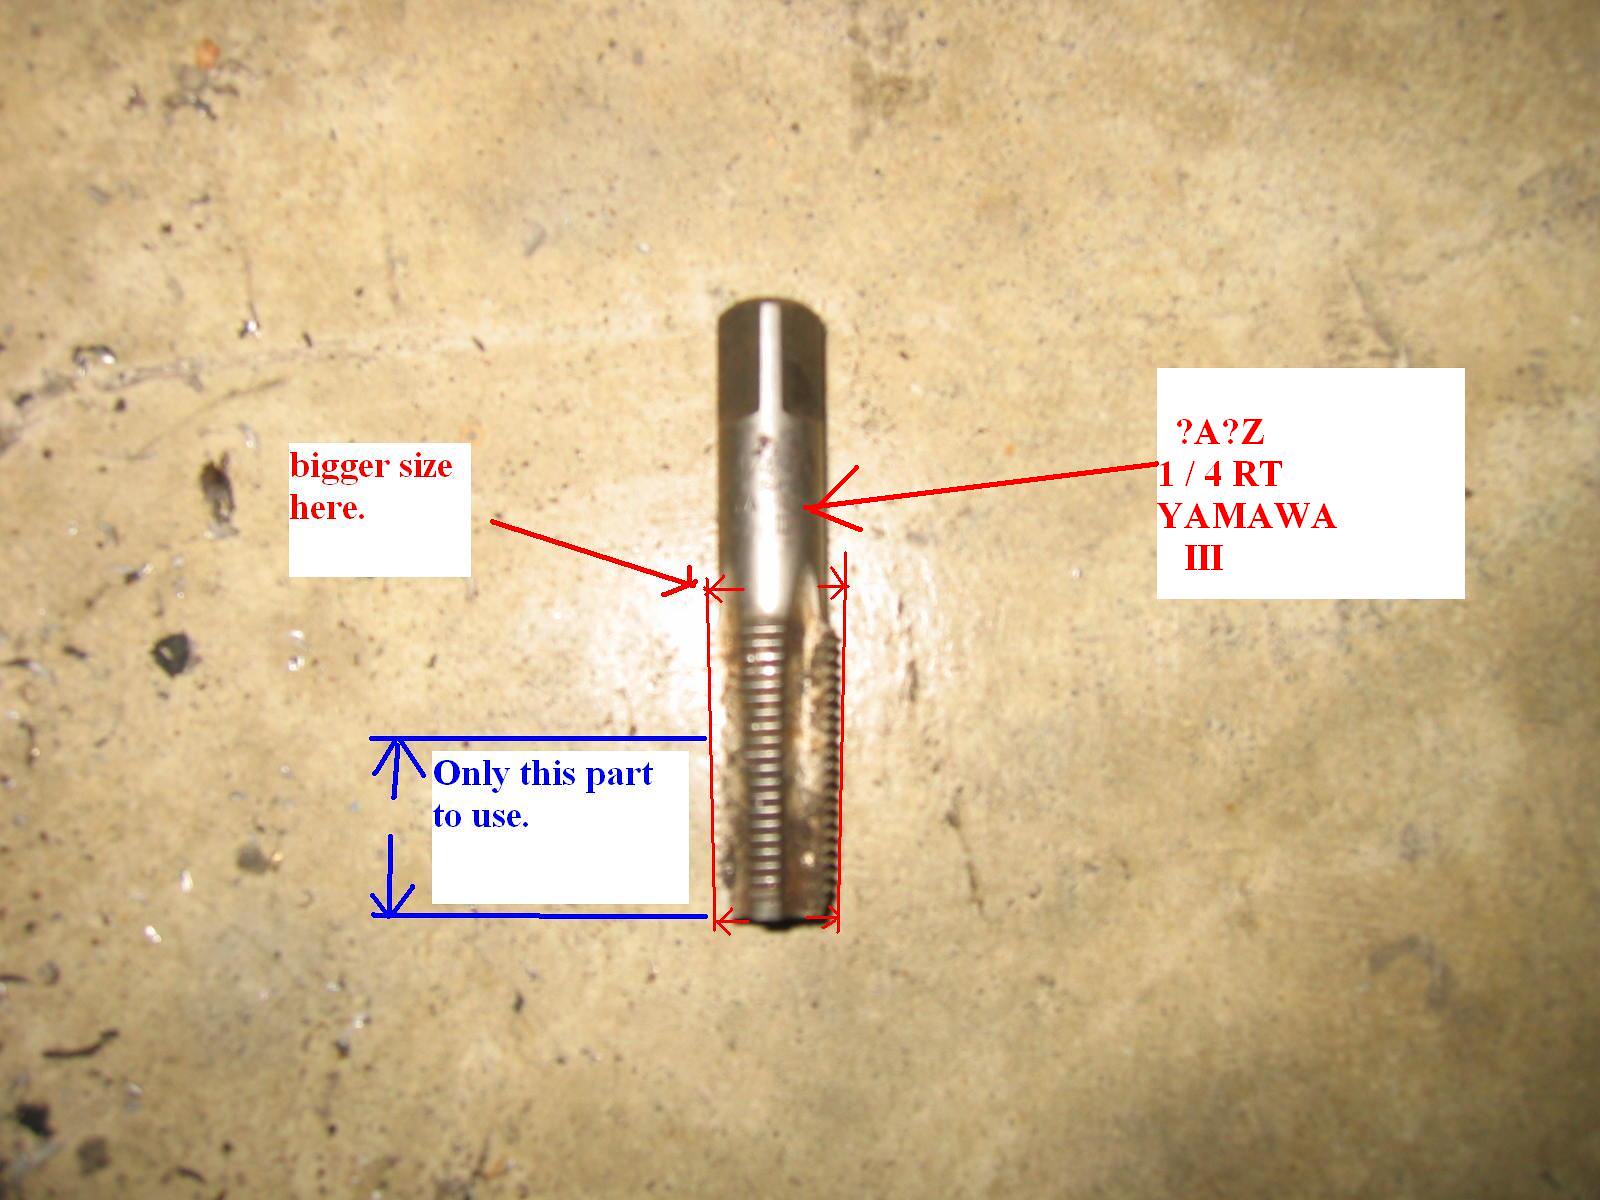 Have the right tool to tap. Remember how deep you are going! 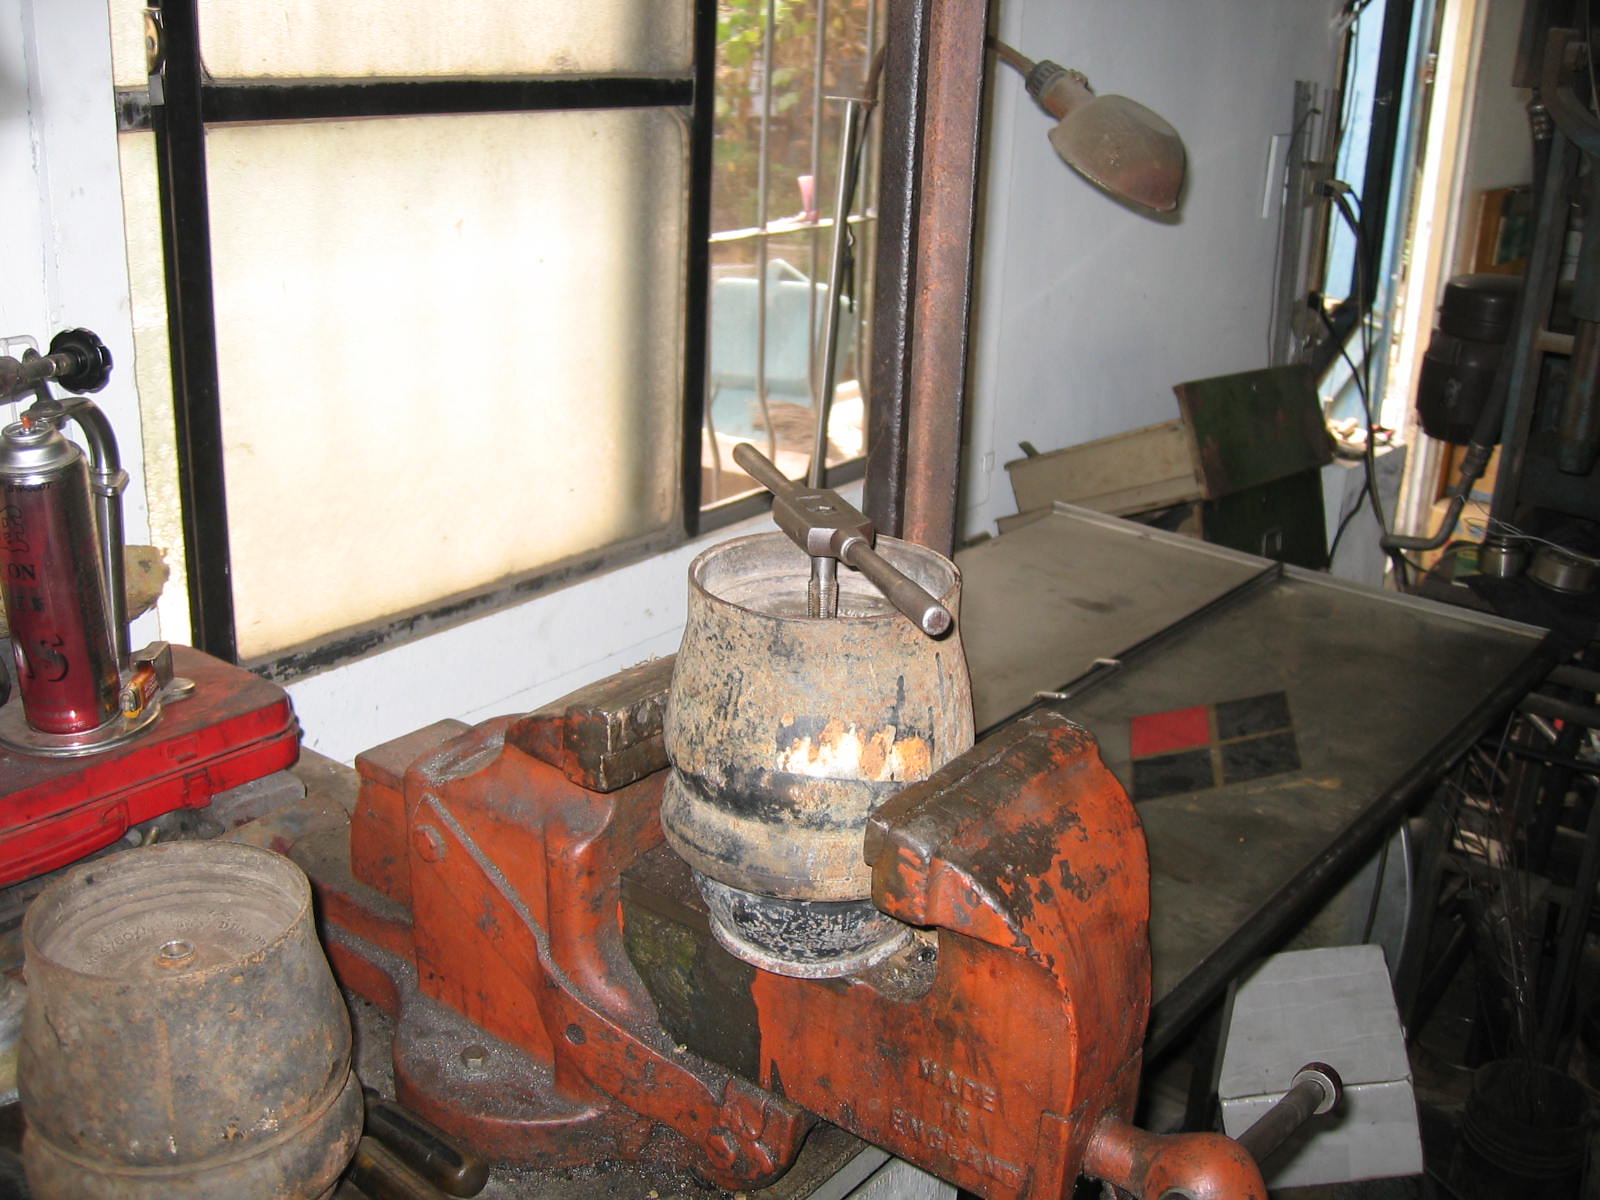 There are two displacer units: one is for 1800 and the other is for Austin 1750. Remember to get some grease on the tool before doing the tapping. 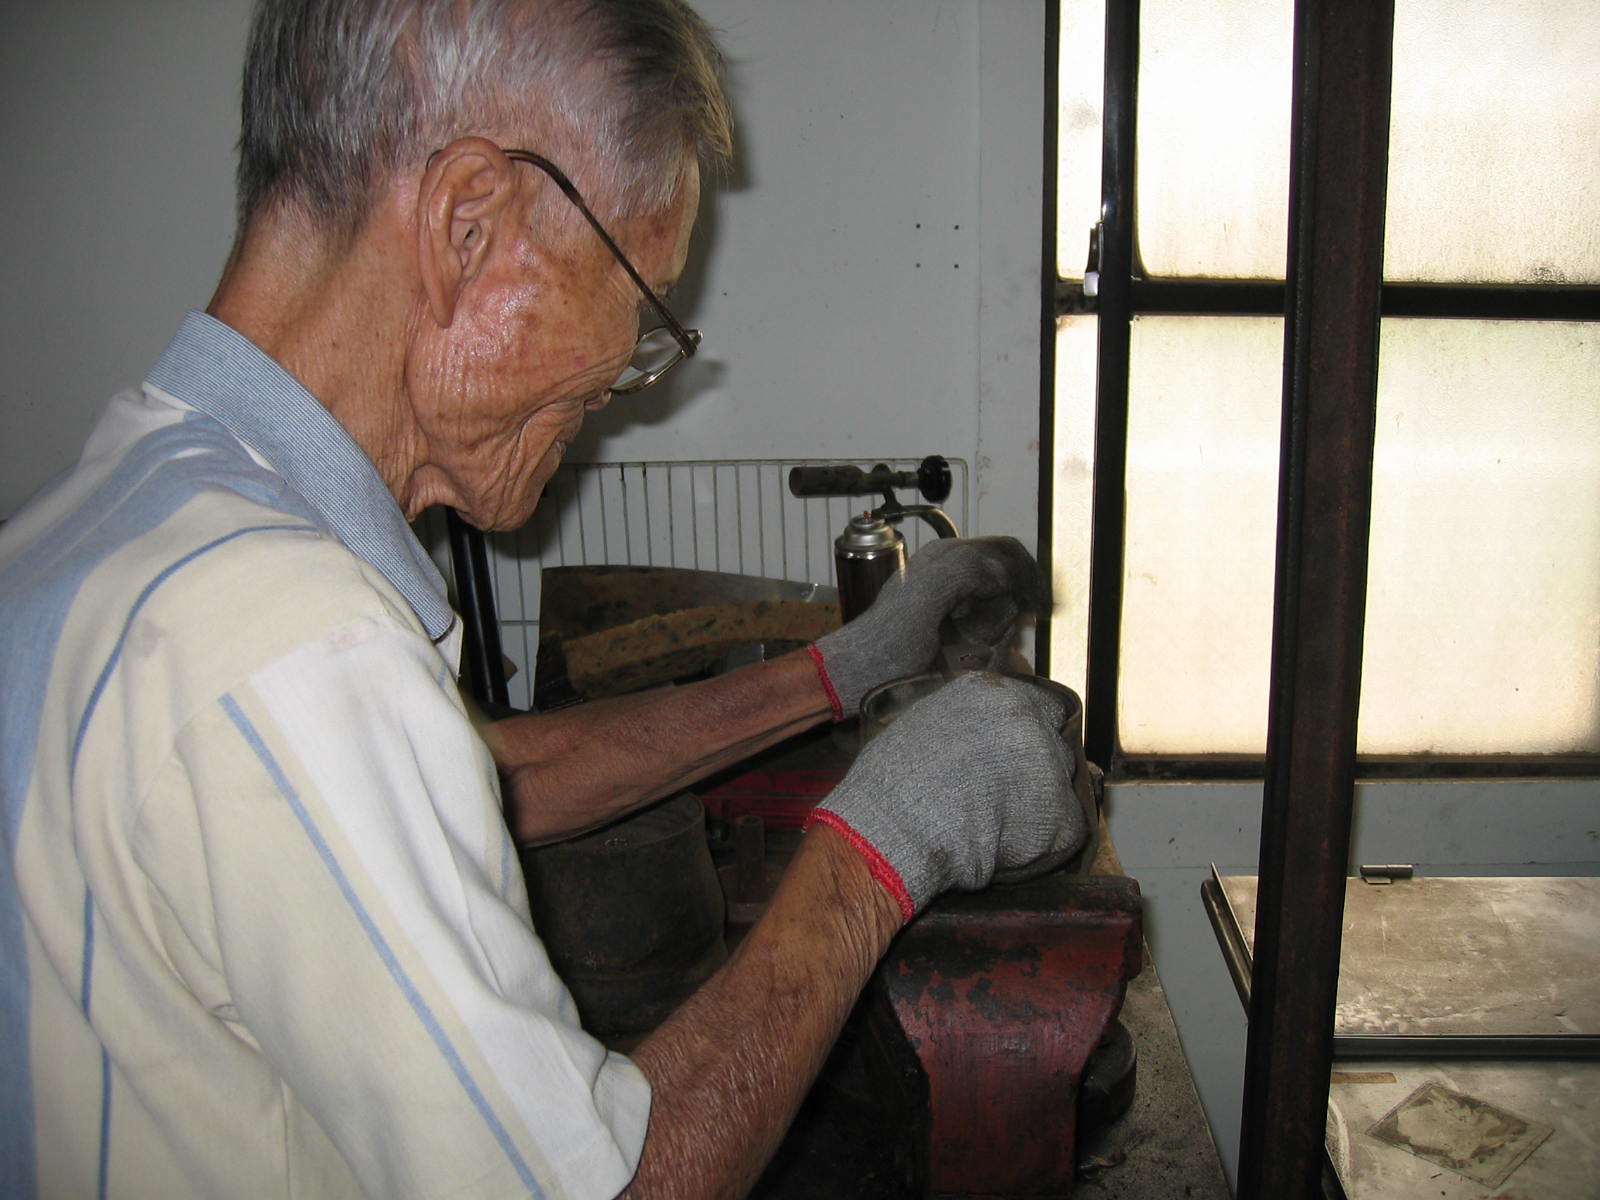 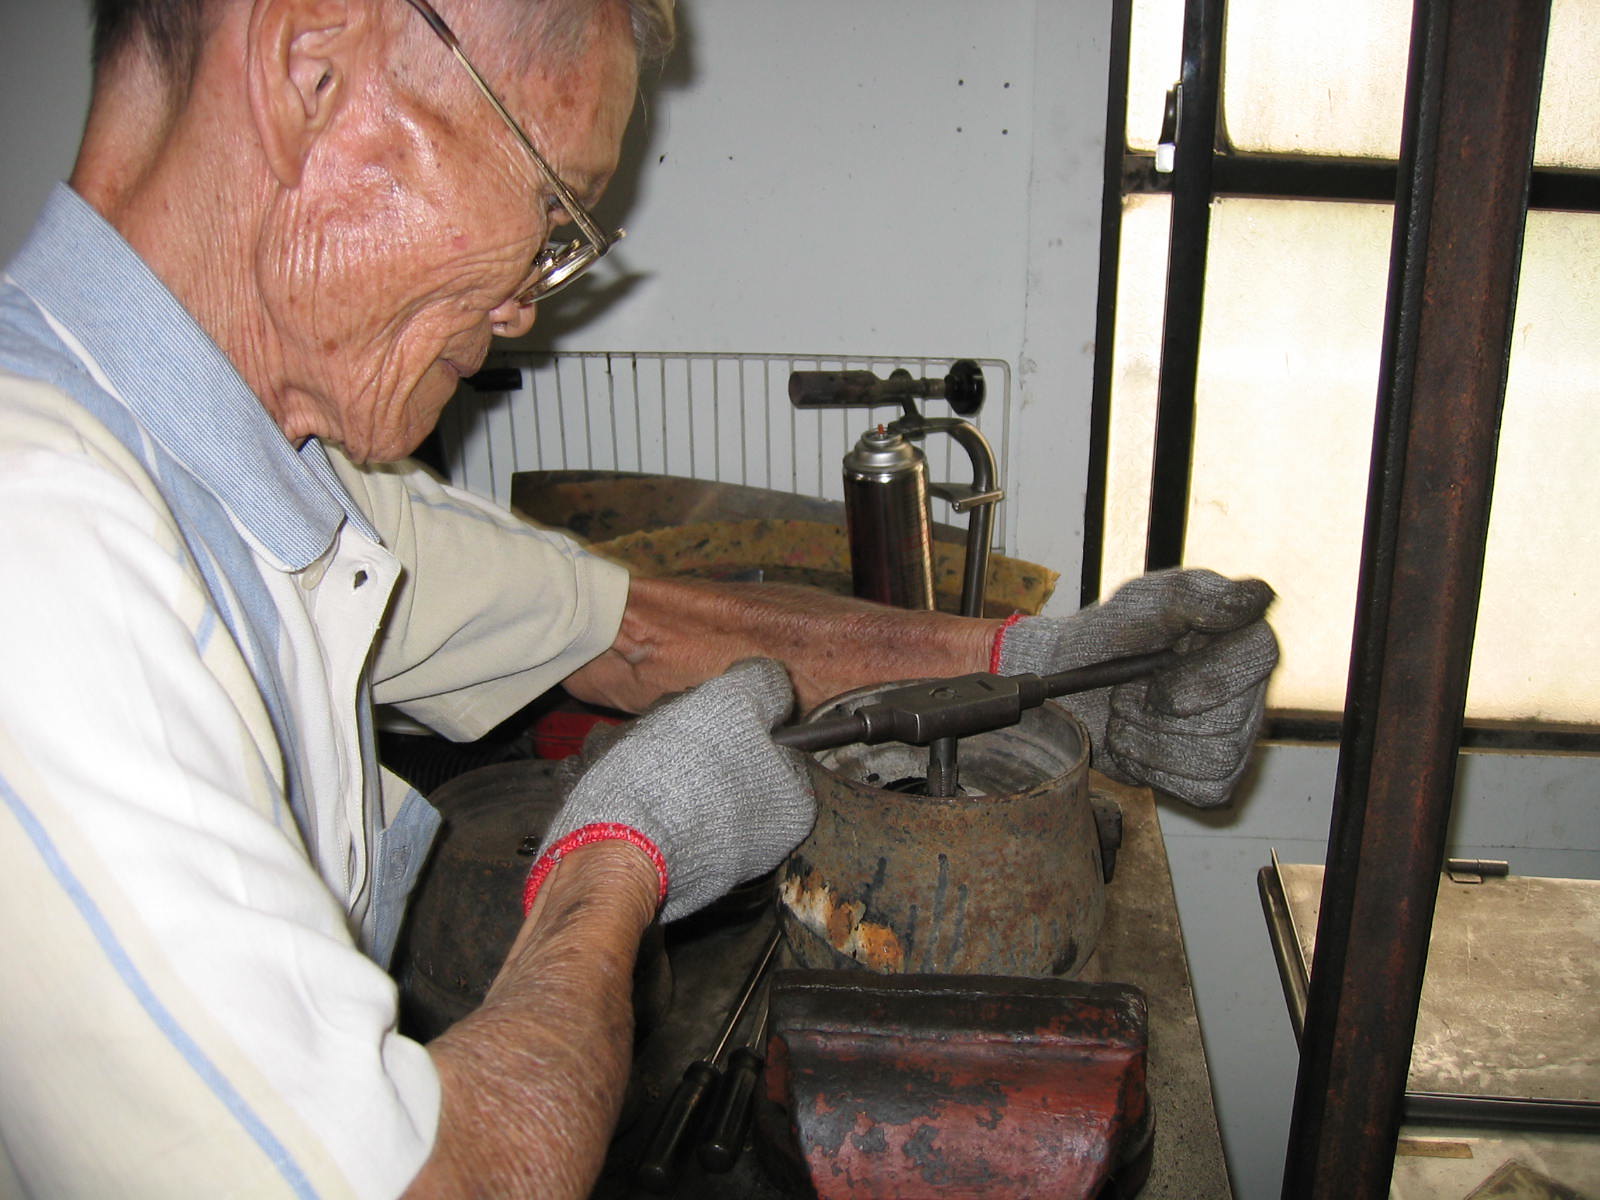 Clockwise a little bit and anitclockwise back again each time. 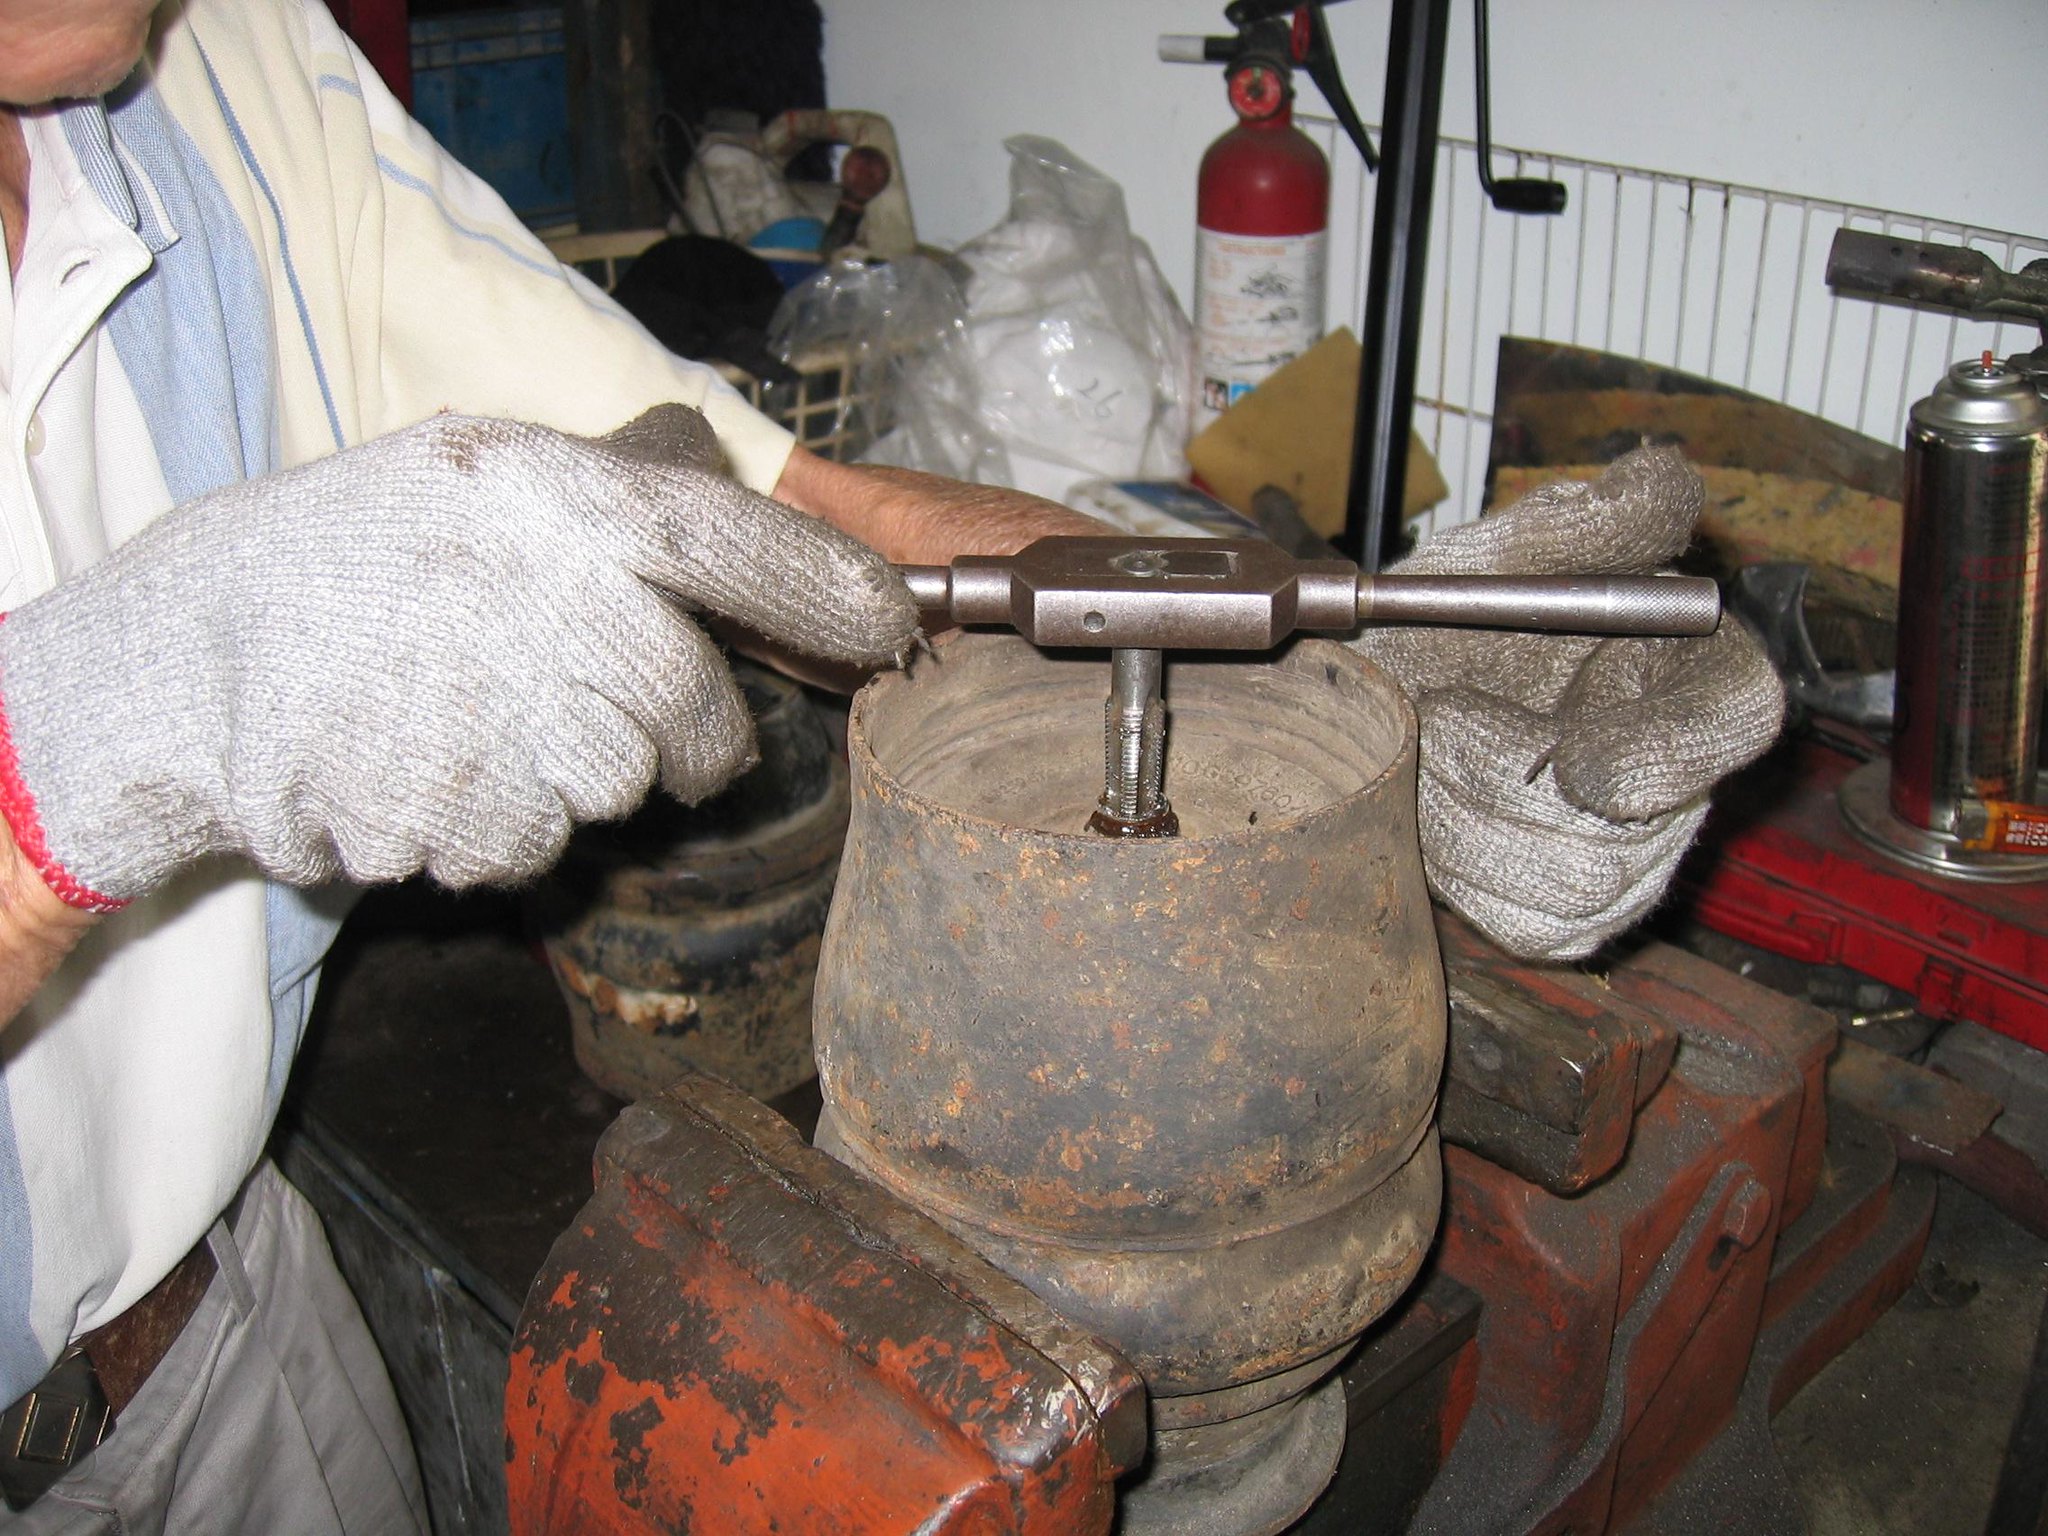
Remember that DON'T TAP SO DEEPER. 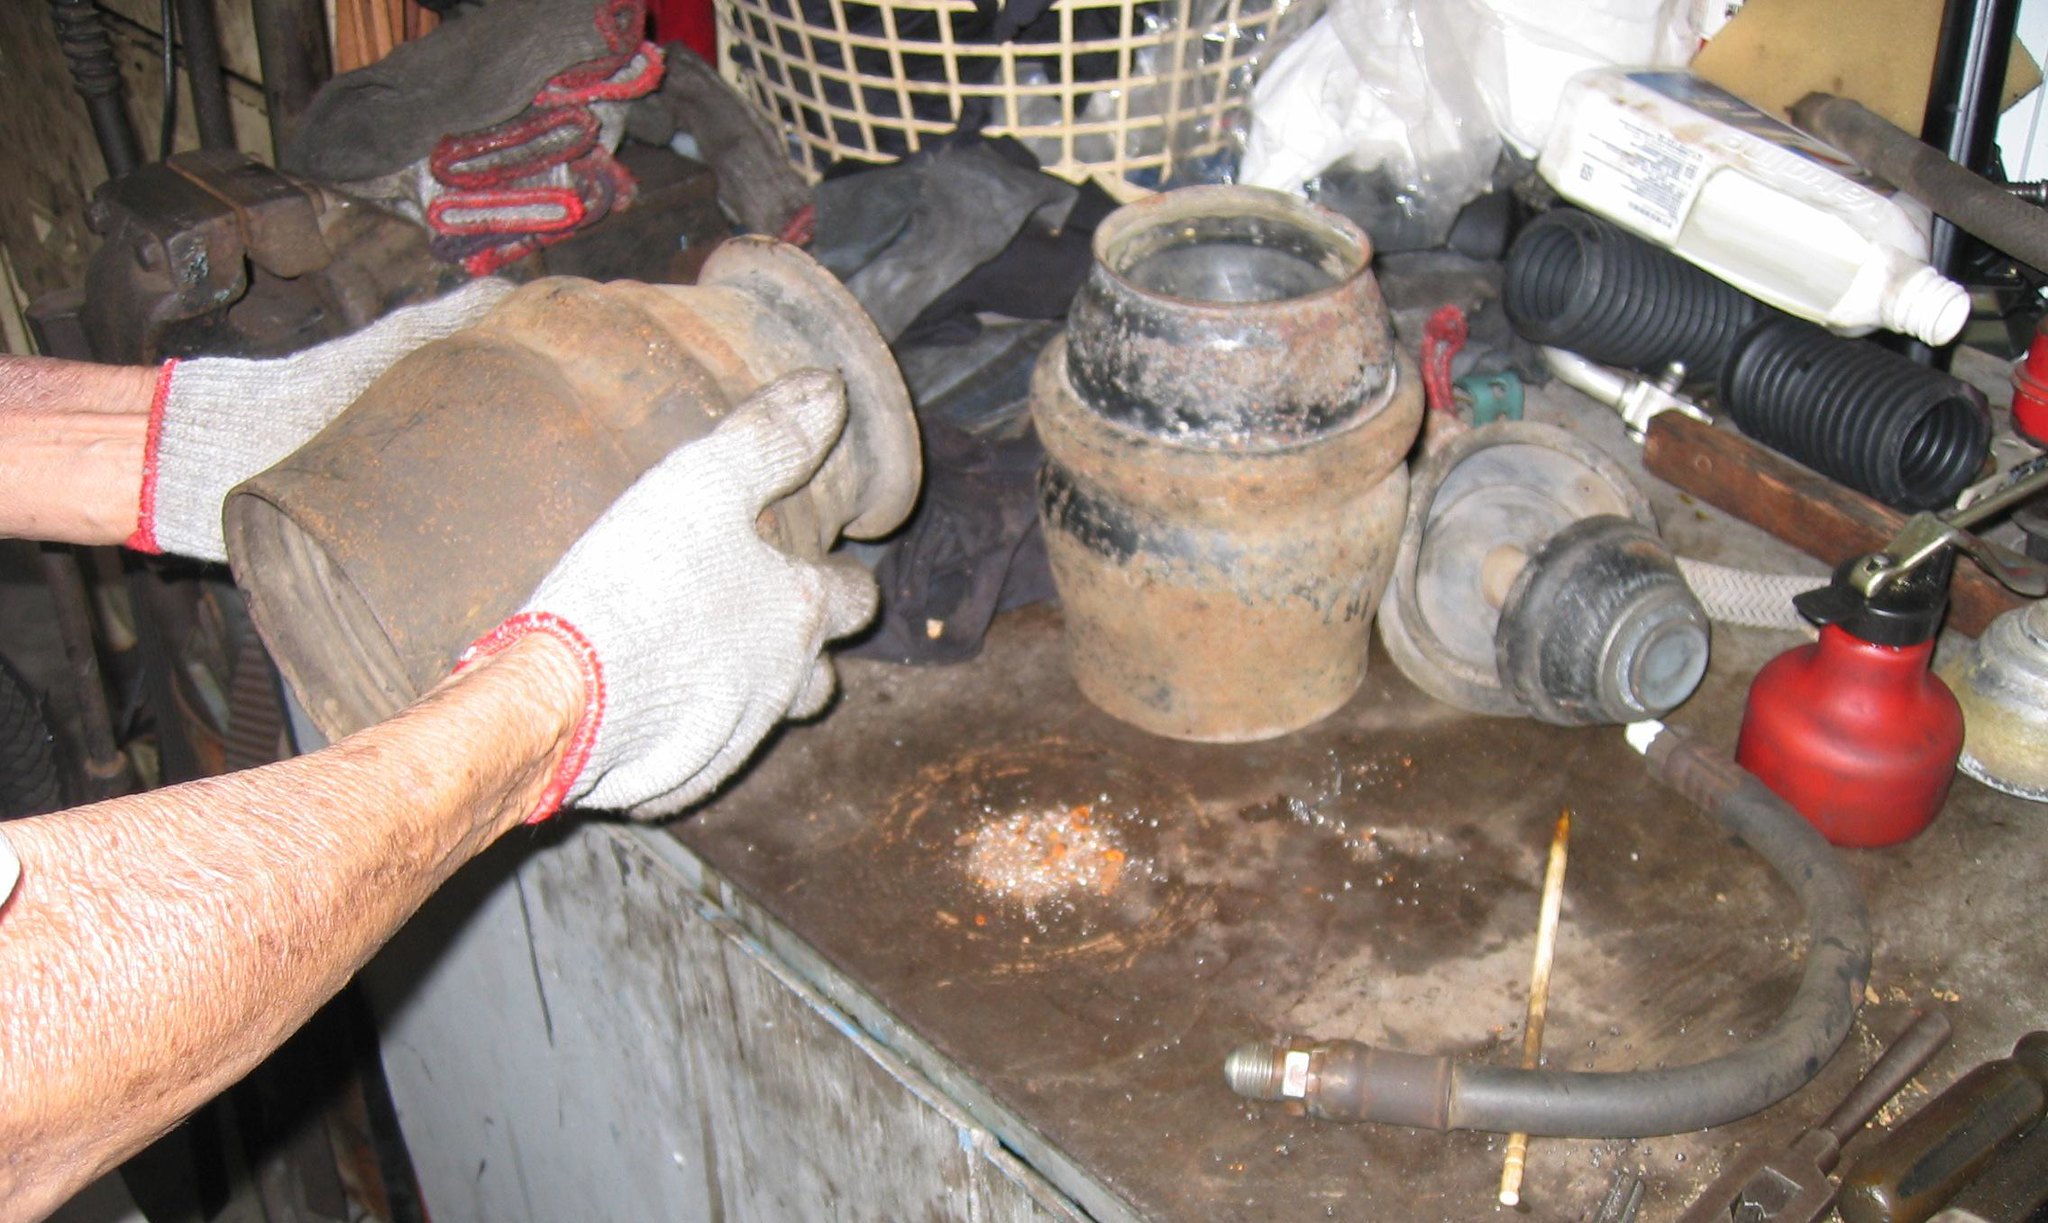 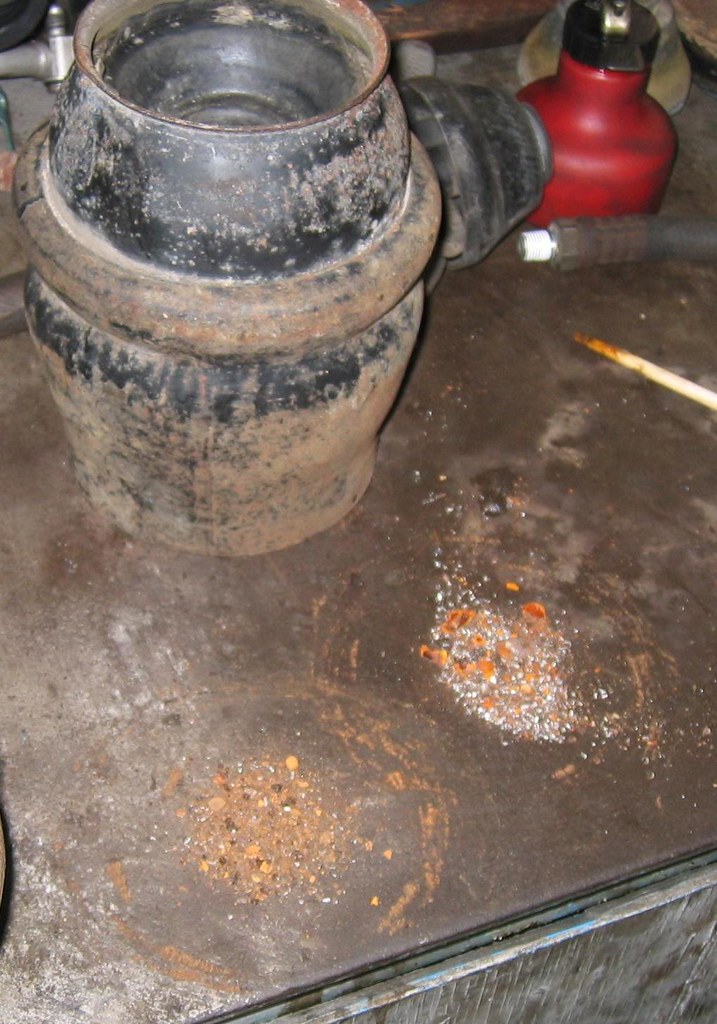 Tapping is done and use pressurized air to clean the displacer unit outside and inside. 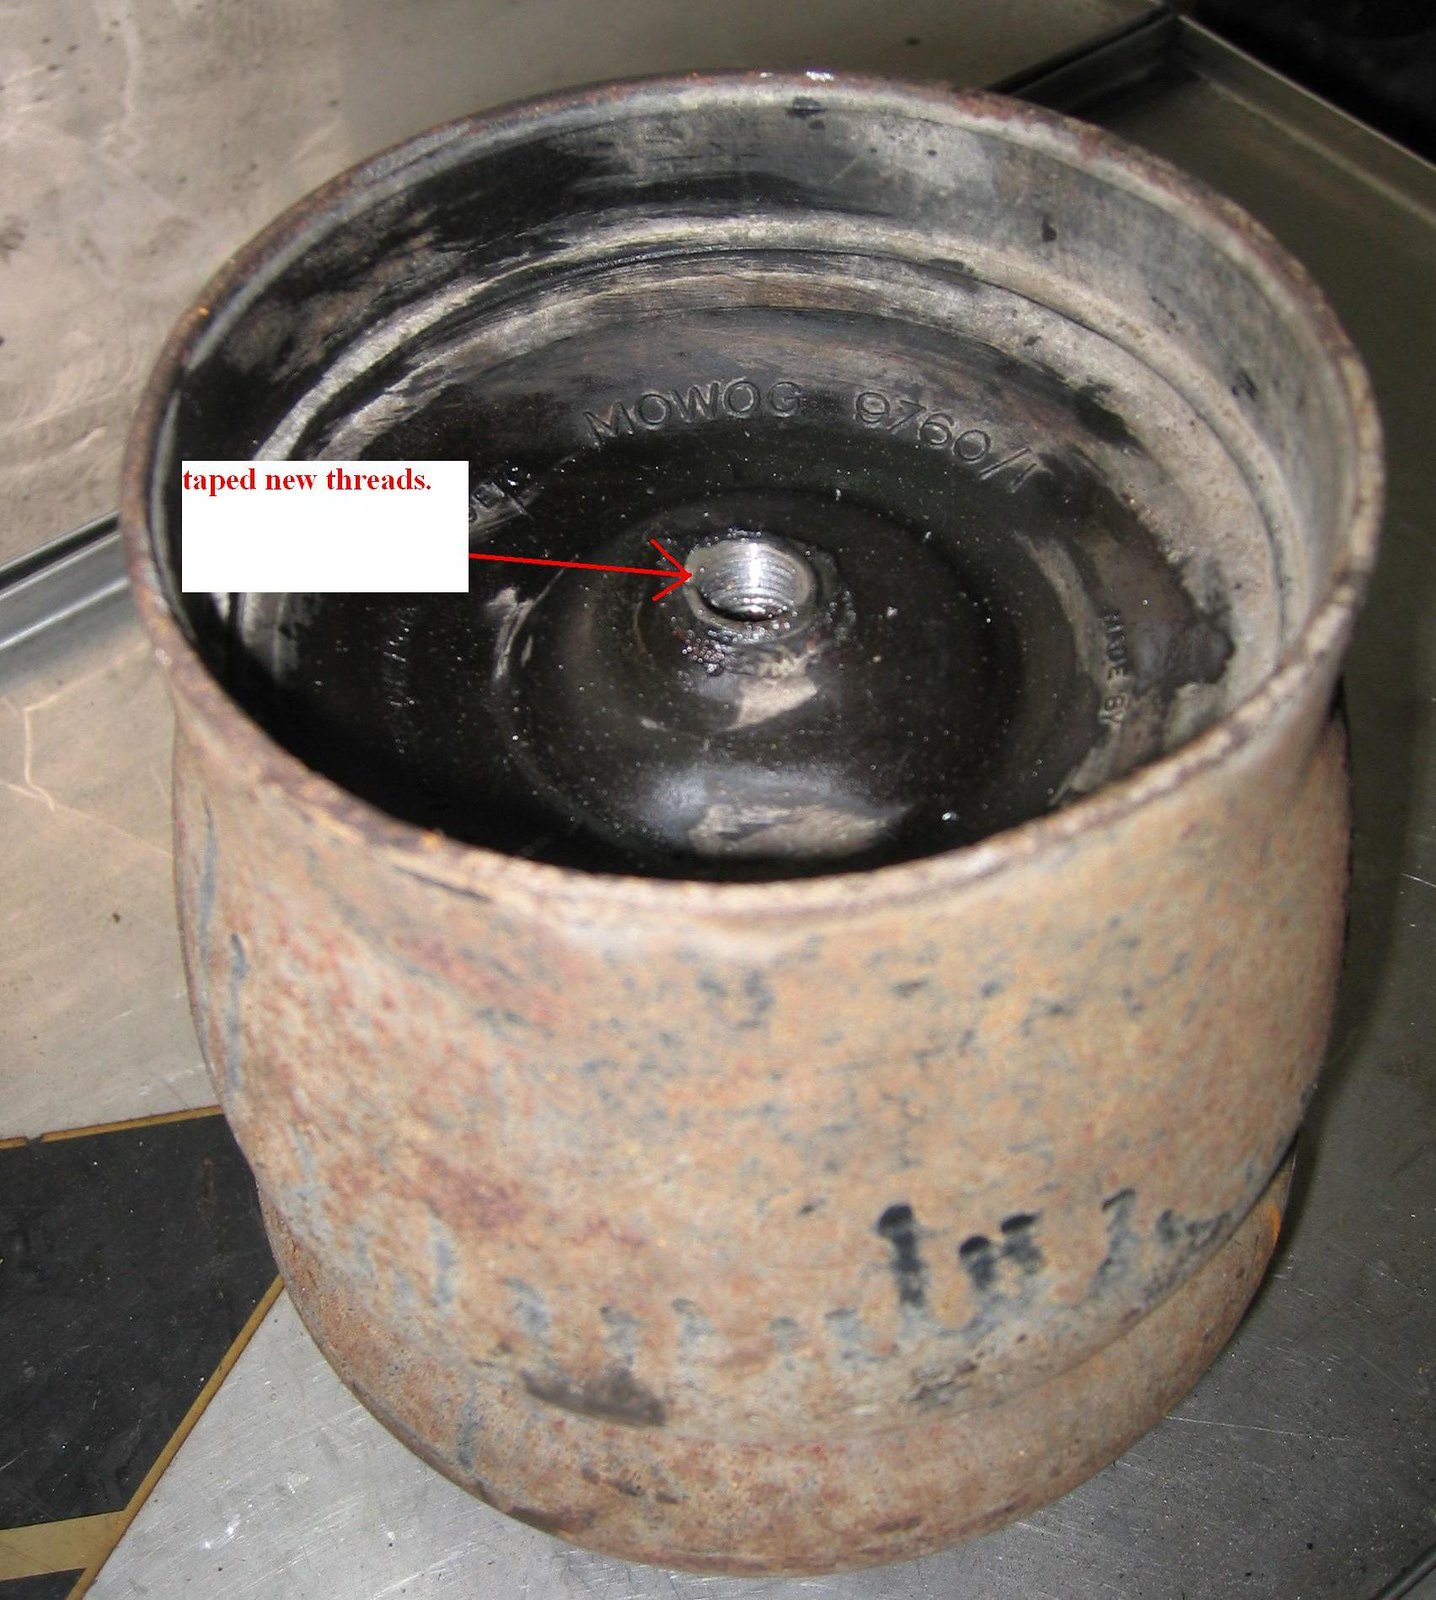 You wouldn't believe that these second hand units, which hadn't been used for more than 10 years, have some rusty pieces of metal inside. Luckily we found it and cleaned it. Luck still with us, the displacer unit works---really unbelievable ! But I would suggest if you have any displacer units, you'd better keep them in good condition. Hope these second hand displacer units will work for another couple of decades. |
|
|
|
Post by dave1800 on Dec 14, 2014 2:24:29 GMT
Thanks Tony, the photos and descriptions are so clear. It is so good to see real engineers at work.
As an aside I see that Taiwan now seems to appear on the list of countries where Scanner Danner Professional series videos can be watched on Youtube if I am reading the list correctly. No idea how long it will take to get here sadly.
Best wishes
David
|
|
|
|
Post by tony on Dec 15, 2014 1:00:31 GMT
Thanks, David. Yes, Taiwan has been on the list just for a few months and I have been watching his videos and learning his brilliant troubleshooting skills. Regards Tony Thanks Tony, the photos and descriptions are so clear. It is so good to see real engineers at work. As an aside I see that Taiwan now seems to appear on the list of countries where Scanner Danner Professional series videos can be watched on Youtube if I am reading the list correctly. No idea how long it will take to get here sadly. Best wishes David |
|
|
|
Post by tony on Dec 15, 2014 1:23:18 GMT
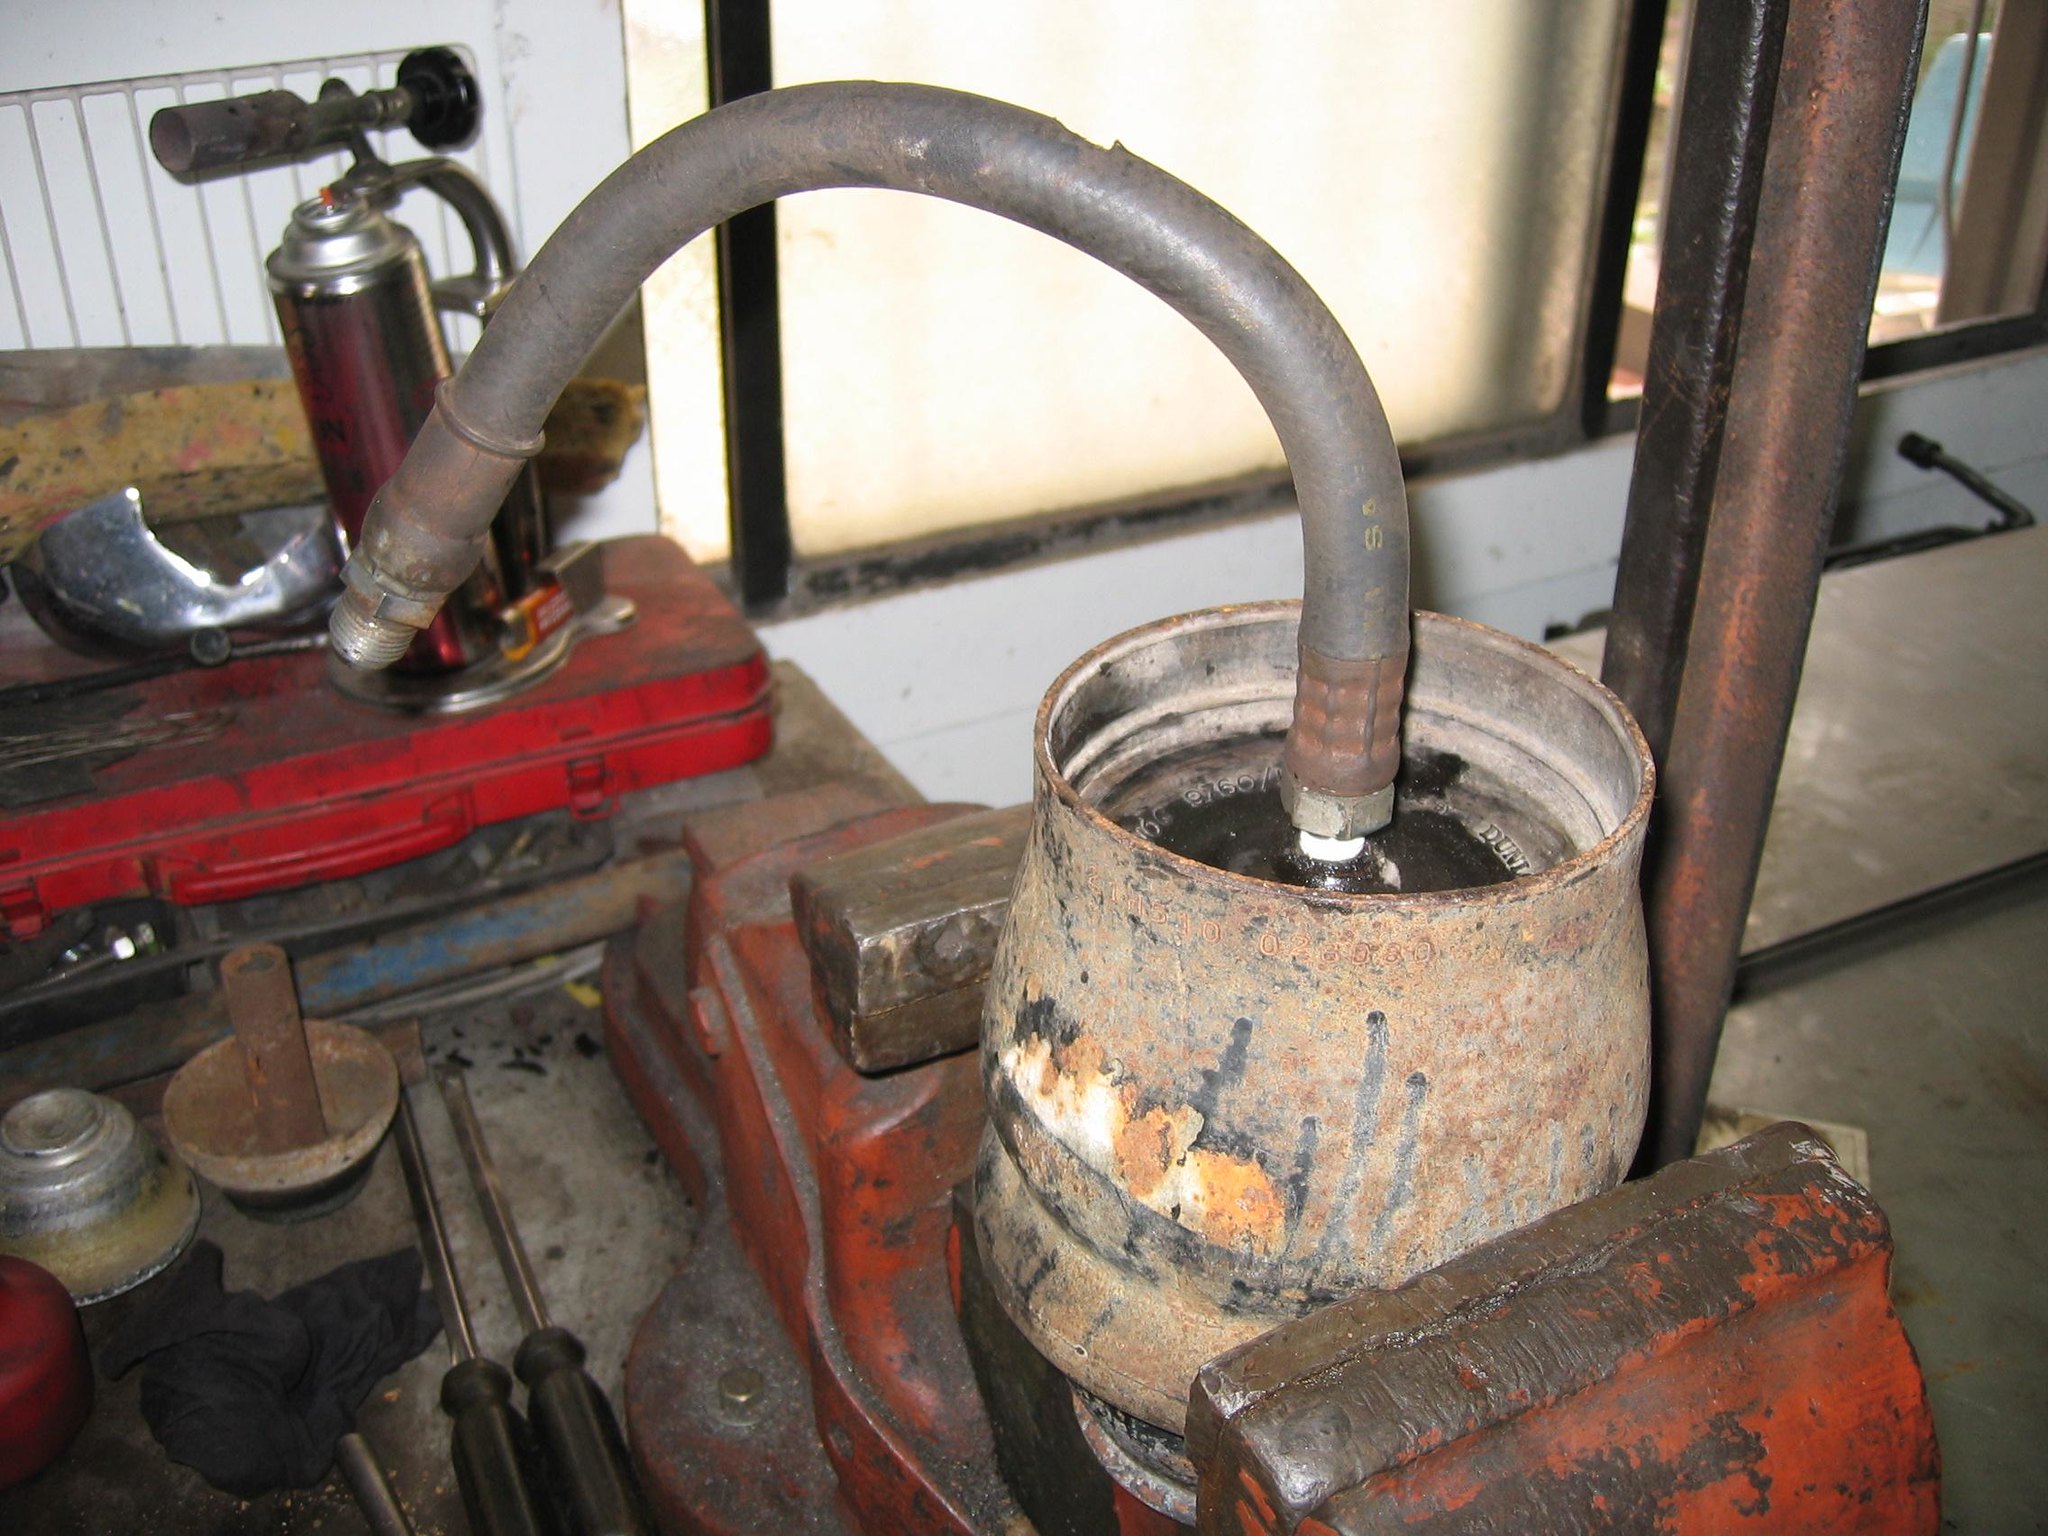
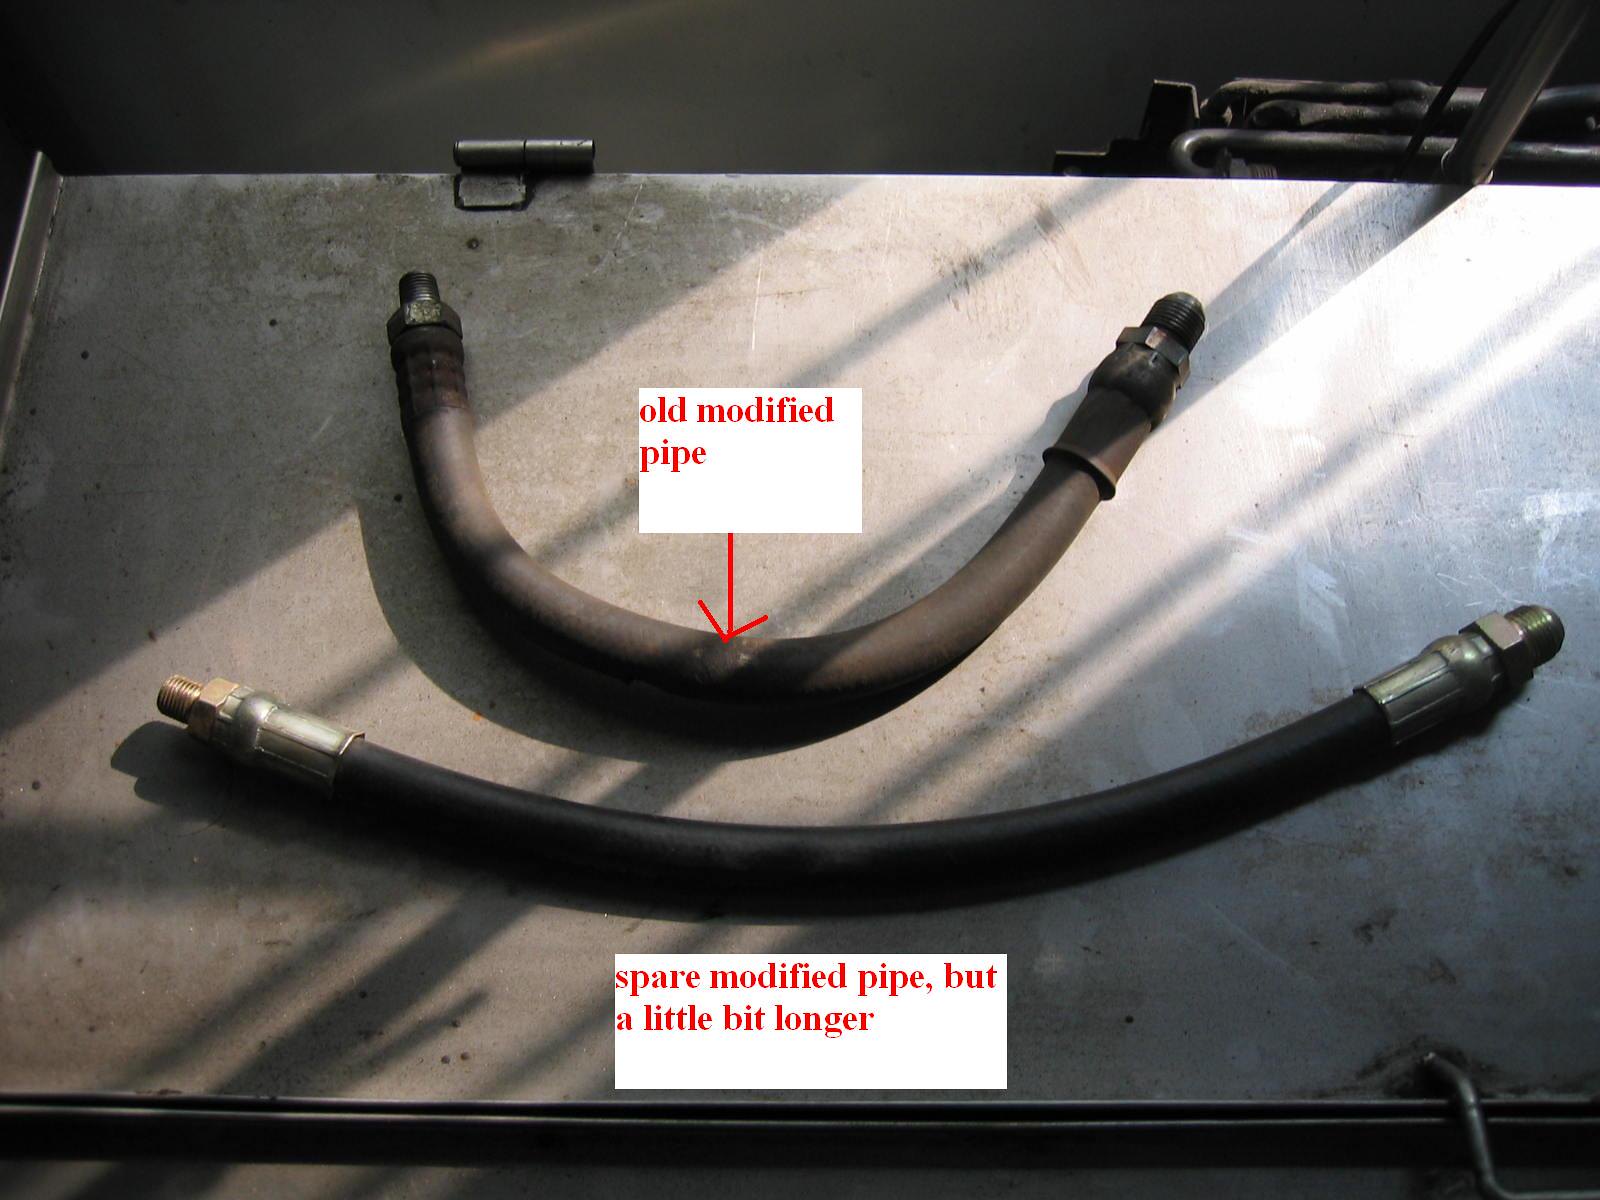 The upper pipe ( metal net inside ) we made has been used for more than 10 years and it's too strong. I just don't like it. The lower one is a spare part, but not that stronger and its length is a little bit longer. I still remember talking to the boss of a pipe re-builder. It was about 8 years ago when our 1800 left side fell down. I had to find out on my own what was wrong. Luckily it was the broken modified pipe of the right rear suspension. I took it to the pipe rebuilder and discussed about how much pressure the pipe should be as I wanted to have it weaker. He told me it was about 300 psi. Now I believe it is higher than the one David found for us. link Neil tested it to 250 psi. 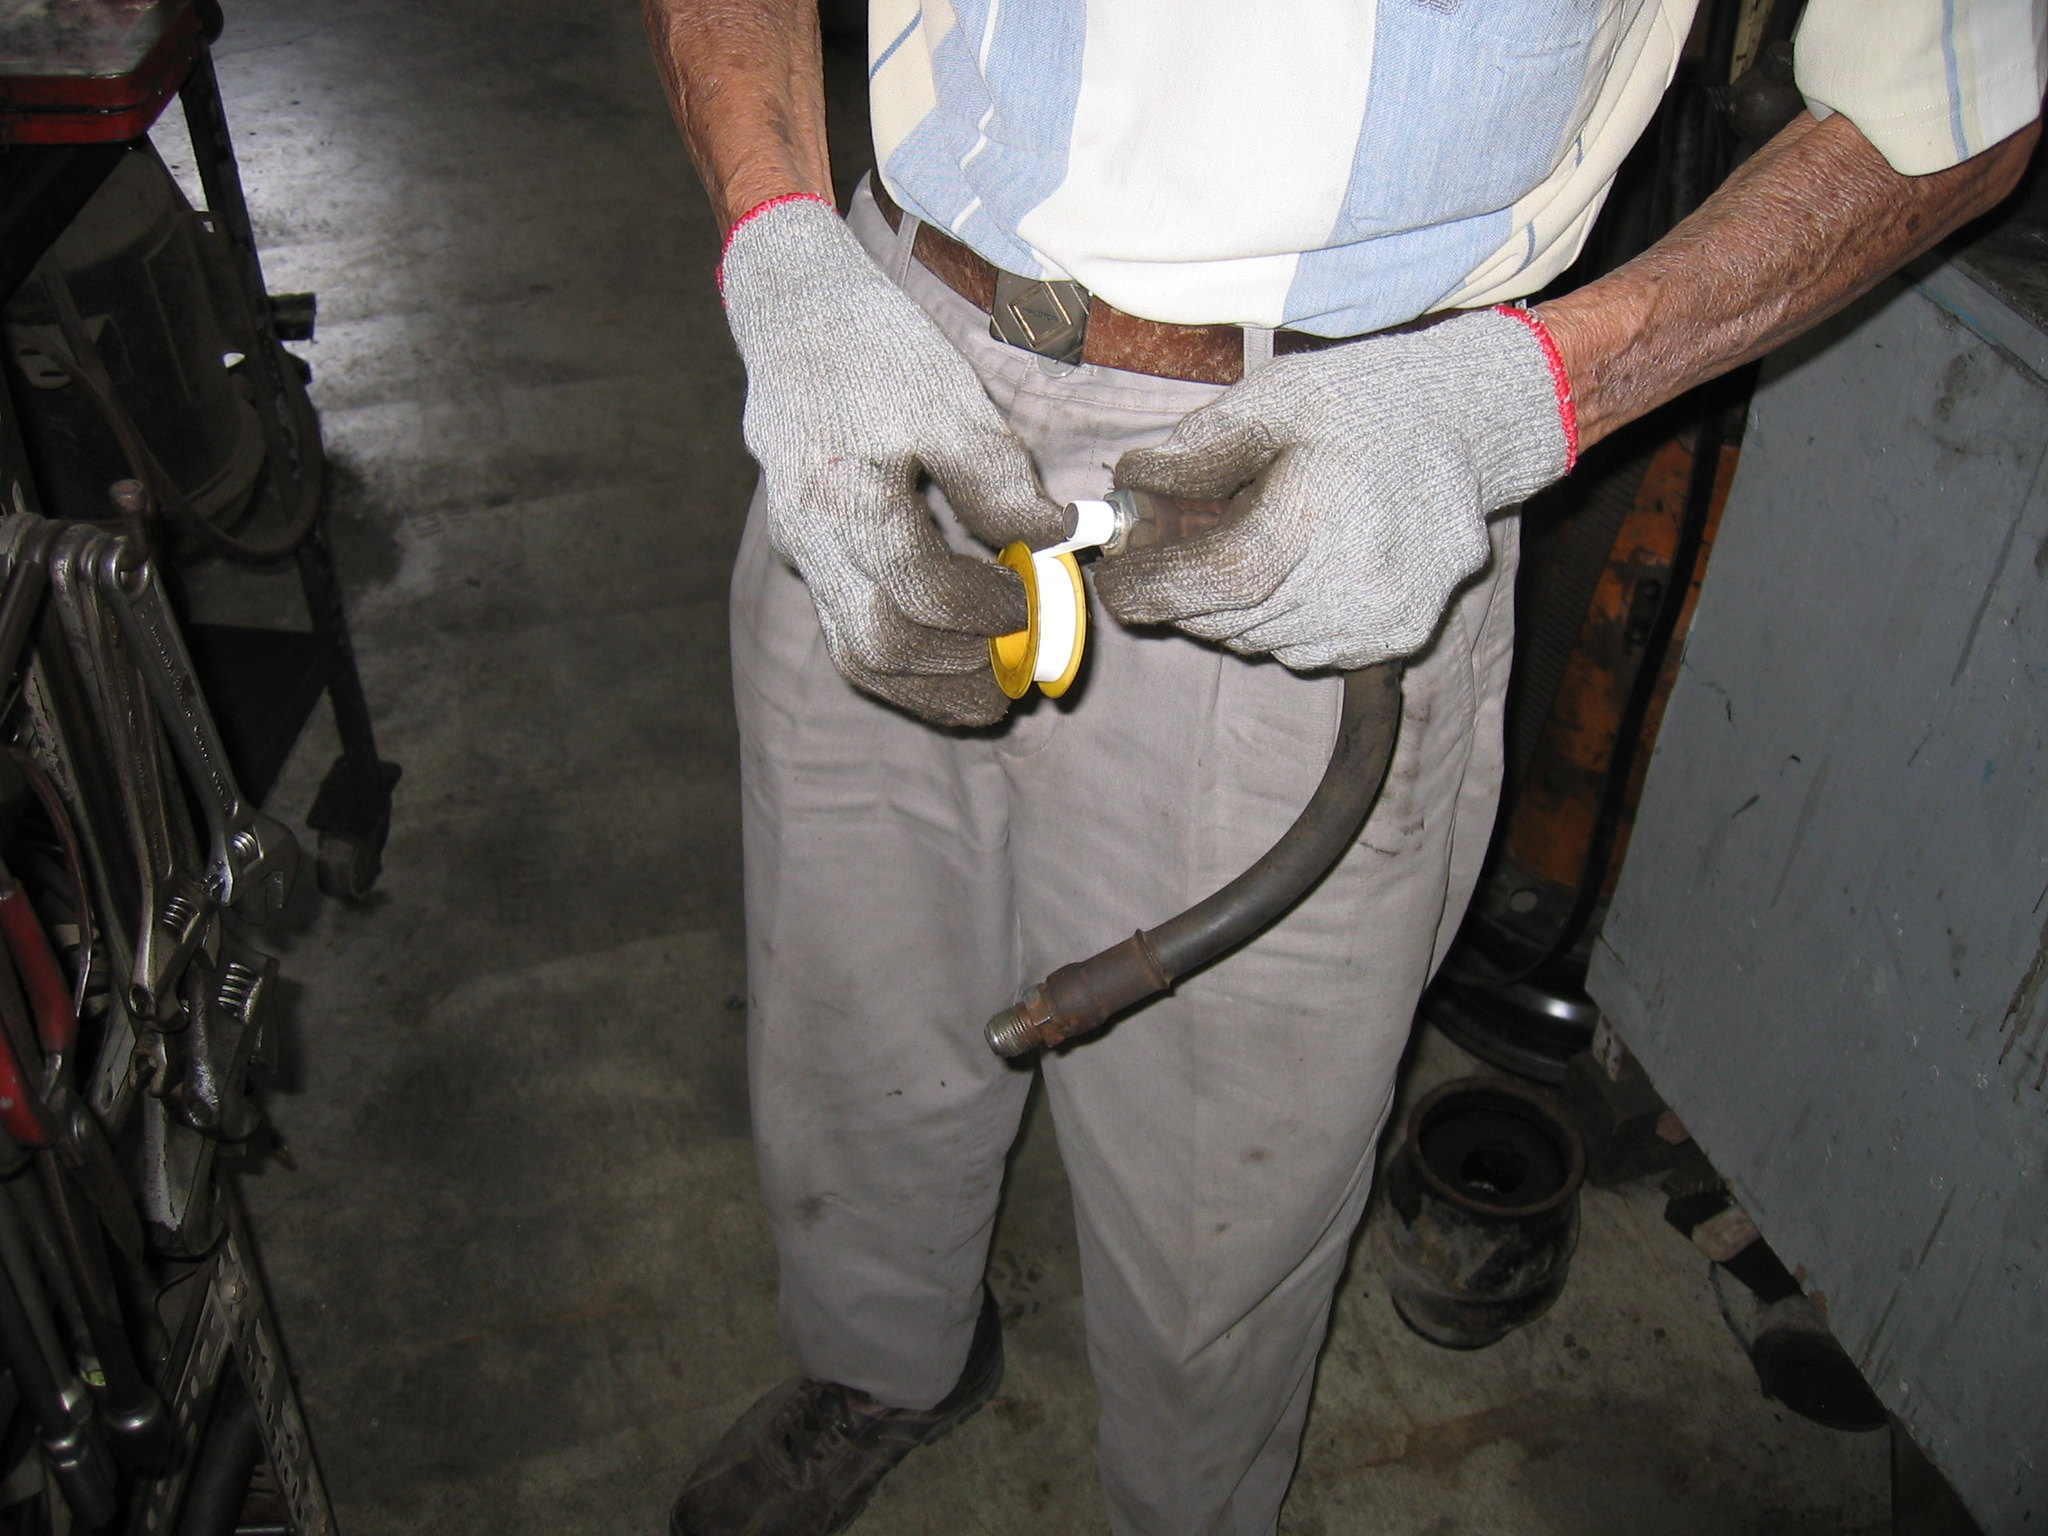 Father still used the old modified pipe with more seal tape ( 5 rounds ) on the threads.
 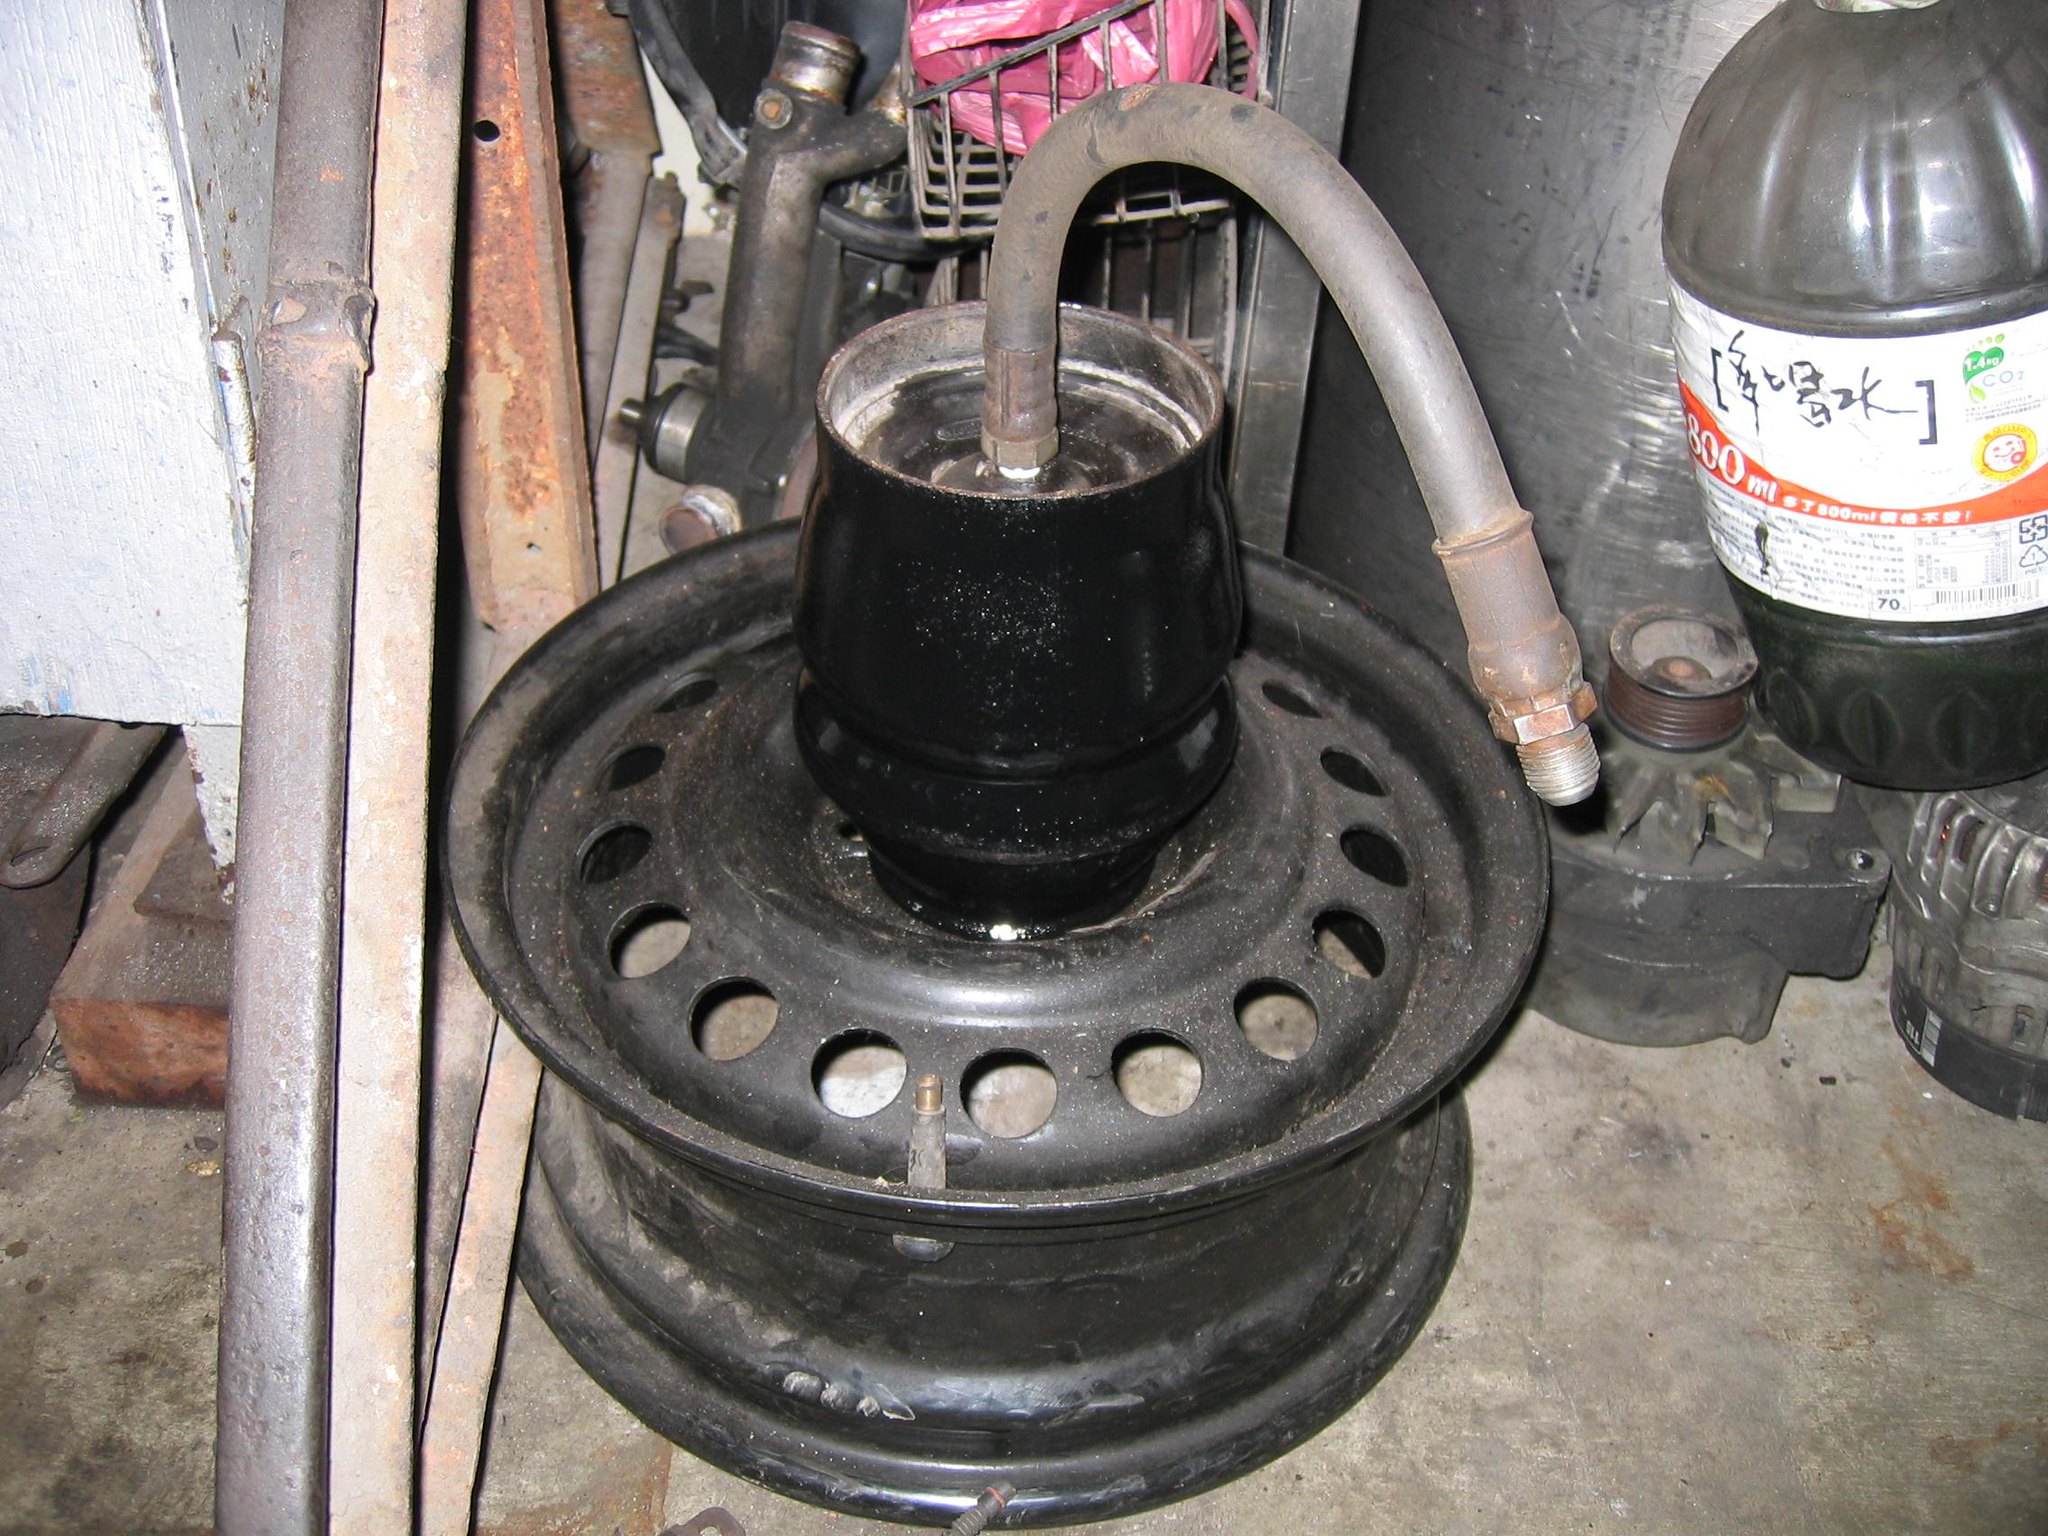 Finally done the job. 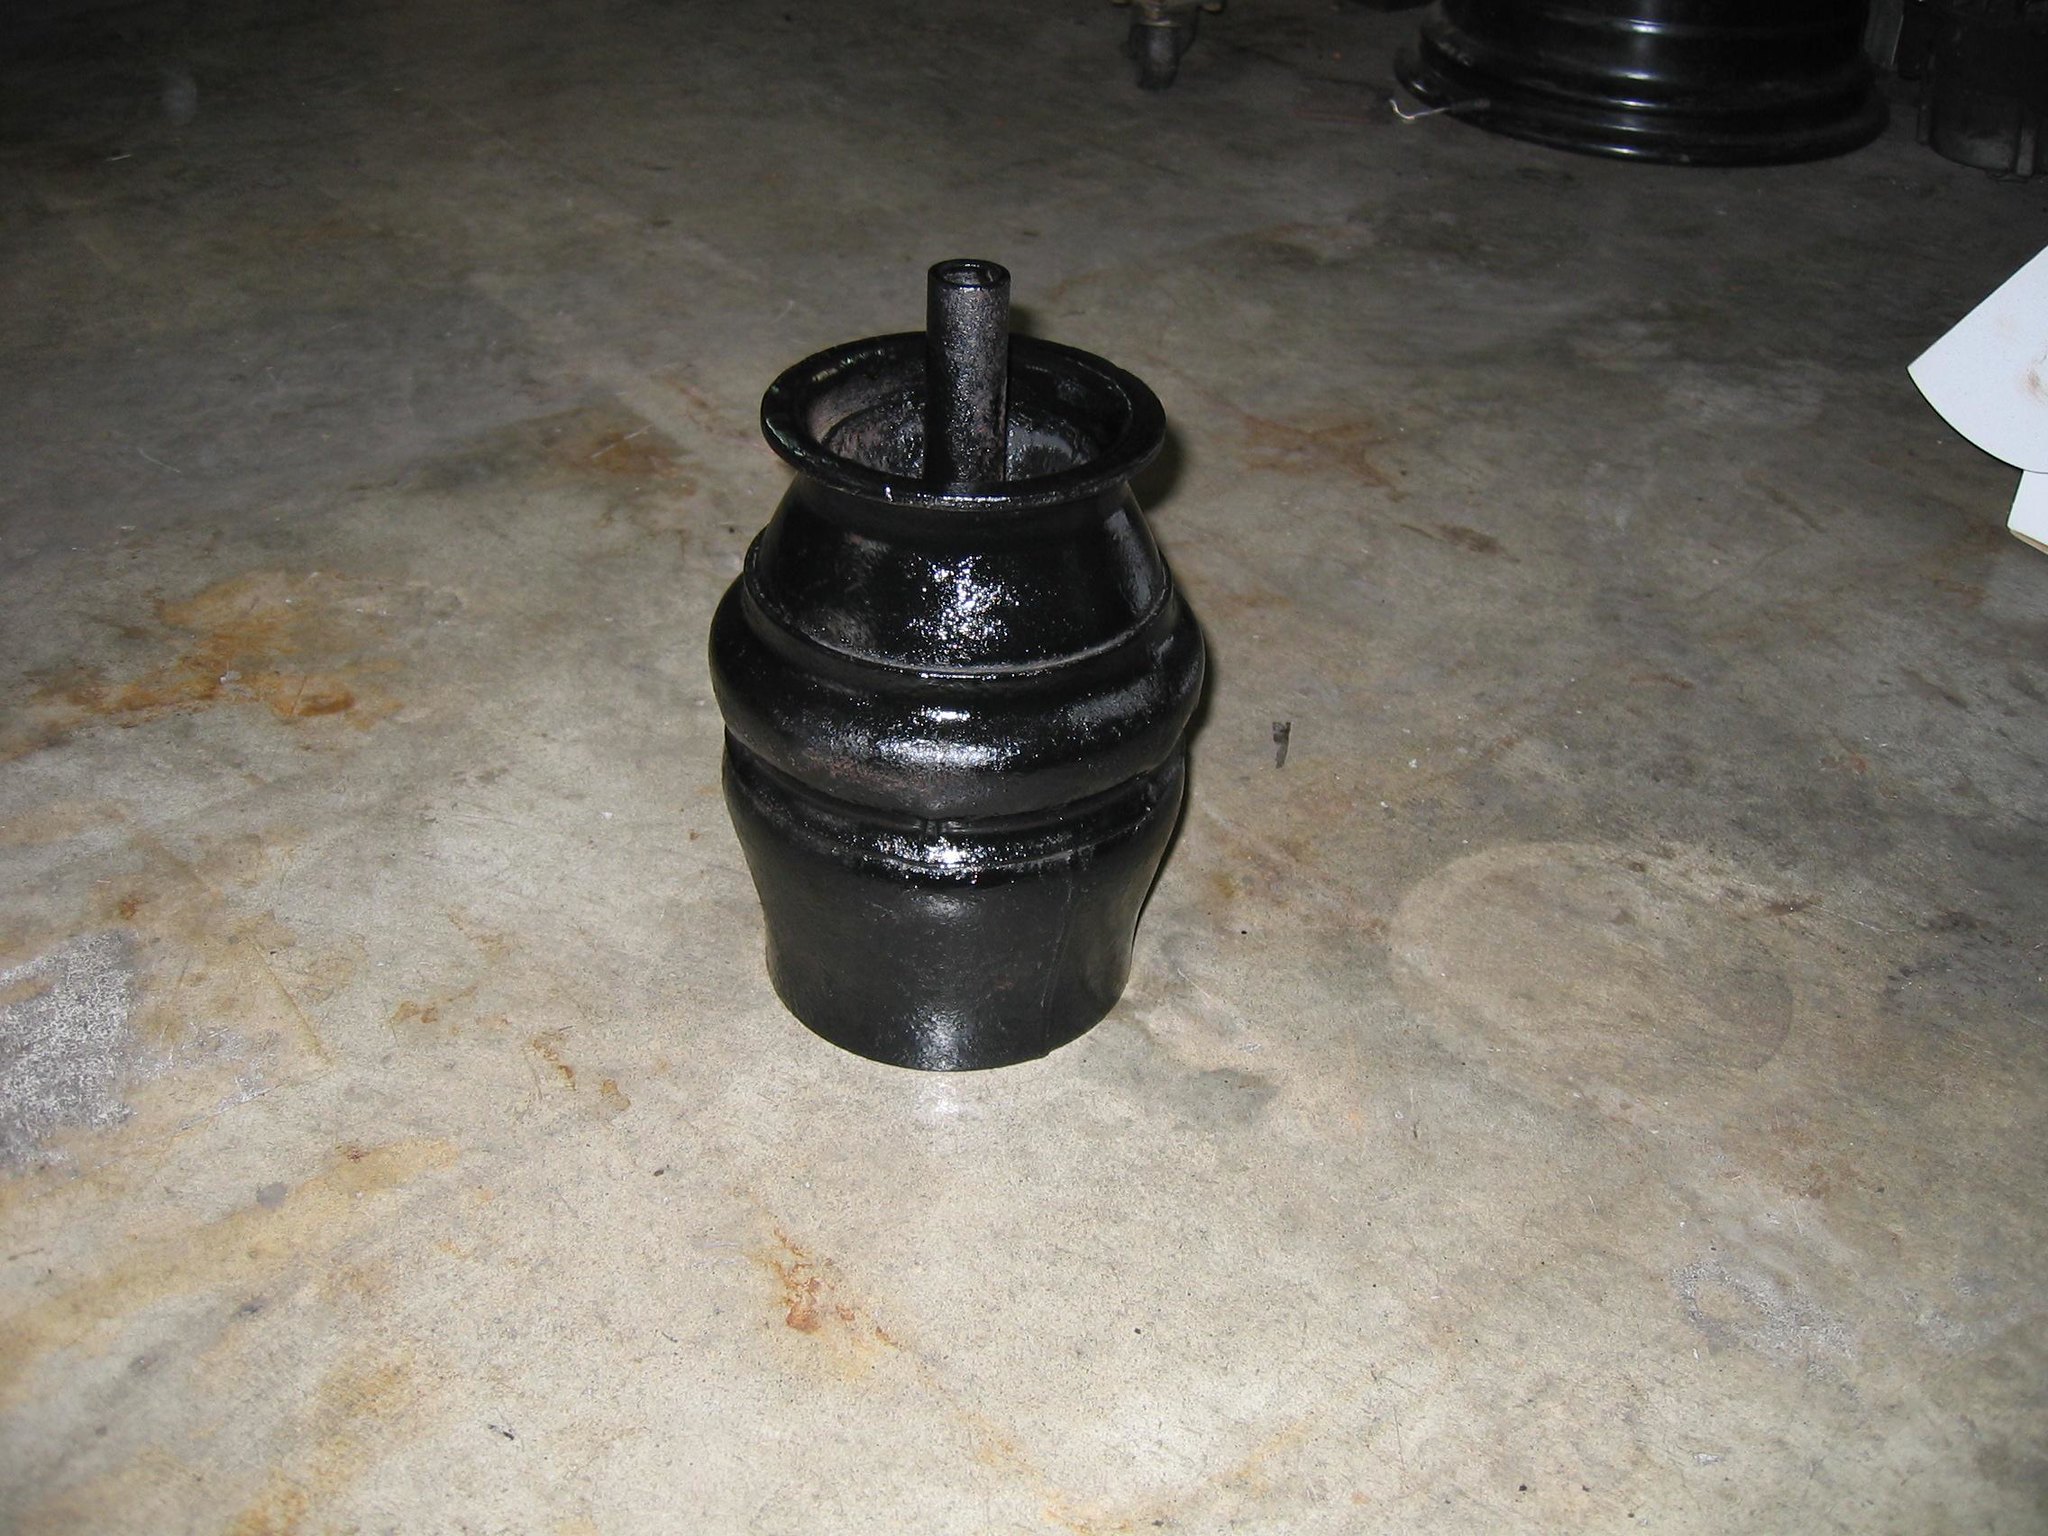 This is another type of displacer unit for Austin 1750. We did the same modification and we think it could be used in the further. As it is too big and may suit for the front one of 1800s with some another modification. |
|


