|
|
Post by Penguin45 on Sept 10, 2017 17:29:32 GMT
Shot some red paint over the repairs under the headlight unit. 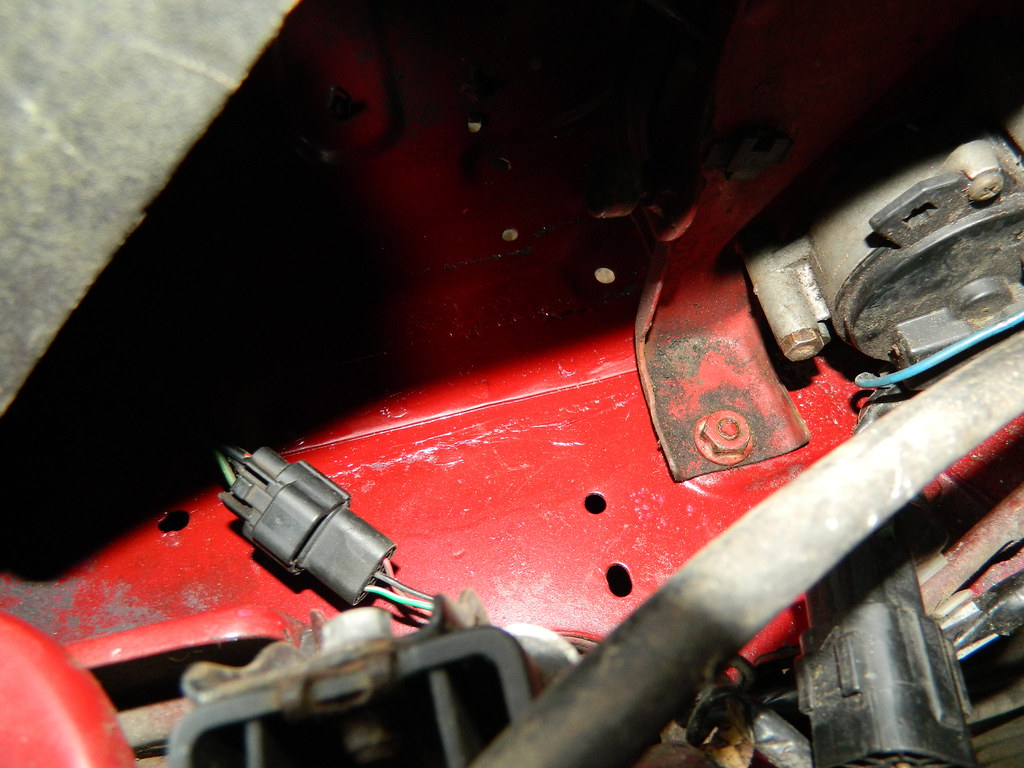 MX5 MX5 by Penguin 45, on Flickr Luvverley. 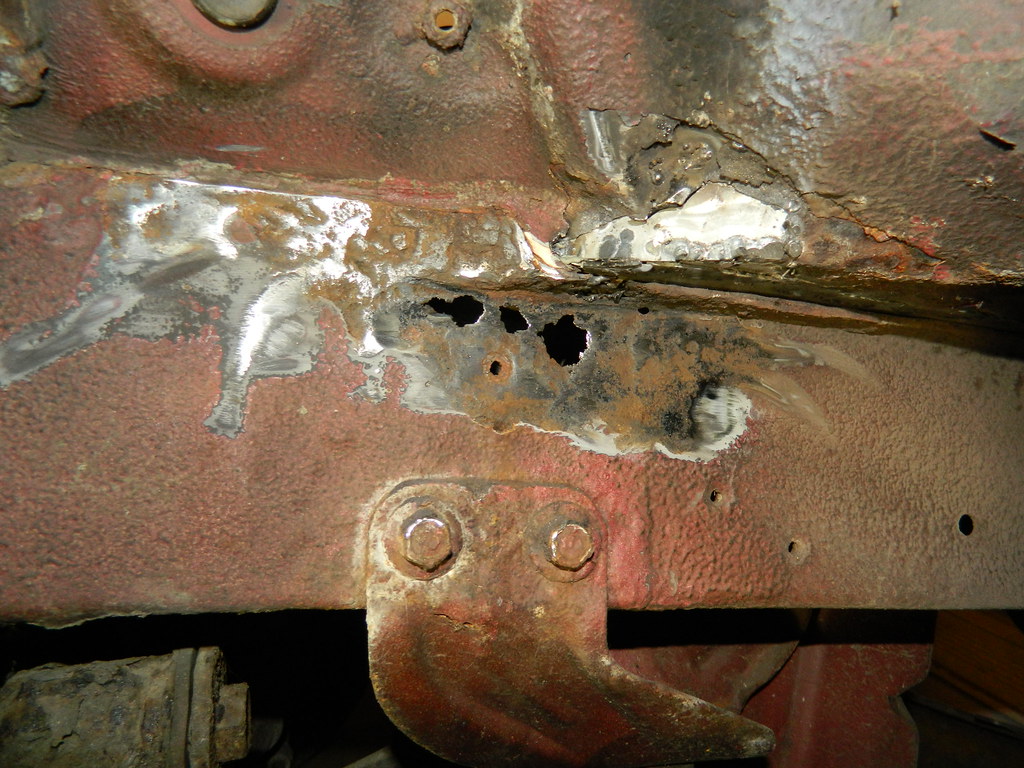 MX5 MX5 by Penguin 45, on Flickr Into the chassis rail. It was only a little swipe with the wire wheel, honest. 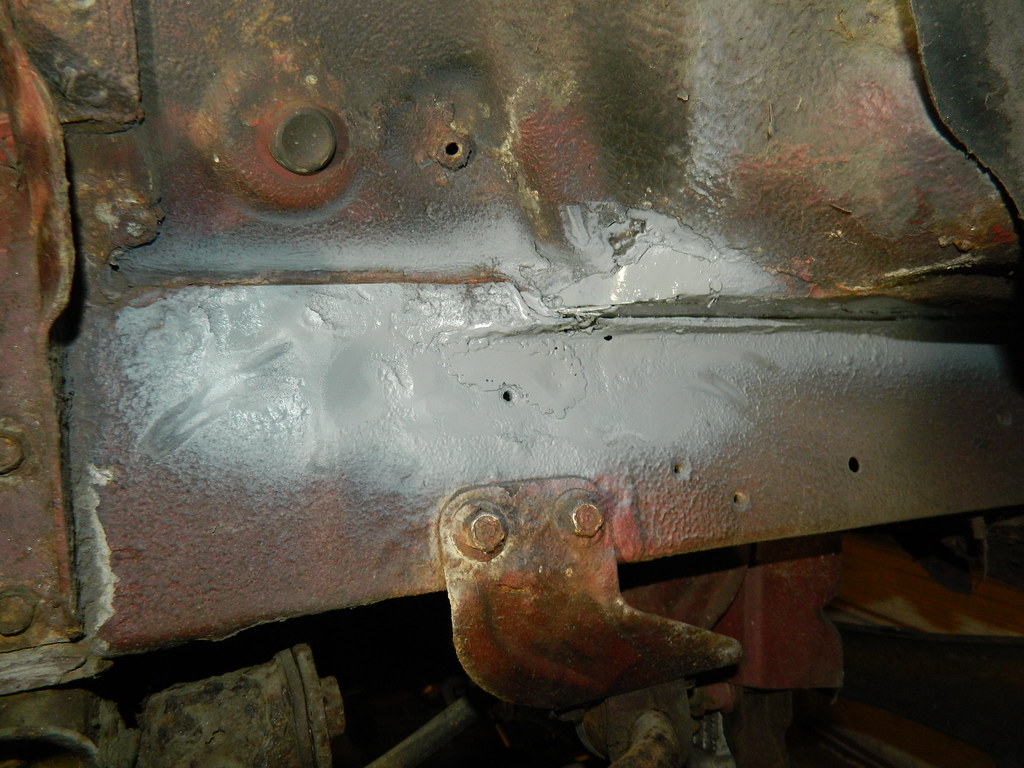 MX5 MX5 by Penguin 45, on Flickr Ground the rot away. Awkward little panel welded home, flatted and primed. 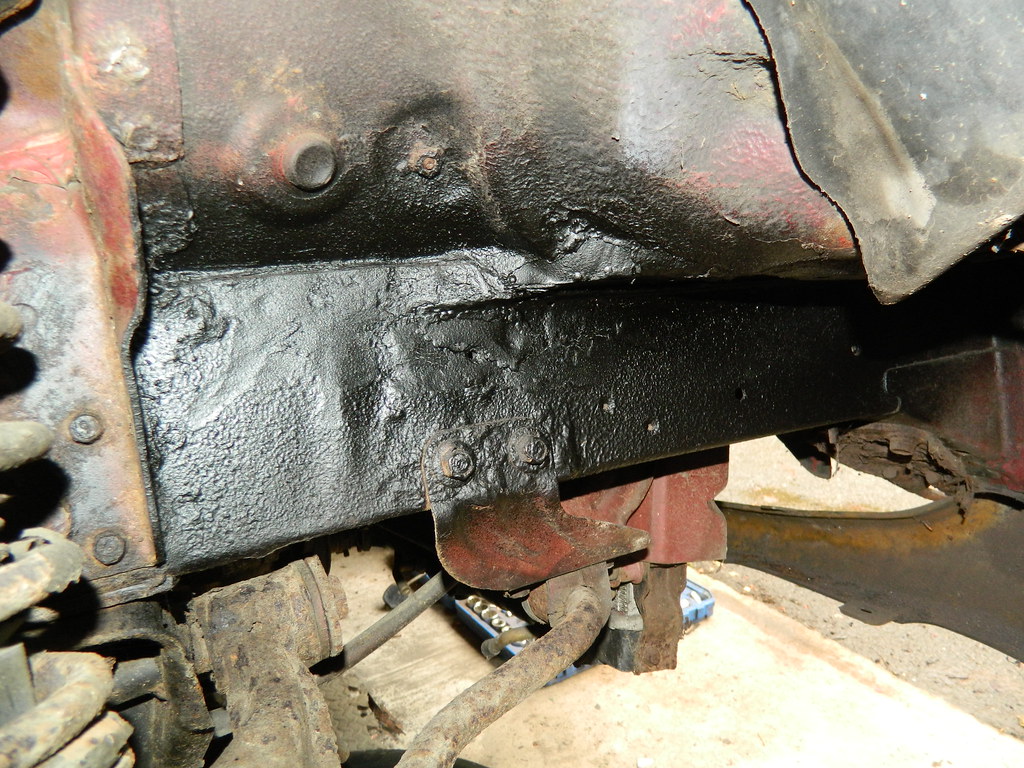 MX5 MX5 by Penguin 45, on Flickr All painted with VTP top coat then undersealed. This included the reverse side of repairs in the headlight area above. Lee, the owner, has popped round and seems happy enougnh with how things are going. He also brought round a large shiny chrome tip for the exhaust. I was going to turn the car round and get started on the inner wing repair, but I haven't had my steel delivery yet, which I will need for the large sections required. I welded the tip on instead.  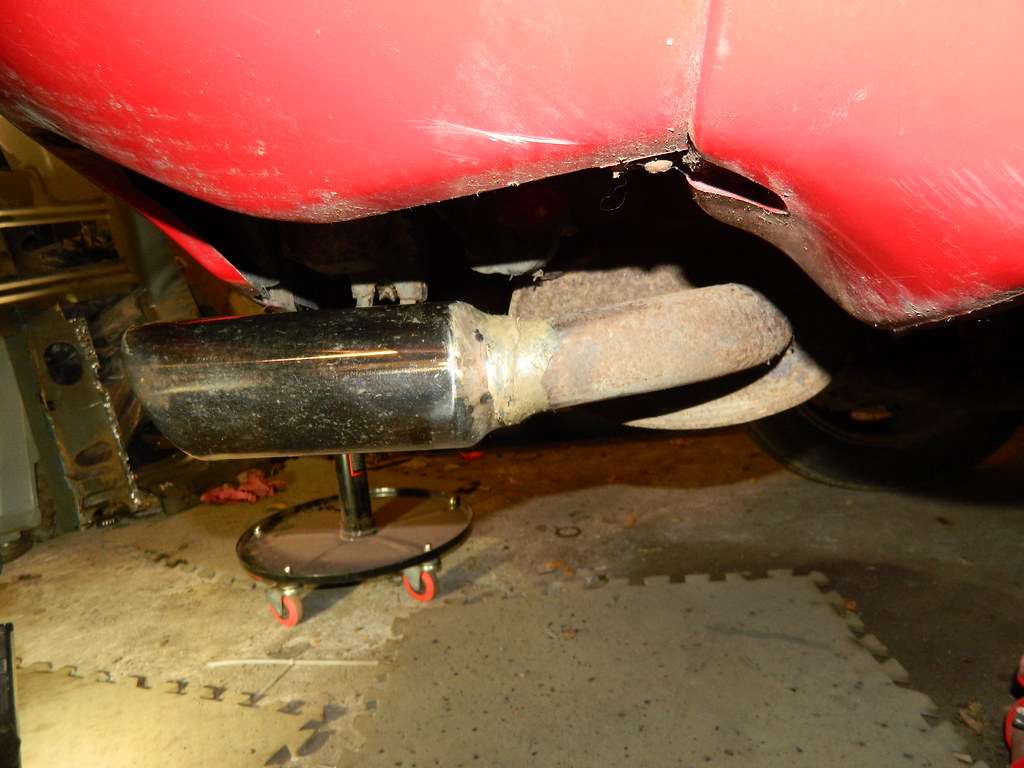 MX5 MX5 by Penguin 45, on Flickr Exhaust pulled down off its rubbers to allow access, but still b-awkward. A smear of GunGum has been used on the belt, braces and safety pins principle. We'll get started on the inner wing tomorrow. Chris. |
|
|
|
Post by Penguin45 on Sept 11, 2017 19:20:54 GMT
And on to the main event. Couple of hours to get the (battered) n/s wing off as the numerous M6 fittings stuck or broke in a random fashion, finlly revealing: 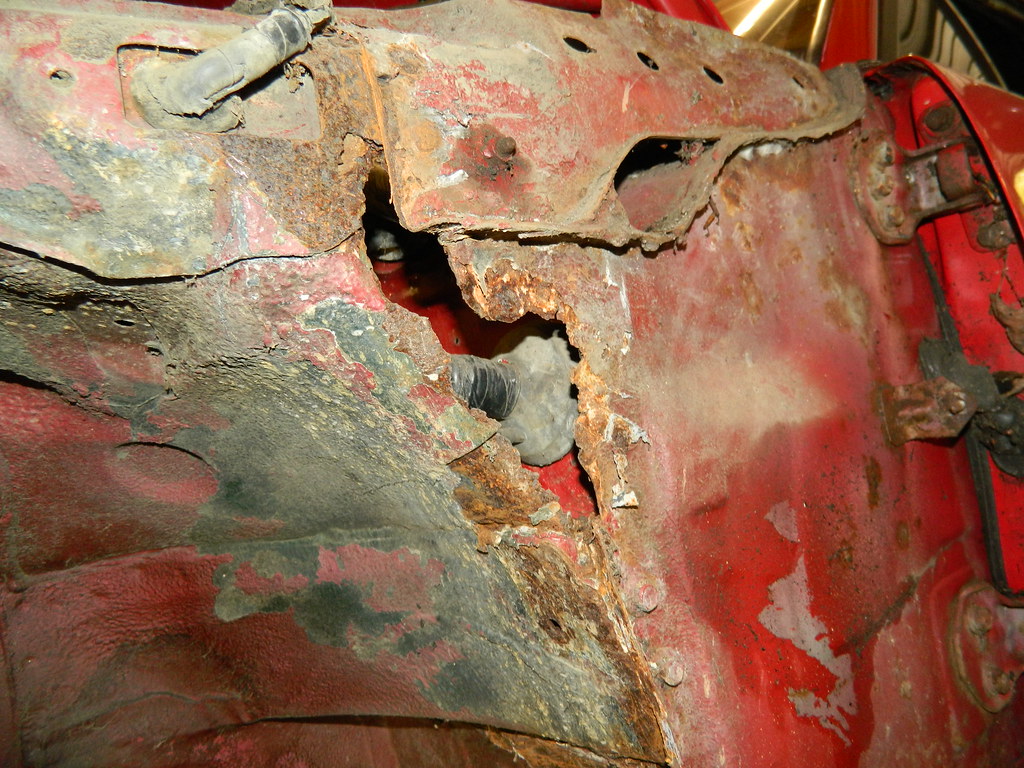 MX5 MX5 by Penguin 45, on Flickr Tadaa! That's horrible. 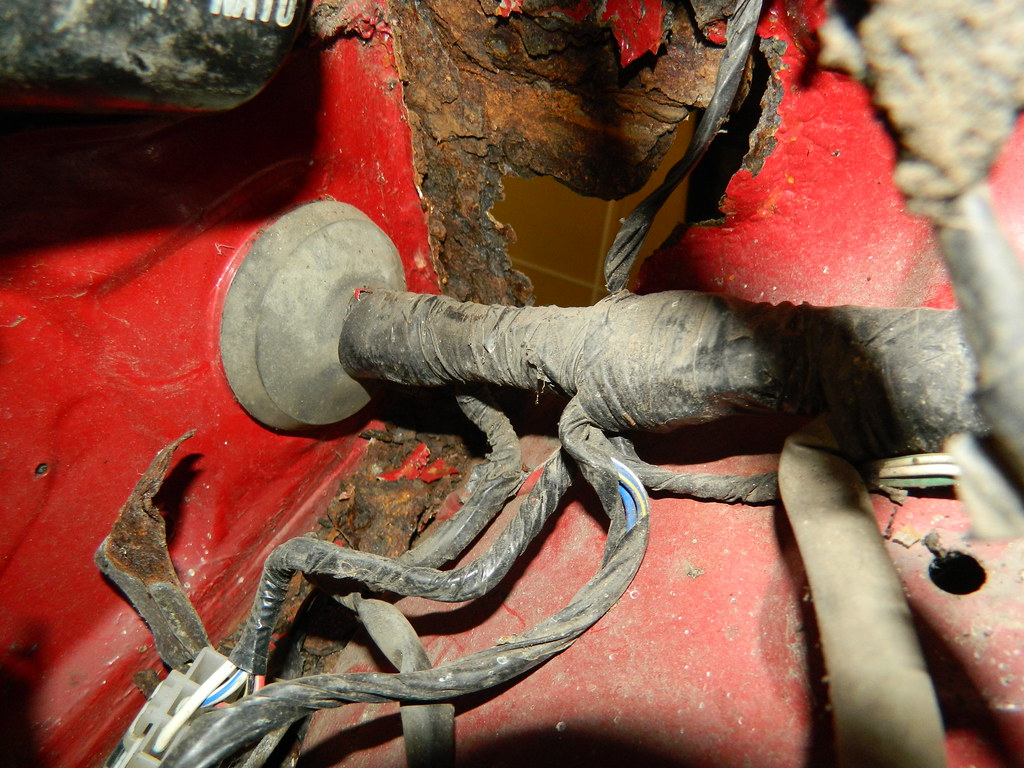 MX5 MX5 by Penguin 45, on Flickr And that big multi-core is right in the way, so I'm going to have to do all of it from the outside. What looks like rust at the bottom is just loose crud. 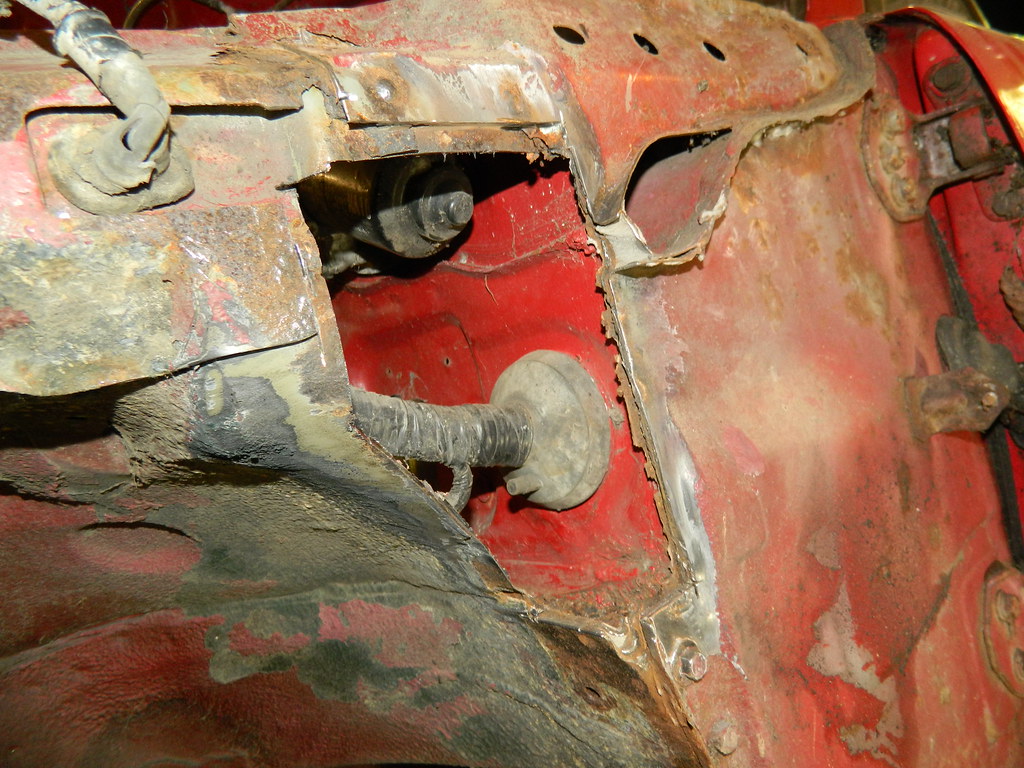 MX5 MX5 by Penguin 45, on Flickr That's better. Nice big clean hole. 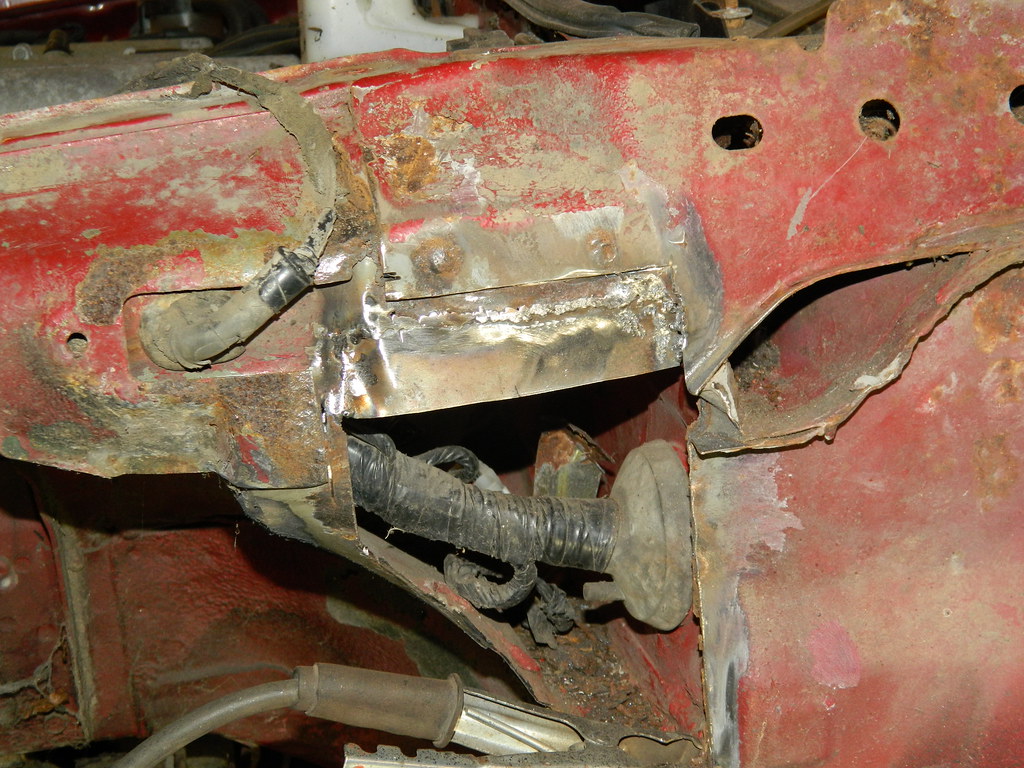 MX5 MX5 by Penguin 45, on Flickr Several layers to be built up, so this is the top inner panel. 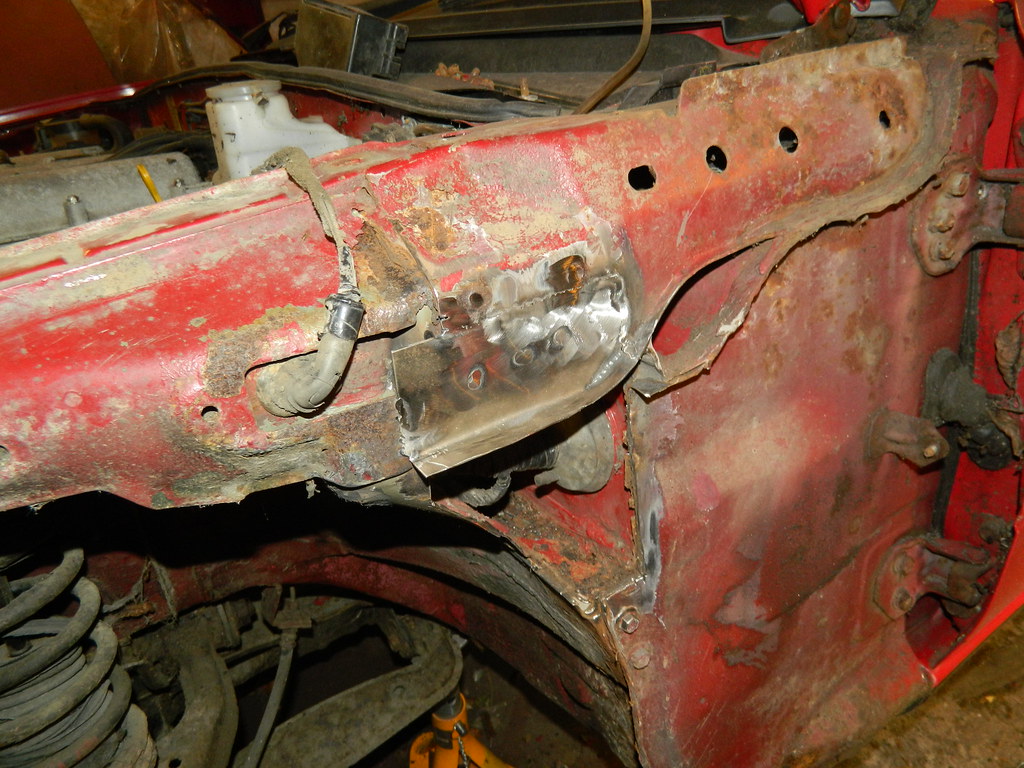 MX5 MX5 by Penguin 45, on Flickr And the top outer one. More to come.... Chris. |
|
|
|
Post by 1800heap on Sept 12, 2017 7:32:11 GMT
Looks like your beer fridge should be well stocked after this lot Chris! Or is it a love job!
Don't suppose you feel like moving to sunny Queensland and helping me with my crab! I am lacking inspiration at the moment and I have only done a little bit!
You are smashing it out well done.
Nick
|
|
|
|
Post by Penguin45 on Sept 13, 2017 20:07:23 GMT
I do thoroughly enjoy this stuff. It's satisfying as it all takes shape again. There is a remuneration for this one though. 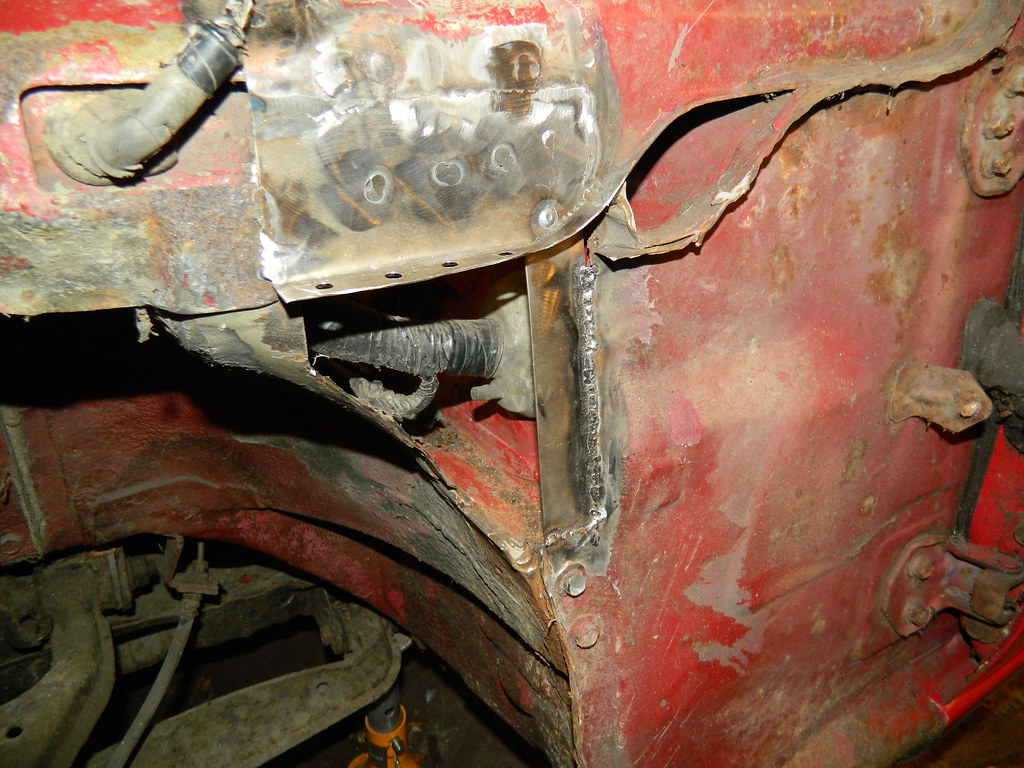 MX5 MX5 by Penguin 45, on Flickr Inner doubler added. 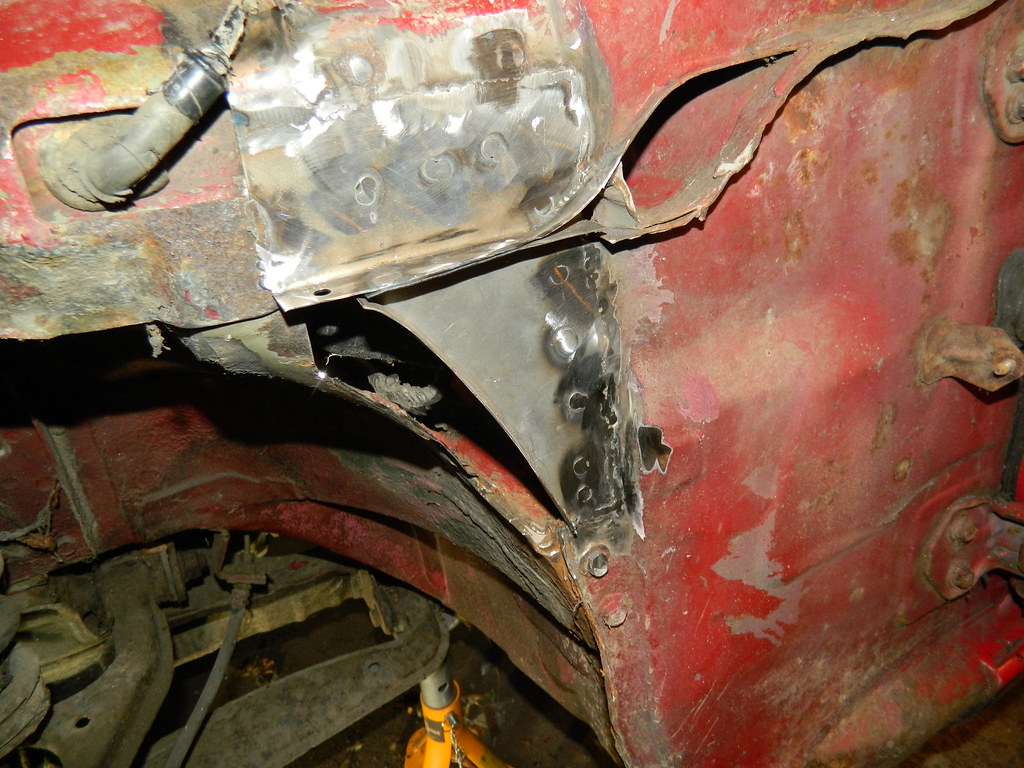 MX5 MX5 by Penguin 45, on Flickr Outer side panel. The front closing panel is made and tacked home. Took ages as it's a complex shape. I'll get it fully welded and flatted back tomorrow. As for Nick's heap (See what I did there?), stick it in a container and send it over.  Chris. |
|
|
|
Post by Penguin45 on Sept 14, 2017 17:25:38 GMT
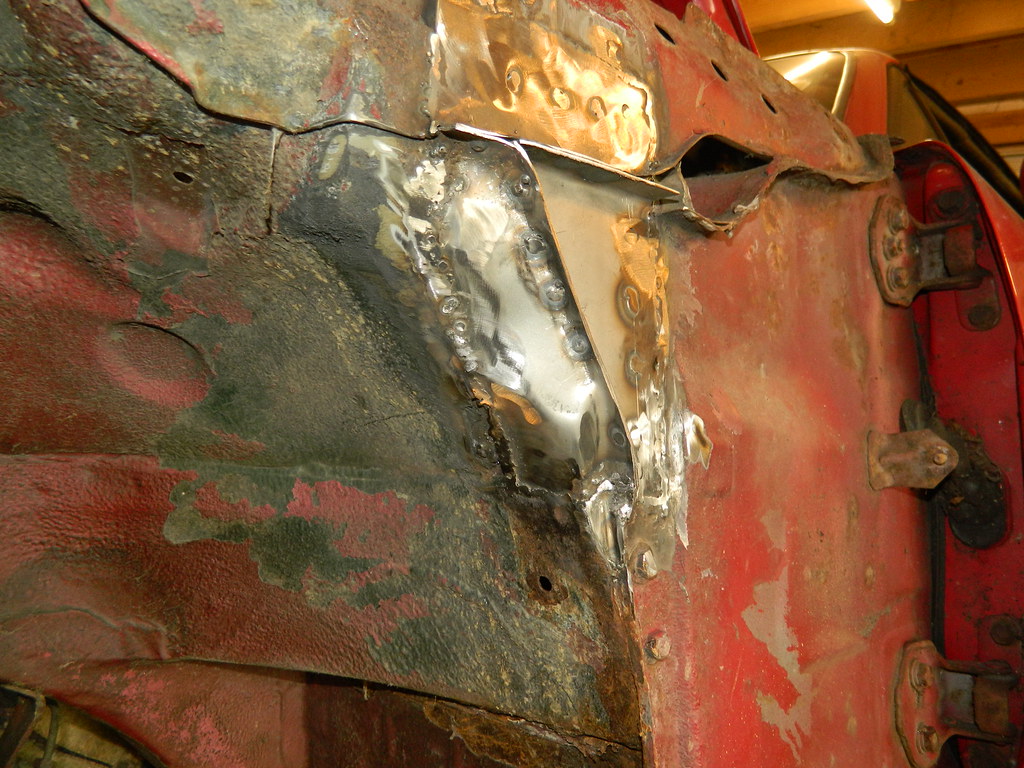 MX5 MX5 by Penguin 45, on Flickr  MX5 MX5 by Penguin 45, on Flickr Front closing panel done. All now primed, seam sealered, painted and undersealed. 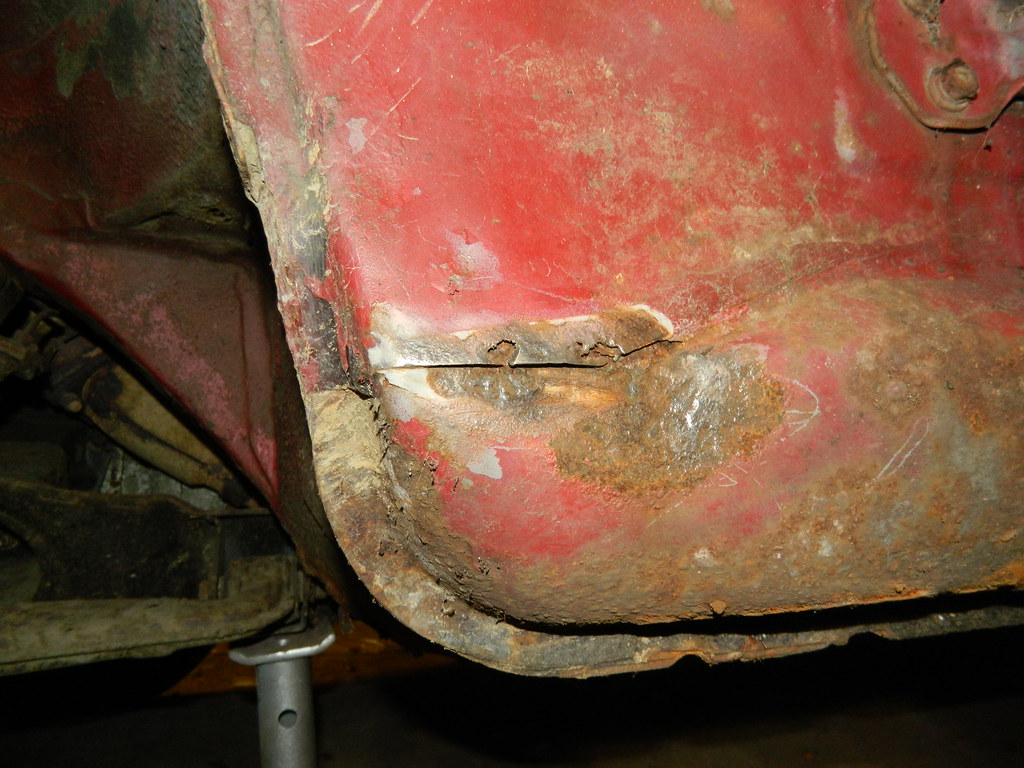 MX5 MX5 by Penguin 45, on Flickr Burst and rotten seam at the front of the sill. 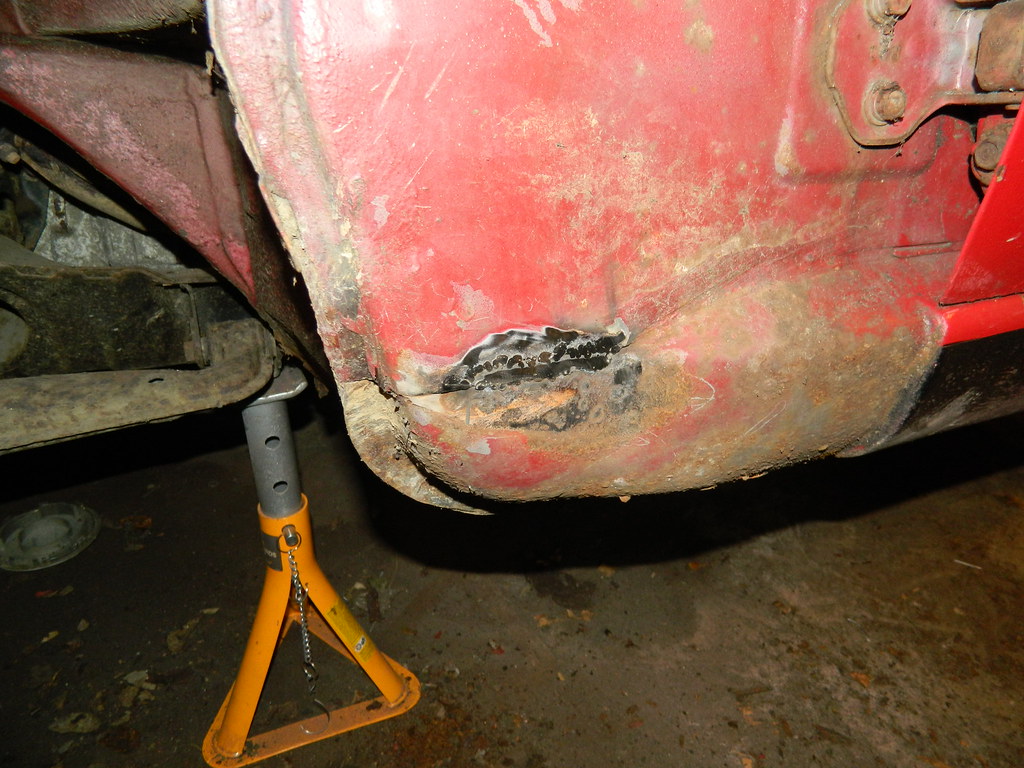 MX5 MX5 by Penguin 45, on Flickr Cut away and replaced.  MX5 MX5 by Penguin 45, on Flickr So just this bit at the front of the chassis rail to sort out and it's done. Chris. |
|
|
|
Post by 1800heap on Sept 15, 2017 23:13:02 GMT
You hit the nail on the head with the "heap" reference Chris. My dad coined the phrase "The Old Heap" for my UK car and it stuck. Hence the name 1800heap. It has faced the scrap yard many times since it has been in the family and has made it through just! My Dad bought it as a junker just for the tryes when I was 15 or so! That was the first scrapping close call 30+ years ago!
Nick
|
|
|
|
Post by Penguin45 on Sept 16, 2017 17:21:14 GMT
I had assumed it was a reference to the car.  Got it finished today. First off the bumber stability bar. 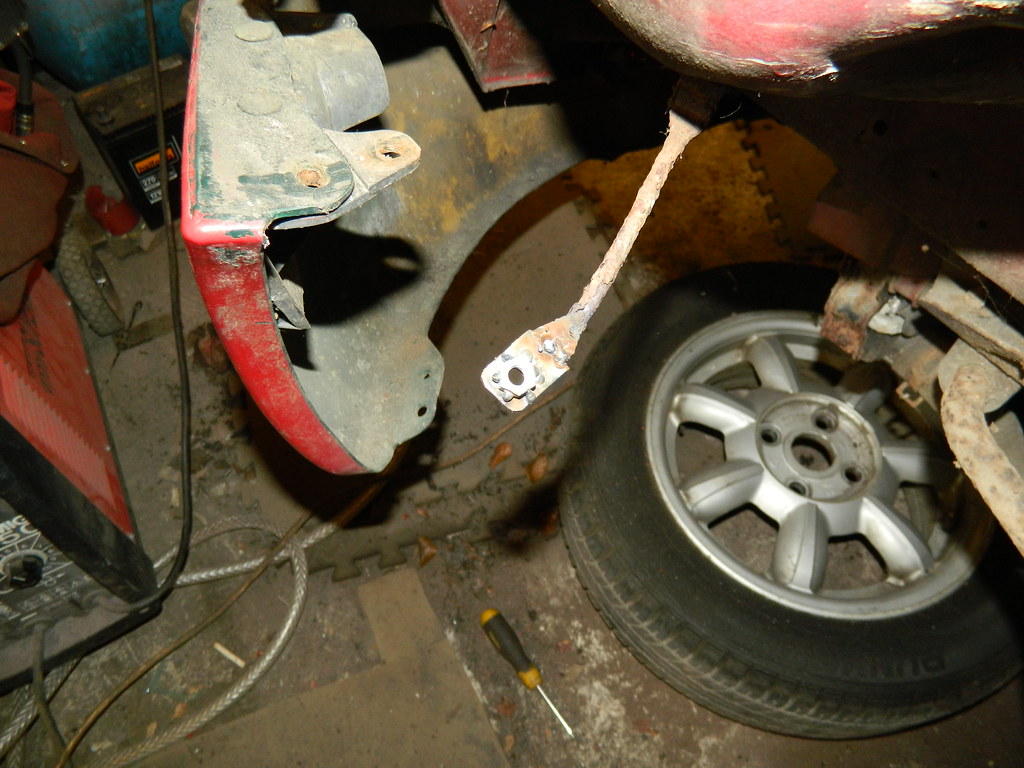 MX5 MX5 by Penguin 45, on Flickr M6 bolt sheared off upon removal. Quickest and simplest solution was to make a new endy-bit. 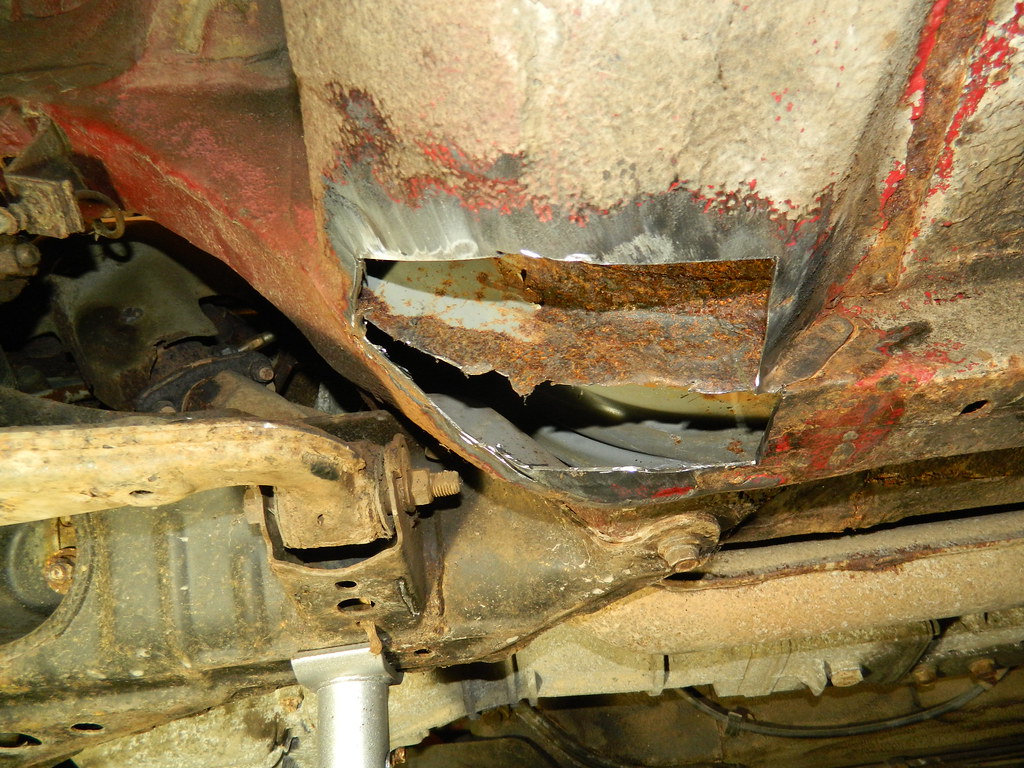 MX5 MX5 by Penguin 45, on Flickr Back to the chassis rail. Turned into a big hole when the rust was fully chased out. Centre drop down panel had to be trimmed back and the rest treated with rust killer. 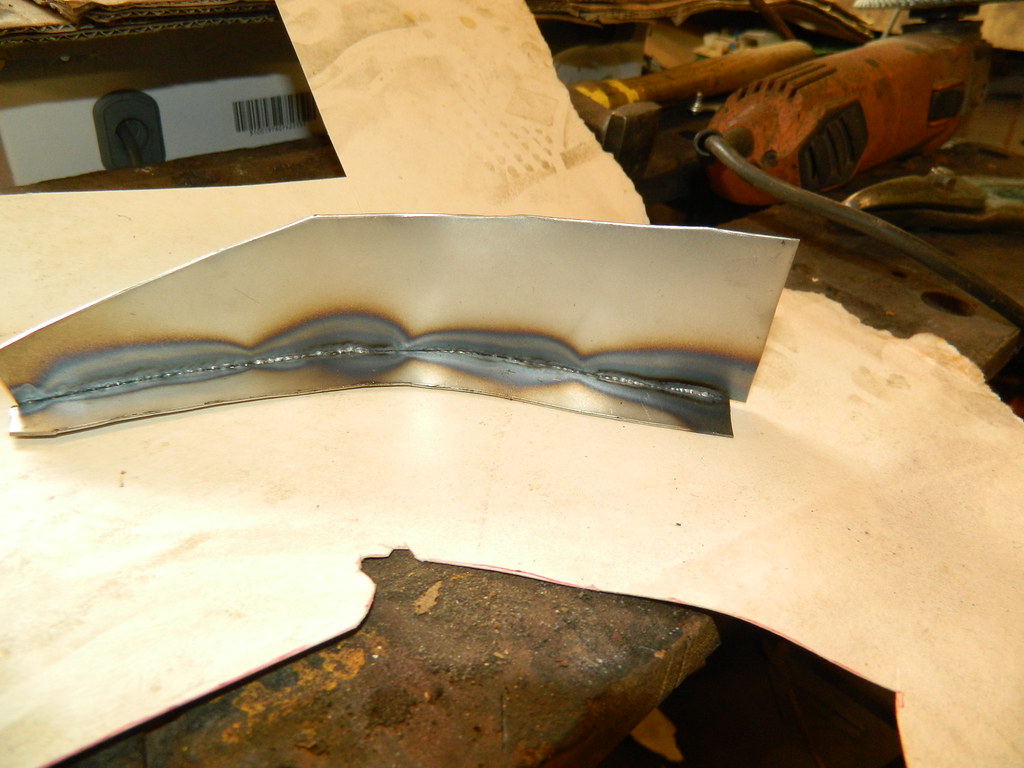 MX5 MX5 by Penguin 45, on Flickr First repair section. This one will make the chassis rail into a box again. 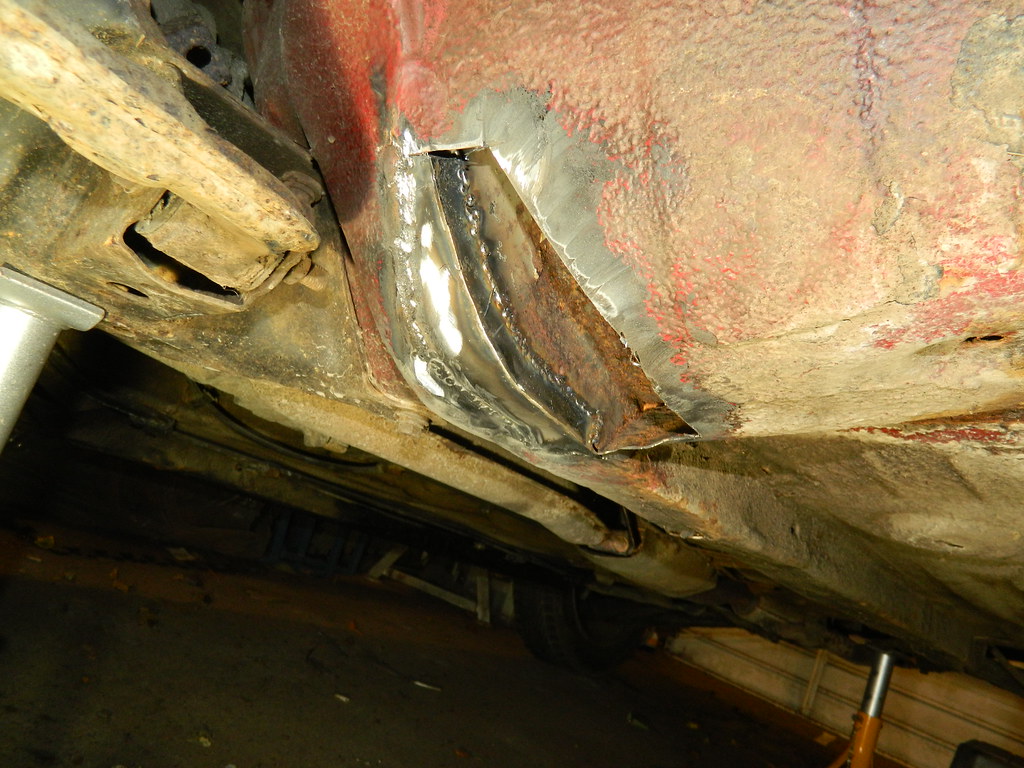 MX5 MX5 by Penguin 45, on Flickr Like that. 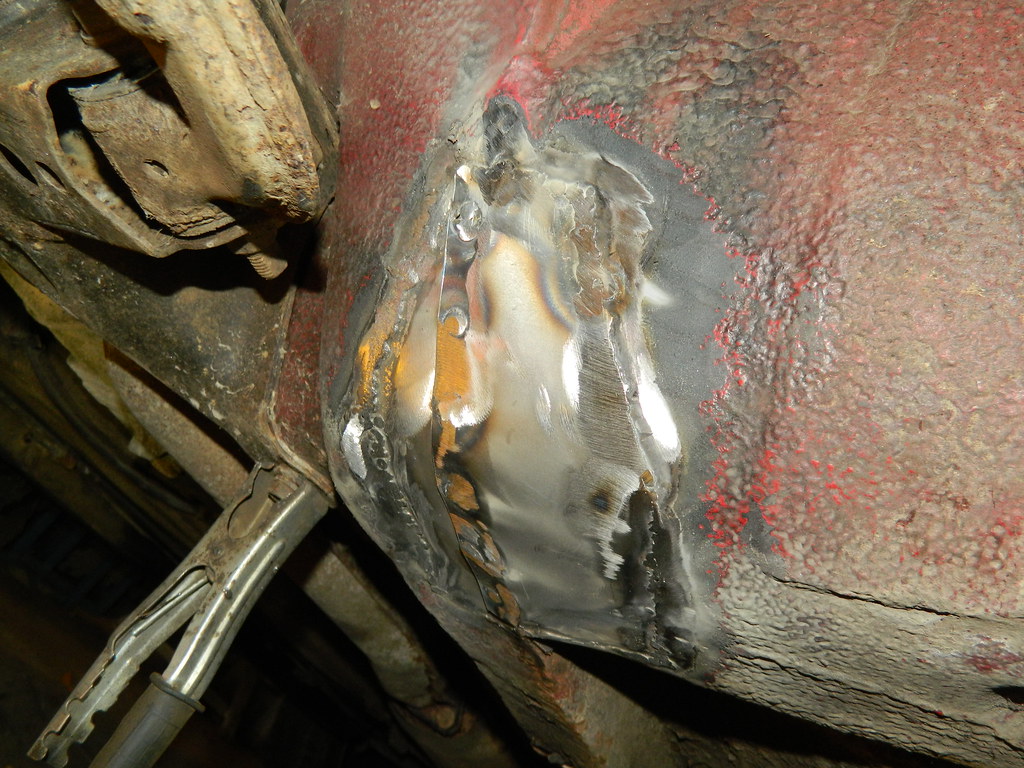 MX5 MX5 by Penguin 45, on Flickr Then this one completes the floor section and overlaps onto the chassis rail. All now primed, painted, seam sealed and undersealed. Managed to straighten out the battered wing a bit, but really it has to be replaced. Stuck it back on the car and that's about it. Lee's coming to get it tomorrow. Chris. |
|
|
|
Post by 1800heap on Sept 16, 2017 22:35:03 GMT
Another one saved from the scrap yard!
What are your top tips for this kind of welding Chris?
Nick
|
|
|
|
Post by Penguin45 on Sept 16, 2017 23:52:21 GMT
Patience is possibly the key to it. Don't expect to get it done in five minutes. Take the time to clear all the grot, then understand what the structure is meant to look like. I've learnt plenty about 'Crabs over the years, but knew nothing about MX5s at the start of this. It would have been quite easy to have just slapped a panel over that last chassis rail repair, but that wouldn't have put any strength back into the centre panel. It's probably crucial like the centre membrane on one of our cars.
Chris.
|
|
|
|
Post by Penguin45 on Nov 26, 2017 17:22:06 GMT
Some weeks ago, Mick the Mustang came wandering into the Robin Hood looking like the cat who's got the cream. Eventually he confessed to the assembled petrol heads that he'd been given a Jaguar XJ6 Executive, with a full tank of petrol and a full tank of LPG. We gleefully told him that they were worth more than the car, before the fighting talk began. "It'll be rotten", I said. Last week end, he appears and says the car is up on the lift and would I have a look. Tee Hee! Yup, both floor/sill joints gone back to the B posts, front of the floor and up what would be the bulkhead. Have some pics, it probably makes more sense than my ramblings. 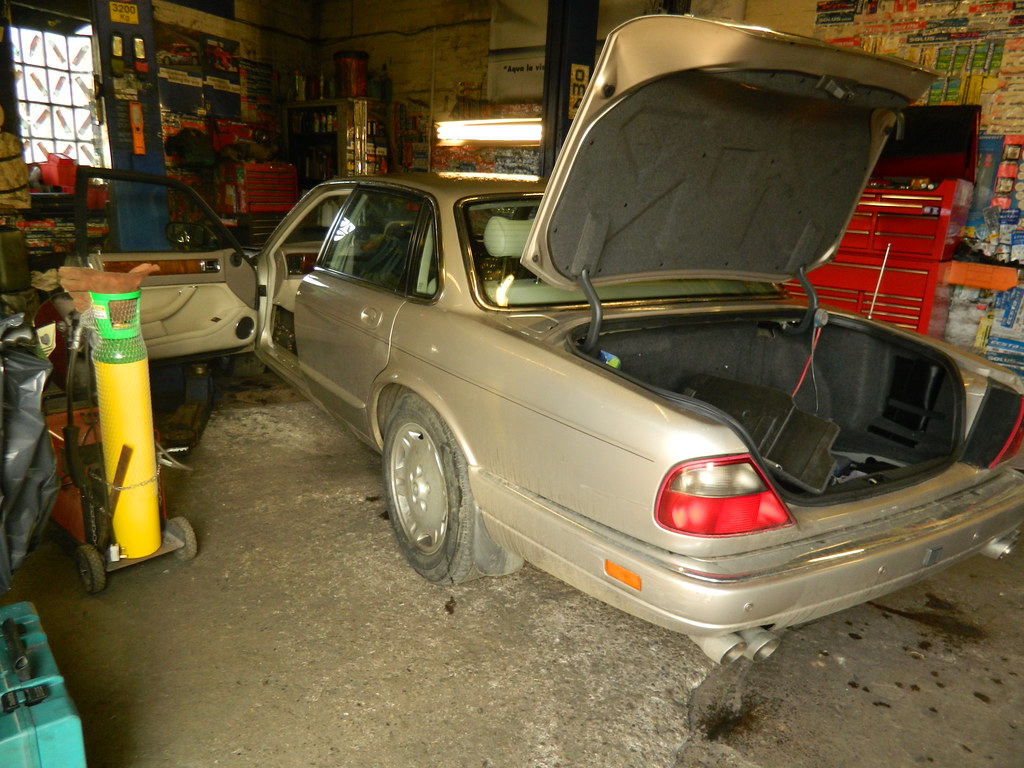 Mick's Jag Mick's Jag by Penguin 45, on Flickr Looks nice, doesn't it? 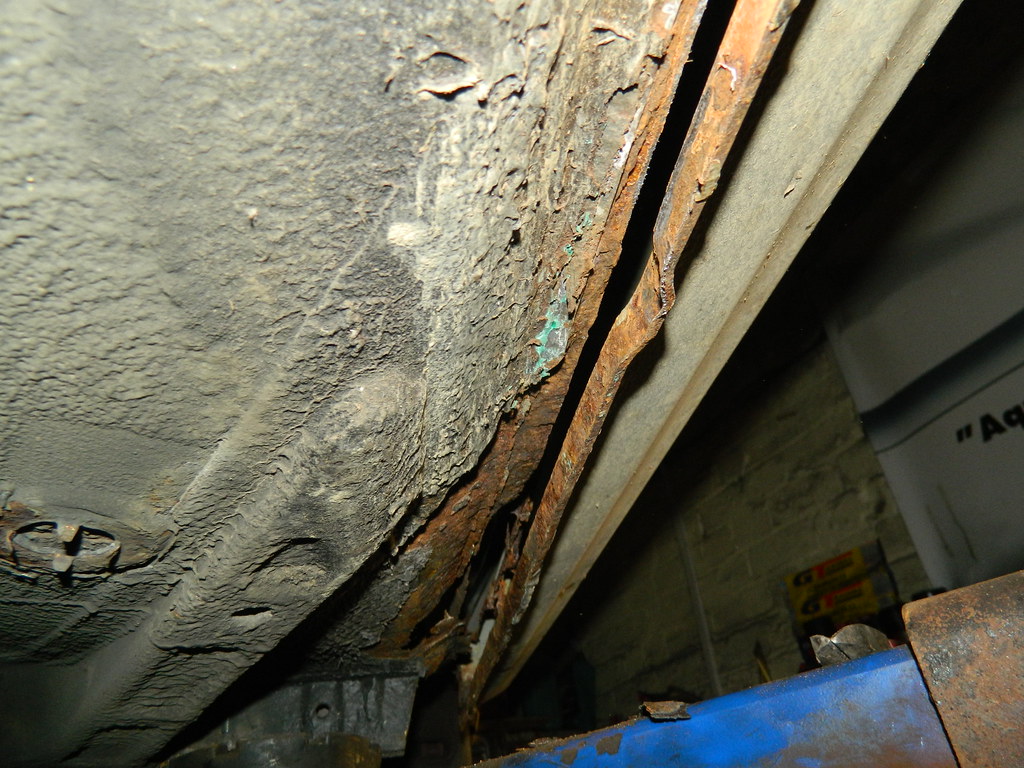 Mick's Jag Mick's Jag by Penguin 45, on Flickr 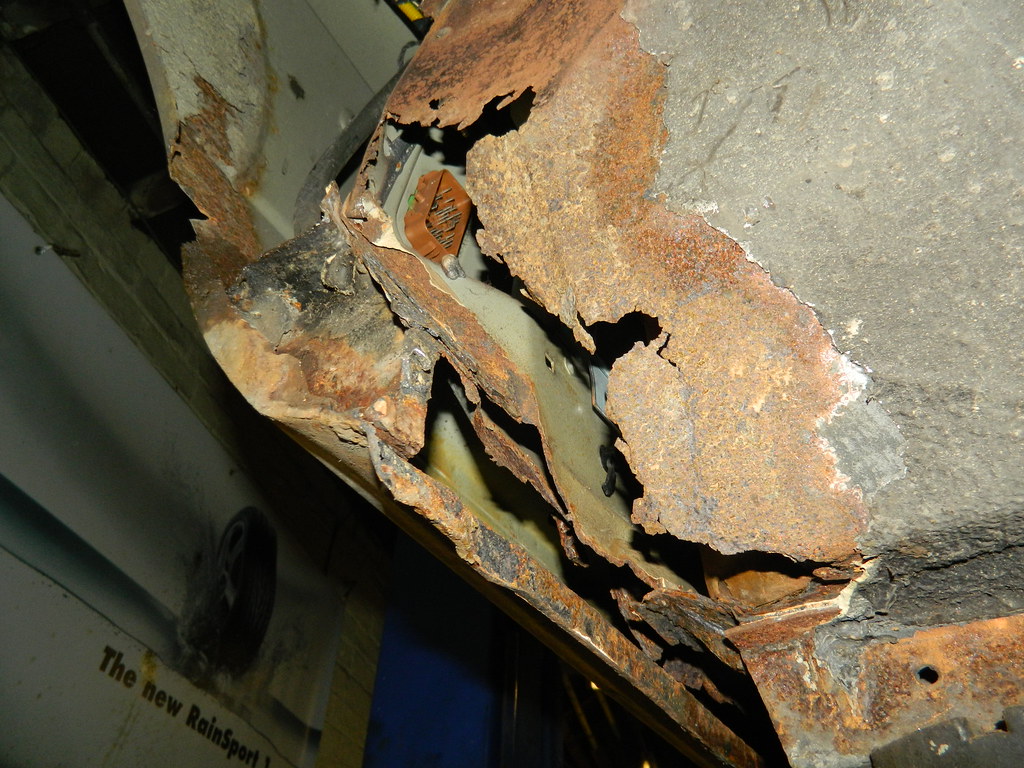 Mick's Jag Mick's Jag by Penguin 45, on Flickr 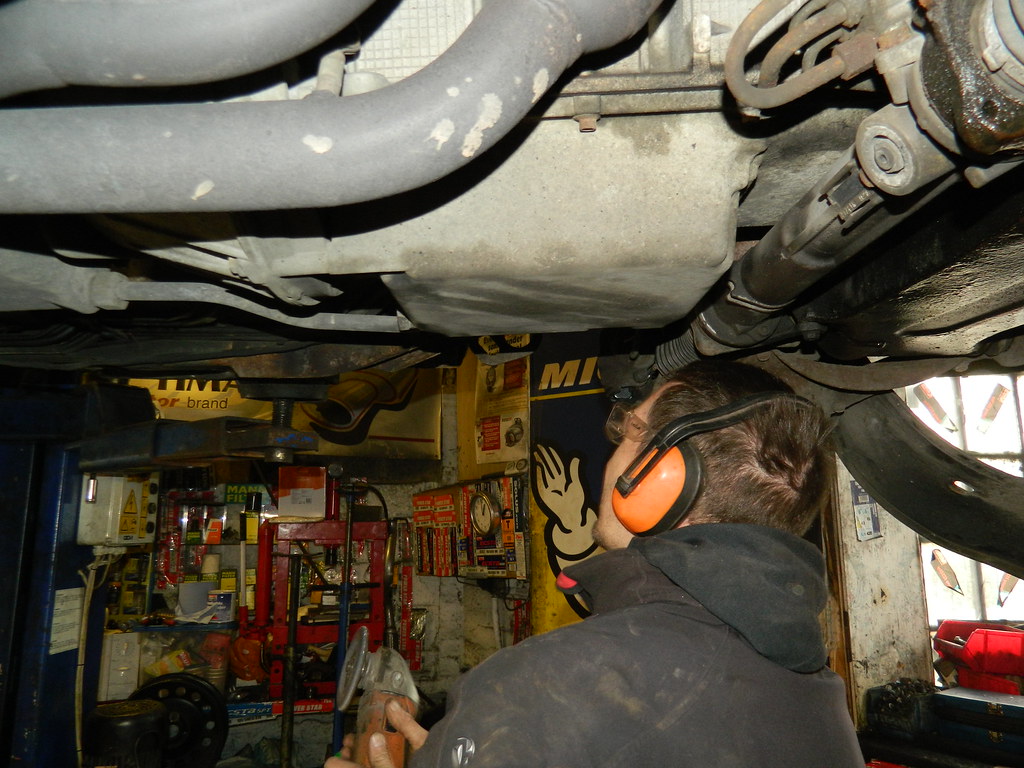 Mick's Jag Mick's Jag by Penguin 45, on Flickr Mick tidying up my handiwork. He's 6' and I'm 5'4", so it was his turn to bang his head on the car. 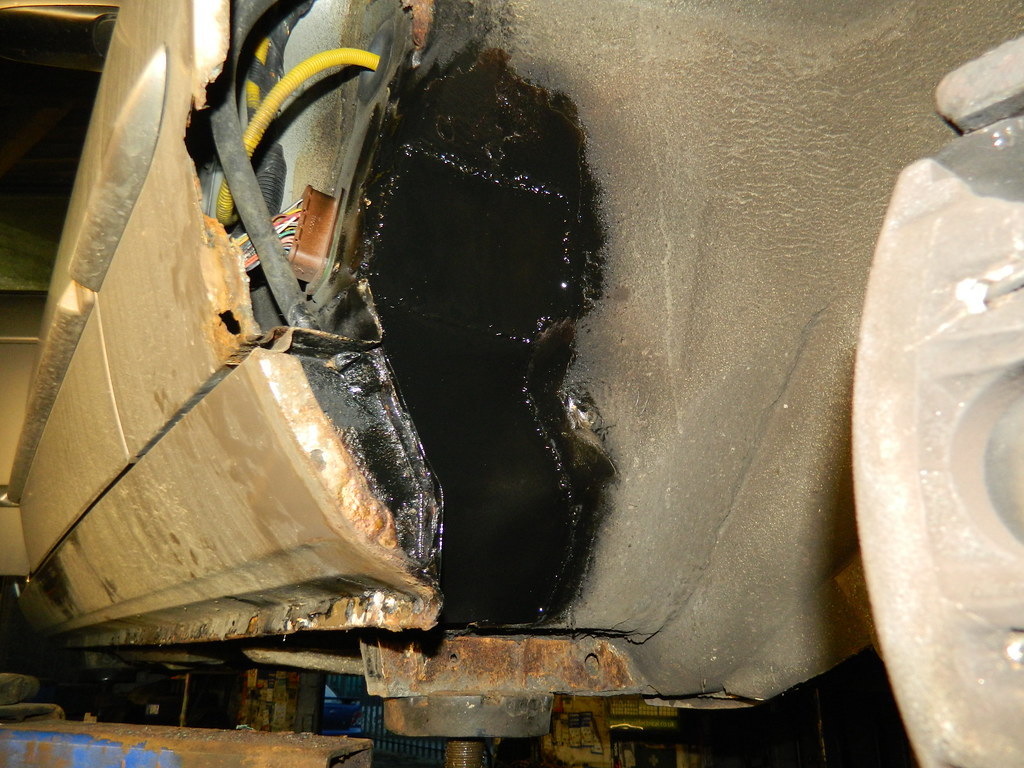 Mick's Jag Mick's Jag by Penguin 45, on Flickr 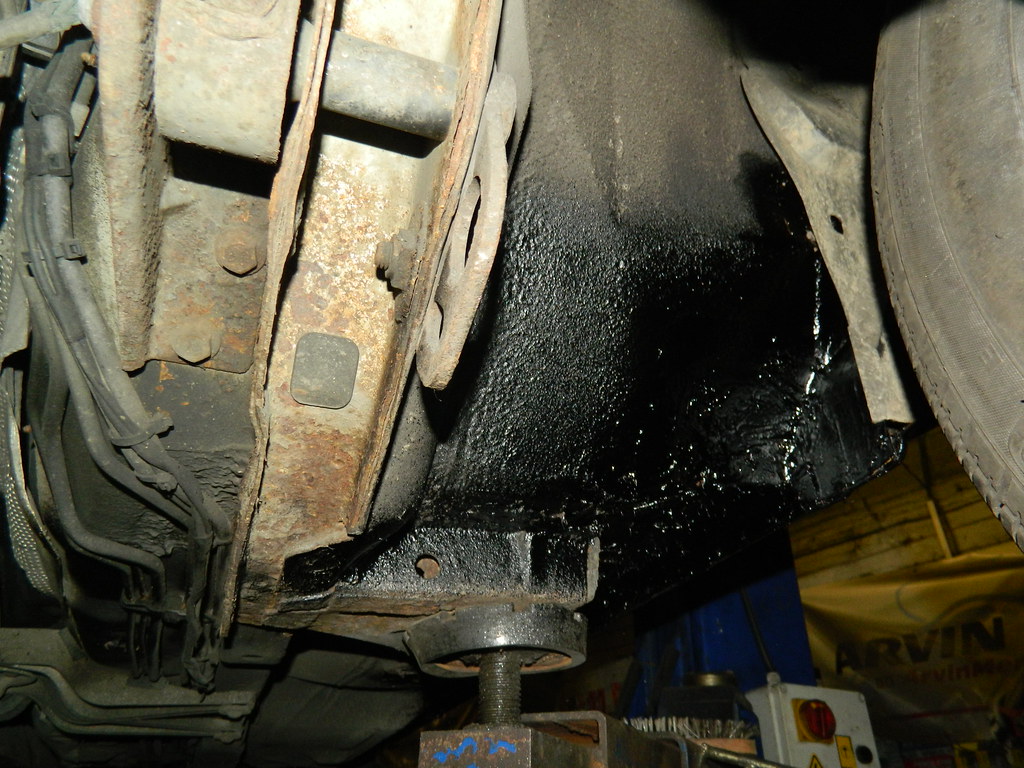 Mick's Jag Mick's Jag by Penguin 45, on Flickr 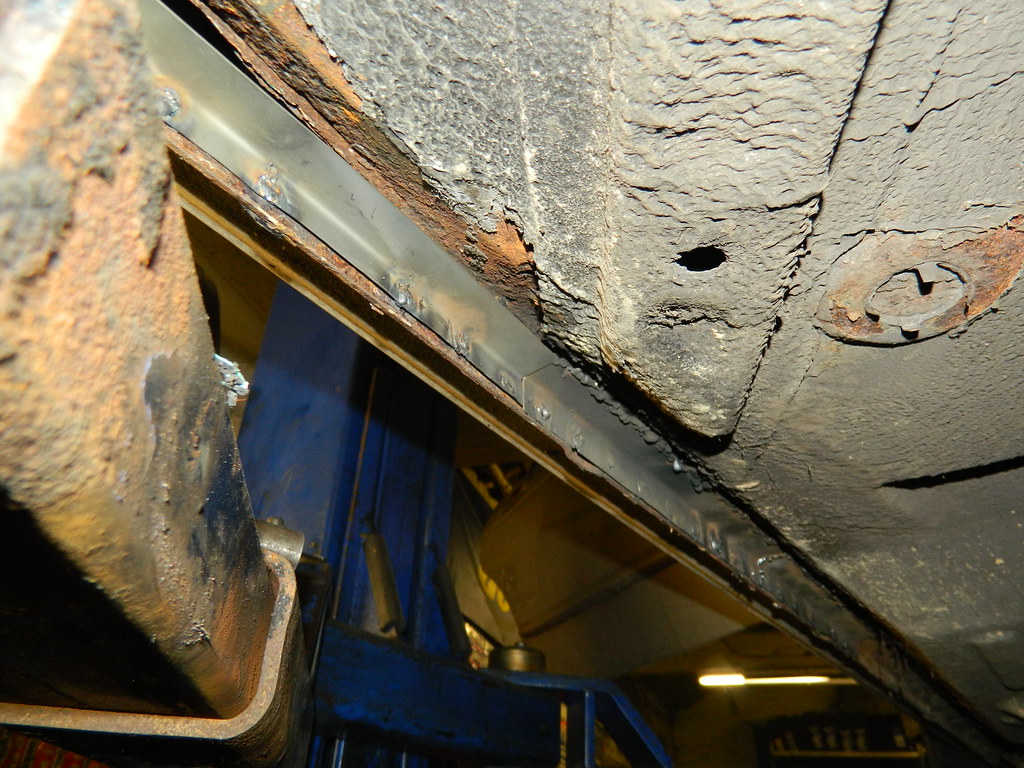 Mick's Jag Mick's Jag by Penguin 45, on Flickr 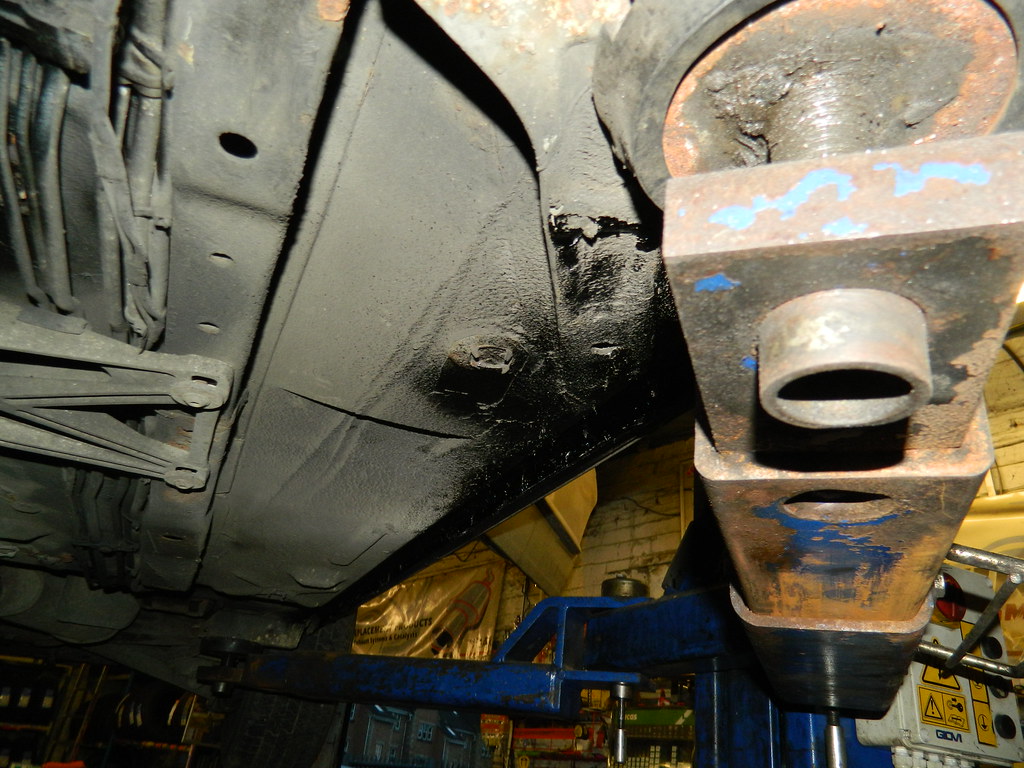 Mick's Jag Mick's Jag by Penguin 45, on Flickr One more patch across the floor on the o/s and that'll be solid. MoT test in January - Sell it afterwards, Mick! Chris. |
|
|
|
Post by Penguin45 on Dec 3, 2017 19:51:56 GMT
Got this finished today. Rest of the grot cut out and the floor repaired. 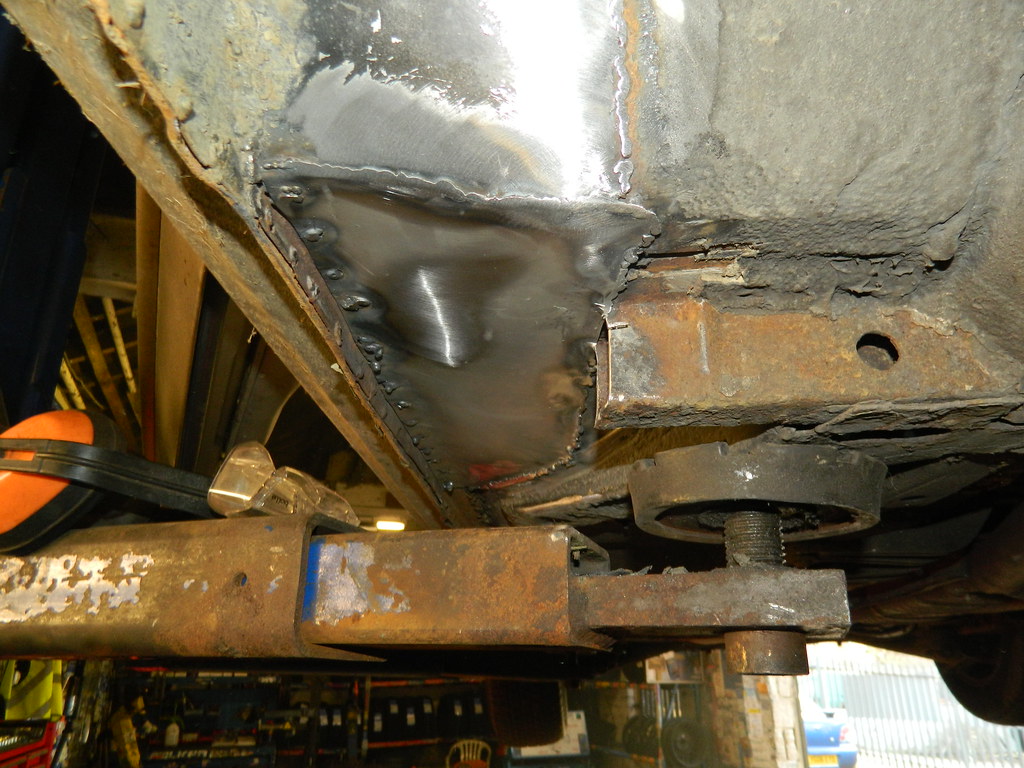 DSCN4712 DSCN4712 by Penguin 45, on Flickr Turned into quite a hole by the time we'd finished. Much flatting was undertaken before covering it all up. 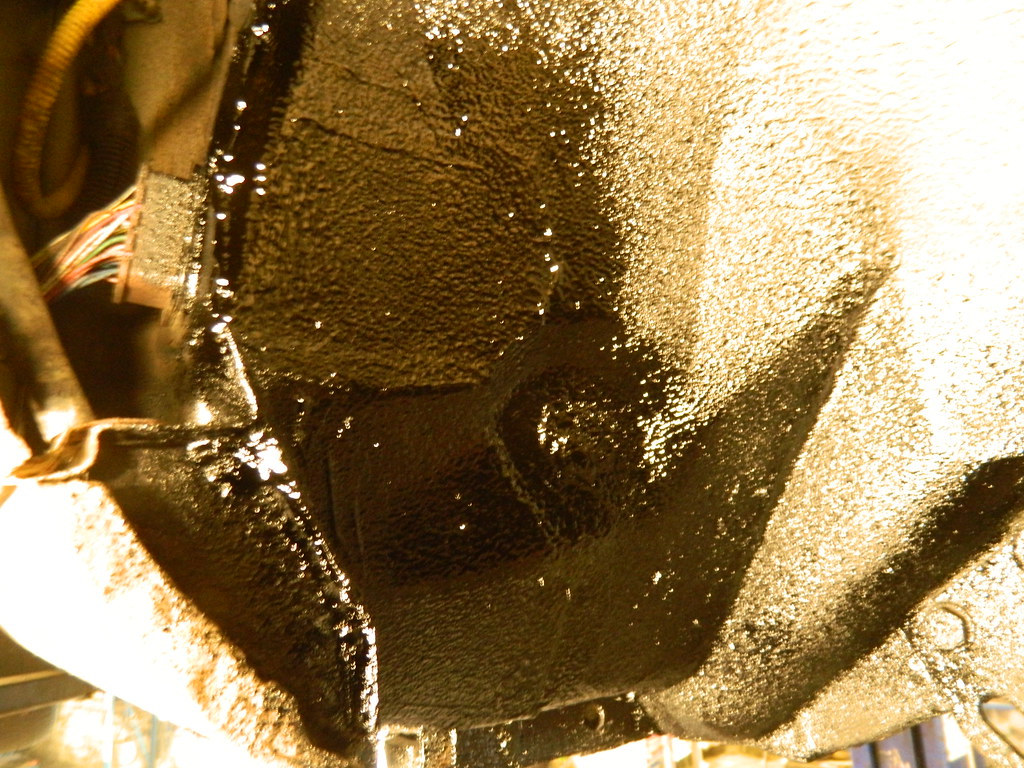 DSCN4713 DSCN4713 by Penguin 45, on Flickr 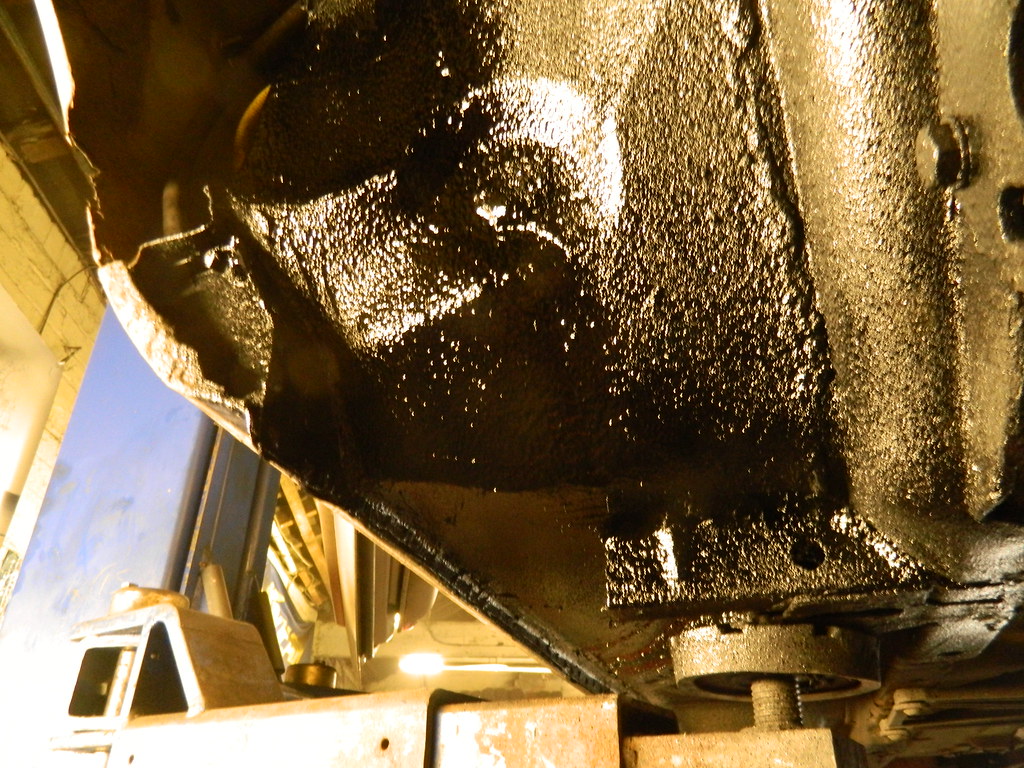 DSCN4715 DSCN4715 by Penguin 45, on Flickr Mick's just got the electronics to sort now. I think he's on his own with that. Chris. |
|
|
|
Post by Penguin45 on Sept 3, 2019 15:02:21 GMT
No welding required, more "Other things to fix". Stuff I get dragged into....  Cimex D48 Cimex D48 by Penguin 45, on Flickr C. |
|
|
|
Post by snoopy11 on Sept 4, 2019 15:30:50 GMT
No welding required, more "Other things to fix". Stuff I get dragged into....  Cimex D48 Cimex D48 by Penguin 45, on Flickr C. And the garage still looks tidy and swept 😛😛😛 |
|